HOWTO - Make a BrewPi Fermentation Controller For Cheap

Homebrew Talk - Beer, Wine, Mead, & Cider Brewing Discussion Forum

Help Support Homebrew Talk - Beer, Wine, Mead, & Cider Brewing Discussion Forum:

This site may earn a commission from merchant affiliate links, including eBay, Amazon, and others.
Status
Not open for further replies.
Finally put my controller to use on Saturday. It was chugging along nicely keeping the beer right around 65F. This morning I went in and noticed that, although the script was still running, there were no temperatures. It did show the fridge setting and beer constant (in beer constant mode), but the actual measured temps were blank in the web page readout.

It took more than one reboot to bring them back, but now I've lost confidence. Any known remedy or info about his happening that would be useful? Has this happened to anyone else and is there an easy way to bring back the temps?

It could be a hardware or wiring issue, just don't know yet, but was running (it is remote and can't get a good internet connection to watch it from home).


cheers, JD

You should be able to go to the maintenance tab and verify your temp probes are showing an address and temp reading, if not its almost certainly a wiring issue.
 
Possibly a wiring issue then. Under the maintenance tab the temp reading on both was null. I checked the wiring at the time, thought I did a good job but perhaps not - I wiggled them - they all seemed good. But that may be what fixed it. Still running last I checked. I'll dig into the logs, but maybe they won't show anything if wiring issue - or would they? Have to be tomorrow. Luckily my fermentation room is fairly constant in temp, but can warm up when the sun shines in.

How the heck do you guys wire up the phone display? Looks like you just run a USB cable - but extra programming needed? A few pages back I got a bit lost on an explanation of code - whether or not that applied to getting a phone display or other issues. Got a computer running now but the network card seems wonky and I do have an old samsung galaxy 1 laying around.

/jd

[edit] BTW, I really appreciate the responses - thanks much for taking the time.
 
You can get away with the phone display without altering any code. That is if you can zoom all the way into the lcd part of the website.
 
In an effort to stop my display from scrambling I've switched my sainsmart relay for 2 ssrs. How I've wired them to the arduino I'm almost certain I've managed to get the polarity wrong. On the ssrs I've run the + to pin 5 and 6 and the - to ground.

But when they're added to devices and the brewpi set to off the LEDs on both the ssrs.

Have I wired them up incorrectly or is that expected when the devices are set to inverted?
 
If you set the brewpi devices to not-inverted do the lights turn off? My SSR's have +/- markings on them for the input side. The output side doesnt matter. its a switch.
 
Yes they do, that's why I thought I might have wired them wrong, but I wired them the logical way I think.
 
Actually the logical way to run them without a resistor would be to put the + to 5v and run - to pin 5 for one and pin 6 for the other. But it depends on how you have the inverted state setup. It would also be a good idea to use a diode going back to the arduino pins so you know that voltage is only flowing in one direction.
 
Actually the logical way to run them without a resistor would be to put the + to 5v and run - to pin 5 for one and pin 6 for the other. But it depends on how you have the inverted state setup. It would also be a good idea to use a diode going back to the arduino pins so you know that voltage is only flowing in one direction.

can you elaborate on that as i've been trying to find an answer and everything points to the - going to ground and + going to a digital pin.

a quote from Elco on his old forum - "Elco
March 2014 Posts: 0
To summarize James' answer: with an SSR instead of a mechanical relay, you can just connect it to a digital pin and ground."

bearing in mind that with this project I am learning as i'm going along so it would be handy to know why my thinking is wrong.

if i were to add in a resistor and diode how would i go about that from where to where and which way would the diode face, i.e. towards or away from pin 5/6?

appreciate your help with this

Whilst i'd still appreciate an explanation, a message from Elco and some more reading around the transistor was originally used to create compatibility with mechanical relays, and the transistor on the original shield was set to defaulted to inverted.

because i plan to only use SSR's with this shield i just need to set brewpi to not inverted and all will be good as it is apparently
 
Last edited:
I'm not very familiar with the program yet but wondering if my refrigerator swings are a bit extreme. It is in beer constant mode and i believe that in the maintenance panel, the advanced settings are all default. I think. Beer temp seems pretty good - might swing a whole degree or so unlike the half degree of the OP, but better than I've done previously.

Here's the chart:
brewpi-chart-65532.jpg
 
Without much information about your setup; my guess is that you either aren't using a thermowell, or you don't have the temp sensor insulated well enough from the chamber air.

It appears that the pid is constantly adjusting the set point to account for the constant over and undershoot.

My beer temp rarely varies more than a couple tenths of a degree.
 
Thanks Donnie,

Yep, haven't got the thermowell installed yet. But thought I had insulated it pretty well - hearing of people using bubble wrap so I thought I would go with thin foam taped over the probe. Will revisit that. Got one of those orange carboy caps that has too small of stems for my thermowell. Guess I could drill it out. /jd
 
On those carboy caps you can usually just cut the blowoff stem down till it's the right diameter for your thermowell
 
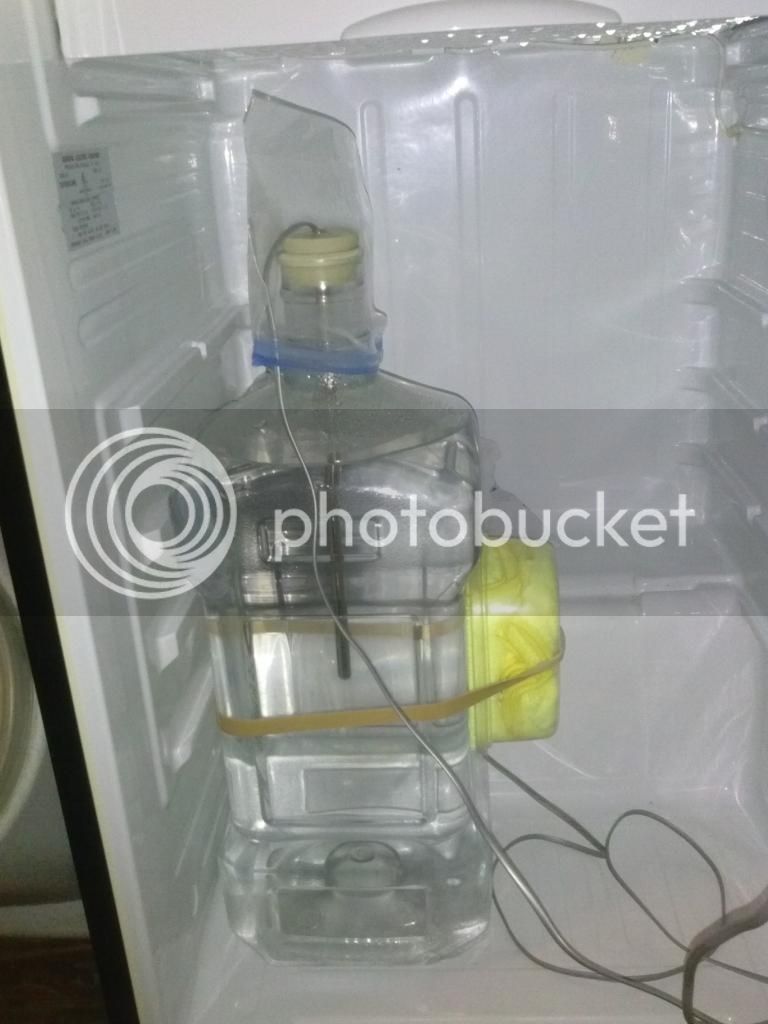
So I want to move away from glass carboys, but have them for now. This is a 6 gallon one, with a 5 gallon batch in it - maybe a bit more. It was from a Bee Cave Brewery Robust Porter recipe so closer to 5.5 gallons but I may have been a bit short. You can see the taped on area of the temp. probe - that's packing foam over it. The difficult thing would be a thermowell in such an active ferment - wouldn't want much less of a blow off tube. This features Nottingham yeast. After the blow, easy to install a cap with thermowell.
blow-off-65538.jpg
 
So I pulled the blowoff tube and inserted a thermowell into the carboy cap. This is a much improved result. I think the spike is when the thermowell was cooling off, but maybe that was temp in middle of beer..
brewpi21-65540.jpg
 
So I pulled the blowoff tube and inserted a thermowell into the carboy cap. This is a much improved result. I think the spike is when the thermowell was cooling off, but maybe that was temp in middle of beer..

I don't really see the value of swapping from the blow off tube to a thermowell after the peak of your fermentation. That was the part that you wanted to regulate the most closely.

I think you can improve your "probe on the side against the carboy" though. Use multiple layers of the insulation, with a grove in the inner layers cut out for the probe. then you can put a larger sheet of bubble wrap or something over that, and strap it on there really good with bubble wrap or something. You really don't want to let any cold air from the fridge into there.

It's a pain in the ass but it will give you very close temps.
 
Yep. Not planning on doing that as a practise. I'm usually doing 10 gal. batches and have enough head space (not using carboys but a Speidel) so I can have both blow off tube and thermowell. Seems so much easier than dealing with all that insulating. But my next batch will probably be another 5 gal., so as my 60L Speidel is probably a bit big for that, I'll be back to the carboy and will insulate per your specs as it will be the same yeast/blow-out so no thermowell. The plan is to ditch the carboys and move towards stainless as in those home-made stainless fermenters threads, providing I don't just get stuck on a 30L Speidel or something. cheerios, JD
 
fwiw, I use inch thick closed cell foam pads roughly 4 inches on a side, strapped to my fermenters (and kegs) with 2" wide velcro straps, with the probe trapped beneath. The isolation is quite good...

Cheers!
 
One question I have remaining is do you wrap that insulation around most of your fermenter to insulate it? Right now I just have that heat tape (12" wide by most of the circumference) like fermatape uses and I think it says to leave an 1/8 air gap at least on one side of it, if I remember right. Seems like a blanket of some sort around it would help mitigate cycling of heat/cool , but not positive. Maybe bubble wrap and a foam pad around it or something. Bubble wrap might keep the tape from getting too hot.
 
If brewpi is running the fermwrap then you don't need to worry about those swings so much. As long as the temp is running fine. You if you don't intend to keep this setup for too long then don't worry either. But from my experience it's better to have a temp probe for the beer temp in this type of setup. Because you dont want to read the fridge temp so much. It works much better to have the fridge temp as close to the heat tape as possible if not underneath it.
 
If brewpi is running the fermwrap then you don't need to worry about those swings so much. As long as the temp is running fine. You if you don't intend to keep this setup for too long then don't worry either. But from my experience it's better to have a temp probe for the beer temp in this type of setup. Because you dont want to read the fridge temp so much. It works much better to have the fridge temp as close to the heat tape as possible if not underneath it.

This, and while taping it to the side can get similar results it also requires you to be a lot more anal and watch it to make sure that its insulated properly.

Where as with a thermowell i just shove the probe down and go about my business knowing it will work exactly the same as it did the time before.
 
I've been running my system with heat tape. And the spikes can be scary. The tape can get up to 100 degrees incredibly fast. And brewpi shuts it down after only a minute max. But it is still enough heat to start changing the liquid mass temperature. The software isn't really designed for this setup. But I've never seen any overshoots or undershoots more than a fraction of a degree.
 
I have a question about temperature modes. When I turn the mode to "off" shouldn't the compressor stop running?
 
Nope. Dual relay board.

I also just noticed the annotation says "mode set to o in web interface". Possible bug?

I think I may have had the actuator set to "non-inverted" by mistake.

My bad.
 
Beware on running updater.py - when the brewpi restarts your outputs might not be inverted anymore.

I updated my brew pi this morning - I've been getting some flaky characters on the display so I wanted to re-flash the 'duino. Decided to update the whole enchilada. Everything went well, updated the controller, everything came back up running where it left off. Keep in mind I was doing the update in the warmth of my house but the brewpi and chamber are out in the garage...

I remembered I had to draw off the some yeast in the bottom of the conical and I went out in the garage ten minutes later and both the heater and AC unit were running and the brewpi said "Waiting to heat"... I checked the maintenance panel and both outputs were not inverted. I believe they were inverted before I upgraded. I'm using a two channel relay board for the outputs. Inverted both outputs and it's under control again.

So - check your brewpi personally after updating it!
 
I make it a point to not keep my settings when I update to a new version.
 
New stuffs. Gotta be bleeding edge or what's the point.
 
LOL! Well, if you have a working system, there should be enough added value in the upgrade to make up for the inevitable pratfall(s).

Guess I'll have to give the BrewPi site (wherever it is these days) a look.
I'm still using the same kit from December 2013 on both of my crates...

Cheers!
 
Nothing fancy just some bug fixes. And I'm sure some new bugs as well. I've been pro typing with these minis so getting the latest greatest version installed before I nail them down is my only concern. Cause once they are finally out to work I don't want to have to pull everything apart just the reprogram. At least until someone figures out how to do a firmware update over bluetooth.
 
Same thing here. Just rebuilt brewpi and cloned repository from GitHub. I installed the devices but didn't notice the inverted/ non inverted on the relay setup. Both relays came on at once. so I went back to check settings. One pin set to non inverted and one to inverted. Not sure if it was just me or bug. All good now. Had to rebuild because I started playing with daytripprs Bluetooth. My d830 video chip in the old laptop died in the middle. Bugger. All up and running on another laptop now. Got to get me some of those minions.
 
Ive got some 2channel relay modules that aren't from sainsmart. I got then off ebay. They are optically isolated and work with brewpi's default setting.
 
Bow-chicka-wow-wow...

After much wrangling, finagling, shenanigans, and all sorts of other psychosis, mine is finally up and running. Snagged a dual volt buck converter that outputs 5v and 12v from ebay, so everything is run from one plug coming in via a standard PC type connector, giving the Arduino it's own power should something happen to the Pi. Then the same connectors disappear off to control the heating and cooling. Colour coded them, because I tend to drink a lot and can't really see the etched labels anyways. And, of course, had to go get myself a custom laser-etched acrylic case to house it in. Gratuitous shots of front and back.

MASSIVE thanks to the community, especially Fuzzy and daytrippr for coming up with the LCD shield (and doomy for the nice addition of the transistor to shut off the backlight after 10 mins.)

IMAG0203.jpg


IMAG0204.jpg
 
Hi all,

These builds are incredible and I am working on mine now, unfortunately I am having trouble getting my sensors recognized by brewpi. Can anyone point me in the right direction? All that shows up for my RevC devices are digital pins with no device showing for temp sensor.

I've looked through the brewpi troubleshooting with little progress (I am a beginner). I have standard sensors wired up as per Fuzze's schematic (minus the relays)

I'm sure there is some help already documented, I just haven't found it.

Thanks for your help.

p.s. the build above me looks amazing! kudos!
 
New stuffs. Gotta be bleeding edge or what's the point.

As I mentioned in the post - my display was getting flaky - so I rebooted the 'duino a few times to no avail... Decided I needed to re-flash the 'duino to get all it's bits in the right places again. updater.py does it for you along with bringing the pi up to date also. :ban:

In the middle of fermentation and didnt really want to loose all my settings.

probably could have waited until the beer was done fermenting.
 
Hi all,

These builds are incredible and I am working on mine now, unfortunately I am having trouble getting my sensors recognized by brewpi. Can anyone point me in the right direction? All that shows up for my RevC devices are digital pins with no device showing for temp sensor.

I've looked through the brewpi troubleshooting with little progress (I am a beginner). I have standard sensors wired up as per Fuzze's schematic (minus the relays)

I'm sure there is some help already documented, I just haven't found it.

Thanks for your help.

p.s. the build above me looks amazing! kudos!

I'll bet a dollar you either have the wrong resistor or your wiring is wrong.
 
I'll bet a dollar you either have the wrong resistor or your wiring is wrong.

I'm pretty sure its the wiring, I have a 4.7K resistor in the it.

I am just looking to test the sensors and collect some data to start (fridge/beer control off) is there a simple schematic you are aware of that would illustrate that? I've tried a simplified version of the basic wiring from Fuzze's post.

Edit: I'm reading temps now. Sorry for the noobie questions, I didn't have my data wired properly to the resistor. Thanks!
 
Bow-chicka-wow-wow...

After much wrangling, finagling, shenanigans, and all sorts of other psychosis, mine is finally up and running. Snagged a dual volt buck converter that outputs 5v and 12v from ebay, so everything is run from one plug coming in via a standard PC type connector, giving the Arduino it's own power should something happen to the Pi. Then the same connectors disappear off to control the heating and cooling. Colour coded them, because I tend to drink a lot and can't really see the etched labels anyways. And, of course, had to go get myself a custom laser-etched acrylic case to house it in. Gratuitous shots of front and back.

MASSIVE thanks to the community, especially Fuzzy and daytrippr for coming up with the LCD shield (and doomy for the nice addition of the transistor to shut off the backlight after 10 mins.)

That is sweet! Great job on that. I got tired of messing around trying to come up with a nice case so i just used plastic stand off with sticky tape on everything and mounted everything right to the back of my fridge. I didn't even solder my connections and just left everything in the breadboard. It's ugly but finished.
 
Status
Not open for further replies.
Back
Top