To keep it damp... a sprinkler? May be overkill though watering a wall.
You are using an out of date browser. It may not display this or other websites correctly.
You should upgrade or use an alternative browser.
You should upgrade or use an alternative browser.
DIY Walk In Cooler Build
- Thread starter Irrenarzt
- Start date

Help Support Homebrew Talk - Beer, Wine, Mead, & Cider Brewing Discussion Forum:
This site may earn a commission from merchant affiliate
links, including eBay, Amazon, and others.
OP
OP
I'm back at work today so Greg is going to stop by once or twice to water the walls. It's been over 48 hours so I think the water needs are dropping now. I don't see it cracking so I think we are out of the woods for the most part. The first 2 days are the most critical...
MooMooBrew
Well-Known Member
How are you doing the doors for this thing?
looking to do something similar.
looking to do something similar.
OP
OP
Well the door is my biggest challenge. I tried finding a used/inexpensive cooler door locally. I found a used one but it was too wide at 5' and it was in bad shape, and the bastige still wanted 500 for it. If you've priced out a new one, then you've seen what it is like to be a small defenseless pretty man in prison, or at least county jail. The cheapest new one I have found is 1350 shipped. No can do.
So my plan is to take a new pre-hung steel insulated entry door for typical outdoor use, add insulation to the back side of it and add a means to bounce the incoming IR radiation off it on the outside exposed side. This is the best I can come up with and not get bent over hard.
Also, I could steal the cooler door off the ghetto walk in up the street but that would be really bad for my karma.
Maybe add your own fabricated thick plastic strip thing like this stuff to keep the cold loss down when the door is open?

and be sure to weather strip the heck out of the fabricated door.
and be sure to weather strip the heck out of the fabricated door.
If you have access to sheet aluminum, a metal shear, and brake you could make a solid door of whatever thickness gives you the insulation factor you want. Then just case your rough opening and hang the door yourself.
If you have one of those insulation panels left over it could be cut and the edges wrapped in aluminum and hung the same way. You could also make into a panel in a wood frame.
If you have one of those insulation panels left over it could be cut and the edges wrapped in aluminum and hung the same way. You could also make into a panel in a wood frame.
MrSaLTy
Well-Known Member
For flooring you could also consider some commercial rubber floor mats. There are a ton of different kinds and they may also provide some R value but I'm not sure. Prices are all over the place on them though.
OP
OP
Thanks for all the suggestions everyone. Keep them coming.
As for the PVC strips, we had already discussed that. Greg had an idea to put them not only at the door, but about 1/2 way through the volume as well to try to create a lager zone. It's worth a shot.
As for the PVC strips, we had already discussed that. Greg had an idea to put them not only at the door, but about 1/2 way through the volume as well to try to create a lager zone. It's worth a shot.
I know John Beere built his own door for a Walk-in.
https://www.homebrewtalk.com/f51/my-latest-project-walk-cooler-11440/http://
I think it is around post 100 where he details out building a door using the wall-board and insulation panels...
Awesome project. :rockin:
https://www.homebrewtalk.com/f51/my-latest-project-walk-cooler-11440/http://
I think it is around post 100 where he details out building a door using the wall-board and insulation panels...
Awesome project. :rockin:
I know John Beere built his own door for a Walk-in.
https://www.homebrewtalk.com/f51/my-latest-project-walk-cooler-11440/http://
I think it is around post 100 where he details out building a door using the wall-board and insulation panels...
Awesome project. :rockin:
I miss my cooler..
") It's fun watching this one come together!
It's fun watching this one come together!
OP
OP
What happened to your cooler John Beere?
MrSaLTy
Well-Known Member
What happened to your cooler John Beere?
His house flooded.... bad.
OP
OP
That's right. I knew that. My bad.
Sorry I brought it up.
Sorry I brought it up.
What happened to your cooler John Beere?
Shall I say that it went, Six Feet Under..? heh
OP
OP
Deep Six is the appropriate name then eh?
OP
OP
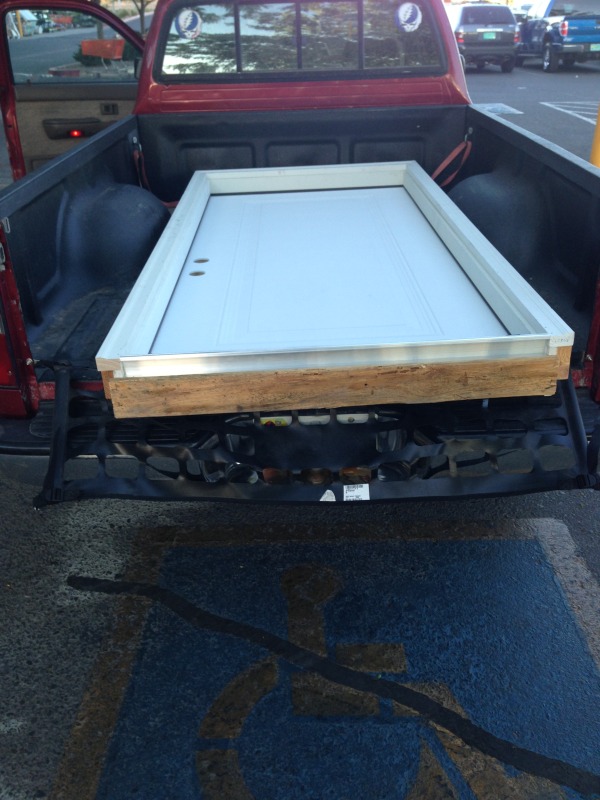
Picked up the door on the way home from work:
OP
OP
I won't get to do anything today as I have to work and I also have a BJCP class tonight after work.
That said, I'm thinking about hanging the door. With most walk ins, you see the door swings outward and seals against the outer wall (assume a nice sealing surface for an actual cooler versus something like stucco). The door I got is an exterior home door and likely will swing inwards in the configuration is it designed. Is there any advantage (I will be using PVC strips behind the door on the inside of the cooler) to flipping it to swing outward? The sealing surface would be then facing out but the sill plate would then be facing in. I don't care anything about left hand versus right hand ergonomics. My main concern is to get the most efficient configuration. I will be insulating the inside face of the door as well and IR/thermal barrier layer on the outside.
Any thoughts on the matter would be appreciated.
One thing to consider if it swings inward is the ergonomics of getting in and out and putting things inside. You will lose all the space it's swing will require, and carrying heavy things in there (kegs, cases) will be a bit harder.
I vote for outwards as you will lose the valuable cold space where the door swings into the cooler.. I also remember having the debate on getting locked inside my cooler and we concluded that it would be way easier to kick the door out if it swung outwards instead of inwards.. heh
OP
OP
I was leaning towards outward as well as this will prevent the door from interfering with the PVC strips. I like the fact that you won't lose valuable cold space as well. I'm going with outwards. Thanks fellas.
NickTheGreat
Well-Known Member
- Joined
- Apr 17, 2012
- Messages
- 1,289
- Reaction score
- 529
This is an outstanding thread. I push my WAF for things anyways, and I don't this would bode well for me
But you've done a great job. Won't be long now, til you're all chilly in there!
I vote for the outward swing too
But you've done a great job. Won't be long now, til you're all chilly in there!
I vote for the outward swing too
Maybe add your own fabricated thick plastic strip thing like this stuff to keep the cold loss down when the door is open?
and be sure to weather strip the heck out of the fabricated door.
THIS. We put one in our mobile kegerator and it saves a lot of cooling.
We put truck bed liner in the bottom of our cooler. It's waterproof and tough as nails. Plus the texture means less slipping.
OP
OP
I ordered the strip doors today so that's covered.
I like the idea of the spray in bed liner. I just did a Rhino liner on my truck a few months back and that schit is tough as nails. I wonder how I can spray that in myself?
I like the idea of the spray in bed liner. I just did a Rhino liner on my truck a few months back and that schit is tough as nails. I wonder how I can spray that in myself?
I ordered the strip doors today so that's covered.
I like the idea of the spray in bed liner. I just did a Rhino liner on my truck a few months back and that schit is tough as nails. I wonder how I can spray that in myself?
They have do-it-yourself kits of other brands. Usually roll-on though.
One brand with a quick google:
http://www.herculiner.com/
check out Rustoleum Restore before you bye those roll on bed liner kits from walmart
OP
OP
That Restore product looks promising and won't likely be that expensive. I bet the bed liner stuff costs a fair amount. Time to do some research...
- Joined
- May 6, 2013
- Messages
- 14,033
- Reaction score
- 3,377
awesome thread, great build so far!
OP
OP
The knife works great. Unfortunately it came on Saturday AFTER all the work I needed to do cutting foam was done. But we still have to populate the roof so it will see some use here pretty soon.
After some research, Herculiner is about 75 bucks plus tax for the 1 gallon kit from Sam's Club. Might be a good option but Whosj doesn't seem to like these and favors Restore. Restore goes for 39.00 on sale right now from Home Despot and will for sure work on wood surfaces. No data on Herculiner being compatible with wood but I'd guess it would set up fine on wood.
After a bit more research, I found this document which shows Herculiner will work on wood.
http://www.herculiner.com/pdf/instructions-other_uses-english.pdf
It mentions a primer but I'm not sure if that's just a normal water based primer or more likely a solvent based one since it appears that Herculiner is a polyurethane/xylene based product.
Heck you could even go with the shop/garage floor coating. The wood would (haha it rhymes) probably soak up some so a thicker coat may be needed of the not originally made for wood products (bed liner or garage coat)
We put that restore down on my swmbo's moms front porch, two coats, its probably 1/4 inch thick but you need to see how far that herculiner says it will go, her porch was maybe 8*12 and it took two cans. But it was concrete that previously had tile on it, we tried to get the grout off but it took to long, so we applied it with a surface variation of +/-.25 inch all over and it flattened it off with rough texture to boot so its anti skid I thought you might get out cheaper with one can of restore then two kits of herculiner but take that with a grain salt and what not. In the end do the math she wont lie.
OP
OP
I'm not sold on the need for a rough floor as I wear Vans so smooth tile is usually not an issue for me. Now a wet floor might be an issue. But something that mops up easy would be a bonus I would think.
The floor coating is the very last step anyway so I have time to consider all my options.
The floor coating is the very last step anyway so I have time to consider all my options.
Travestian
Well-Known Member
You could always do one of those garage floor paints with the paint chips in them. They look pretty good and are durable. I think you can have an entire garage floor worth of space done for about $99.
First, thanks for the progress reports and updates with pics.
I used that garage floor paint in my utility room. I wanted it water resistent after I had to replace the floor and water heater. It's a two part epoxy paint and is pretty easy to put down with or without the use of the "chips".
I don't think you would have any issues using this although I don't know if it says its for use on wood or not. Just put a primer coat down and the wood won't pull any moisture from the epoxy paint. You could do what I did and seal all the cracks around the room and put the epoxy paint a few inches up the sides of the wall.
Waterproof, easy to clean (even with the chips added), and durable.
Good luck.
OP
OP
So today was a day at work for me but Ghettogyle Greg did some vapor barrier work with his boy Marshall today:
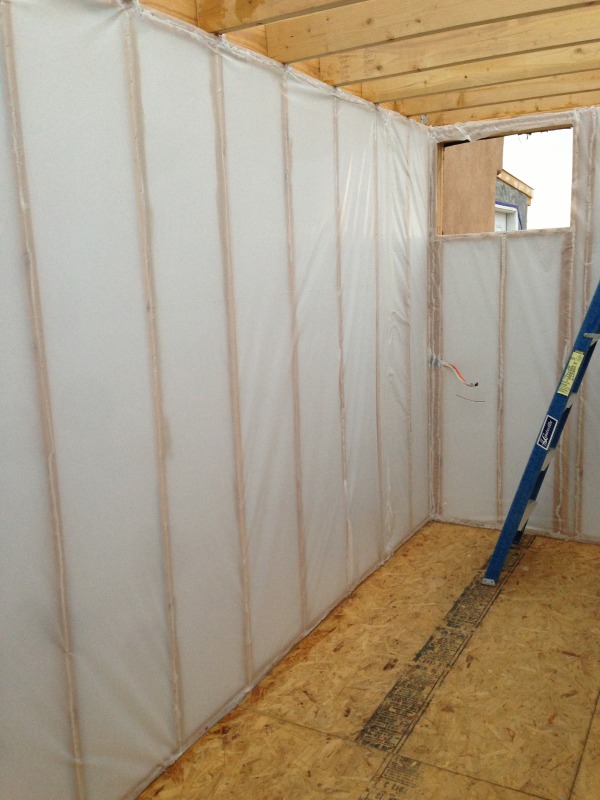
You can see it must have rained a bit as it is wet at the base of the pictured wall on the OSB flooring.
Monsoon season is here now it seems. I really need to get the roof on this ***** stat.
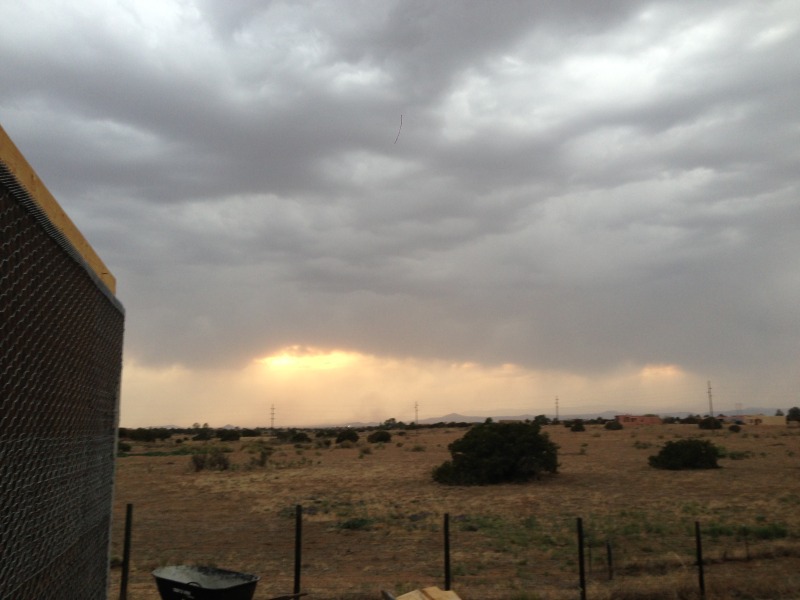
I realized we don't have quite enough cooler panels to completely cover the interior so tomorrow morning I'm picking up some panel scraps I located through a couple of buddies of mine. We should be able to make some progress this weekend if it doesn't rain all that much. Thank God for some rain though as it has been over 100 every day this week...
You can see it must have rained a bit as it is wet at the base of the pictured wall on the OSB flooring.
Monsoon season is here now it seems. I really need to get the roof on this ***** stat.
I realized we don't have quite enough cooler panels to completely cover the interior so tomorrow morning I'm picking up some panel scraps I located through a couple of buddies of mine. We should be able to make some progress this weekend if it doesn't rain all that much. Thank God for some rain though as it has been over 100 every day this week...
OP
OP
Picked up some panel scrap this morning:
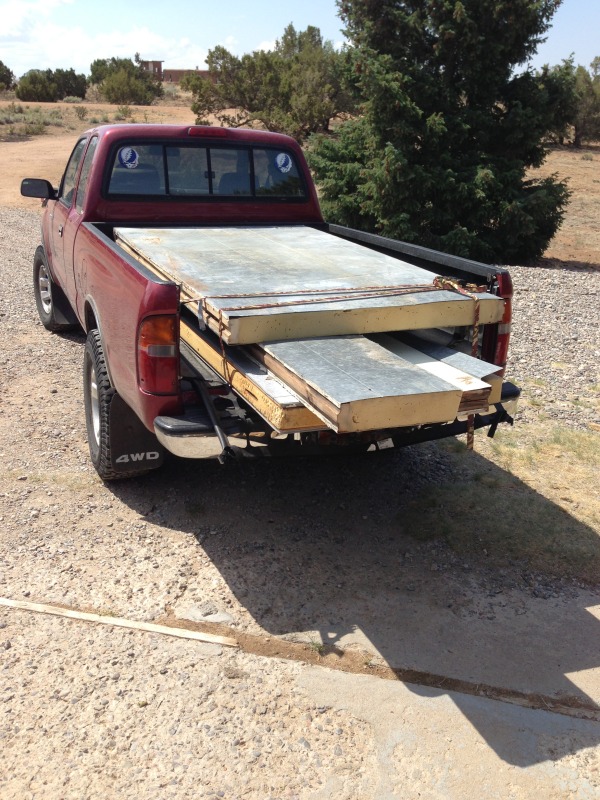
It's definitely different than my current panels so we may not use it. We'll see.
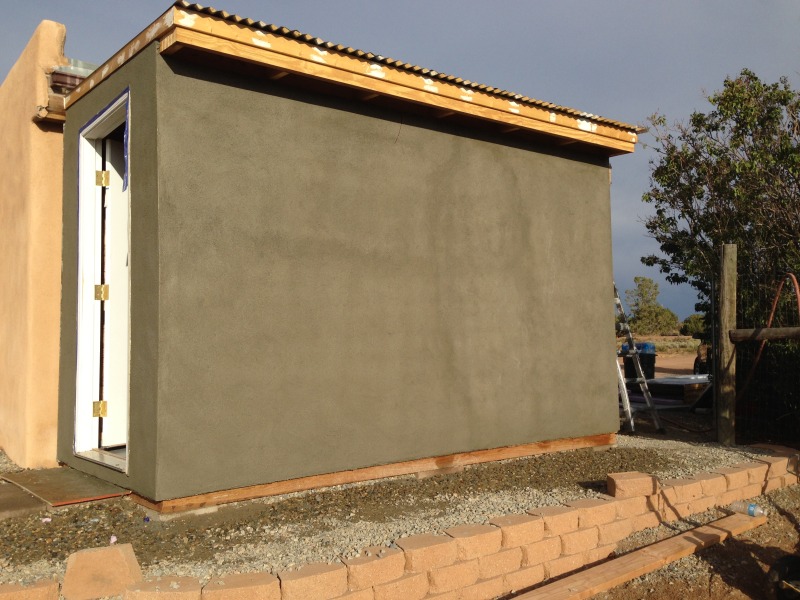
Brown coat going up on the shed:
More of the same:
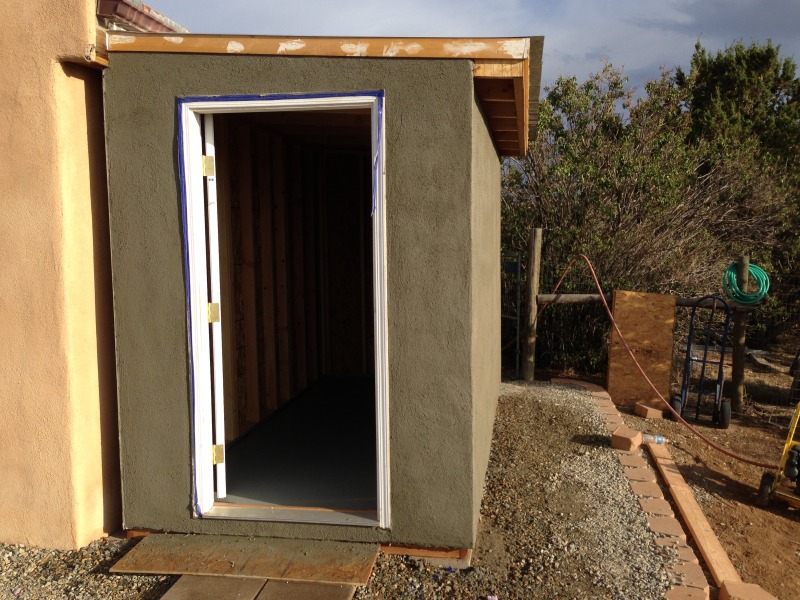
Door going up:
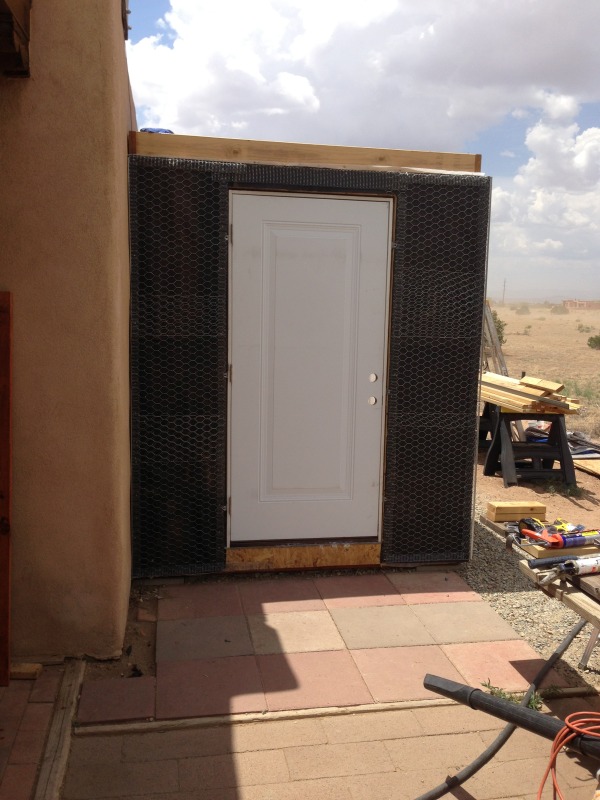
I took the door off the hinges so we don't have to deal with it until we need it. I will have to insulate and IR barrier it anyway.
Monsoon season is officially here as we got a 2:15 PM rainstorm that is still going as of 2:37 PM.
Had to throw down a couple quick tarps to protect the OSB:
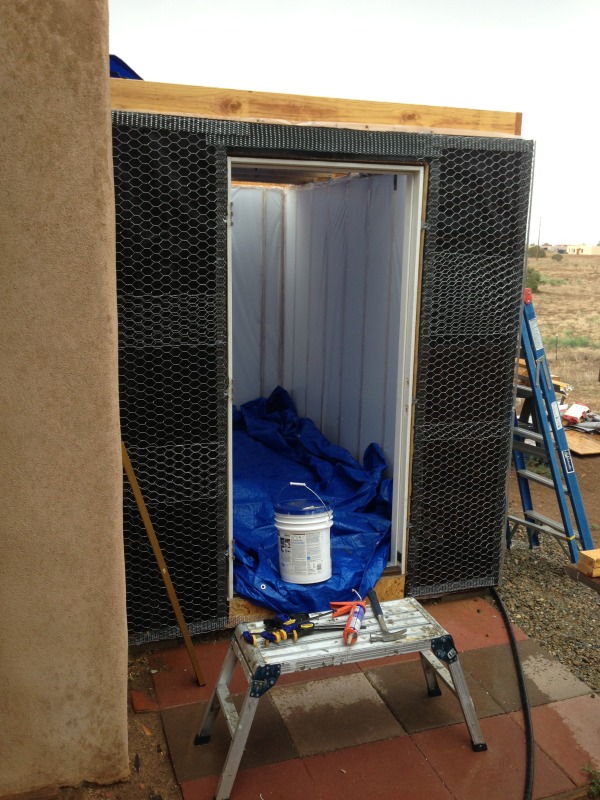
Still raining:
At least it's not hot anymore.
After the rain stopped, we removed the tarp from the floor but it still got soaked. Bummer.
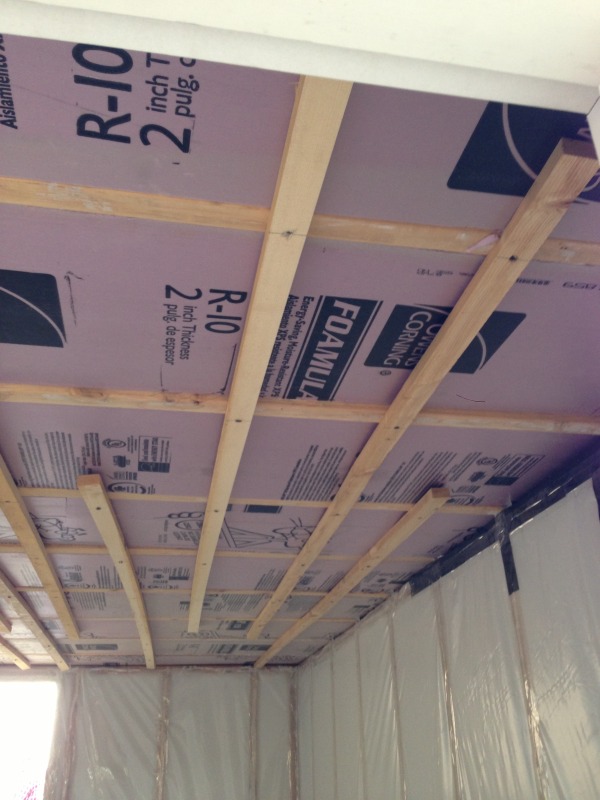
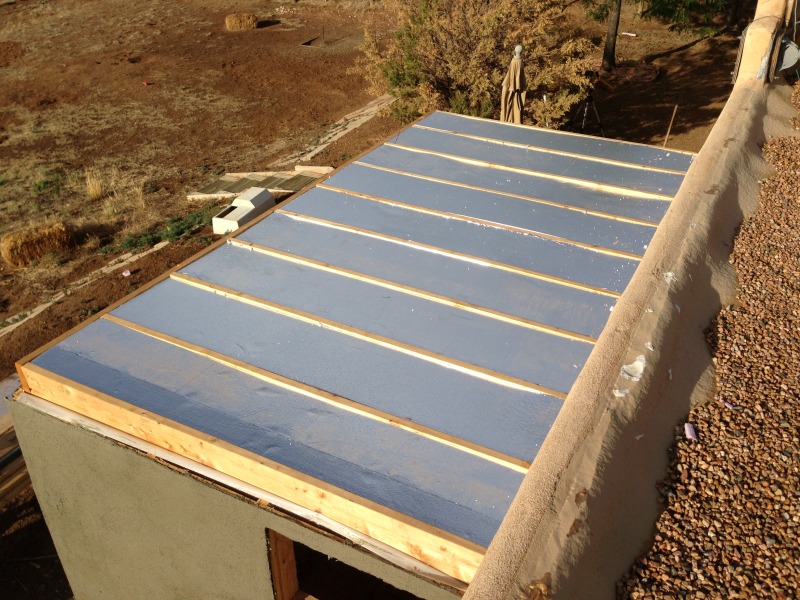
We started populating the roof with XPS 150. This is only the first layer but there will be two layers of 2" and one layer of 1" EPS on top. There will be a vapor barrier on both the top and bottom of the foam sandwiches. We put up the furring strips only as a temporary way to keep the XPS from penetrating too deep. We will remove these once we go to put up the vapor barrier.
Got some brown coat done today:
Roof joists are populated:
Now off to Home Depot for a light supply run...
It's definitely different than my current panels so we may not use it. We'll see.
Brown coat going up on the shed:
More of the same:
Door going up:
I took the door off the hinges so we don't have to deal with it until we need it. I will have to insulate and IR barrier it anyway.
Monsoon season is officially here as we got a 2:15 PM rainstorm that is still going as of 2:37 PM.
Had to throw down a couple quick tarps to protect the OSB:
Still raining:
At least it's not hot anymore.
After the rain stopped, we removed the tarp from the floor but it still got soaked. Bummer.
We started populating the roof with XPS 150. This is only the first layer but there will be two layers of 2" and one layer of 1" EPS on top. There will be a vapor barrier on both the top and bottom of the foam sandwiches. We put up the furring strips only as a temporary way to keep the XPS from penetrating too deep. We will remove these once we go to put up the vapor barrier.
Got some brown coat done today:
Roof joists are populated:
Now off to Home Depot for a light supply run...
- Joined
- May 6, 2013
- Messages
- 14,033
- Reaction score
- 3,377
nice work!
OP
OP
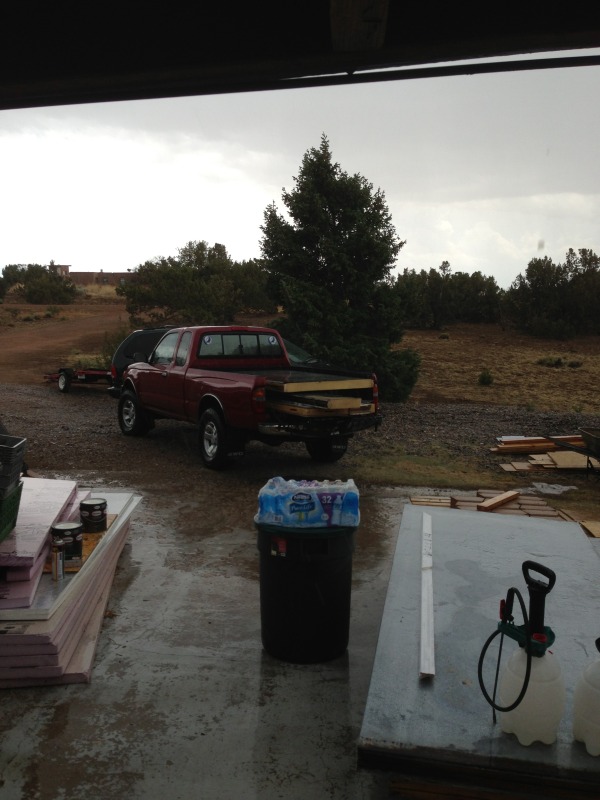
Last pic of the day. Home Depot run...
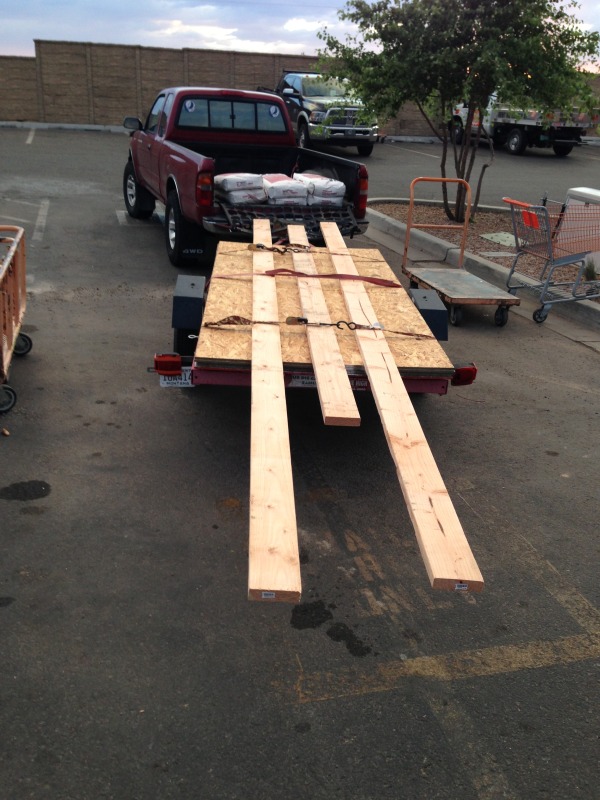
Seemingly little volume but I can't ever seem to get out of there for less than 200 bucks...
Some lady ran into the back of my trailer at a red light before I got to the HD. No damage but I definitely felt it. She didn't bother to stick around and fled the scene by reversing into a Walgreens and zipping off through their parking lot. I think she wasted one of her fog lights so I'm good with the whole incident. I didn't feel like dealing with the cops anyway.
The nerve of some bitches I tell ya.
OP
OP
We had a bit of a setback today as the vapor barrier had leaked in two spots close to where the AC unit will go. So I had to cut out the barrier there and we are now removing staples and sanding down the cheapass ALEX caulk (which doesn't really do a good job of sticking to the 6 mil PTFE). Ghettogyle Greg had suggested getting the cheapest caulk possible for this application. I applaud his trying to save me money but that caulk just plain does not stick to the vapor barrier. We really need to get a roof on this *****. BAD. So much for it never raining here...
Once we have all that caulk removed and prepped, we can go ahead and re-barrier that area. We also need to seal in the XPS panels along the top where they meet the inner roof wall, as well as where they meet the outside tops. That'll probably take all day. Stuccoing is taking place in the meantime.
Devil is in the details with a project like this...
OP
OP
There was some production today regardless of the early setback. It did not rain today thankfully.
Repaired the interior vapor barrier:
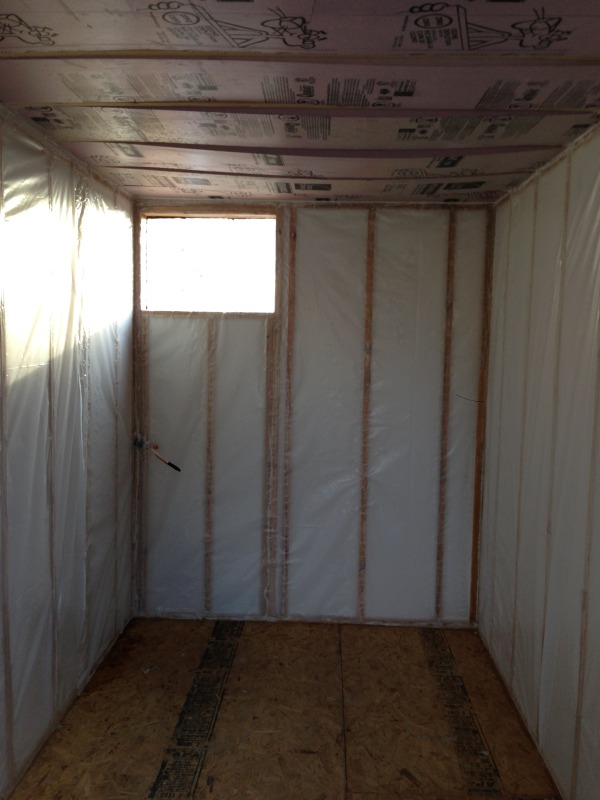
You can see the silicone is a marginally better bonding agent for HDPE. I have concluded that installing vapor barriers sucks.
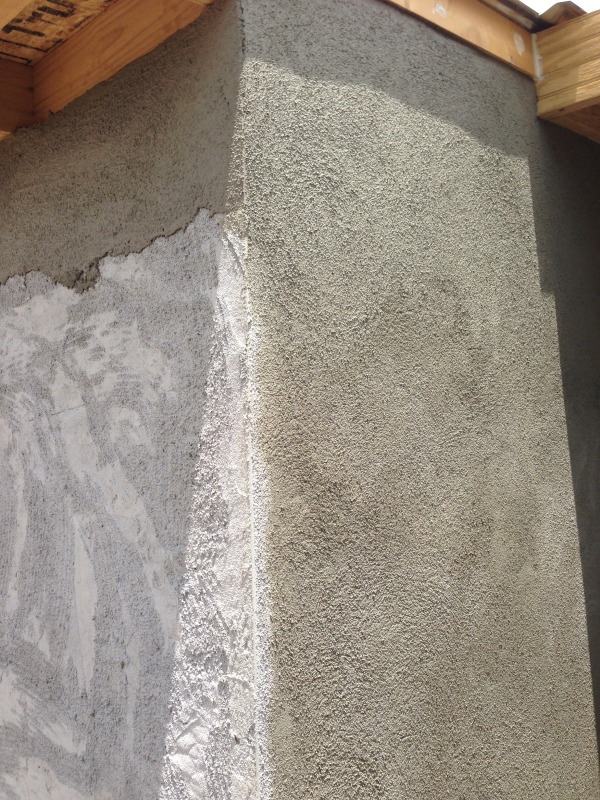
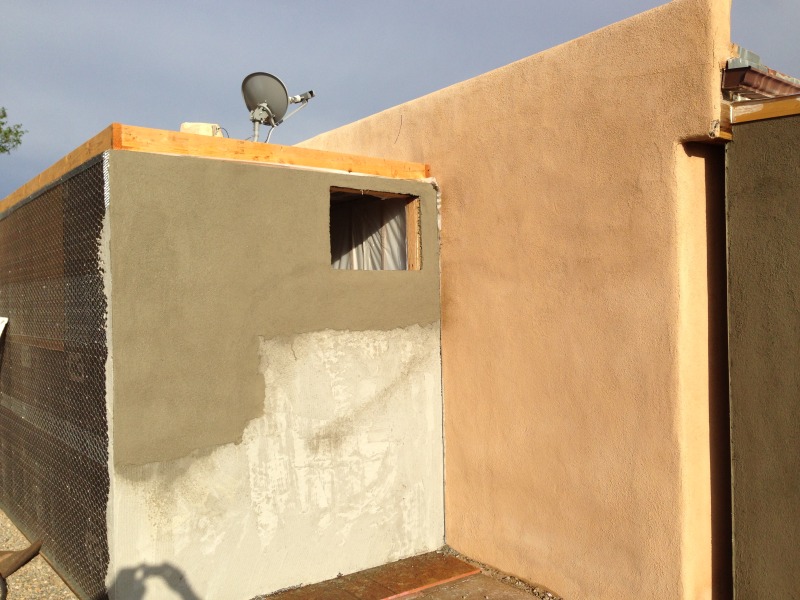
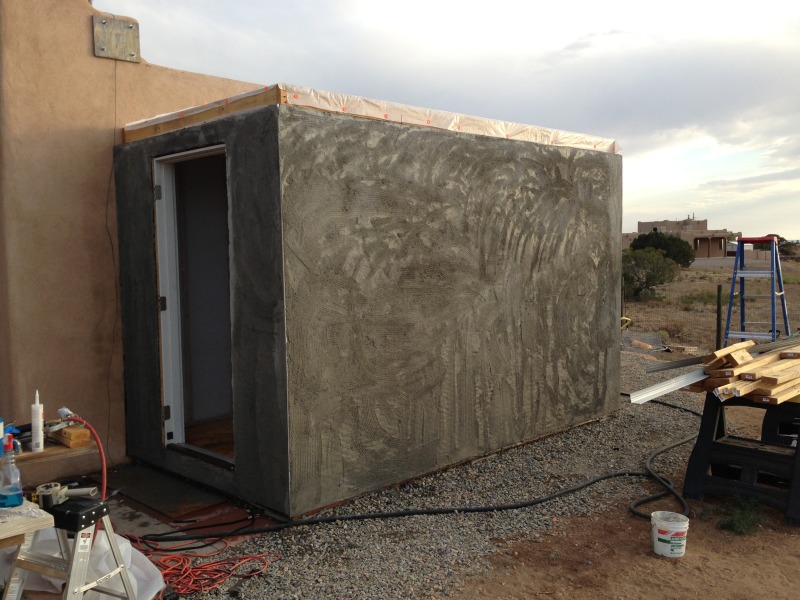
Scratch coat on the door side finally:

On the side wall as well:
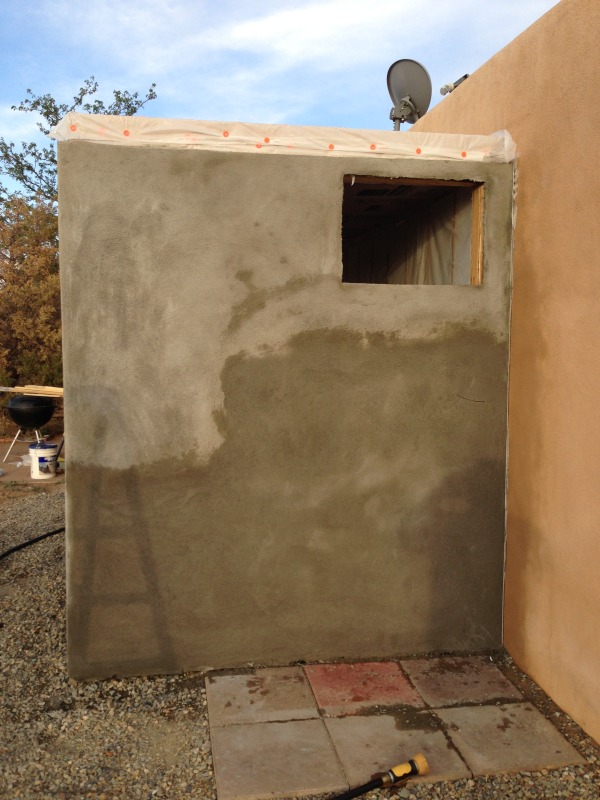
Brown coat on AC side wall:
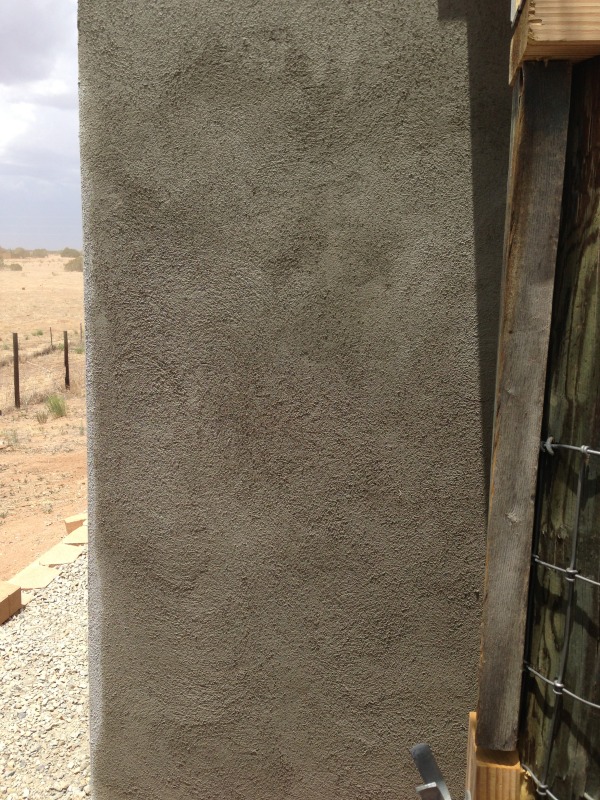
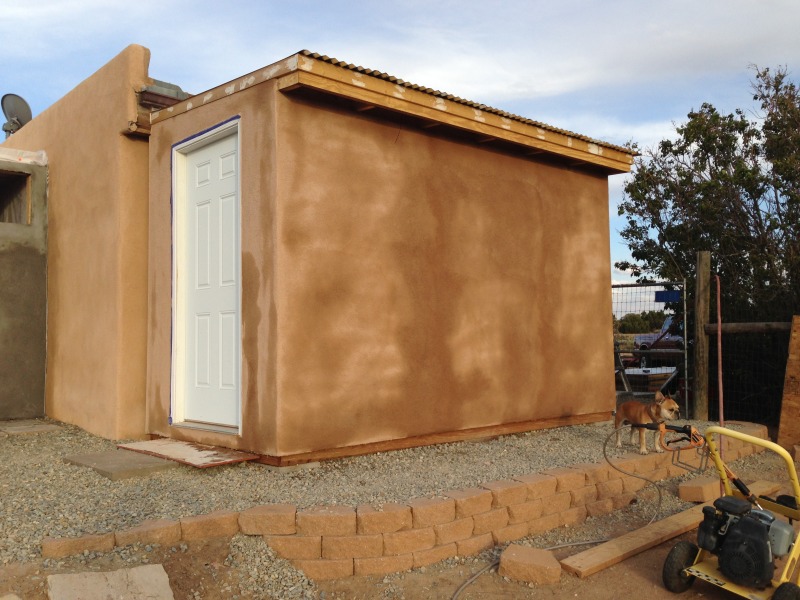
Color coat is done on the shed:
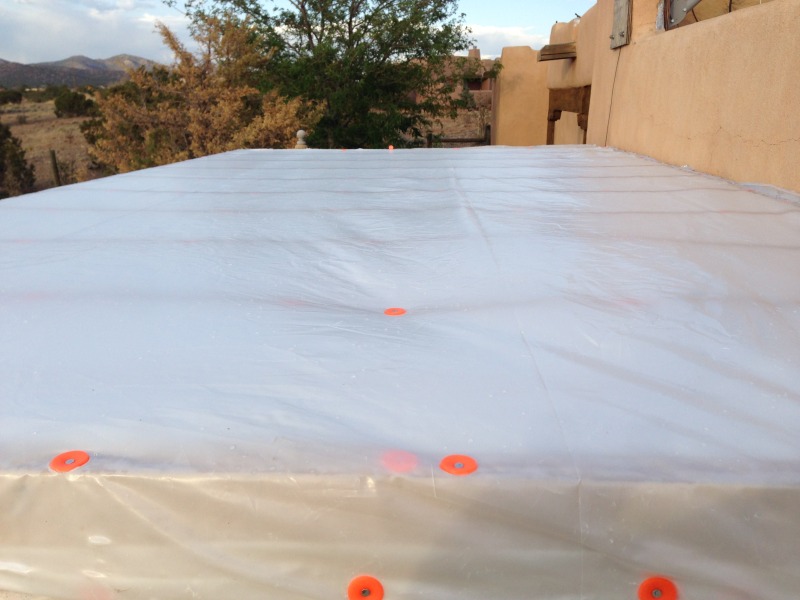
Double vapor barrier on the roof. This should help keep it dry until we get the roof on...
G. Greg's kid Marshall has been helping but he's REALLY green. We need to provide guidance which is slowing us down a bit but he's catching on quick in some respects. He can water down the scratch and brown coats well which is a relief as that's getting old.
Repaired the interior vapor barrier:
You can see the silicone is a marginally better bonding agent for HDPE. I have concluded that installing vapor barriers sucks.
Scratch coat on the door side finally:
On the side wall as well:
Brown coat on AC side wall:
Color coat is done on the shed:
Double vapor barrier on the roof. This should help keep it dry until we get the roof on...
G. Greg's kid Marshall has been helping but he's REALLY green. We need to provide guidance which is slowing us down a bit but he's catching on quick in some respects. He can water down the scratch and brown coats well which is a relief as that's getting old.
Similar threads
- Replies
- 4
- Views
- 953
- Replies
- 6
- Views
- 738

Latest posts
-
-

-
-
-
-

-
 Closed pressure transfer from a plastic fermentation bucket
- Latest: mac.cartier