Another 3d Printed Stir Plate - 80mm PC Fan & PWM Controller - Link to Files

Homebrew Talk - Beer, Wine, Mead, & Cider Brewing Discussion Forum

Help Support Homebrew Talk - Beer, Wine, Mead, & Cider Brewing Discussion Forum:

This site may earn a commission from merchant affiliate links, including eBay, Amazon, and others.

thehebs

Well-Known Member
Joined
Sep 28, 2015
Messages
111
Reaction score
40
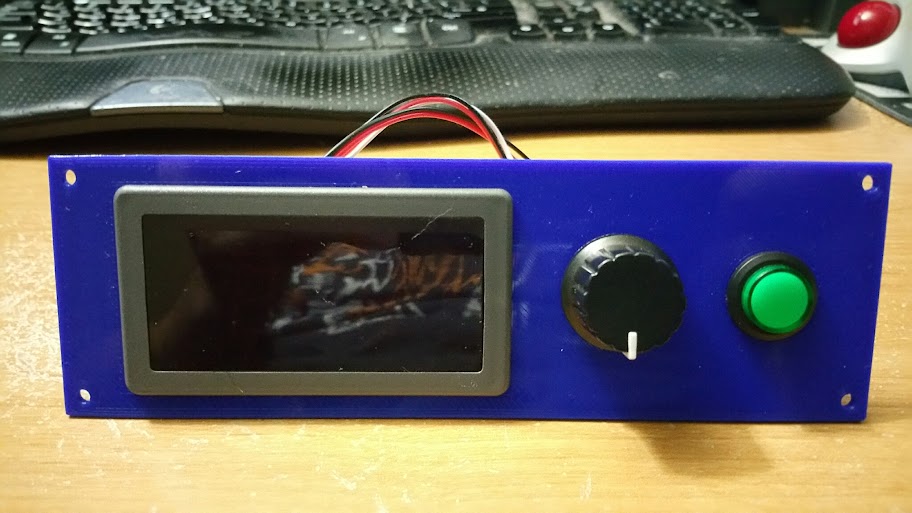
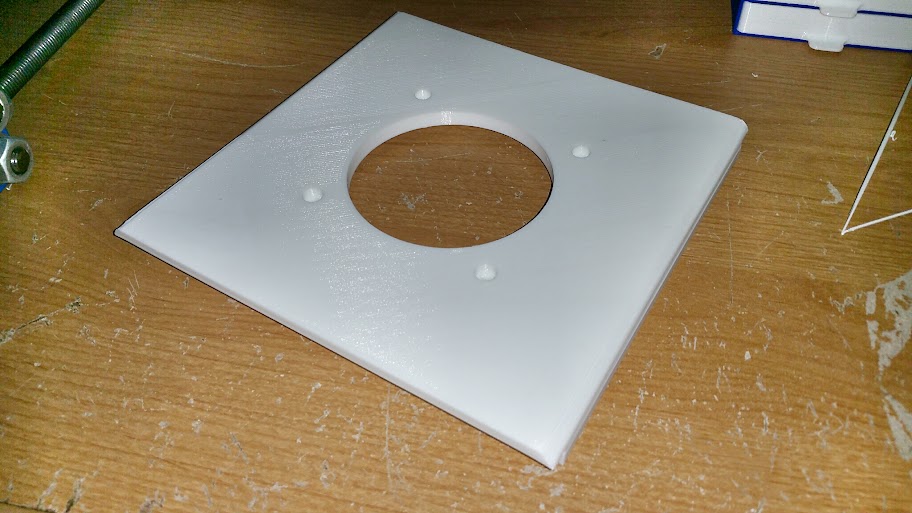
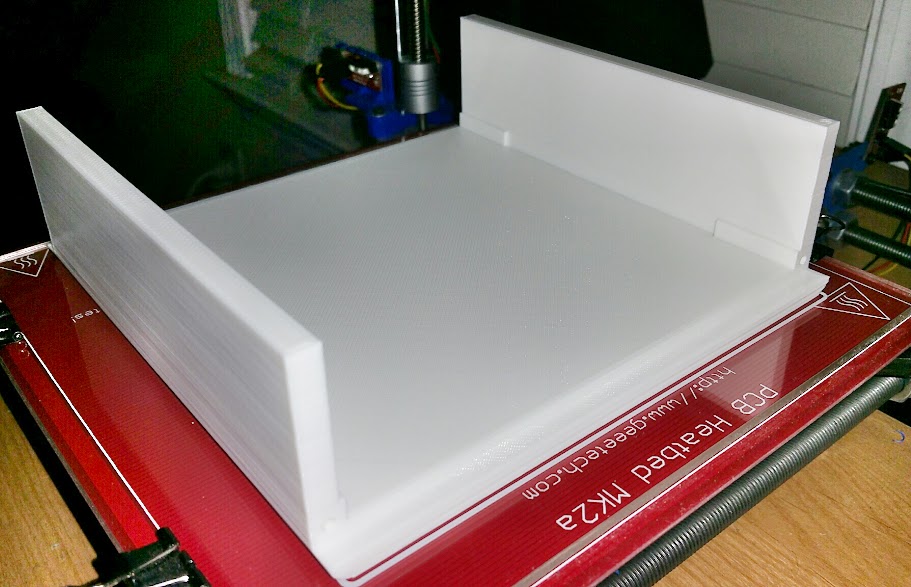
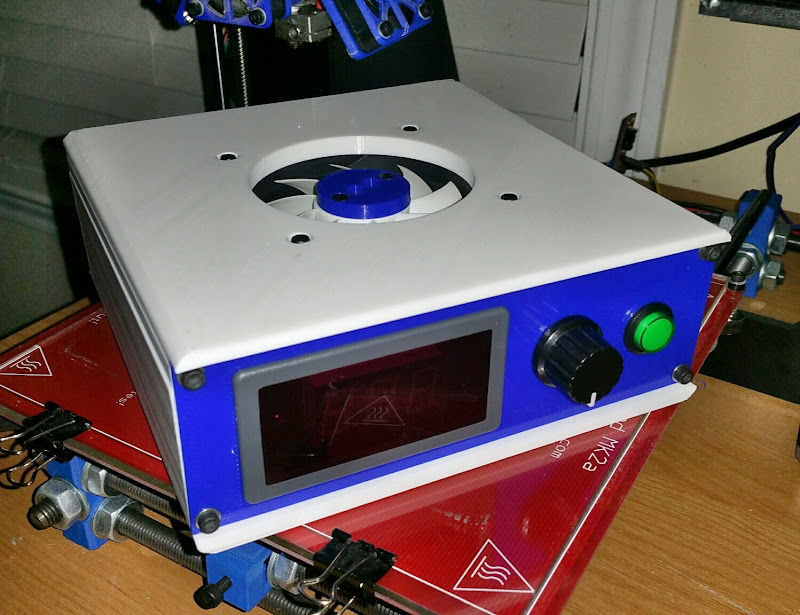
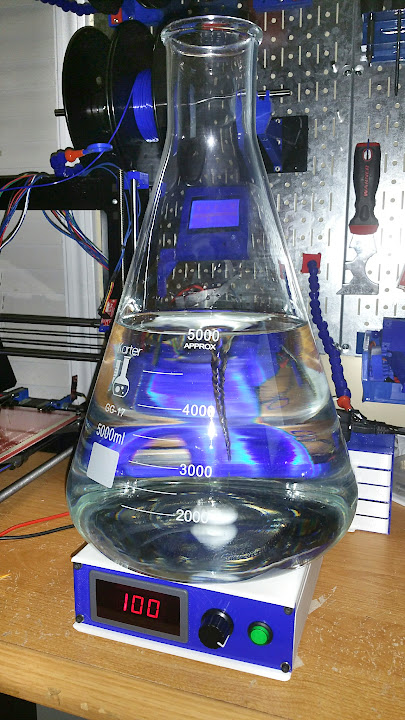
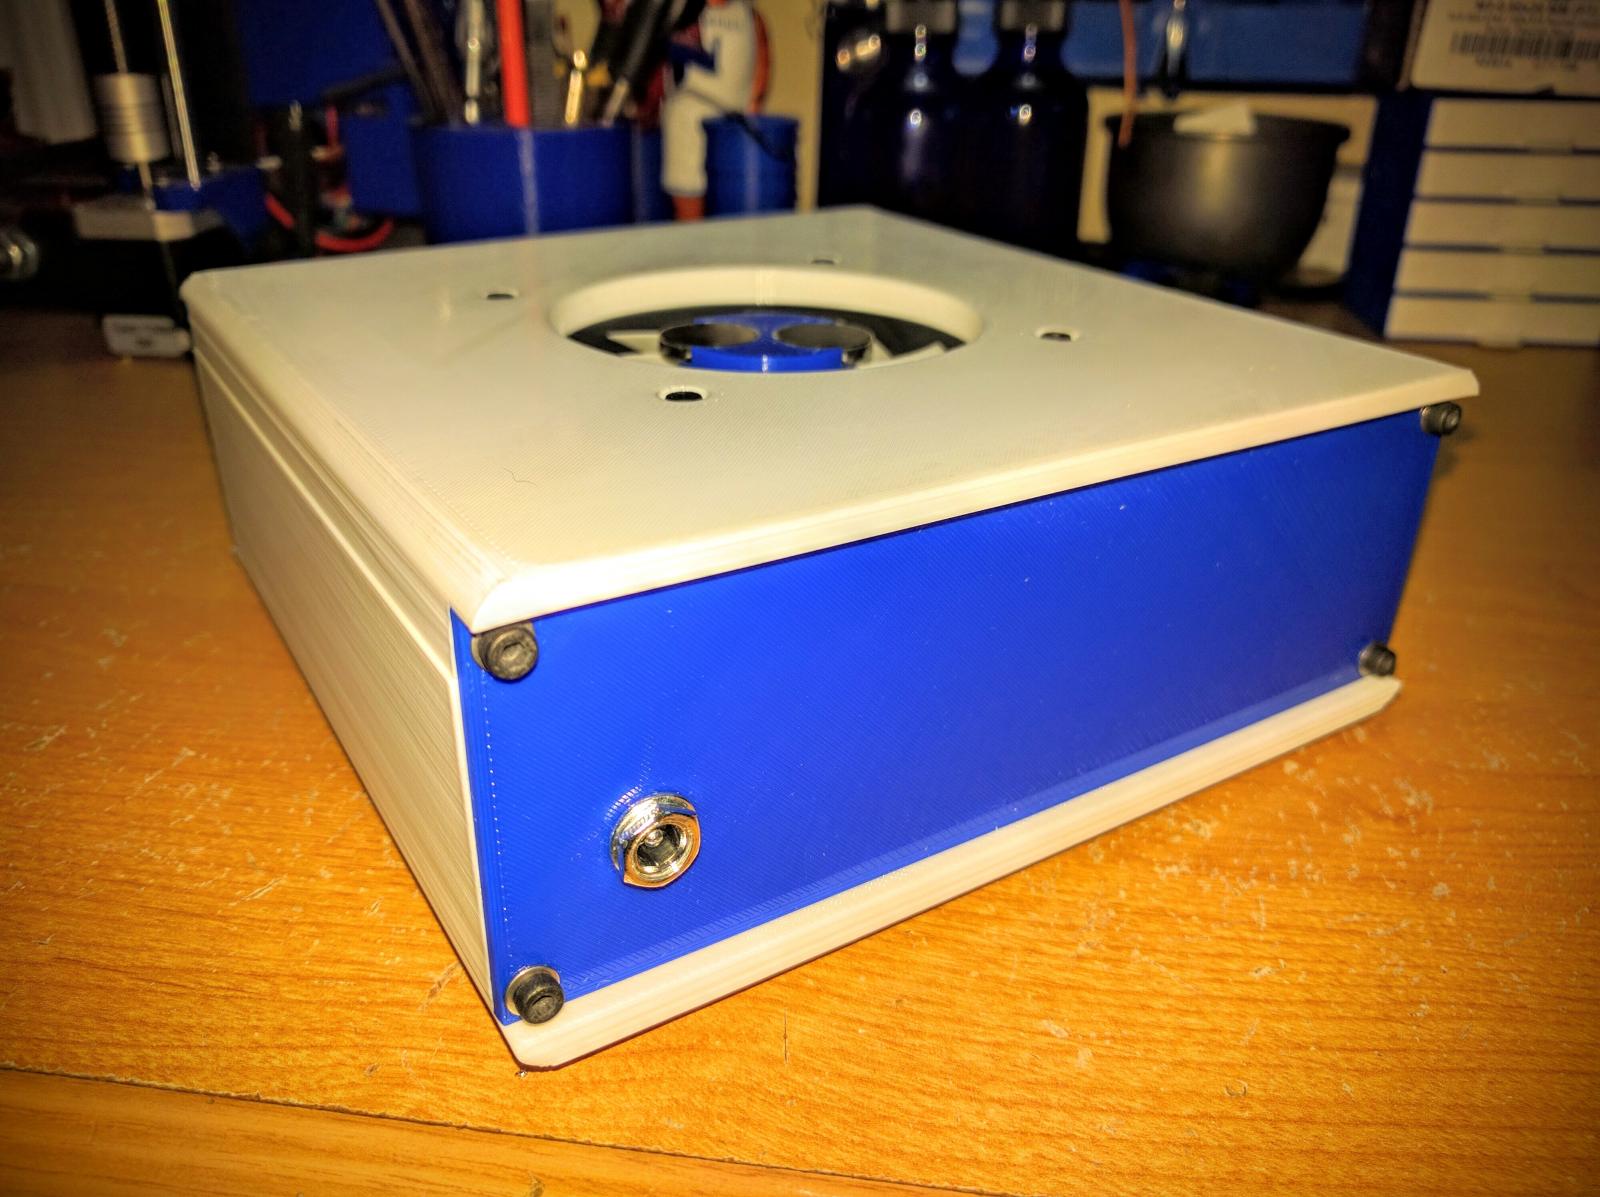
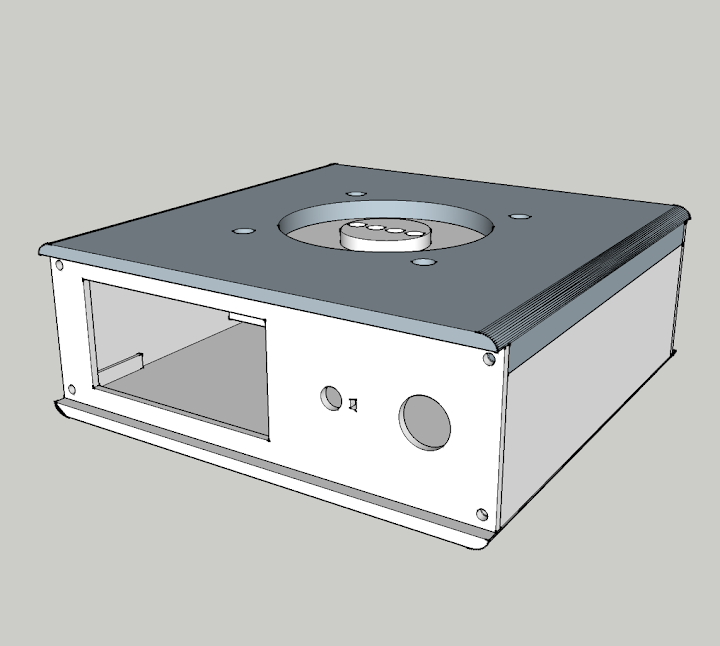
I have seen some 3d printed stir plates floating around so I figured I would make my own rendition by remixing my stc1000 enclosure.

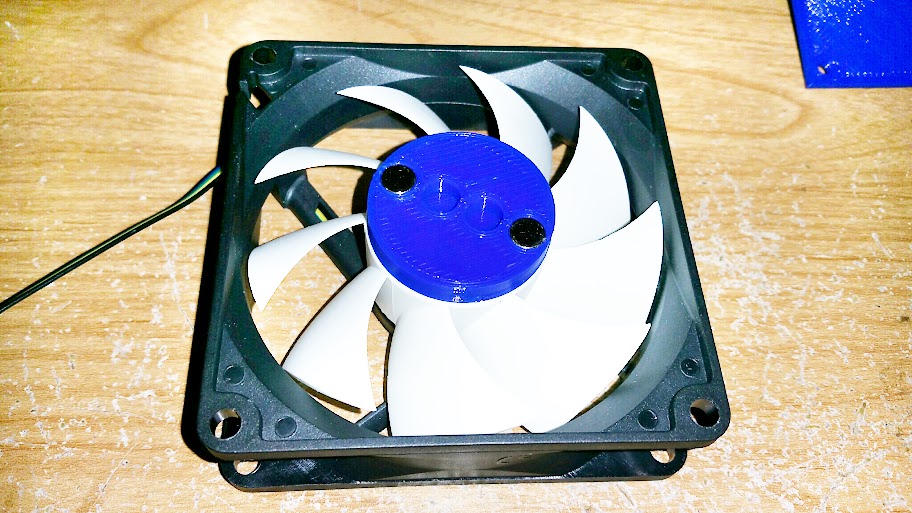
I used an 80mm fan, pwm speed controller, and some little .7" x .11" neo magnets.
all%2Bparts%2Bassembled%2B-%2Ball%2Bcomplete%2B1.1.png


upload_-1


upload_-1


upload_-1


upload_-1


upload_-1


upload_-1


upload_-1


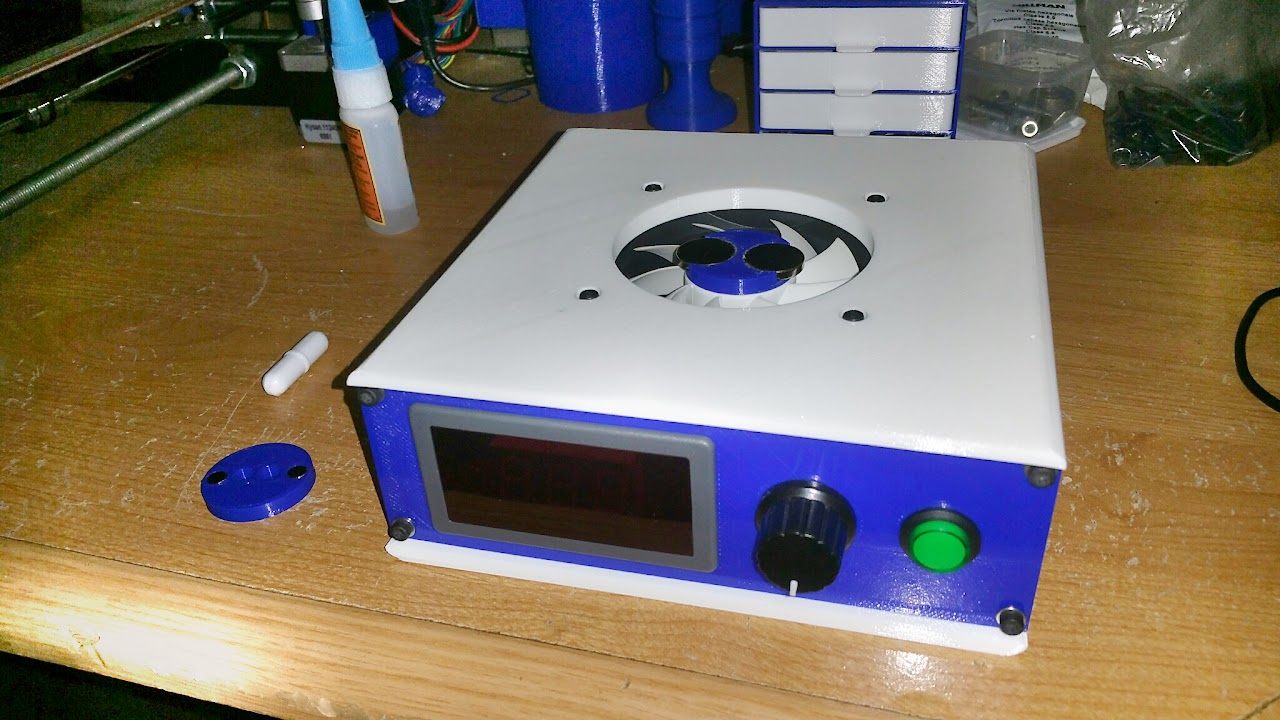
Upgraded magnets
upload_-1


And I shall call it... R2...

upload_-1


Test Video:
[ame]https://www.youtube.com/watch?v=ZQPAgM_KiDU[/ame]

--------------------------------

Files: http://www.thingiverse.com/thing:1413550

Fan: http://www.amazon.com/gp/product/B00H3SWJ24/?tag=skimlinks_replacement-20

Controller: http://www.ebay.com/itm/141645156384

Magnets: http://www.homedepot.com/p/MASTER-M...rth-Magnet-Discs-3-per-Pack-07047HD/202526369

Stir Bar Kit: http://www.amazon.com/gp/product/B01A60XJBU/?tag=skimlinks_replacement-20

5L Flask: http://www.amazon.com/gp/product/B006UKI9X4/?tag=skimlinks_replacement-20

I used M3 x 40mm socket cap machine screws, nuts, and washer for the fan, and M3 x 22 socket cap machine screws and washers to mount the front and rear plates.

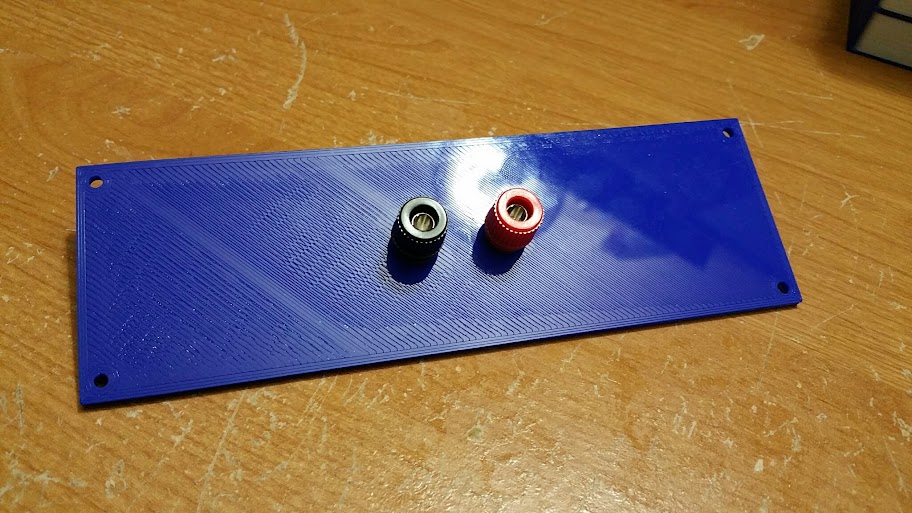
I personally used binding posts in the rear plate to connect some little banana plug leads to my bench top PSU. Feel free to request any kind of changes to the rear plate for various power options, or the front plate for different types of controllers and displays.

--------------------------------

CHANGELOG:
3/12/2016 - The stir plate is complete and I have tested to make sure the fan works, etc... but I have not tested it out with a erlenmeyer flask, stir bar, and liquids yet. My flask should arrive weds., and I will upload video of the test (and more pics) when complete.

3/17/2016 - I got my 5L flask in today and tested the stir plate. The magnets I was using were too small, at least for my biggest stir bar. It kept throwing the bar to the outside. I ran to home depot and bought some .7" DIA x .11" thick rare earth super magnets and remixed my magnet puck. I still had issues with the biggest stir bar, but then I tried the second largest stir bar and it worked extremely well. I got a decent vortext at 25% on the PWM controller, and it just got better all the way up to 100%. I also added some little rubber feet to the bottom of the stir plate for vibration dampening. I would also like to note that I didnt even glue the magnet puck to the fan. The magnets are strong enough to stick to the fan magnetically.
 
Last edited by a moderator:
First post updated. I had to use bigger magnets. I updated the files on thingiverse, as well as the change log. I added new pics and a test video.
 
Last edited by a moderator:
I was looking at getting this printed up for me at 3dhubs.com. Can you let me know which material you used? I was going to go with ABS, but I was curious if you had input being the designer.

Thank you.
 
Pretty beefy ... 3DHubs prices were $46 on up to ridiculous.

I would think ABS could bend without ribs. PLA would be my guess.
 
Pretty beefy ... 3DHubs prices were $46 on up to ridiculous.

I would think ABS could bend without ribs. PLA would be my guess.

You got that right. I was just going to spring for the M3D printer at only $350. Then the possibilities skyrocket. Their pro version comes out Monday, rumored preorder price of only $500, patience just might pay off.
 
I mostly print with PLA because I dont have an enclosure. ABS requires an enclosure or else the print will split and warp. Either material would be fine for this application.

Yea this thing is really beefy and uses a decent amount of filament. I think it took about 26 hours total print time (not including bed cleanup and prep between prints).

$50 isnt too outrageous. The filament cost is around 10 to 15 bucks. I then usually charge about $2 per hour of print time. 2*26 = 52 + 15$ (filament cost) = $67 bucks.
 
PETG is supposedly also a really good option. I have never used it but I might start. Supposedly it has the good properties of both pla and abs (doesnt split or warp and is easy to print, but has high temperature tolerances and is very durable).

As for printers, I would recommend the wanhao duplicator i3. It is a similar design as my DIY i3, but its pre built and pretty user friendly. I think its around 300 to 400. They make a monoprice version (Same printer, different logo) that they sell on amazon.
 
All great stuff, thanks for all of the information and the read.

I bought the stuff on eBay and amazon to make the stir plate....but it might sit and wait until the printer arrives!

I get a 25% discount when ordering from that site, so I might just give it a shot if that price seems fair.
 
All great stuff, thanks for all of the information and the read.

I bought the stuff on eBay and amazon to make the stir plate....but it might sit and wait until the printer arrives!

I get a 25% discount when ordering from that site, so I might just give it a shot if that price seems fair.

Which site?
 
3Dhubs.com

Looking through those shank collar extensions are exactly what I need, tap handles, other stuff and things around the house...the printer seems like a better option each time.

M3D has some really cool filaments that are pliable and color changing. Price seems reasonable as well, but they may be shorter in length than the amazon ones you mention.

One thing to keep in mind is that printers require calibration, usually for each type of filament. Sometimes you even have to calibrate for specific colors of the same brand of filament.

I mostly print with hatchbox PLA, which is about 20 to 25 on amazon.
 
I tweaked the top plate a little by adding a .25mm support layer between the screw hole and the screw head recess. Otherwise, they print a little ugly and requires cleanup with a hobby knife.
 
Printing this now. Not really experienced wiring things though but I want to learn. Can anyone post pictures of how they have it wired? it looks pretty straight forward, I just don't want to do anything wrong.
 
The i3 plus arrived today, a little calibration and I'm off! The base plate is printing out now!
 
I really like the price tag on that one. Good for a beginner?

I suppose, it's my first as well. As with anything, read up and take your time. Level the rod, level the bed, do a dummy print (I did a circle and it came out great), then off to the races it was for me.

This place - 3d printer store - actually has USA stock of the item and some pretty good prices on packages. I got mine elsewhere and it took about 11 days to get to me right from China.

The bed is going for about 9 hours now and about 54% done, there is some slight warping just on the front (or back) or one corner right now, hopefully that won't affect me. But things like that you have to know the right temps, which research can only take you so far.

Curious to see how it turns out for you. Please post pictures :)
 
All parts printed out and semi assembled. The bowing on the bottom plate I didn't like, so that's printing now. Although, I decided to take this time to test out some other features of matter control and am using some higher resolution settings, it'll be a good day or two before I see the end result.

All in all the design came together nicely, it's well thought out and should work great once this plate is ready.

I just had to use the allen wrench to start the holes for the screws and then they fed in without issue, yet still firm to hold.

Awesome to hear. Mine should be done printing next week (using 3dhubs so it will be shipped to me). Can't wait to get it out together.
 
Thanks for the inspiration. Might replace my ghetto cigar box stir plate with something similar. Might just cut it out of Plex though. I was already planning on doing that for one of my temp controllers instead of a project box.
 
Have you already placed an order?

I just got my hub setup. Im not sure how much my hub would say to print the enclosure but I am sure we could work something out.

https://www.3dhubs.com/memphis/hubs/thehebs

Darn it! Yeah i did. I did PLA and it was only $18 + shipping. Looking good so far. A little warping on the main body but very minor.
 
Have you already placed an order?

I just got my hub setup. Im not sure how much my hub would say to print the enclosure but I am sure we could work something out.

https://www.3dhubs.com/memphis/hubs/thehebs
I wonder if there's a way to tag the hubs so if we order stuff we can work with HBT members. I wonder how many folks here have a hub?
 
Darn it! Yeah i did. I did PLA and it was only $18 + shipping. Looking good so far. A little warping on the main body but very minor.

$18 is an awesome price! I priced it out through their tool online and it was telling me $50-60 plus shipping! Good score!

The plate was at 40% when I woke up this morning and I was able to get a cool shot of the honeycomb structure being spit out, the head was going crazy but so precise, pretty sweet.

RQ0Vtpr.jpg

I had to shop around to find it for $18! I was seeing the same prices you were at first
 
Finally finished printing and working well. I actually have a starter going on it now. Thanks again to thehebs for the great design and making it available to all. The addition of the RPM monitor and switch are awesome. The sizes mentioned for the M3 screws are just right, came together great all in all.

7igdp4S.jpg


Yes yes, I know I installed it upside down, I'll fix it after this starter I promise!
8keF6ng.jpg


I originally thought this gap was there to allow for the air from the fan to escape, now I'm not sure. Although this is a 5k ml flask, there is a little sag in there. Also here you can see the top plate is at 2mm thickness and the bottom is at 1.
wTR2l6S.jpg
 
Finally finished printing and working well. I actually have a starter going on it now. Thanks again to thehebs for the great design and making it available to all. The addition of the RPM monitor and switch are awesome. The sizes mentioned for the M3 screws are just right, came together great all in all.


Yes yes, I know I installed it upside down, I'll fix it after this starter I promise!


I originally thought this gap was there to allow for the air from the fan to escape, now I'm not sure. Although this is a 5k ml flask, there is a little sag in there. Also here you can see the top plate is at 2mm thickness and the bottom is at 1.

Glad to hear it worked out for you. It seems like you might be over extruding a tad which is explains the large gap. I have a slight gap in mine, and I am debating extruding the top and bottom surfaces in a little to reduce the overall height of the front and rear plates to close the gap.

Mine seems to be pretty solid though. I have run a full 5L flask on it without issues.
 
So I can take it apart, put the top and bottom together, measure the faceplate gap in the front and back and just scale the plates to the new size?
 
So I can take it apart, put the top and bottom together, measure the faceplate gap in the front and back and just scale the plates to the new size?

I just updated all the files. I unhid all the parts in the SKP, and I modified the front and rear plates by making them .5mm shorter. Im not sure if thats enough to close your gap though.
 
So I can take it apart, put the top and bottom together, measure the faceplate gap in the front and back and just scale the plates to the new size?

And that wouldnt have worked because it would have brought the screw holes inward which wouldnt allow them to line up with the holes in the top and bottom plates.
 

Latest posts

Back
Top