Zeus's rebirth. Non typical, all steam brew stand.

Homebrew Talk - Beer, Wine, Mead, & Cider Brewing Discussion Forum

Help Support Homebrew Talk - Beer, Wine, Mead, & Cider Brewing Discussion Forum:

This site may earn a commission from merchant affiliate links, including eBay, Amazon, and others.
Don't feel sorry for me about the start up not working out... life goes on and I'm in another better start up. Life is good, except that I never get to brew !

On that topic, I bought a nice little Armstrong steam trap on E Bay for $20 plus shipping.

These things separate the condensate from the steam (vapor) without allowing the steam to escape. These things normally sell for ~$250 or so, but there are a bunch of them new on eBay for cheap. I think they will also act as a vacuum break, but I have yet to confirm that.

Data sheets are here.
http://www.armstronginternational.c...bucket-1800-series-stainless-steel-horizontal

The 1000 series will work as well, but they exit out the top instead of out the side. These valves must all be mounted upright. They don't work mounted on their side that I know of.

The steam trap is normally placed at a low point after the steam has lost its heat. When enough condensate collects, it opens and releases it automatically. I'm hoping to use 1 steam trap for multiple vessels by having a check valve in each condensate line. Should that not work I'll need a steam trap for each one, but I think a check valve will work.

Prior to finding this unit, I was either going to order a big clunky cast iron unit or drop the condensate out manually with a ball valve. I'm happy to have this unit as it will be one less thing to watch while brewing.

This, of course, implies that I'm not blowing my steam directly into my mash in the MLT or wort in the boil kettle. I'll be keeping the steam separate from these liquids by heat transfer between a copper coil and the liquids themselves. I did the heat transfer calculation for the coils in a previous post in this thread.

FYI, if you buy one of these, make sure to get a threaded model and not a weld socket model. The weld socket models are not threaded.

FYI, there is a small chance that the output from one of these steam traps could be piped directly back into the boiler. It all depends if mounting the steam trap outlet above the boiler provides enough head to force the condensate back into the boiler. Theoretically it should, but practically, I'm not sure. Generally a pump would pump the condensate back into the boiler. The pressure differential should be very small because theoretically the entire steam line is at the same pressure. I'm hoping the hydrostatic head plus a little bast of steam pushes it back into the boiler.
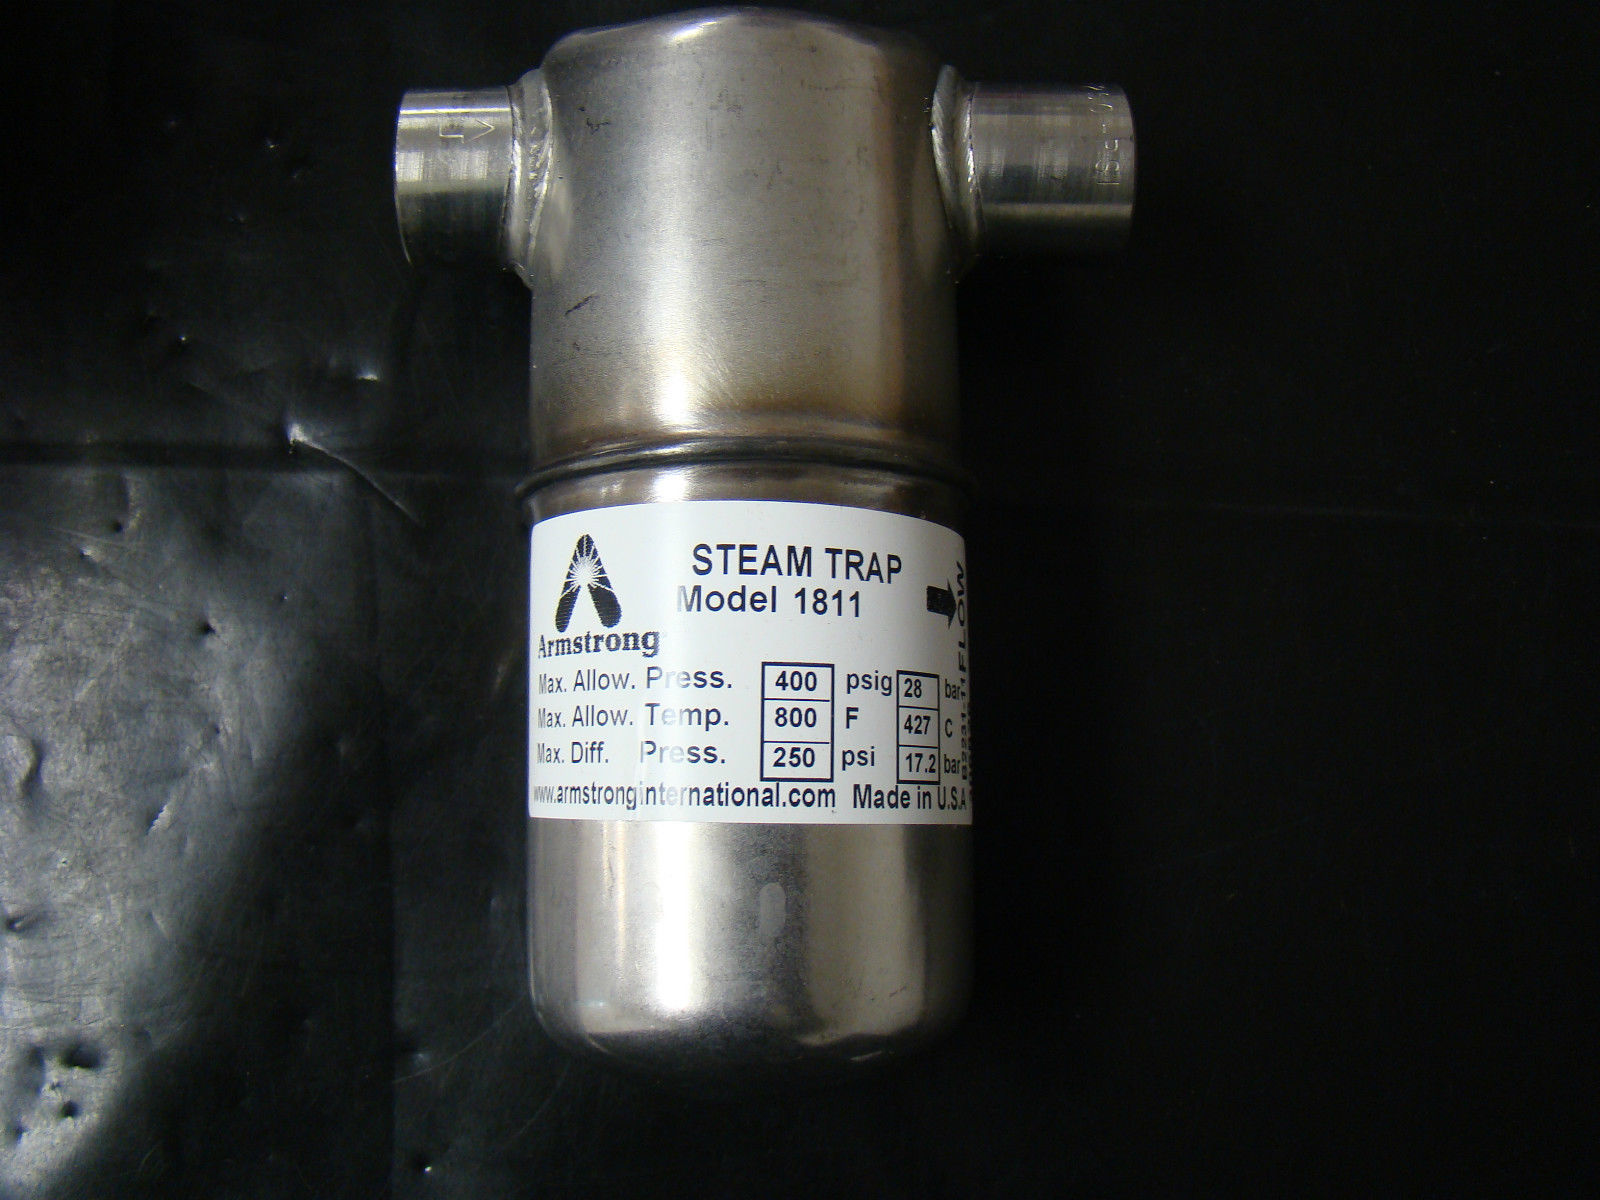
Armstrong Steam Trap.JPG
 
I've been making some time to work on this thing in the evenings.

- I've got the sink almost plumbed in and that means I have water to fill the boiler !
- the steam trap arrived
- I'm picking up the rest of the fittings to plumb the steam coil into the boil kettle
- I hope to braze (SiBr TIG Brazing) the fittings into the boil kettle in the next few days
- I haven't pulled the power cable yet. I'm going to just lay it on the floor temporarily to do the test runs, because I want to see where the boiler ends up before I knock holes in drywall to install it permanently.

The first test run will just be to see how fast I can boil water in the boil kettle.

I've spent a ton of time recently trying to figuring out the details of delivering the steam to the mash or wort. None of my vessels are going to use infused steam.

Not in the boil kettle because if you inject steam into the boil kettle you won't reduce the volume of wort during the boil. And I'm a bit worried that the steam water might develop flavors that find their way into the beer. So at no point will any steam water mix with the wort.

Not in the mash tun because I'm worried that the high temperature of the steam (250F) will develop temperature gradients in the mash bed and/or kill the enzymes of the mash where the steam bubbles release their heat. I started a thread on this topic here

https://www.homebrewtalk.com/f36/why-doesnt-mash-heating-denature-amylase-enzymes-518680/

The reason I'm paranoid about this happening is that I'm pretty sure I observed it with some of my steam mashes back in 2007. Steam has a ton of heat in it and if you don't manage to spread it around, it causes hot spots, which wreck mash efficiency.

So... I'm going to heat the mash by circulating it through an external heat exchanger powered by steam instead of hot water (HERMS) or an electric element (RIMS). I got my inspiration for the HX from time4Another1's setup on youtube.

The details of his HX are shown here:
[ame]https://www.youtube.com/watch?v=RIJascCLwHo[/ame]

[ame]https://www.youtube.com/watch?v=EZBBmPdL9xI[/ame]

I'm going to use the same 4" triclover spool (tube), except it will be filled with steam (up to 30 PSI, 275F, if I need it that hot) instead of having an element and water in it as he does. BTW, I think its brilliant to have water in the HX like he does and eliminate the electric element coming into direct contact with the mash liquid.

I'm also going to have 2 coils in mine, one for heating the mash liquid as usual, but a second coil for heating sparge water. I'm hoping that this eliminates the need for an HLT.

time4Another1 tested his HX as a water heater in one of his (150?) videos, but I can't find it. It worked perfectly fine, though his available flow was limited due to using only a 1500 watt element. My flow rate will be limited by the area of the water coil as I can inject as much steam as needed into the HX vessel, as fast as the mash and water coils condense it.

Maybe I'm slow, but its taken a ton of time to figure all this out. Having a bunch of heat energy stored in a boiler is great, but the real problem lies in efficiently and effectively delivering that energy to the wort and mash. Its going to be interesting to see how this all works.

FWIW, Time4Another1's brewery has a number of very innovative design features. I really like how compact it is and how well it seems to work.
 
One other issue comes up when using the HX to heat sparge water: pressure.

If I feed filtered tap water straight into the sparge water coil in the HX, it will be at the city water pressure, 50-60 PSI. This is too high to use with camlocks or with an auto sparge. So I'll need to reduce the pressure of the filtered water supply down to 5 PSI or so with a regulator.

Its not a huge technical issue, but its another device in the system, which is a pain to plumb and, of course, costs $$$$. But... if it eliminates the need for an HLT entirely, thats a good thing. HLTs cost money, take up space, need to be cleaned, etc. too.

The removal of the HLT from the system isn't new. If you go back and look at the first ZEUS design, I was going to use a small on demand water heater to heat water for sparging and do away with the HLT in that design too.
 
Why am I running steam in my HX instead of hot water ?

2 reasons

1) no temperature lag. The temperature in the HX cavity will change instantly when steam is added to it. Steam has very little thermal mass. It carries its energy in a phase change.

2) the heat exchange coefficient for steam->copper->liquid is twice that of water->copper->liquid.

So a steam powered HX can be smaller and/or more powerful, while also having a faster response time. At some point in time the HX temp control will be automated.

FYI, 4" triclamp spools and endcaps are rated to hundreds of PSI and the seals are rated to 400F, depending on the material you chose.
 
Brewman,

Cool stuff. I guess I am a little confused though on the heat exchanger. Say you are running your wort through the HEX, and heating it with steam. Based on your earlier calculations, the steam is going to heat the wort more efficiently than hot water, perhaps even bringing it to boil. I assume you are trying to avoid the color/carmelization problems people experience with the RIMS system (and I don't blame you).

However, it looks like your underlying concern here relates to the denaturization of enzymes. Wouldn't the wort already have many of the enzymes floating around in it before entering the HEX? Wouldn't heating that wort FASTER in this case actually make it hotter and therefore more likely to denature the enzymes? Or do you just anticipate trying to temperature control the outgoing wort at whatever step temperature you are trying to achieve?

I was at a commercial distillery the other night and noticed that they heat their mash by direct infusion over the top of the mash. Couldn't you do the same and just have a device that constantly mixes the mash in order to avoid temperature gradients?

I don't want to kill your idea here, since that HEX is pretty awesome, and looks fun to build. But I guess I'm just a little concerned that you might not be solving your underlying problem.
 
Brewman,

Cool stuff. I guess I am a little confused though on the heat exchanger. Say you are running your wort through the HEX, and heating it with steam. Based on your earlier calculations, the steam is going to heat the wort more efficiently than hot water, perhaps even bringing it to boil.

I don't think I made such a statement. In general steam will heat water and wort the same way. Wort has a higher density, so its going to heat a bit slower if anything.

Within the HX, the relative heating rates will be determined by the flow rates of each and the respective coil areas.

The sparge water coil will probably be much longer than the mash coil because sparge water is going from 50F to 170F, whereas the mash liquid needs to go from 160F to 170F, ie not much compared to the sparge water. However, the flow rate of the sparge water is much lower. 6 gallons of sparge water over 30 minutes is a flow rate of 0.2 gallons per minute.

The other thing is that even though the steam in the boil is 30 PSI/275F, I don't need to run the HX at that. I can run it at any temp/pressure I want.

It's going to take some playing around to figure this all out, but it should be possible to make it work.

FYI, this all assumes that I'm recirculating the mash while sparging, which is one of the goals of my system. I've done this in the past and it works great. High efficiency, the mash stays warm, ie no stuck mash and the wort stays clear. Some of the other system (Brutus, for example) stop circulating the mash during the sparge. I think recirculating it is better.

FWIW, the two HX coils will have the same ends, ie camlock, so I can put whatever liquid I want through each.

I assume you are trying to avoid the color/carmelization problems people experience with the RIMS system (and I don't blame you).
Yes I am. At a max temp of 275F, I doubt that a lot of carmelization will occur, but I might be wrong. The wort would only be in contact with those temps for very short time if at all.

FWIW, Belgium candy sugar is heated to temps between 210F and 290F, for extended lengths of time.

However, it looks like your underlying concern here relates to the denaturization of enzymes. Wouldn't the wort already have many of the enzymes floating around in it before entering the HEX?
I did some research on this. Like I said, its taken a lot of thought to get the design to this point.

Enzymes exist on both the grist and in the mash liquid. Grist is stationary and the liquid is mobile, especially if its being circulated.

Wouldn't heating that wort FASTER in this case actually make it hotter and therefore more likely to denature the enzymes? Or do you just anticipate trying to temperature control the outgoing wort at whatever step temperature you are trying to achieve?

Heat travels from hot to cold. The rate of heating is controlled by how high you raise the temperature above its current temp.

Lets say you have a mash sitting at 150F and you want to get it to 170F. If you set the flow and HX temp up so that the wort leaves the HX at 170F, it will eventually warm the mash solids up to 170F as well. However, it will heat the mash solids up much faster if you heat mash liquid temp coming out of the HX is at 180 or 185F.

From what I can tell, the speed at which you heat the wort up doesn't make much of a difference. What matters is how hot you get it and for how long.

During the mash out, heating the wort to 180F before putting it back into the tun is probably fine. You want to kill the enzymes anyway, the mash liquid doesn't have any tannins in it and 180F is low enough that no carmelization is happening.

The situation is a little less clear when doing a mash step. Lets say you are at 135F and you want to step to 142F. Is it OK if the mash liquids leave the HX at 155F ? Remember that the trip from entering the HX to being back in the bed is only a few seconds at most, providing the pump is running.

What I didn't want to do is inject steam directly into the mash. Because then the mash bed solids become a heat exchange surface and the mash in the vicinity of the steam outlet holes is going to be at the steam temp, ie 250F. Some of this could be mitigated by running the steam though a copper tube in the mash first, but the mash solids touching the coil are still going to be heated up significantly.

I was at a commercial distillery the other night and noticed that they heat their mash by direct infusion over the top of the mash. Couldn't you do the same and just have a device that constantly mixes the mash in order to avoid temperature gradients?

That is a very interesting idea, but I wonder how well it would work in a home brew situation.

What they are basically doing is releasing steam over the mash, which warms the "air" above it. I say "air" because if you inject steam into that volume, it will displace all the air until there is none. The hot vapor above the mash will heat the surface of the mash and if you circulate the mash it will continually pull the heat down through the rest of the mash. I can't help but think that the surface mash solids would be pretty hot if they weren't being stirred.

The problem with continually stirring a mash is that you don't develop a filtering bed. And hot side aeration if you believe that happens in a mash tun environment, though the steam vapor above the mash is going to pretty much eliminate any oxygen from that space.

I'm guessing that they pumped the mash into a separate vessel for sparging or they removed the stirring mechanism and stopped stirring (and heating) when sparging in that vessel ?

The other issue is that the mash tun would need to be ventilated so that pressure didn't build up if too much steam was injected OR the mash tun would become a pressure vessel. Because the mash isn't moving much (unlike mash liquid flowing quickly though a copper tube) the heat exchange rate isn't going to be that high unless there is a pretty healthy temp differential between the steam above and the mash itself. However, at atmospheric pressure the space above could be at 212F, which isn't too bad.

Not sure what to think about that concept.

I don't want to kill your idea here, since that HEX is pretty awesome, and looks fun to build. But I guess I'm just a little concerned that you might not be solving your underlying problem.

I think its the gentlest way of heating a mash, maybe short of heating the space above the mash.

Time4Another1 brewed a beer that was 3rd place in the SJPoor world beer competition with his system.

If straight steam in the HX vessel is too harsh for the wort in the coil, I'll add some water to the vessel cavity and inject the steam into the water first, ie it would be a steam infused water HERMS. It would then be the same as Time4another1s setup except that he uses an element to heat the water in his HX and I would heat mine with steam. I can easily regulate the water level in it by placing the HX steam trap higher or lower on the vessel.

Like I said, its taken a ton of thought to get the system design to this point.

FYI, some of the commercial breweries heat the mash by pumping it through an external HX rather than heating the kettle. A counter flow chilling coil could be used for this purpose. What I don't understand is how the wort would stay liquid going through the HX, unless the steam was regulated so that no boil occurred in the HX OR the HX circuit was pressurized.

But maybe its OK if the wort boils in the HX and goes back into the kettle as steam, which would cause the wort in the HX to bubble. The only problem with that is that the solids in the wort would probably get deposited on the inside of the HX coil where the wort started to boil ? Not sure.
 
Cool stuff. I guess I am a little confused though on the heat exchanger. Say you are running your wort through the HEX, and heating it with steam. Based on your earlier calculations, the steam is going to heat the wort more efficiently than hot water, perhaps even bringing it to boil. I assume you are trying to avoid the color/carmelization problems people experience with the RIMS system (and I don't blame you).

I just realized that I misinterpreted your question. Steam as a heat source in a heat exchanger WILL heat wort faster than water as a heat source in a heat exchanger, yes.

I'll have complete control over the HX steam injection rate into the HX cavity. And also the mash liquid flow rate. Thus I can set up the HX so that the mash liquid comes out at any temp I want, just like time4another1's system. (Note the temp sensor in the top of his HX vessel.)

Just because the boiler is at 30 PSI/275F doesn't mean the HX vessel is running at that.

At first this system looks really complicated, with a lot of things to figure out. And its true, it is. But that is because its the first one ever being built. In reality its not much more complicated than a straight up electric HERMS brewery. You'll see that once its assembled.

Lets not forget that a simple HX is eliminating a complete HLT from the system either and it should have superior performance to a HERMS.

Pride goeth before a fall... I've just jinx myself... watch me eat crow on that last statement !
 
These posts are cathartic for me because I get to dump all the accumulated thoughts in my head out on "paper". Its a brain purge ! Plus I know you guys read them and will point out any false logic I'm relying on or bring forth your better ideas.

Wife looks at me: "What ya thinking about ?"
Me: "Don't ask !"

I've done the alternative, where I tell her. She just rolls her eyes. Homebrewing is such a great hobby.
 
I'm guessing that they pumped the mash into a separate vessel for sparging or they removed the stirring mechanism and stopped stirring (and heating) when sparging in that vessel ?

The other issue is that the mash tun would need to be ventilated so that pressure didn't build up if too much steam was injected OR the mash tun would become a pressure vessel. Because the mash isn't moving much (unlike mash liquid flowing quickly though a copper tube) the heat exchange rate isn't going to be that high unless there is a pretty healthy temp differential between the steam above and the mash itself. However, at atmospheric pressure the space above could be at 212F, which isn't too bad.

Yeah they definitely had ventilation to that thing. It was huge.

And I don't really know if you sparge in a distillery set-up. They actually do all their fermentation along with the grain, so you don't separate it after the mash is done (I think this is what the "sour mash" is). Thank god I can't legally get into distilling because I wouldn't be able to afford both these hobbies.

Anyways, I guess I was a little confused about how the HEX works, but I see that you regulate how hot the outbound wort will be before recirculating it back into the wort.

Anyways, I'm glad you are getting back into this since its a great read.
 
Safety

FWIW, here is the description for the ball valves I'm using on this project.

"Brass straight ball valve. 3/4 in. For use with water, oil or air, 150 PSI (steam) and 600 PSI non-shock, solder ends, full port, can be use -20° to 350°F temperature range. Chrome finish."

These are the run of the mill ball valves from my local big box hardware store. But these are the ratings for the valve that *I* chose from *MY* hardware store. If you do this project, I want you to make sure that the valves *YOU* chose are safe.

Here is an interesting steam regulations document.
http://www.cbs.state.or.us/bcd/programs/boiler/Class5.pdf

THIS THREAD IS *NOT* a substitute for knowing what you are doing with steam. IF YOU DON'T KNOW FIRST HAND THAT WHAT YOU ARE DOING IS SAFE, DON'T DO IT.

It probably doesn't need mentioning, but I'll mention it anyway... you can't use PVC or PEX for steam lines.

Here is a document that explains why small copper pipes carrying steam above 15 PSIG must be joined by a material that has a melting point above 1100F. When they are, they have an allowable pressure rating of 120 PSI. YOU CANNOT SOLDER COPPER STEAM PIPES CARRYING STEAM ABOVE 15 PSIG.

http://www.copper.org/applications/plumbing/techcorner/cu_tube_steam_systems.html

You might think this is common sense, but here is a thread wherein plumbers are soldering copper steam pipes and the result is "Of the copper steam piping jobs I've seen, about half leaked and half did not. That's not a very good percentage"

FYI, the steam in my system will operate at 30 PSIG which is ~45 PISA.

Most Harris silver solders have a melting temp greater than 1100F.
http://www.harrisproductsgroup.com/en/Products/Alloys/Brazing/High-Silver/Safety-Silv-25.aspx

DOUBLE CHECK THAT WHATEVER SOLDER YOU BRAZE WITH IS SAFE.


ALL STEAM SYSTEMS NEED TO BE TESTED AT TWICE THEIR WORKING PRESSURE.

For my 30 PSI system, this means I need to cap the relief valves and fill everything with water at 60 PSI and make sure nothing leaks. Luckily this is the supply pressure to my house.

Steam systems are no place to use unknown valves and old pipe. Only new pipe of known source and with the pressure rating on the fitting if its cast should be used.

The pressure rating on my steam iron hose is 8 Kg/cm^2 = 114 PSI. Max temp is 150C, 302F.

The tubing coil in my vessels is ASTM-B-280 (ACR) copper tubing. This is known as Air Conditioning Refrigeration Field Service. It has a pressure rating of 770 PSI at 300F. Type L, rated at 610 PSI and other types could have been used as well.

http://www.chem.mtu.edu/~fmorriso/cm3215/copper_tube_handbook.pdf


Boiler Over Pressure Protection

My boiler has a fully operational steam pressure relief valve. Watts 174, set at 30 PSI.

The boiler also needs to have a pressure controlled switch that shuts off the heat source when the pressure set point is reached. I'm going to use one of these switches in a normally closed configuration in series with the SSR control circuit. Thus when the boiler reaches the pressure set point, the switch circuit will open, killing the drive voltage to the SSRs and shutting off the power to the elements.

They are rated to 250F and have a burst pressure of 1250 PSI. I'll remotely mount the switch on a piece of copper tubing to isolate it from some of the heat. It will be below the water line, so its fed with water, not steam.

http://sensing.honeywell.com/honeywell-sensing-switch-5000 series-productsheet.pdf

They are about $50 from Digikey.

Just in case anyone has concerns about my water heater tank blowing up, consider this

- the water heater tank has a factory pressure rating of 150 PSI.
- Mythbusters have blown several water heaters up. They fail at about 300 PSI
- it has a Watts 174A steam pressure relief valve with a set point of 30 PSI.
- it will have a pressure switch with a set point of a bit less than 30 PSI.

So for the boiler to over pressure, first the element shut off system would have to fail, then the pressure relief valve would have to fail. Then the elements would have to stay on until the vessel hit a pressure of about 300 PSI, which is about 420F. The elements would probably burn out or fail before this happened.

In spite of this being a home built DIY project, I think it would meet all the requirements for a commercial system. I have not taken any corners or used any sub spec components.

Edit: another tidbit, valve markings.

WOG = Water Oil Gas.
WSP = Working Steam Pressure

600 WOG = the valve is rated for 600 PSI with water, oil and gas for fluids.
125 WSP = the valve is rated for saturated steam at 125 PSI.

If a valve is steam rated, it will usually have the steam pressure marked on the valve with WSG.

All the valves that come into contact with steam must be WSG rated. When they aren't its usually a case of the seat material or the packing not being up to the temperatures associated with steam at pressure. Steam valves must also have stems that are blow out proof. Do not use a non steam rated valve for steam applications. Luckily steam rated valves are plentiful and inexpensive.
 
A few details about my water heater aka boiler.

- Its a Whirlpool, something like this one.
http://www.whirlpoolwaterheaters.com/products/electric-water-heaters/e2f30ld035v/
- it has a 30 gallon capacity. There were 20 gallon electric hot water heaters, but they only had 1 element port. I wanted 2 element ports.
- its a "shorty". Its only 28 inches tall.
- I bought it at Lowes. I'm not sure if its a regular stock item or not. There were two on the shelf and I bought one. I didn't see it on the Lowe's web page.
- it has 2 element ports, but was only equipped with one 3,000 watt element from the factory. I put 2 6 Kw elements in it.

- from the factory it has 5 3/4" NPT ports into the shell. Hot (out), cold (in), drain, pressure relief and anode.

The hot port is on the side near the top.
The cold port is on the side near the bottom.
The anode port is on the top of the heater.
The drain is on the side, near the bottom.
The pressure relief is on the side, near the top.

The hot and cold ports are special. They have a 3/4" NPT pipe nipple welded into the shell, ie they are male. The rest of the ports are female.

The cold port has a plastic hose inside the shell that looks to keep the cold water down low in the boiler. I think it serves to keep cold incoming water from immediately mixing with the hot water.

The hot port also has a plastic hose inside the shell. It seems to try to draw the hot water off the top of the boiler.

The anode is probably magnesium. Its a simple rod.

The inside of the shell is lined with something. I can see the lining through the ports. Its black and looks sort of dimpled. That is all I know about it.

It is insulated with a spray foam between the the shell and the sheet metal cover.

I hope the plastic pieces on the cold and hot water ports, the shell lining and the shell insulation stand up to 275F temperatures and steam. Hot water heaters normally operate at about 140F. I do know that some car washes use residential gas fired hot water heaters and run them at very elevated temperatures. They don't last long, but they work.

Here is how I am going to use the ports.

- the steam vapor will come off the port on the top of the water heater.

- the inlet water will go in the cold water port. This port will have a female garden hose fitting.

- the drain will remain the drain. It had a plastic valve. I'm replacing it with a steam rated valve. It will have a male garden hose fitting.

- the pressure relief valve must be above the water line so that if it relieves, it relieves steam, not water. It will be located on a tee off the port on the top of the water heater

- the hot water port will probably be capped. I could put the pressure relief valve on it, *IF* the plastic hose does indeed draw from the very top of the tank and if it doesn't melt. In the event of an emergency I can't rely on either of those, so its safer to mount it on the top port and just cap the hot water port.

- the existing pressure relief valve port will probably be used for a temperature sensor and the pressure switch. I could control the boiler with 2 pressure switches, but I'll probably use a PID controller, even though that is overkill for turning the elements on and off. I want to know what temperature the steam is at in the boiler.

I'm using garden hose fittings instead of camlock fittings on the drain and fill because garden hose fittings are rated for residential water pressures. Camlocks are not. If I need to add water to the boiler while its operating, it will take residential pressure to overcome the pressure inside the boiler, ie 30 PSI.

I removed the thermostat control from it, of course. Each element will be controlled by a 100A SSR.

I got some work done on things tonight. I'll post some pictures of the water heater tomorrow, so this post is easier to understand.
 
I finally found a decent, inexpensive boiler water level switch.

You can't see the water level in the boiler. It needs to have some head space above the water for storing steam but it also needs to have enough water in it that the elements stay covered and don't burn out.

The traditional way to handle this is to install a boiler level sight glass tube. I'm scared of those things. They are the biggest leak source in a boiler, so much so that they have a valve at each end to turn them off when not in use and so that you can replace the glass without shutting down the boiler. No thanks !

So I've been searching and searching for a way to measure the water level in the boiler and/or a switch system to tell me when its low. Finally I found something that will work. I found it by searching on "horizontal level switch" instead of boiler or water and level switch.

Here is what I found.
attachment.php


It was $15 on eBay.

That switch is only part of the filling system. It tells you when the water level is too low. I'll tell you about the rest of the filling system after I test it.

FYI, I'll probably fill the boiler with hot water from my domestic hot water tank. Its 75 gallons and the water in it is probably at 140F. Its a lot cheaper and more efficient to fill the boiler with that water than to fill it with cold water and heat it electrically. And faster too. Even though doing that doesn't save that many BTUs. (140F - 60F) x 25 gallons x 8.33 pounds per gallon = 16,700 BTUs = ~5 KwHrs of electricity. About 24 minutes of heating time.

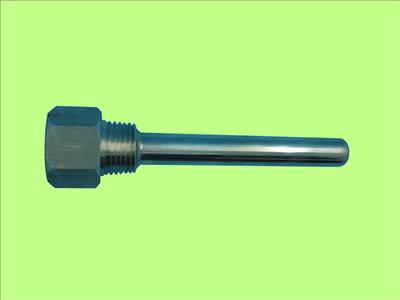
I also bought a bunch of 4" thermowells. They were $8 each with shipping.
attachment.php


I'm using thermowells instead of dedicated liquid RTDs (which my PID controller uses) because in a later incarnation this system is going to be controlled by a Raspberry Pi and it uses the digital serial temperature sensors which are not available in a liquid fitting.

Comment

The time consuming part of this project is NOT assembling things.

The time consuming part is figuring everything out and then finding and buying the stuff to make that work. The actual build time on this system is quite low.

And it isn't that expensive either. I'll put together a parts list with costs once it actually works.

I don't know how to make the attached files not appear below this. Hmmm...

horizontal level switch.JPG


thermowell.jpg
 
Here is a picture of the water heater.

attachment.php


The red port marked Hot is the outlet.
The blue port marked Cold is the inlet.
The port to the left of the cold port was the drain.
The port to the left of the hot port had the pressure relief valve.
I've installed a galvanized pipe nipple in the top port where the anode went.

The elements sit one each behind the white foam insulation pieces. You can just see the bottom element.

The 3 white plastic caps on the top of the water heater was where the foam was injected between the shell and the sheet metal. There are no other ports in the shell that I know of, but then I haven't removed the sheet metal to find out either.

I think its nice that all the ports and the elements are on one side of the water heater shell. You can stick it in the corner and still get access to everything. Most water heaters have the elements on one side and the ports on the other side, at least the in and out ports. I think the ports on my water heater are grouped this way because its designed to sit in a cupboard under a counter top.

20150312_104517.jpg
 
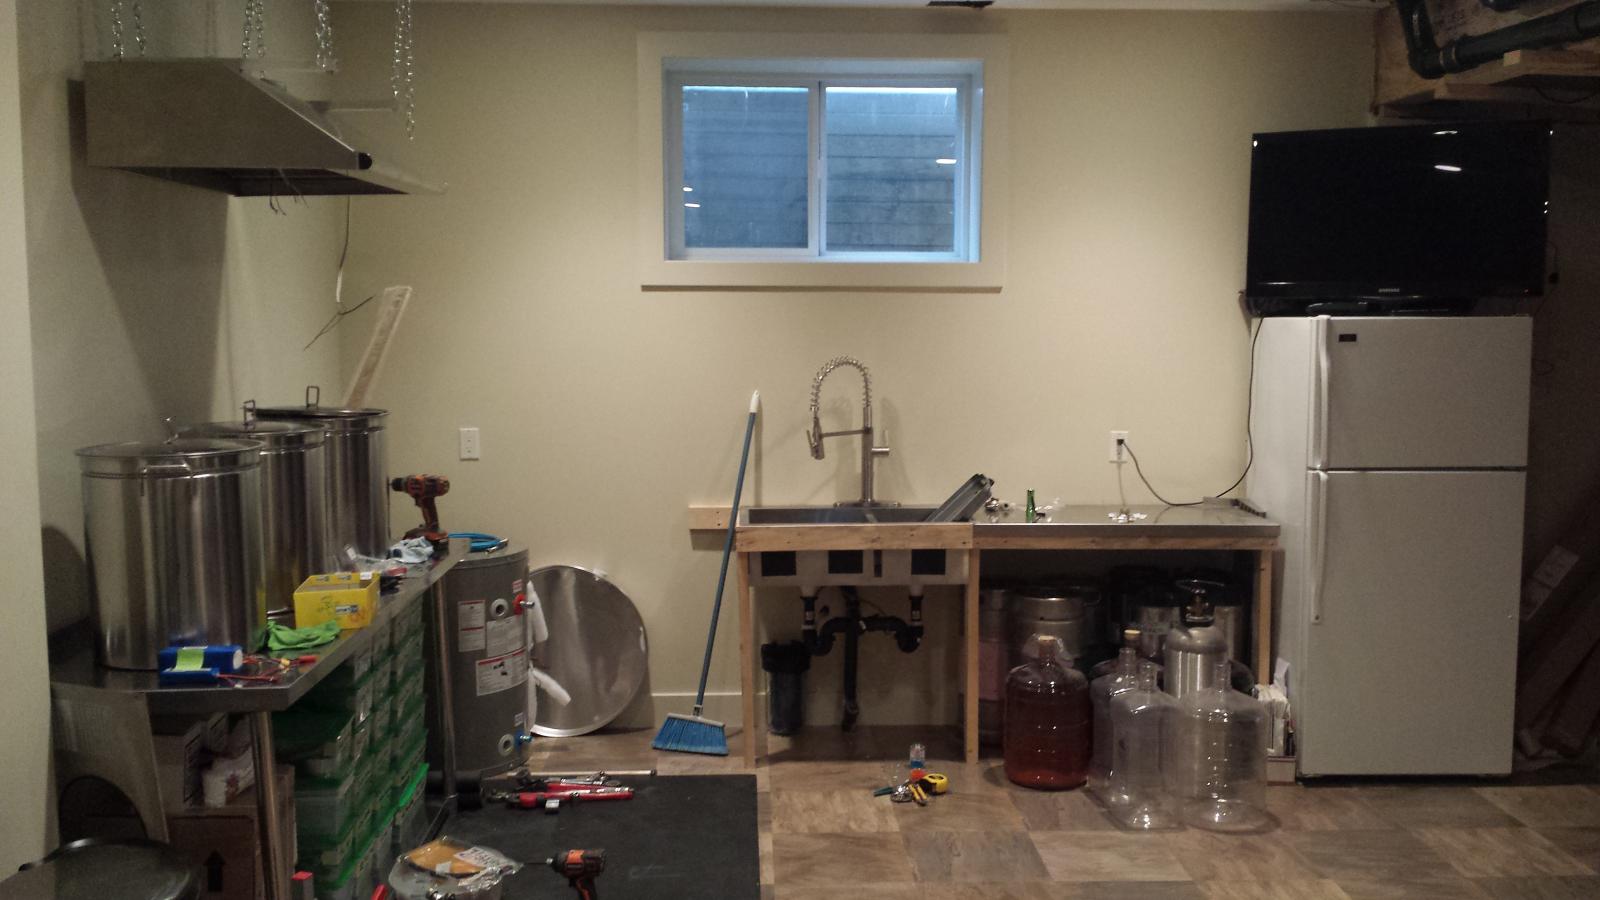
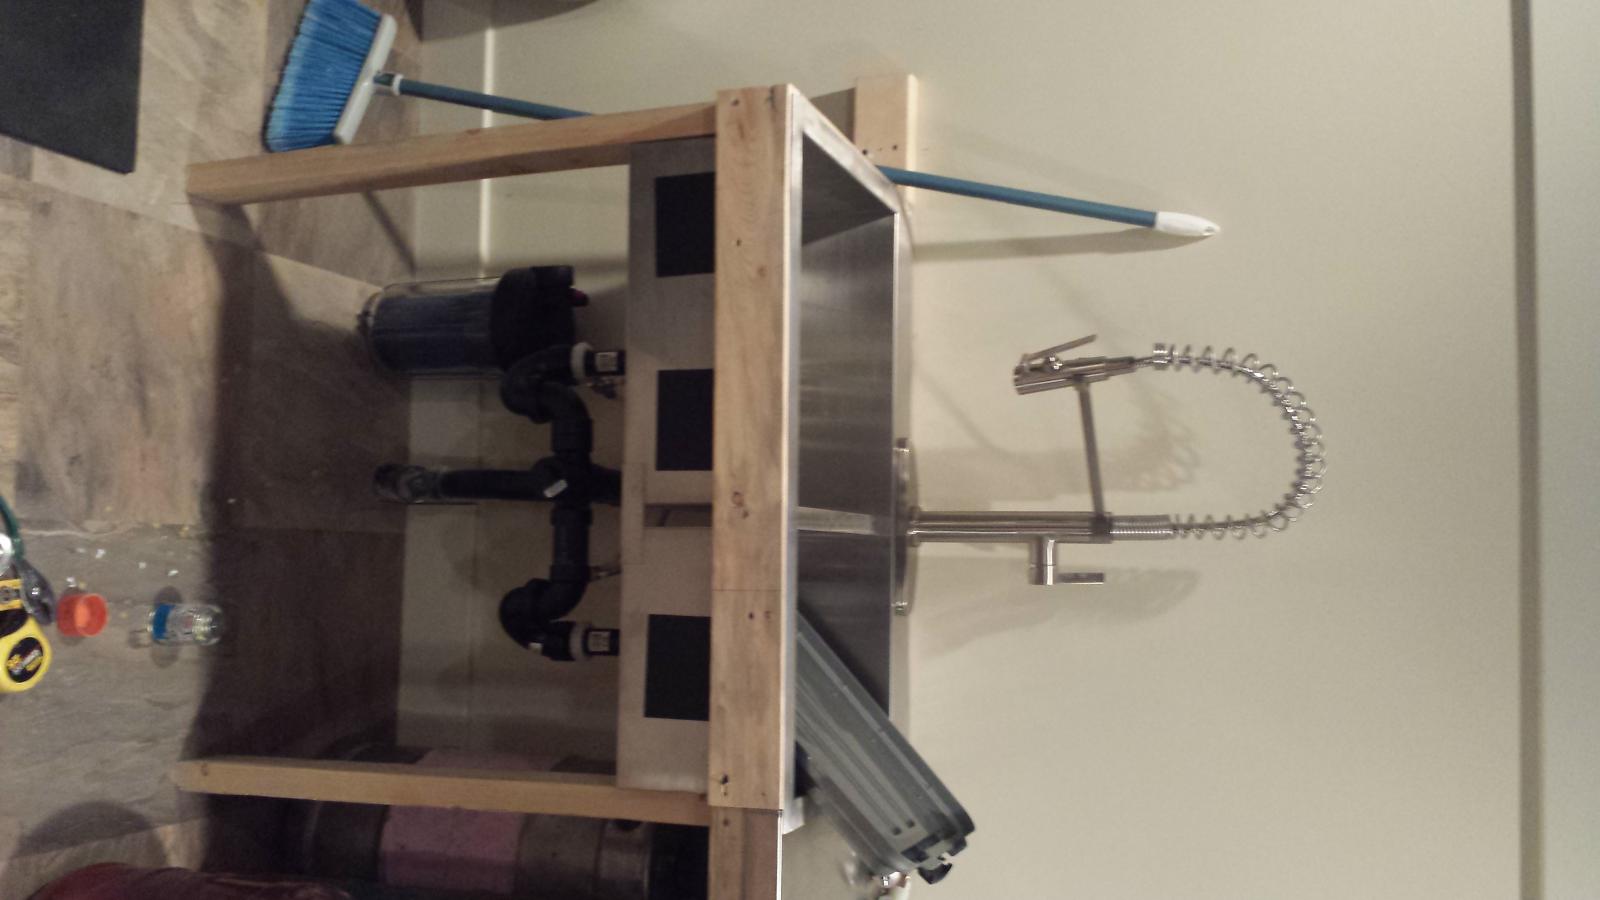
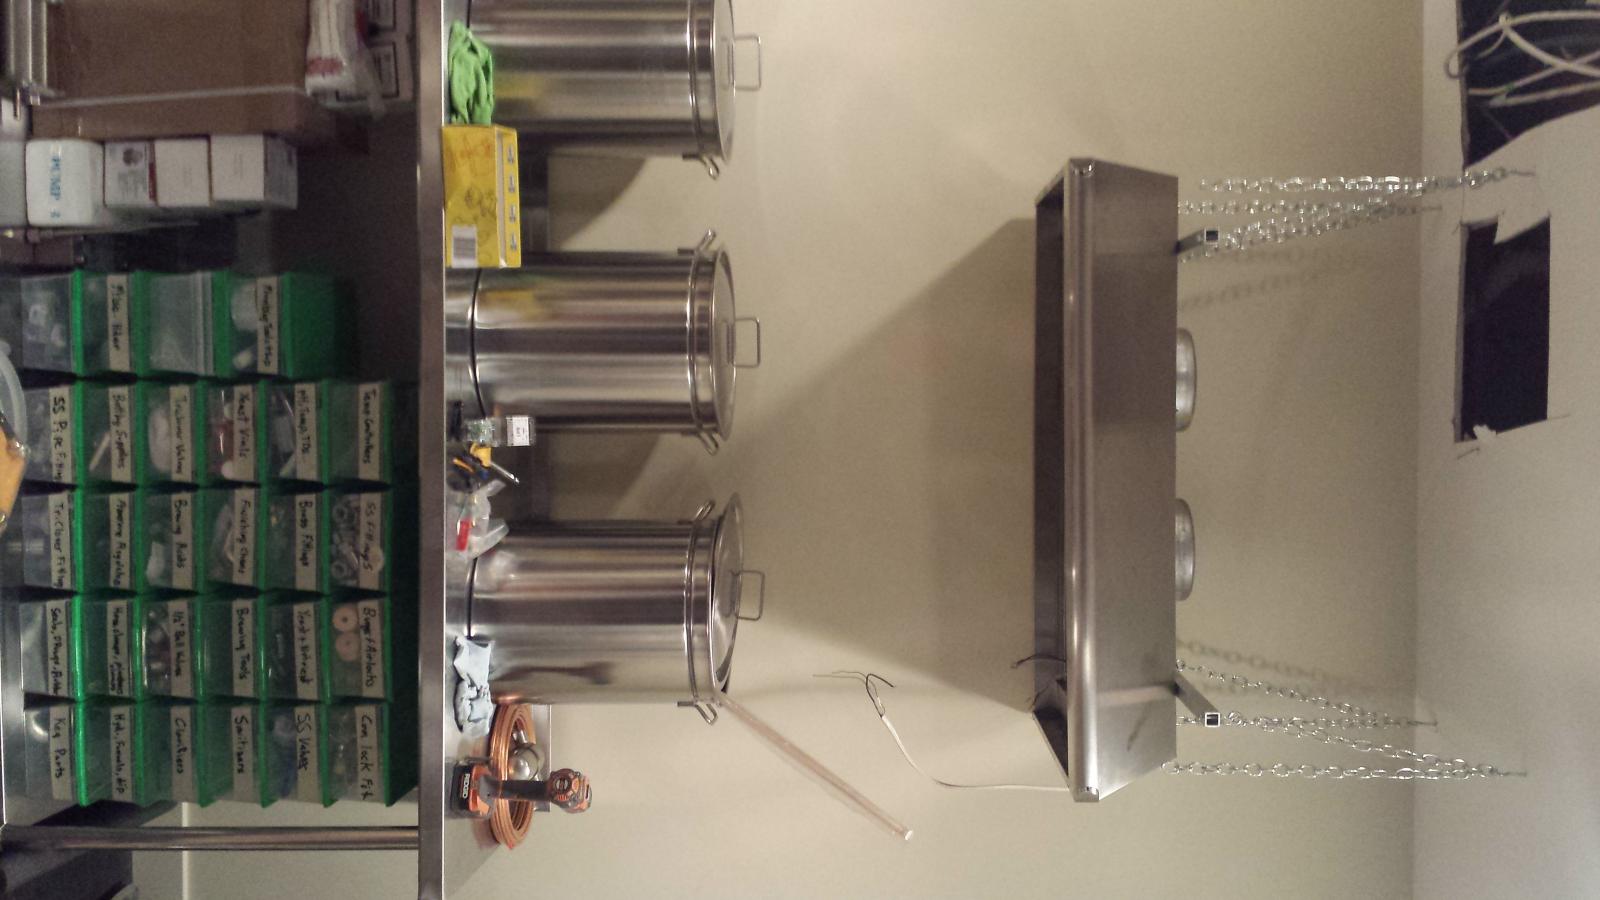
I got the sink plumbed and the fumehood hung, but not wired or plumbed.

My goal for this week is to get the couplers for the steam coil welded into the boil kettle and get the entire steam loop plumbed up.

I'm going to use galvanized fittings for now. I'll replace them with SS once I get the plumbing finalized.
 
Thanks for the encouragement. See below.

I'm so happy to have a friggin sink. Haven't had one in my brew area for a long time.

I'm getting the itch to brew, real bad. Can't wait to use this thing.

I need to put some sort of a backsplash up behind the sink before I wreck the drywall. This is just a temporary location for the brewery.

20150316_103447.jpg


20150316_103410.jpg


20150316_103357.jpg


20150316_103423.jpg
 
Very nice! I believe reading in one of these threads about this build that you are in CA. If you were closer I'd be more than happy to come over and lend a hand if you were interested, as I have a bit of experience with wiring and some plumbing as well. Sadly, you're about 1500 or so miles away. I'll keep tossing moral support your way though. Keep up the great work!
 
Thanks !

So... its come to my attention that when steam is used in a "real" brewery, they don't usually (anymore, anyway) heat the wort with steam coils in the kettle, they run/pump the wort through an external steam heater.

I found 2 references to this. https://www.ibd.org.uk/cms/file/310 and "The Handbook of Brewing", as provided by Google Books, page 420 or so. I found it by searching on "brewery boiling circulate".

I'm thinking that instead of putting coils in the kettle I could use a counter flow chiller heat exchanger to boil the wort, only use steam in it instead of water. One good thing about that is the steam is going to boil the wort in the HX even if the temp in the kettle is below boiling.

However, Dave Miller, in his book Brew Like A Pro, says that pumps shouldn't be used in the boil process because of hot side aeration. Not even to whirlpool the wort prior to chilling.

The only reason I care about this at the moment is that I don't want to punch holes in my boil kettle that I am going to regret later. If I'm going to use a heat exchanger to boil the wort, I'd have ports in totally different places.

Not sure what to think on this.
 
I've decided I'm going to put a simple coil in the brew kettle and steam it up to see how it works.

I spent a ton of time this week getting materials to put the couplers into the boil kettle. I'm sharing this story to save someone else from going down the same rabbit hole that I did.

I have a TIG welder. I was going to TIG weld the fittings in, but I'm a bit out of practice and I've never TIG'd stainless like this and I'd have to set up a back purge system and the kettle wall is pretty thin and... so I'm reluctant to do that. In hind sight, it might have been simpler.

Then I learned about Silicon Bronze TIG brazing. Welding is when the parent metals are melted together. Brazing is when a metal is melted over the parent metals, joining them. TIG brazing is easier, less distortion, etc. and if done quickly, can be done without a backside purge gas. Another advantage is that you can braze dis similar metals together, but you can't weld them. Think brass to SS.

So I called up about 25 welding shops and suppliers trying to find SiBr filler rod. Nobody has any. But then I happened to find a welding consultant who had a roll of SiBr MIG wire that I could try. Yippee. I took 10 feet.

But... he told me I would never be happy with it, not if I tried Silver Soldering, because SSoldering is much neater, cleaner, simpler, etc, and even lower heat input, due to a lower melting temp, so less metal distortion and discoloring. (StainlessS melts at ~2700F, SiBr at ~1800F, ~50% SilverSolder at 1100+, 6% SS at 450F)

So then I came back home and read the silver soldering thread (all 150 pages of it !) in the DIY forum.

I hadn't read it before because I tried silver soldering fittings into kegs back in 1999-2001 and had a very bad experience with it. I managed to get some done, but it was a huge hit and miss effort to do so, for several reasons. 1) I was using a paste flux, 2) lead free solders weren't as good back then and 3) I wasn't dimpling the interface between the keg and the fitting.

After some thought I came to the conclusion that the approach used in the thread was much better than my previous attempts and it was the best solution for putting fittings into my vessels. Besides, I'm going to need to SS any steam parts that aren't threaded together at some point, so why not start SSing now ?

Another upside of silver soldering is that I can probably use it to put 4" triclover cleanout ports on my 1/4 barrel Sanke kegs. TIG welding them on would have been frustrating because of the very limited space between the keg handles and the base of the TC ferrule. With SS, all I need to do is heat the fitting to the appropriate temperature. It doesn't need the finesse (and space) that a TIG torch needs.

So then I repeated my calls to the local welding and plumbing shops searching for the proper silver solder and liquid flux. For various reasons it was a gong show. Welding shops either didn't have stock or had no use for SSing. What kind of welder resorts to SSing ?

Plumbing shops were hilarious. Some had fluxed SS rods, which were outrageously expensive and not appropriate. Some carried the brands but not the products and had high minimum orders to bring it in. Like $200. Some didn't understand the difference between plumbing solder and silver solder. And nobody understood why I wanted a liquid flux.

Finally I found a plumbing wholesaler with 6% Ag/94% Sn solder (identical to Harris StayBrite #8) and liquid flux at another. I also bought a little propane torch on a hose and an adapter so that I can attach it to my propane tank. One of the problems I had back in 1999-2001 was that I was using a torch on a bottle and every time I moved the torch the flame intensity changed ! Made it pretty hard to get the metal to just the right temperature to activate the flux paste and yet not burn it, so say nothing of trying to fill tiny gaps between the fitting and the hole I bored in the side of the keg... as you can see, I'm still mentally scared from that experience ! I pride myself on being able to weld just about anything, so it was huge blow to my ego to have so much trouble doing it.

Anyway, I have my welding supplies and I have the tools that I need.

I still need to make the dimple tool, though.

I'll start putting the couplers in on the weekend.

FYI, as far as I can tell the strength of various joints are as follows

6% Silver Solder 8 to 11,000 PSI.
46 to 54% Silver Solder 16,000 PSI.
SiBr TIG welds 60,000 PSI.
Stainless TIG welds depends on parent material and filler rod, but 60,000 PSI and up.

I have not found a source of ~50% SS yet and what I have found is really expensive. Like $80/lb. Whereas SiBr filler rod is less than $20/lb. I prefer to TIG over a torch for heat control, so I may use SiBr for brass steam fittings over silver soldering them.
 
I found a bit of time to work on things yesterday.

I got the boiler plumbed up enough to test it. Its missing the temp probe, pressure switch, level switch and gauge, but the fill and drain are plumbed in as well as the pressure relief and master steam valve, so its usable, for testing purposes anyway.

I spent some time cleaning kegs and cleaning up in general. This is the first time I've had a dedicated brewing sink and I absolutely love it. I wish the space to the right of the sink was bigger, but beggars cant be chosers. The SS top came from a recylcing bin at a local metal recycler. I wish I had another one.

I'm watching Homebrew Wednesday Youtube clips on the TV.

I cleaned and prepped the keg in the sink so its ready for me to cut the hole for a 4" triclover ferrule. Its going to be a fermentor.

For the longest time I thought I wanted to brew in the garage and then spent a lot of time going back and forth trying to decide between garage and basement. I just have to say I'm 100% happy I'm in the basement.

I hope to get more done in the next few days.

FYI, boiler code says that the outlet of the relief valve needs to be hard piped with the exit close to the ground. It also needs to be at a high point on the boiler so that it relieves steam, not superheated water.

I hope that thing never opens during operation. I wanted to run it away from the front of the boiler, but it would probably wreck the paint on the wall if I routed it back and it opened. I may change that though. I don't like it venting steam in the area where someone might be standing.

FYI, safety release valves are not supposed to operate as pressure control valves. They are for boiler over protection only. In my case a PID controller will turn the element(s) on and off. That will be backed up by a pressure switch. I'm waiting for parts to arrive to install these items.

20150321_115533.jpg


20150322_125231.jpg
 
I need to put something on the wall behind the sink and work area to save the drywall from splashes. I don't want to glue it onto the wall because the brewery might not stay where it is. Any ideas ?
 
I feel your pain. When I was doing appliance repair I frequently used Harris StaySilv #15 when going from copper lines off the compressor to steel ones going into the cabinet. Some were designed so poorly that it was almost impossible not to melt the insulation, much less catching it on fire. I don't miss doing that work, but it was a nice skill to learn.

How about using a sheet of plexiglass behind the sink, using some screws and fender washers into a few studs, and if the screws are small enough, if/when you decide to move it, you just need a dab of mud and a splash of paint, and no one would be the wiser. Just put a thin bead of quality silicone caulk where it hits the back edge of the sink, to keep the water from going behind the it. Justa thought.
 
How about using a sheet of plexiglass behind the sink, using some screws and fender washers into a few studs, and if the screws are small enough, if/when you decide to move it, you just need a dab of mud and a splash of paint, and no one would be the wiser. Just put a thin bead of quality silicone caulk where it hits the back edge of the sink, to keep the water from going behind the it. Justa thought.

I was thinking of something plastic. I've never seen a sheet of plexiglass for sale at a hardware store. I guess I'll have to look into it.
 
What is flashing ?

I'd love to cover it with a sheet of SS or even aluminum, but I can't justify the cost.
 
I like the idea of using flashing. How would it work to laminate it to a piece of plywood and then screw that to the wall. I could then put some hooks in it to hold things.

How would one laminate the flashing to the plywood ? Contact cement ?
 
That could work, but ideally you'll need multiple overlapping rows of it to make it waterproof, because it isn't very wide and water would get into butt joints and delaminate the cement. I was thinking you were looking for a single sheet solution. Heck, you could possibly even use one section of a shower surround insert (maybe get lucky and find an open box/damaged one for cheap) and just cut it to length. Depends on how ornate you would like to be. And how much work you want to put into it. Lots of solutions to this problem. My first thought when you mentioned it was SS, but I figured as you said it was probably going to be temporary, that'd be a pretty big investment.
 
I had a busy week. I didn't get to work on anything directly, but I did get some stuff organized.

- I found a piece of SS for the backsplash. Actually I found a couple candidates. I have to measure them, pick one and install it.

- I bought a 1/2" conduit knock out and some parts (bolts, fittings) to pull a flange on the holes for ports that I have to weld or solder into the kettles

- I finally found the fittings to connect the steam hose to the boiler and kettle. It turns out the crimped on fittings on the steam hose are -04 (1/4") British Standard Pipe Parallel (BSPP). I had to go to several specialty hose and fitting shops before I found an expert that knew what he was talking about and identified it. It was a major pain figuring this out. All the other places I went to had no clue. I bought up 3 1/4" BSPP x 1/4" NPT fittings. They were $2.75 each.

- The steam pressure switch arrived.

- Some other stuff for stir plates and fermentors arrived too, but I'm not talking about that in detail right now.

I'm still missing the steam pressure gauge and boiler water level gauge, but at least I can connect the boiler to the steam coil in the kettle now. I could run without the missing items. I'll see how far I get with putting the ports into the kettle before I make that decision.

I'll try to get the backsplash up and the ports in the kettle. If I get ambitious I'll plumb in the pressure switch and temp sensor.

I also ordered the fittings and hardware for mash HX and designed the wort chiller HX. I'll talk about them when I start working on them.

Edit: forgot the pictures.

Here is a link to BSPP.
http://en.wikipedia.org/wiki/British_Standard_Pipe

Note that there is also BSPT, which is British Straight Pipe Tapered. This hose needs BSPP, because the seal is made at the cone/fitting interface, NOT the threads, as on a piece of pipe.

20150327_235327.jpg


20150327_235401.jpg
 
I went to start welding and soldering keg fittings in my garage and was reminded that the lighting is absolutely terrible. Only 4 bulbs in a 700 ft^2 garage. Typical minimum builder spec.

Its been bugging me since we bought our house 2 years ago. Time to do something about it, especially since I'd like to work in the garage in the evening.

On top of it all, I had to change some of the framing in the ceiling, not because of hanging the lights but because it needed to be changed for other reasons and there was no use hanging and wiring lights only to have to tear them down and redo them when I do the framing changing.

So I'm side tracked doing some framing in the ceiling of my garage, pulling wires and hanging light fixtures. I hope to be done tomorrow night, at least enough (half) of the garage that I can resume working on brewery stuff.
 
very interested in your steam system, wondering what's the latest!

I really think you're onto something - a single element instead of many and a large "battery" of thermal energy which has high txfr efficiency to your boil pot. Nothing new to the chemical processing industry (or large brewery), but certainly a departure from home-brewing convention.

I'm sure it's got its quirks, but it seems to solve a lot of problems.
 
I agree.

The latest is that our family is on an Easter holiday. I'll get back to working on things next week. The pressure switch and gauge arrived. I've got everything I need to safely fire it up.
 
Hey Brewman, last we heard you had everything needed to safely fire it up and that you were going to try it the week after Easter. Hopefully the reason for no updates isn't because it wasn't a particularly safe startup? :-O
 
The week after Easter and the rest of April turned out to be extremely busy. My wife went on a work related trip for 2 1/2 weeks, meaning I had to take care of our 3 kids. I also had an investment go sideways that required attention to get back on track. And I had to evict the tenants from a rental property we own. Needless to say it was a hectic month.

The good news is that my wife came back today and I've accumulated massive Brownie points, so I should have my evenings free for the next while to work on things.

While all that was going on, the level sensor for the boiler arrived, as did a few other goodies I haven't been talking about. I should be able to do a really thorough test of things as soon as I get some fittings welded into my boil kettle.

On the bad news front, I've been waiting over a month for SS TC fittings to ship for the fermentors and the heat exchanger and they still aren't here.
 
So I finally got possession yesterday of the basement suite that I evicted the tenants from. Turns out they trashed the place. It needs new carpets and paint and a window is broken.

Getting it back into renting condition is going to take up my free time for a while.
 
Wow, you sure have been busy. Over the years, I've went back and forth about owning rental property and being a landlord, and each time I've concluded the upside gain doesn't outweigh the potential downside costs. Pretty much for the reason you've described above. Plus all the 'tenant protections' that have been put into place, well, I just couldn't justify the hassle. Hopefully the damage deposit covers at least a decent percentage of the necessary cleanup, but of course it won't come close to covering your time. Which sux, because you do have a life. Is there any way to recover any more from them, or are you SOL?
 
I'm taking them to court, suing for damages. I'm doing the affidavits now. More time wasted, but I'm hoping to recover a couple thousand dollars.
 
Back
Top