Wildwest's brew lean-to (my almost dream build)

Homebrew Talk - Beer, Wine, Mead, & Cider Brewing Discussion Forum

Help Support Homebrew Talk - Beer, Wine, Mead, & Cider Brewing Discussion Forum:

This site may earn a commission from merchant affiliate links, including eBay, Amazon, and others.

wildwest450

Well-Known Member
Joined
Dec 27, 2007
Messages
8,978
Reaction score
191
Who doesn't want a dedicated brew space? I was planning to start one in the spring, but a change in fortune has dictated I start asap. There are a few obstacles in my way, starting with a 10'x12' shed that was to close to the existing house. Today I solved that problem with a friends tractor, and a sore back.

Tomorrow several trees have to go as i'm getting some free site work done. My neighbor happens to be getting some dozer work done and needs some fill dirt, I just happen to have a monster load of it.

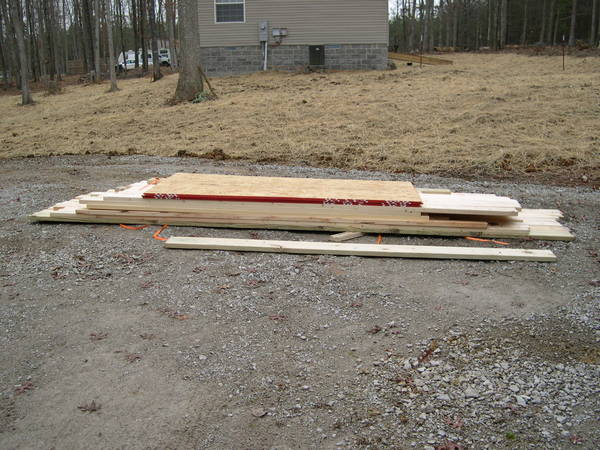
This project will span the winter, so updates and pics will be forthcoming.
I plan it to be 10'x24' with a 6'x10' cold room (i'm still not positive on the size)
It will have a concrete floor with drains, hot&cold water and 220v, in case i want to go crazy with my rig.

I am more than open to suggestions on the cold room or any other aspect that someone who has done a brew shed can contribute. I'm a good carpenter and my old man has his electrician's license, so those bases are covered.

So cheer me on, and fire those helpful pointers!:mug:

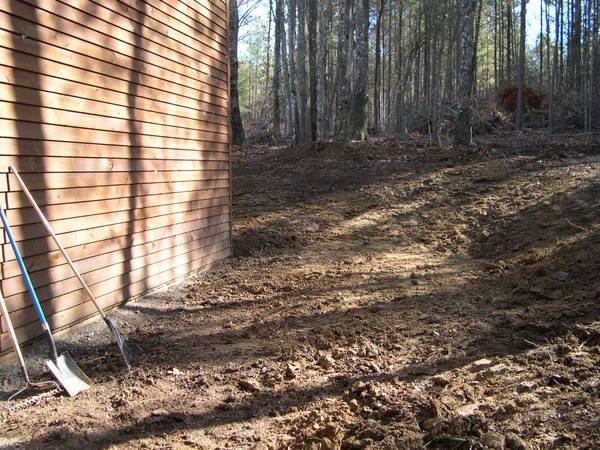
Stage 1-moving stupid shed out of the way.
I want to go right up to the edge of the existing door with the brew shed so I can still use existing door to access utility shed.
DSCN2188.jpg


Gently pulling shed with friends tractor
DSCN2197.jpg


Tada, tons of room.
DSCN2200.jpg


No laughing at my silly looking hot water heater exhaust, yes it's ghetto.:(
 
I paid my dues today. I had to help cut trees so the dozer could get in and level my site. I didn't realize I signed up for tree climbing duty. On the bright side we had one awesome brush fire.

DSCN2207.jpg


Swmbo guarding the fire.:rolleyes:
DSCN2209.jpg
 
Go with 2 X 6 studs in the cold room if you want to use R-30 insulation. You can go 24 inches on center since R-30 is meant for ceilings. I then put R-5 solid foam board on top of the R-30 and even though it's in the 40's right now outside, the little space heater I have in my "cold" room is holding at 64 degrees and fermenters are bubbling away.
 
i have not seen any body try using s.i.p.s or structurally insulated panels for a cold room. That would by my only choice, they are Styrofoam of varying thicknesses with osb on the inside and out, with man sized R values. look into it sometimes you can get a smokin deal on cut offs check with the dealers in your area.
 
All right, dozer work was completed yesterday. A little finish work on the grade and I can order lumber. Unfortunately i'm leaving town on Thursday, so I hope to at least get it squared up and the post's in the ground before I leave. Now it's a race against the weather.

DSCN2226.JPG
 
if you decide to use the foam board ontop of the r-30 insulation or whatever it may be. Shell out the extra bucks and get the foam that has the reflective backing on it (a p foil faced foam sheathing). We use this at work for military boxes and it works well. What ever you do make sure you DO NOT short your self on this. The energy saving will help out and peace of mind that it can hold the temp you want.:mug:
 
Got it squared up and the corner posts in. Tomorrow I will finish the posts and let them sit until I get back from Michigan. Then the framing should only take a day or so, the most work is tearing off the house siding carefully so it can be reused.

DSCN2227.jpg
 
I'm in a rental, so I'll have to live vicariously through you. Looking forward to updates!
 
i hate you!!


however if you should find yourself going down I-69 to return home via indy and I-65 let me know and i'll meet you for a beer a dark horse in marshall, mi.
 
i hate you!!


however if you should find yourself going down I-69 to return home via indy and I-65 let me know and i'll meet you for a beer a dark horse in marshall, mi.

You'd hate me worse if you knew my bro-in-law is a pro bbq'er (award winning) and is doing a pre-game surf and turf tailgate followed by a bbq dinner after the game. I'll probably put the 20 lbs I just lost back on.:D.
 
if you decide to use the foam board ontop of the r-30 insulation or whatever it may be. Shell out the extra bucks and get the foam that has the reflective backing on it (a p foil faced foam sheathing). We use this at work for military boxes and it works well. What ever you do make sure you DO NOT short your self on this. The energy saving will help out and peace of mind that it can hold the temp you want.:mug:

I agree 100% with this stuff. Its what i have been using in the Squam Brewery's fermenting room (we have to heat year round) and once its taped up it looks good

I put up FRP white institutional board for the inside. Its tough stuff but makes a great washable fire resistant, bright wall covering. Used in restaurants where cleaning is very important. Home depot sells it for $32 per 4 X 8 sheet.

https://www.homebrewtalk.com/f51/squam-lakes-brewery-pictures-144764/

Good luck on your project

How are you attaching the FRP white institutional board? At what temp do you keep your cold room? I was thinking 48-50f, that's a good conditioning temp. I could also ferment lagers, and ales (with some insulation) and I want grain storage. It seems like that reflective insulation would be overkill?:confused:
 
I used 2 in ss ribbed type nails. They are used for putting up wool siding. This FRP is very flexable stuff and usualy it is glued to a plywood wall. As it needs something behind it I used rough-cut 2 X 4 and put 2in insulation between them. This added the strength to stabilize it and gave me some insulation. By the way my brew space in underground so my walls are always cold.

We try to ferment at a constant 65-70 F for everything. We select yeast for that environment.
You probably have 4 in walls and I would guess that for your cold room 4 in of pink insulation would be good. Then add the silver sided insulation and your done. I used the 2 in sutff. You will need some kind of covering over your pink insulation so why not use this stuff. It does not look bad and you can clean it easily
100_1713.jpg

This is the stuff and you need the special tape. You can see that i used fender washers and 3 in screws to attach it.

100_1717.jpg

As for grain storage we use 55 gallon plastic barrels with a lid to keep the small critters out.
 
You probably have 4 in walls and I would guess that for your cold room 4 in of pink insulation would be good. Then add the silver sided insulation and your done. I used the 2 in sutff. You will need some kind of covering over your pink insulation so why not use this stuff. It does not look bad and you can clean it easily

Thanks for the info. Actually my building is post framed with 6x6's. With the nailers (horizontal studs) inside and out, I can have it netted and cellulose blown in a full 8" thick. So R-value won't be a problem.
 
Made a little progress today, the lumber was delivered at 10:00am.
I was able to strip some siding, and put the treated skirt board on. I'm a ways out of grade so i'll have to buy some gravel. With some boards on, it looks like it will be plenty big enough, which i'm glad of. I hope to have it ready for the roof by weeks end.

DSCN2233.JPG


DSCN2235.JPG
 
More progress, it's ready for roof steel. I'm leaving the nailers off the ends for now, so I can get gravel in. My main goal is to get the roof on, graded, and cement in for now. Then i'll sheet and side it.

DSCN2243.jpg


Near laser straight overhangs.:)

DSCN2245.jpg
 
Roof steel and connection flashing are done. Now to get fill gravel in and try to do cement before the weather gets rough.

DSCN2250.jpg
 
Must be nice to live where you don't need permits for this sorta thing. Looks good.

Anything beyond cutting a couple 4"x4" on my island and some neighbors calling the city for any permits pulled. Unloaded a 280 cu/ft Argon bottle refill and I had a fire marshal at my door within an hour. "Welding bottle fire hazard" by a neighbor.
 
I sit sadly in my man cave looking out at the rain, it looks like winter is upon us in Tennessee. I was hoping to get my cement in, and at least brew in the empty shell until spring comes (out of money until truck gets paid off).

The only thing worse than not having a brewshed is having one that's 1/4 done.:(

DSCN2255.jpg
 
Are you not going to have the walls up soon??

Won't that ruin the studs?

It's post framed(no studs), and the roof is on, so no water worries for now. I do have the materials to dry it in, I just need the weather to cooperate.:mug:
 
This is looking really good...I'm really impressed.

Too bad my wife picked us a house in a neighborhood with an HOA that wouldn't approve a project like this if they were stone cold drunk.
 
This is looking really good...I'm really impressed.

Too bad my wife picked us a house in a neighborhood with an HOA that wouldn't approve a project like this if they were stone cold drunk.

Ha! Our hoa's only rule is to pay $25 a year to use the lake. Freedom does come with a price however, there are a ton of crappy looking trailers with post frame roofs built over them in the neighborhood. Fortunately my neighbors all have decent places and keep them up.
 

Latest posts

Back
Top