Spunding question

Homebrew Talk - Beer, Wine, Mead, & Cider Brewing Discussion Forum

Help Support Homebrew Talk - Beer, Wine, Mead, & Cider Brewing Discussion Forum:

This site may earn a commission from merchant affiliate links, including eBay, Amazon, and others.
What's the downside to putting on a spunding valve as soon as you pitch the yeast and setting to 30 psi from day 1? I assume there's a reason to avoid spunding during peak fermentation, but I'm not sure what it is.
 
What's the downside to putting on a spunding valve as soon as you pitch the yeast and setting to 30 psi from day 1? I assume there's a reason to avoid spunding during peak fermentation, but I'm not sure what it is.

Fermenting under pressure can stress the yeast and create flavors you don't want. I assume you are talking about doing this in a Unitank type setup (maybe a keg), but if not having the carbonated beer at 30PSI makes the transfer much more difficult since the CO2 will want to break out of solution more aggressively. Granted, you can do pressurized transfers.

Also, you can get crap in the spunding valve depending on the vigor of the ferment which can cause it to get stuck closed/open which is it's own problem.


If I get to mine late, I will add some boiled sugar solution to get the couple points I needed back when I transfer to the spunding keg, usually injected into the hose attached to the liquid out through which I transfer the beer in. That way it gets reasonably mixed during the transfer. Since the yeast are still actively working they just keep on chewing through the sugar as well.
 
What's the downside to putting on a spunding valve as soon as you pitch the yeast and setting to 30 psi from day 1? I assume there's a reason to avoid spunding during peak fermentation, but I'm not sure what it is.

Besides above, you will end up with all the trub and dead yeast in the bottom of your kegs.
 
Appreciate all the replies in this thread. My first spund has come off well. Was 4-5 gravity points above FG when I racked it into the keg.Let it spund with the pressure valve on it's highest setting for about 48 hours in the garage at 75F ambient. Since the guage only goes to 15, the needle went over to the maximum. Put it in the fridge last night, had a wee taste this morning. It is very lightly carbonated and reading around 12 psi. I'll get to a post later this afternoon.

that said, I believe I need a second keg with a spunding set up. I generally get thru a 5 gallon keg in about a week. With two kegs, I can brew once a week, and always have one in the fridge and one spund conditioning. With only one keg now, there is always a few days between finishing one, and then racking the next one in, the a few days to carbonate nicely.

Also, I have been doing open fermentation (well, covering the fermenter mouth with foil. I've noticed that it works fine for a week, but if I leave it for 2 weeks in the fermenter, then the risk of infection goes waaaaaaay up. I had a couple in a row that went bad. So either need to start using the airlock again or rack it when the krausen starts falling back in.

With a Kveik, bet you could really push the fermentation time, let spund 24 -36 hours, cool overnight in the fridge, and have a drinkable kegged beer in 4-5 days start to finish. Maybe take on a 72 hour challenge once my Kveik arrives.
 
I have many of those floating pickups. They can have big foaming problems if they form a vortex to the surface while dispensing. I was able to defeat that by cutting a hole in the silicone tube just behind where it sticks over the float tube.

bbca477cd5a7344de014c0249224b928.jpg
Nate: Can you explain a little more about your vortex issue and solution. I have been having problems with my Top Draw floating dip tube lately. When I first tap the keg, I don't get any beer; I just get CO2. When I opened the kegs up, the tubing was floating on the top of the beer with the opening out of the beer -- it was not submerged. I had to use a sanitized SS spoon to submerge the tubing to get the beer to flow. Opening the keg defeats the purpose of spunding in the first place. Is this the same problem you were having?
 
No, in my case I would get a little beer dispensed and then it would just turn to all foam. The higher the pressure in the keg, the more likely it would be to foam out. My theory was that, as the rate that the liquid went into the tube increased, the more likely it was to form a vortex to the surface (like the sink draining fast vs slow).

Did you fill you keg through the Top Draw? I fill my kegs by running liquid into the OUT post, so the tubing for the float (1/4" silicone) is filled with liquid from the beginning. In your case it sounds like you might have filled it some other way and so the tube was filled with gas instead of liquid?

I did try putting a couple 1/4" 20 stainless nuts on the middle of the silicone tube to weigh it down. After cutting the hole shown, that wasn't required though.
 
I did fill it through the beer out/floating dip tube. That's why I am so perplexed. However, someone pointed out that air may have pushed beer out of the dip tube if I left the fermenter valve open until all of the beer was tranferred. However, I have a conical and usually have beer left over in it after I fill the keg.

I like the idea of nuts because they are heavier than washers which is what I was considering. How did the nuts work? Did they free float on the tubing? Did they interfere with the tubing (e.g. cause kinks etc.)? Just curious.
 
I wouldn't say they 'free floated'. I just went and retried it with a 1/4 20 nut and it must have been bigger than that because the 1/4" one didn't slide on. I just found some nuts that slid on but weren't loose, so they just stayed where they were put on the tubing.
 
I wonder if it would work if I put a nut at the base of the metal inlet tube and over the rubber tubing where it slides on to the inlet tube. As long as any part of the inlet is submerged, I would think the rubber tube would fill with beer.

Do think a 1/4" would fit over the rubber tubing and metal tube or I need something bigger?
 
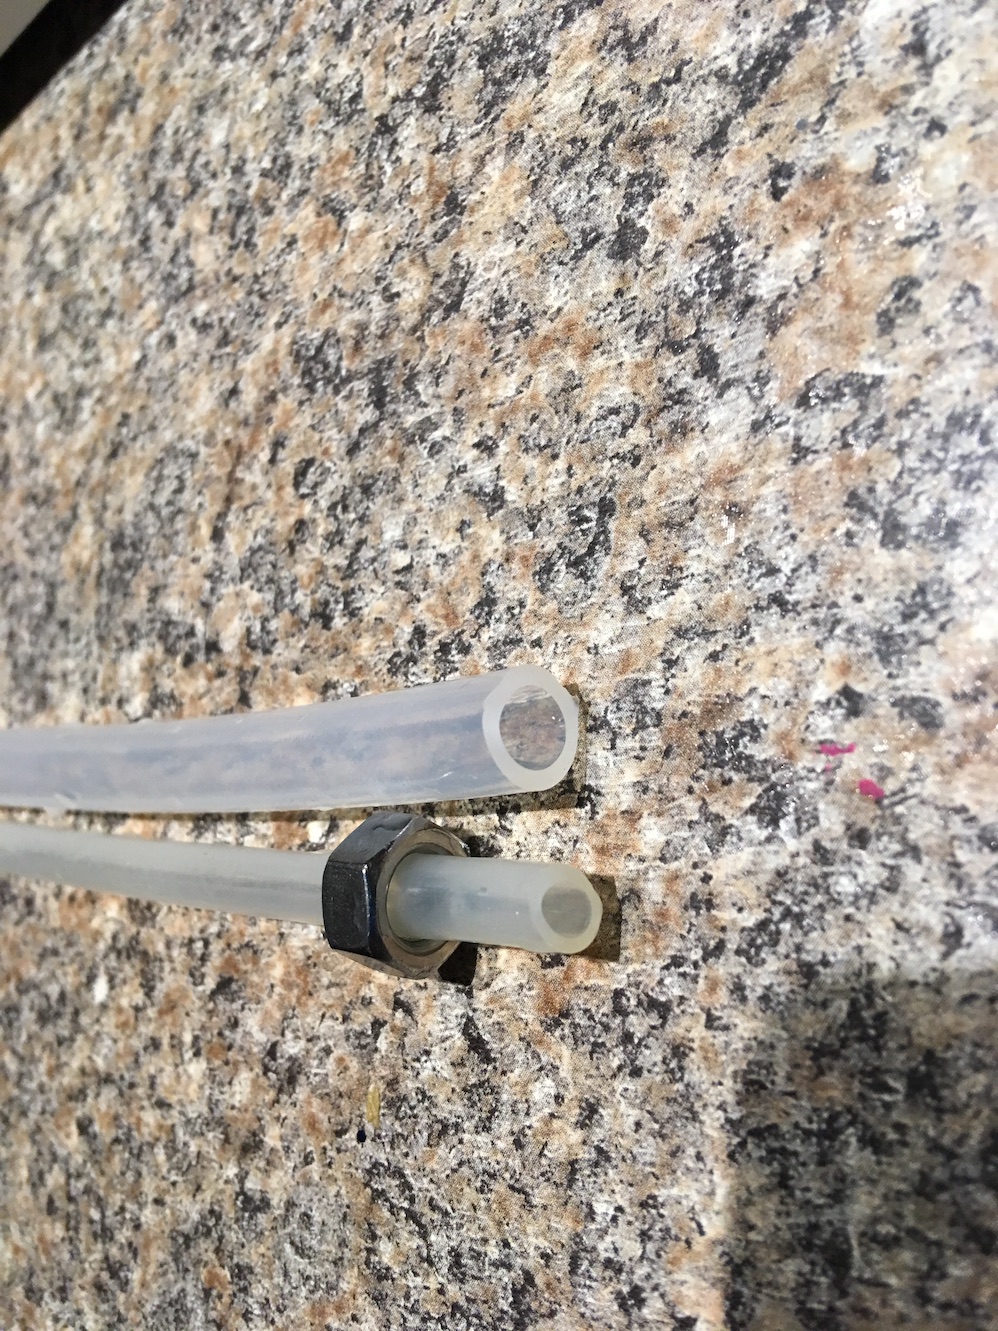
That is all dependent on the tubing you are using. Here is a picture of the tubing that came with the Fermentasaurus floating pickup with a 1/4" nut on it, seems to fit fine. On the other side is some other tubing that I use for floating pickups, and I think you would need a 3/8" nut for that one. Check the tubing you have to figure out what you need.
IMG_1303.JPG
 
Well I bought some 5/8" and 7/16" stainless steel nuts from the marine hardware store. The 5/8" were too small. The 7/16" fit perfectly over the rubber tubing. I put the nut on the rubber tube, inserted the metal tube with the float into the rubber tubing, then slid the nut up over the rubber/metal tube as far as I could. It was a real tight fit, but it stayed in place. I may try a 1/2" nut tonight.

Dip Tube Float.jpg


I tested it with a keg full of water and it seemed to work. When I slowly lowered the empty tube into the keg, the tubing floated, but the nut submerged the inlet tube under the water. I assume that if I hooked it up to a tap and opened it, the beer would fill the empty tube and submerge it as well. Nate: Thanks for all your help yesterday. That is what I love about this site. Cheers.
 
Looks good. Just watch out for the vortex foaming issue. That is why I put the hole down the tube so it didn't try to suck right near the surface.
 
Here is what I did - It seems to be working well. The SS wire keeps the tubing a decent distance down from the float and the "T" pulls the beer from the side, not above.

I like this idea. Where did you get the wire?
 
At some point, this thread went from spunding to floating dip tube and keg fermentation. A nice option to consider for sure. Maybe this topic should have a dedicated thread.
 
It is still all related to the conversation though. OP asked about spunding. It then went to trub being transferred to the keg and yeast coming over for spunding which turned into floating dip tube. IMO, all of it is still good info for spunding and for OP to use.
 
You don't even want to know how much McMaster-Carr wants for SS float balls :eek:

Otoh, with a tiny bit of creativity one could cop a ball from Blichmann Engineering (originally meant for the autosparge of which I'm a user and huge fan) for comparatively cheap $$

https://parts.blichmannengineering.com/category-s/100.htm

The 2-3/4" ball has a threaded insert one could adapt, while the smaller 1-5/8" ball has a sleeve running through the poles wide enough to accomodate 3/8" OD tubing. That one would be trickier to use in this application (and is actually more expensive)...

Cheers!
 
Is it part of the obsession? I started with capping bottles, graduated to 1 liter swing top bottles, eventually to help my daughter with a high school soda making senior project I forced myself to buy a keg, and now somehow courtesy of a Northern Brewer sale it is two kegs. Is there a monkey on my back?

At least I rationalize it as.
1. a 5 gallon session keg lasts me 7-10 days
2. with a spunded second keg, then I've always got a carbonated batch ready to tap
3. brewing once/week keeps me ahead of the curve
4. brew the odd non-session beer that should keep a while in bottles, and now I don't drink those early because I've run out of stock
5. I think spunding is cool. If the gravity is too low, then add some sugar for keg carbonation

So second try spunding. This time with an Opshaug Norwegian yeast so the 80-85F ambient garage temp should not produce off flavors (unlike try 1 with an English yeast). Will post results in a few days but I'm liking this spunding thing. It's easy. Either when gravity is dropping toward FG, spund it. If missed the window, then 1/2 cane sugar and bob's your uncle. And if it's not quite carbed enough, it's got a head start when firing up the CO2.
 
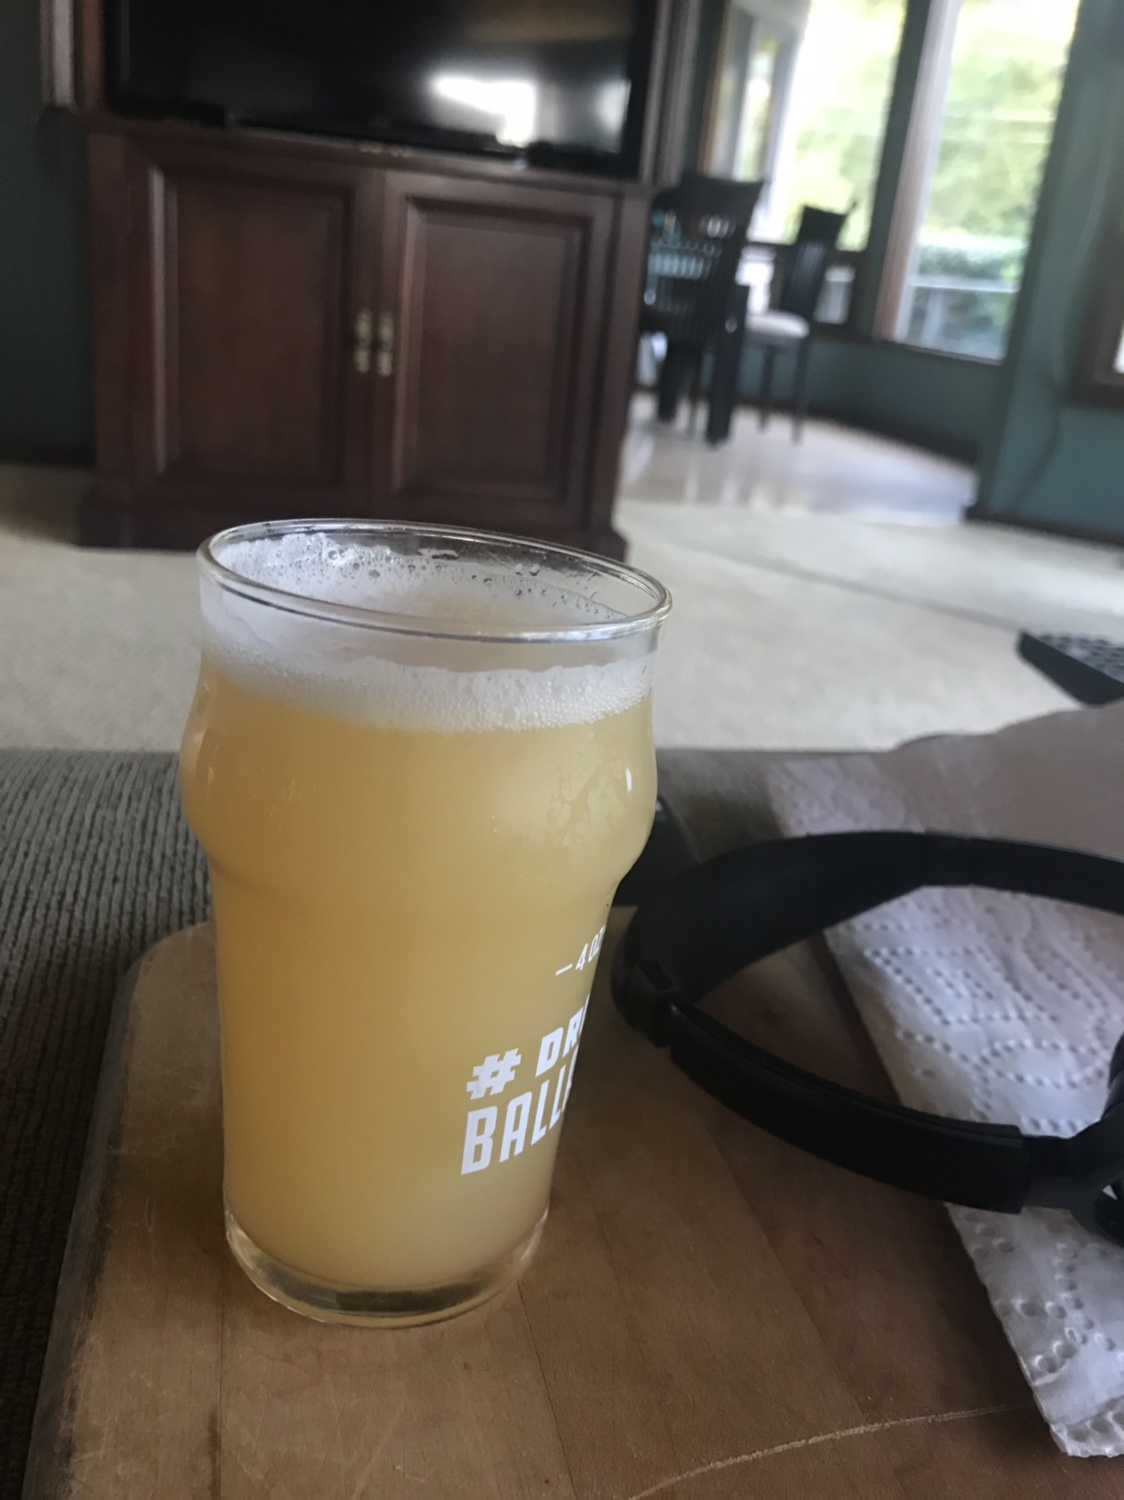
My Opshaug Norwegian yeast harvest ale using homegown East Seattle Goldings hops spunded and came out quite tasty. One odd thing was that the pressure guage read ~25 when I put the keg in the fridge this morning, and still read around 25 in the evening when I started to test. I've pulled probably 3-4 pints. Not doing a side by side comparison, but seems like the carbonation bubbles are a lot finer vs CO2. I like it. Will take a photo tomorrow.
 
My Opshaug Norwegian yeast harvest ale using homegown East Seattle Goldings hops spunded and came out quite tasty. One odd thing was that the pressure guage read ~25 when I put the keg in the fridge this morning, and still read around 25 in the evening when I started to test. I've pulled probably 3-4 pints. Not doing a side by side comparison, but seems like the carbonation bubbles are a lot finer vs CO2. I like it. Will take a photo tomorrow.
Yeah, the CO2 from the spund is more dissolved into your beer from the start. Forced carb will eventually be the same. I think the beer generally tastes better spunded. No young carbonic bite provided you don't have a glass of yeasty beer.
 
Yeah, the CO2 from the spund is more dissolved into your beer from the start. Forced carb will eventually be the same. I think the beer generally tastes better spunded. No young carbonic bite provided you don't have a glass of yeasty beer.

Somebody here on HBT once said that natural (spunded) carbonation is like having billions of tiny carb stones all working to carb your beer at the same time. I thought it a pretty apt description.

I do a variation on spunding (well, it is). I have a conical and when the gravity gets to about 7 points higher than what I expect FG to be, I close it up. The PRV on my Spike releases about 13.5 psi, so at a fairly normal 64 degrees I end up with about 1.5 or so volumes of CO2 in the beer. When I crash to about 40, the pressure ends up about 7.5 psi. A little lick of CO2 from the tank and it's ready to go. Sometimes I just set and forget, sometimes I'll throw it on CO2 at 36 psi for about 4 hours, which gets me close. Then on serving pressure and I'm there.
Very nice.

I'm still dropping to the keg when I see it start to stall. If I know I can't be around to drop to the keg at the right time I will prime the keg after sanitizing. Then let it gas purge via fermentation. After that it's drop to the keg and spund to my set point.
 
I've struggled a bit with the idea of spunding in a keg. Probably THE major reason I switched from bottle conditioning to kegging was to eliminate the yeast dregs in bottles.

I actually have the Clear Beer device to allow the dip tube to float in the beer, but I've never used it. Maybe it's time to fool with it and see if there's a noticeable difference compared to what I do now.

****

I just had an idea. If someone can get a 5-gallon keg, a picnic tap, a spunding valve, and one of those little CO2 injectors to push beer out of a keg, they could be kegging. Spunding is just bottle conditioning in a stainless steel bottle--all they'd need to do is transfer the beer when they've got a few points of gravity remaining, allow it to finish, chill it, then push the beer out with the CO2 injector.

No CO2 tank, no regulator. A cheaper way to get into kegging, and no bottling.

CO2 Injector

CO2 cartridges

Spunding Valve

The yeast can be a problem especially if you transfer a lot over (depending on where your fermentor dip tube is) and if you transfer a little too early. I had mixed experiences with clear beer (actual clear beer not the clear beer system). Some beers would be super clear like they were filtered while others would be hazy. I just recently tried something on one keg. I drilled a hole in the lid and added another beer out post. I kept the original beer out and co2 in posts.

I use the original beer out to fill the keg so it is always filling at the bottom. I use the original co2 in like normal. I added a floating dip tube to the lid beer out post. Once the beer is ready to drink, I attach the beer line to the original beer post and pull yeast from the bottom until it runs clearish. I then connect the beer line to the lid post and pull clear beer from the top to drink. Removing the yeast from the bottom really isn't necessary but I like getting it out of the keg so even the last pull is clear.
I bought a tubing cutter to take an inch off the line. A few of my kegs have dimple in the bottom and SS pick up to that dimple to pull all that soda syrup. I've typically dumped the first pint or two.

I think it was @schematix started clipping the pick up tube.

I also like dense packing lees S-04 or Munton Premium Gold

....... Pasted from link below.......

Safale S-04
A well known English ale strain noted for its fast fermentation, fast settling and its ability to form a very compact sediment at the end of the fermentation, helping to improve beer clarity. Used in the production of a wide range of ales including English ale styles. This yeast is recommended for the production of a large range of ale beers and is specially well adapted to cask-conditioned ales and fermentation in cylindro-conical tanks. Sedimentation: high. Final gravity: medium. Recommended fermentation temperature: 15C – 24C (59-75°F). Recommended dosage: 50-80 g/hl (1.9-3 g/gal).

Muntons Premium Gold Dry Ale Yeast
The yeast has excellent crusting characteristics forming a firm 'jelly like' deposit at the bottom of the fermenter and bottle or barrel. Flavour profile is excellent and the yeast has the ability to drop out of suspension very rapidly. There is a major benefit if you are bottling your beer. When pouring your beer you will not disturb the firm yeast sediment and therefore can fill your glass safe in the knowledge that it will be a clear bright pint. This benefit also applies when you are siphoning your beer from the fermenter into your bottles or barrel. Once again the firm crusting characteristics will ensure that you transfer all of your beer to your bottles or barrel and therefore will not waste any.

https://www.winning-homebrew.com/beer-yeast.html
 
The yeast can be a problem especially if you transfer a lot over (depending on where your fermentor dip tube is) and if you transfer a little too early. I had mixed experiences with clear beer (actual clear beer not the clear beer system). Some beers would be super clear like they were filtered while others would be hazy. I just recently tried something on one keg. I drilled a hole in the lid and added another beer out post. I kept the original beer out and co2 in posts.

I use the original beer out to fill the keg so it is always filling at the bottom. I use the original co2 in like normal. I added a floating dip tube to the lid beer out post. Once the beer is ready to drink, I attach the beer line to the original beer post and pull yeast from the bottom until it runs clearish. I then connect the beer line to the lid post and pull clear beer from the top to drink. Removing the yeast from the bottom really isn't necessary but I like getting it out of the keg so even the last pull is clear.

How did you drill the lid? Step bit?

I see several liquid posts on the Brewhardware site. Was there any particular one you used for this? I have an extra keg lid, so I can give this a try. I like the whole idea better than just replacing the existing dip tube with the clear-beer device.

https://www.brewhardware.com/SearchResults.asp?Search=ball+lock+keg+post+thread&Submit=

Me too...


I bought it from Williams Brewing. My coworker actually did it for me. I was trying but didn't have the right bit. He just used a regular metal cutting bit on a drill press. I forgot the size but I will ask him.

The only problem is the dip tube inside doesn't go outside of the threaded part so you have to buy dip tubes and cut them. If you buy regular beer out dip tubes, you have to sand the two ears on the end of the tube. I didn't even realize the dip tubes had those ears until I was trying to put this all together. Luckily Adventures In Homebrewing sells used beer out dip tubes that have no ears for $1 so I'm going to buy a bunch of those.

https://www.williamsbrewing.com/Liquid-Ball-Lock-With-Threaded-Post-P4507.aspx
https://www.homebrewing.org/14-Straight-3-gallon-Soda-Keg-Liquid-Dip-Tube-No-Ears-Used-_p_6482.html
 
Huh. I have never noticed the ears on any dip tube and I have a motley crue of used kegs purchased over the years. Interesting.
 
Back
Top