French door refrigerator kegerator project

Homebrew Talk - Beer, Wine, Mead, & Cider Brewing Discussion Forum

Help Support Homebrew Talk - Beer, Wine, Mead, & Cider Brewing Discussion Forum:

This site may earn a commission from merchant affiliate links, including eBay, Amazon, and others.

bozotros

Active Member
Joined
May 30, 2012
Messages
39
Reaction score
23
Location
Seattle
Through a semi-fortuitous set of circumstances, this 1 year old, 21 cu foot Jenn-Air French door refrigerator became available to me. My brewing buddy John (who is the engineering brains of this operation) and I are setting out to convert this baby into a sweet, 6 tap kegerator.

The plan is to have 3 taps on each door. 6 ball lock kegs will fit nicely inside the fridge box, with a little space left over. There should be room above the kegs for one or more of the fridge shelves to go back in for refrigerated storage, and we'll use the lower level freezer for hops storage and pint glass cooling. We'll try to post pictures as we go along.

In the picture here of the fridge exterior, the blue tape marks the level for the taps holes -- I think 54" off the floor.

Any comments are of course always welcome.

BGM

Fridge exterior.jpg
 
Here's the interior box of the fridge with the water lines and all side shelf brackets and other clutter removed.

Fridge interior before.jpg
 
And here's the door with all the shelves and junk removed. I've opted to leave the plastic inner liner in place for now. We may revisit this decision as we go along, but I like the clean look it makes as opposed to seeing the exposed insulation, and 6 kegs fit nicely with the doors closed even with the plastic liner.

Door interior before.jpg
 
WOW....I have often looked at one of those and thought "hmmm....I wonder" but the price kills it before the thought can formulate fully. Anxious to see what you guys do with this.
 
Really anxious to see how your project progresses. I have an LG that looks very similar that I just moved into the garage because of all the problems it had with lights, shelves, drawers, etc. It does not have any problems keeping things cold! I would love to follow in your footsteps :D:mug:
 
In a nutshell we had the same issue. Bought new house 1 yr ago and indulged my bride with new appliances, including this refrigerator 1 year ago. It cools just fine but our big issue was one of the french doors would occasionally not close fully; JennAir tried by couldn't do much.
Adhering to the "happy wife, happy wife" credo, and knowing I was going to do a keezer/kegerator etc. anyway and wanted a new appliance for that, I bit the bullet and sprang for **another** new fridge and 'inherited' this one. Pretty much a win/win (discounting the $$$, but whatever).

Interestingly, in the garage, where the floor slopes slightly down front to back of the fridge, and I was able to screw the front levelers all the way up, the door closes and stays closed just fine now.
 
Added 2 white Melamine shelving pieces cut to fit into the hollows in the bottom of the fridge to make the base level.

Interior with base inserts.jpg
 
In a nutshell we had the same issue. Bought new house 1 yr ago and indulged my bride with new appliances, including this refrigerator 1 year ago. It cools just fine but our big issue was one of the french doors would occasionally not close fully; JennAir tried by couldn't do much.
Adhering to the "happy wife, happy wife" credo, and knowing I was going to do a keezer/kegerator etc. anyway and wanted a new appliance for that, I bit the bullet and sprang for **another** new fridge and 'inherited' this one. Pretty much a win/win (discounting the $$$, but whatever).

Interestingly, in the garage, where the floor slopes slightly down front to back of the fridge, and I was able to screw the front levelers all the way up, the door closes and stays closed just fine now.

Sorry Honey. It can't be fixed, but I get YOU a new one!! Lol :mug:
 
Getting ready to start this in earnest. Here are some photos of the inside build components from Keg Connection. Here's the basic setup, with all lines connected by the guys at KC. Exterior regulator with tank pressure and outgoing pressure gauges; 2 way splitter (will be mounted inside the unit), and 2 regulator assemblies (for inside the right and left hand door) each with 3 regulators and outgoing lines to each of the 3 kegs on each side.

Gas line set up unpacked.jpg
 
Closeups of the tank/outgoing gas regulator, splitter, and one of the door keg regulator assemblies.

Main regulator.jpg


Gas line splitter.jpg


Triple regulator left side.jpg
 
Wow, each keg has independent pressure control? That's pretty baller! And here I was too lazy to change a single gauge from style-style.
 
Yes, it was an expense, but not all that much more. My vision is this thing will last many years; we do a whole range of brews from low ABV summer session beers to porters, as well as the occasional hard cider, so being able to manage the pressure to each of those kegs independently was important to me.

And it means if I am pressurizing a newly filled keg, I can still keep drinking the rest of the kegs!
 
As it does, real life postponed us actually doing any work until this weekend.

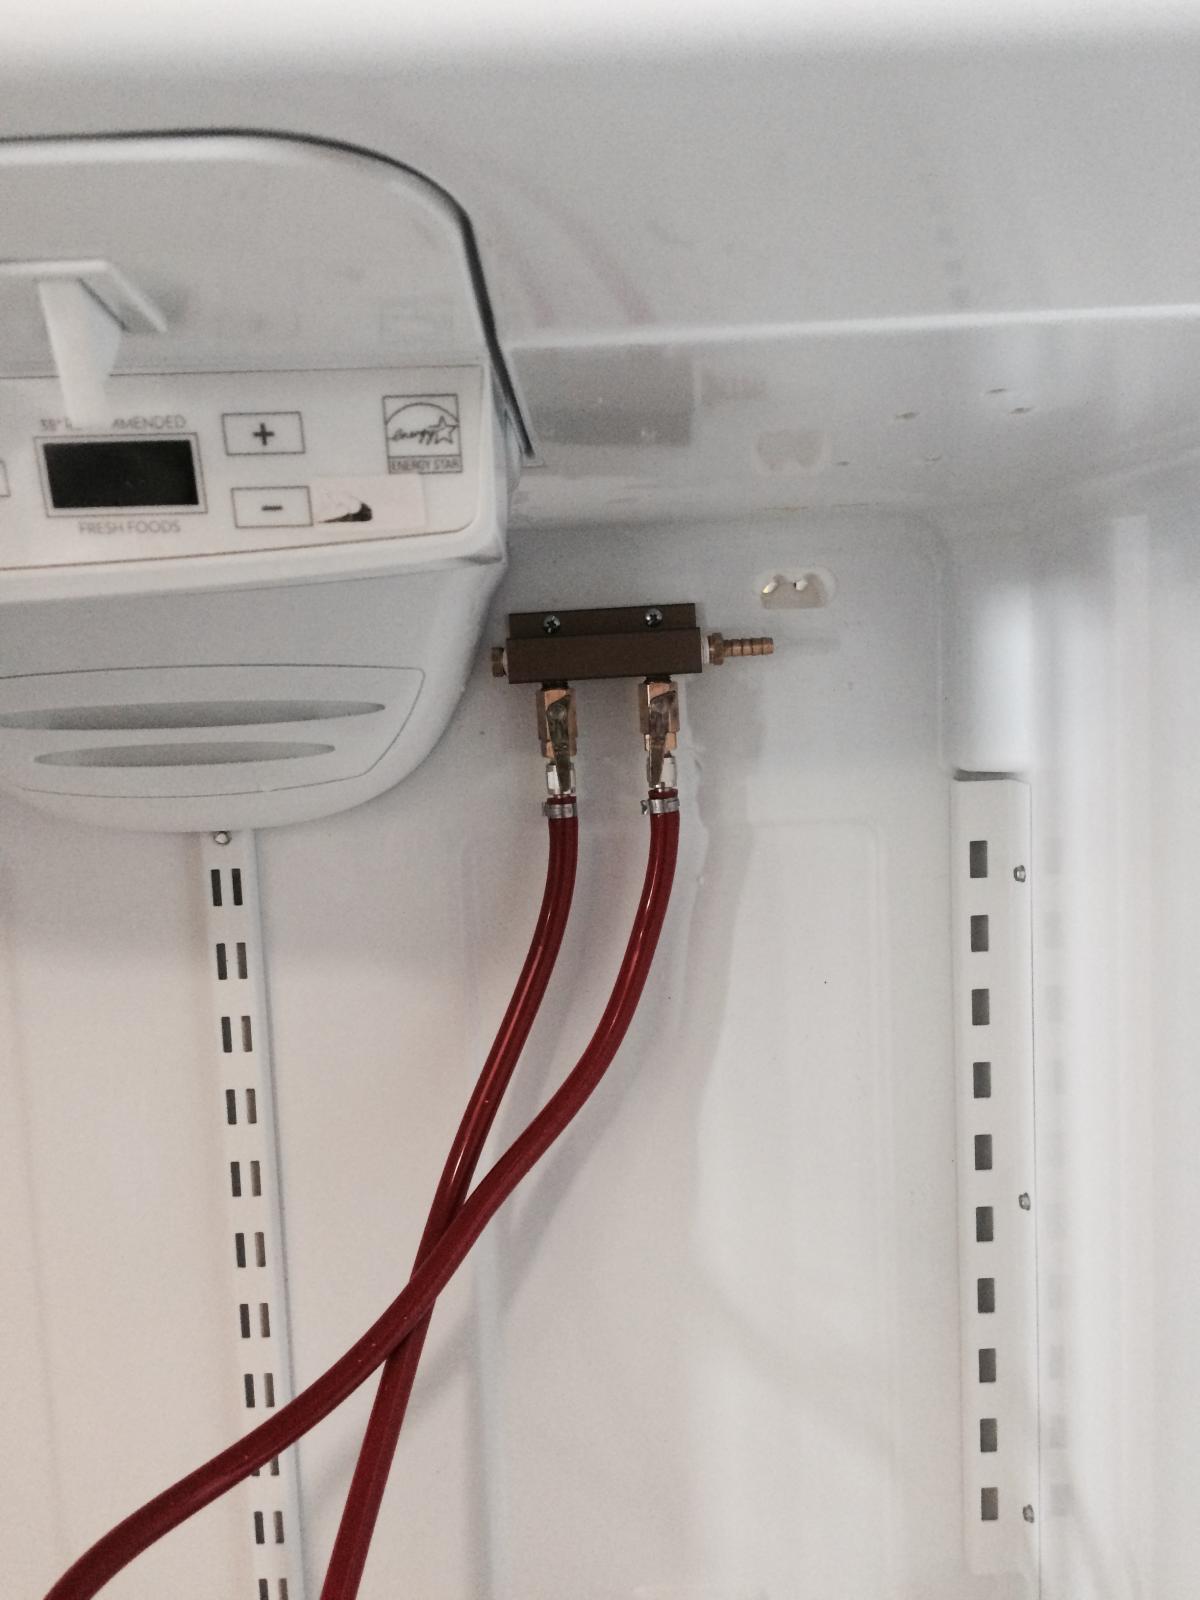
I spent a lot of time thinking and talking to my brewing partner John and the guys at my local hardware store about how best to secure the 2 way splitter (to the rear of the fridge) and the two 3-regulator assemblies (one to each door). The splitter is pretty light and won't have much stress on it, but the regulator assemblies are really heavy.

I really did not want to epoxy these babies in, since you never know when/if you might need to remove one or all of them - one goes bad, gets clogged, needs special cleaning, etc.

The consensus was moly screws, using the plastic moly inserts designed for sheetrock. Here are the first two holes I drilled in the back of the fridge for the 2 way splitter with the blue moly inserts inserted; I put a drop of epoxy on the end of each in hopes they would hold more firmly to the foam insulation.

(The double holes in the top right corner of the inside of the fridge are where the cold water/ice maker lines passed through. I'll use that opening for the gas line to pass from my new 20 lb tank outside to the splitter inside)

Splitter holes.jpg
 
The plastic molys don't work, which I learned after they were in and epoxied in.:smack:
The screws snug up somewhat but won't tighten.

So I got some 'industrial strength' Velcro and added that to buttress the moly screws:

Scotch industrial velcro.jpg


Splitter holes with velcro.jpg
 
But it was clear the plastic moly/Velcro system would not be strong enough to hold the 2 heavy door regulator modules.

Again, after consultation with John and the hardware store, I opted for the 1 piece metal moly type screw, which after installation in the hole, and the screw is tightened the first time, expands the moly piece like an accordion. Here's the first one installed into the right door.

Metal moly in door.jpg
 
As you can see, getting this sucker to actually bite and hold was a *****. There was not enough resistance by the foam insulation to keep the whole insert from spinning, so we held it with vice grips then turned the screw (an operation that requires 2 people - thank you John!) until the insert began to accordion out. Even then it still spun so I put a few drops of epoxy under the insert rim, waited a half hour and it held so I could tighten the screw and get a tight fit.

But the whole procedure took a long time and as we tried to duplicate on the other holes it became clear it would take forever to get all of the holes done and each one was so bent and ragged from holding it with the vise grips it looked tacky (to put it mildly)

So back to the hardware store, where the incredibly helpful guy walked us through all the different kinds of insertable screw assemblies. We decided these would likely really work well. The blue insert goes into the hole drilled. Once it is all the way in, you use the white plastic connectors to pull it so that is lays flat perpendicular to the hole, and then cinch up the white square outside insert which fits in the outside of the hold and holds the assemblage in place. This should have resolved the problem of the inserts turning on us.

Blue ratcheted moly.jpg
 
...which I'm still convinced would have been the perfect solution here, except...

the blue metal insert was about an inch too long and could not get all the in the hole before butting up against the inside of the metal door skin. We tried cutting and bending them but no go. These buggers are strong.

So we pawed through my "throw all your extra **** in here" drawer and realized the old fashioned expansion sheet rock screw assemblies would work. Only issue is that if I ever need to unscrew one, the expansion piece inside will likely fall away and then I'll have to figure out something else. But I want his sucker done!

Metal expansion screw assembly.jpg
 
And here's a closeup of the door assembly in place. The other door should be pretty easy now that we know how we are going to do it/what actually works.
I hope that part, and the work to drill/install the taps into the doors can get done this weekend.

R door regulator installed close up.jpg
 
Lookin' good!

Once those metal "molly bolts" crack your plastic out from movement, glue a wooden "sleeper" over the area, and mount your regulators with wood screws..............Lot simpler than pokin' all those holes, and spinnin' anchors and what not! :D
 
Back
Top