You are using an out of date browser. It may not display this or other websites correctly.
You should upgrade or use an alternative browser.
You should upgrade or use an alternative browser.
DIY Conical Fermenter
- Thread starter Yuri_Rage
- Start date

Help Support Homebrew Talk - Beer, Wine, Mead, & Cider Brewing Discussion Forum:
This site may earn a commission from merchant affiliate
links, including eBay, Amazon, and others.
Kelly.
Well-Known Member
so what does the final setup look like?
the last picture is on page 7, and i was wondering if anything had changed?
i was thinking about building one and only using it for fermentation.
any problems doing that with your setup so far?
the last picture is on page 7, and i was wondering if anything had changed?
i was thinking about building one and only using it for fermentation.
any problems doing that with your setup so far?
OP
OP
Well, I only use my conical for fermentation...mostly because I'm not sure what else to use it for. It's been working great! More pics are in my gallery.
krispy d
Well-Known Member
I am thoroughly convinced that DIY no longer means Do It Yourself but rather Do It Yuri! that fermenter is beautiful!
OK Yuri, I'm convinced, whats the 15 gal con gonna cost me with shipping to 11779?
OP
OP
WormBoy said:OK Yuri, I'm convinced, whats the 15 gal con gonna cost me with shipping to 11779?
Somewhere between $500 and $600...I'm a huge slacker and need to finish these things! I want to have them done in time for Christmas.
LouT
Can't wait to go AG...
nabs478 said:I think it's crap too. If there's no oxygen, or oxidisng agents, then I'll be fine. But things that have microscopic sharp edges, like an unpolished surface, can catalyse reactions, which is why I wanted a second opinion. Now that I have about six other opinions I know what to do.
BTW, I asked them how they would do it, and he said, in a very technical way, that they stick some pads in a drill and buff the surface....$500?? I have a drill, what's a polishing pad worth?
If you've never polished metal, especially stainless, I can see how you'd think that. It's a nasty nasty exhausting dirty and did I say nasty, job!
Check in your area for a company that "Electropolishes" stainless steel pipe and hardware. The process uses electrical discharge in an electrolyte bath and will both remove oxidation and passivate at same time, saves the tedious grind, polish, and passivate steps in finishing.
How much does electropolishing cost? I mean typically.
Ouch, I'd rather have the outside copper or nickle plated or something, lol.
OP
OP
All this polishing stuff is nonsense. Check the inside of your corny kegs - are they polished to a mirror finish? Clean your fermenter well, sanitize it thoroughly, and be done with it.
For those folks that have the commercial stainless steel pots for boiling and want better heat transfer, have the bottom plated first with nickle to seal the stainless then a heavy copper coat. Trying to plate copper directly to stainless does not work, copper coats the stainless but does not stick.
D*Bo
Well-Known Member
I haven't read thru the entire article yet, but as far as an air lock, what about an adjustable pressure relief?
If the conical is rated for pressure, set the relief valve for the pressure you want and let the CO2 from fermentation carb up the beer.
Would there be any negative effects on the beer from this?
As long as you still have the secondary relief valve on the cornie lid incase the adj. valve fails.
If the conical is rated for pressure, set the relief valve for the pressure you want and let the CO2 from fermentation carb up the beer.
Would there be any negative effects on the beer from this?
As long as you still have the secondary relief valve on the cornie lid incase the adj. valve fails.
I am fermenting under pressure in a sanke, and this is my best beer yet on my final brewing setup (I have made a bunch of changes and finally have it where I want it, lol). I need to find another adjustable pressure relief valve as this one only goes to 20 psi and I need 30 psi @ 65*F for carbonating ales to 2.9 volumes if I want.
ThaDutchMasta
Well-Known Member
- Joined
- Jan 24, 2008
- Messages
- 54
- Reaction score
- 0
Yuri, just wanted to say your a pimp! im gonna have to jump on my MIG and get me a hopper!
Yuri definitely has a strong pimp hand ")
did these ever hit the market? i'm very interested in buying one.
if not, i have a guy interested in building one, so i could contract him and use your awesome work as a reference.
if none of that works out, i'm buying a new one (or used if i can find) as soon as my debt is gone.
i'm very interested in buying one.if not, i have a guy interested in building one, so i could contract him and use your awesome work as a reference.
if none of that works out, i'm buying a new one (or used if i can find) as soon as my debt is gone.
OP
OP
Here is a picture of design #2. This one is likely going to be shipped to DeathBrewer. It's still a little rough - I'm going to put a finish on all of the raw steel pieces, and the racking port has yet to be drilled.
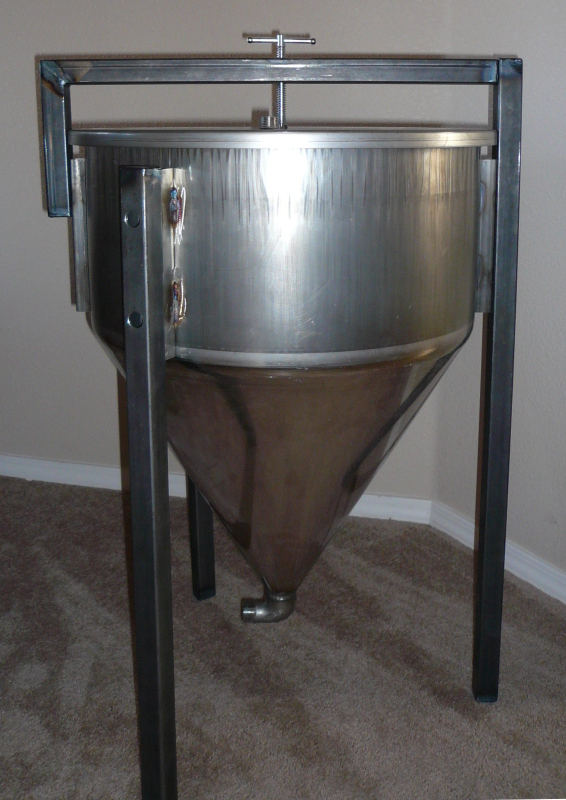
Design #3 is in the works (Death, you'll have your choice of which you prefer). I'm going to make a hexagonal stand for that one and use the same design for the screw-down lid seal. More pictures later.
Design #3 is in the works (Death, you'll have your choice of which you prefer). I'm going to make a hexagonal stand for that one and use the same design for the screw-down lid seal. More pictures later.
HarvInSTL
Well-Known Member
Yuri_Rage said:Here is a picture of design #2. This one is likely going to be shipped to DeathBrewer. It's still a little rough - I'm going to put a finish on all of the raw steel pieces, and the racking port has yet to be drilled.
https://cdn.homebrewtalk.com/gallery/data/1/death_conical.jpg
Design #3 is in the works (Death, you'll have your choice of which you prefer). I'm going to make a hexagonal stand for that one and use the same design for the screw-down lid seal. More pictures later.
Any pictures of the inside?
OP
OP
Who says trig and beer don't mix?

If you don't know how this fits into the conical fermenter plans yet, hold on...there's more on the way as I get it done.
Harv, I'll get some interior pics later tonight when things are more finished.
If you don't know how this fits into the conical fermenter plans yet, hold on...there's more on the way as I get it done.
Harv, I'll get some interior pics later tonight when things are more finished.
OP
OP
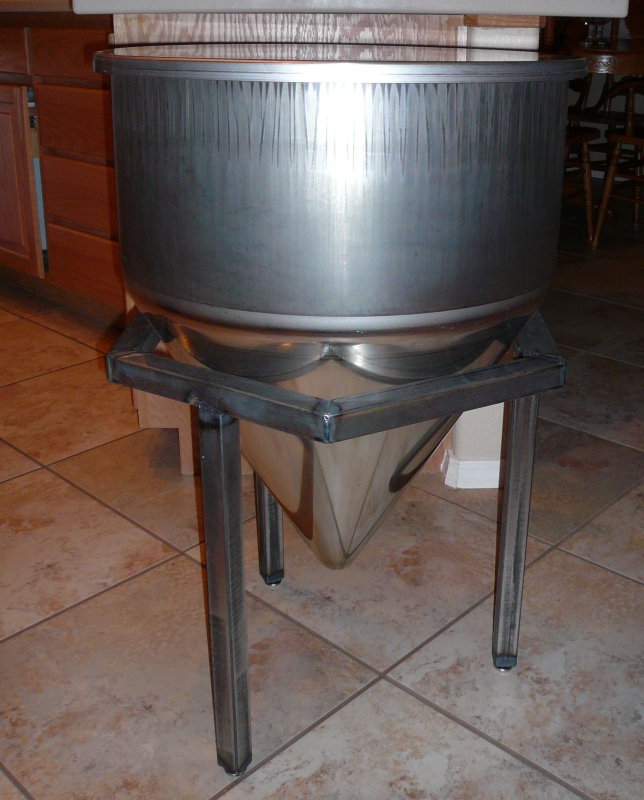
Here's the hexagonal stand:
OP
OP
Pressure mechanism for lid in place:

How much pressure can these things take do you think Yuri? I am very interested to find out more information.
Brewing Clamper
Well-Known Member
So, how do I get in line for one of these bad boys?
OP
OP
I haven't pressure tested the new design yet, but I'm confident that it will hold the 4-5 psi required for a pressure transfer. I'm guessing that force carbonating inside one might be a bit of a lofty goal. More to follow as work progresses.wortmonger said:How much pressure can these things take do you think Yuri? I am very interested to find out more information.
Bad news, good news, and then more bad news...Brewing Clamper said:So, how do I get in line for one of these bad boys?
Bad news first: I have two available right now, and they're both spoken for.
The good news: I have two more TMS hoppers waiting to be converted.
More bad news: I'm moving all of my shop equipment to Texas tomorrow, so I won't be able to finish the other two until later this year when I'm more established in the new location (likely in the fall).
Brewing Clamper
Well-Known Member
So what you're saying is that there is a posibility?! I like it!
OP
OP
More pictures!
The first two show my simple back-gas configuration. The hose is hooked up to a spare argon cylinder with the regulator set to very low pressure (3-5 psi). I use foil tape to secure everything. The first picture's setup is probably adequate, but for extra insurance, I enclose it with some more tape as shown in the second picture.
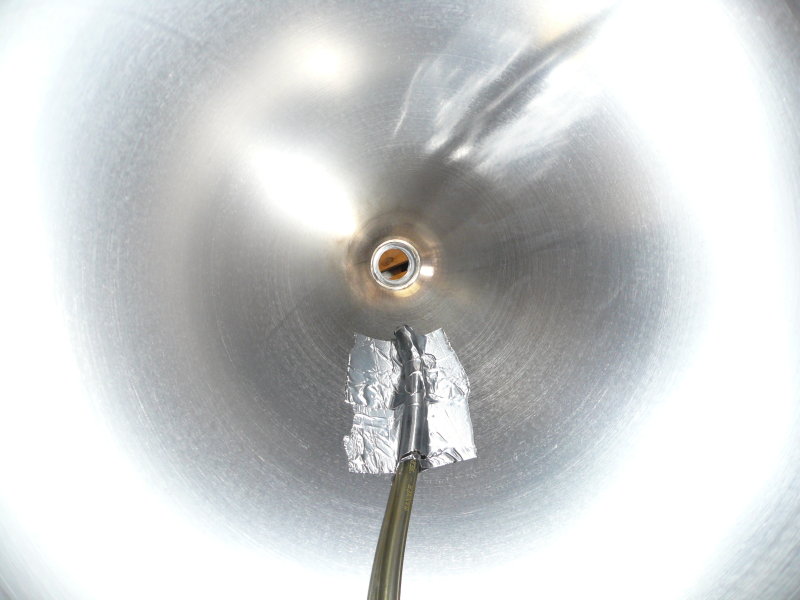

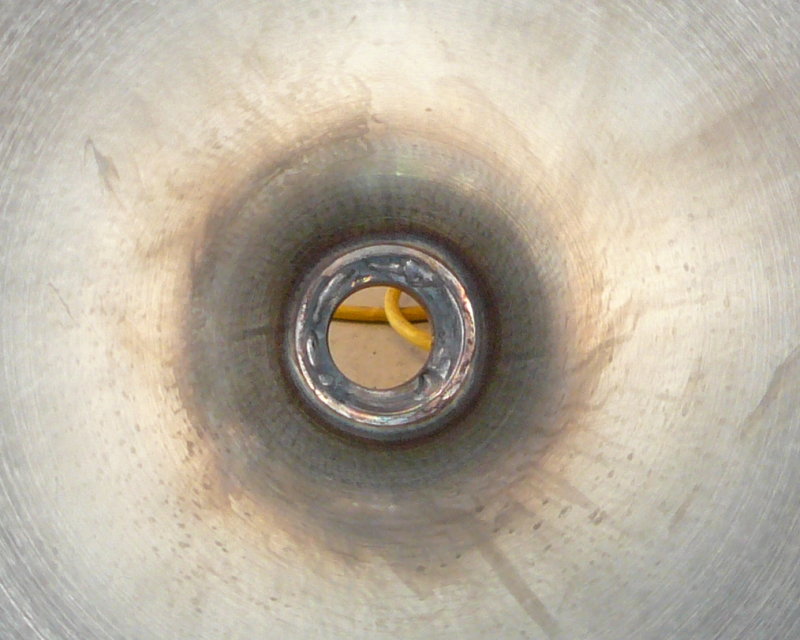
Harv, I'm assuming this is the picture you wanted. This is the interior of the bottom weld before any cleanup. The heat discoloration will disappear with a quick scrub with BKF. I think that looks pretty sanitary, don't you?
(the yellow stuff you can see through the fitting is an extension cord that wandered into the picture)
The first two show my simple back-gas configuration. The hose is hooked up to a spare argon cylinder with the regulator set to very low pressure (3-5 psi). I use foil tape to secure everything. The first picture's setup is probably adequate, but for extra insurance, I enclose it with some more tape as shown in the second picture.
Harv, I'm assuming this is the picture you wanted. This is the interior of the bottom weld before any cleanup. The heat discoloration will disappear with a quick scrub with BKF. I think that looks pretty sanitary, don't you?
(the yellow stuff you can see through the fitting is an extension cord that wandered into the picture)
OP
OP
Here they are! I just need to clean them up a bit more, drill a single hole in each one for the racking port, and install the rubber lid seals. Thanks to a late night last night, the legs/hardware are powder coated. Almost there!
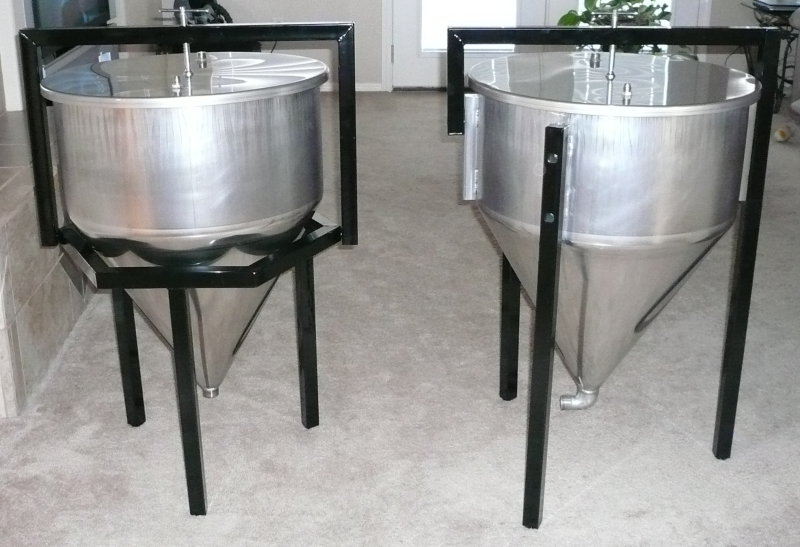
I may have missed this, but why the hexagonal stand for one, and the legs directly bolted onto the conical for the other?
old_townie
Well-Known Member
IT looks like YURI found a hardware-free way of cradling the cone in the stand!!! my guess is this is how he can set the cone into the stand allowing him to remove the cone easily.
I'm STOKED!! Clean in place is NO fun... and i've been hemming and hawing about an easy way to allow me to remove a cone from the stand, but still have a stable base for fermenting
this is super cool
I'm STOKED!! Clean in place is NO fun... and i've been hemming and hawing about an easy way to allow me to remove a cone from the stand, but still have a stable base for fermenting
this is super cool
BeerCanuck
Well-Known Member
Those fermenters look sweet...Yuri
Cheers
BeerCanuck
Cheers
BeerCanuck
OP
OP
The primary reason for the hexagonal stand was to minimize the amount of welding on the fermenter body. The one with legs on the sides has four brackets welded to the outside, resulting in 16 welds, all requiring cleanup on the inside. My attempts at minimizing the heat still resulted in full penetration welds - quite structurally sound, but weld marks become evident opposite the side that had the heat applied (flux and/or back-gassing prevented any major mishaps). Through eliminating those welds, the fermenter on the hexagonal stand has a much more uniform interior. I'm still working on getting all the grind marks out of the other one. I don't think I sacrificed anything with the new design, and I'm much happier with the results. If there are additional benefits, like the ones townie mentioned, so much the better!
Well crap, I was hoping it would hold more pressure than that. Nice setup though, I love your stuff. So professional looking and clean.
Yuri_Rage said:Here they are! I just need to clean them up a bit more, drill a single hole in each one for the racking port, and install the rubber lid seals. Thanks to a late night last night, the legs/hardware are powder coated. Almost there!
wow. the powder coating makes those look sick! beer porn indeed!

brewitall
Well-Known Member
The problem with the design (although very minor), is the single screw in the middle of the crossmember to seal the top.
Because the thin stainless lid doesn't flex evenly all around under pressure, you get leaks caused by the uneven fit.
The solution to this is to tranfer the clamping force from the center of the lid to the outside edges. I have been using a set of aluminum channel fastened at right angles where the center of the cross sets under the clamping screw and the four ends extend to the edge of my lid.
While this has been fairly effective in sealing my conical, I'm thinking of constructing a "convex wagon wheel" that has a solid ring the same size as the top of my fermentor with 6 curving supports that meet at the center above wheel so that pressure from the hold down screw will be distributed through the fixture to put downward pressure on the edge of the lid rather than lifting the egde of the lid by placing the down force in the center.
OP
OP
The four clamps didn't work at all. My first fermenter barely seals at all and will hold absolutely no pressure whatsoever.
I just got done pressure testing the new design with the screw down system. It'll hold 1-2 psi; not quite what I expected, but the lid definitely seals uniformly as long as the pressure is low. It's enough for a pressure transfer, but there's no way you're going to force carb in these fermenters.
If you think about it, you're asking a lot of the system if you're trying to force carb/serve. The lids are about 21" in diameter, or 346 square inches. 2 psi puts over 1/4 ton of force on the lid. 10 psi is over a ton and a half of pressure against the bottom side of that lid!
Similar threads
- Replies
- 1
- Views
- 279
- Replies
- 0
- Views
- 591
California
SOLD Spike CF10 unitank extras 750
- Replies
- 0
- Views
- 427
