DIY Conical Fermenter

Homebrew Talk - Beer, Wine, Mead, & Cider Brewing Discussion Forum

Help Support Homebrew Talk - Beer, Wine, Mead, & Cider Brewing Discussion Forum:

This site may earn a commission from merchant affiliate links, including eBay, Amazon, and others.
Todd said:
That is odd, when I was trying to search it kept bringing back no results, now this morning is works. Oh well, maybe they had a server problem.

Thanks.

did you have any problems with leaks or anything with it?
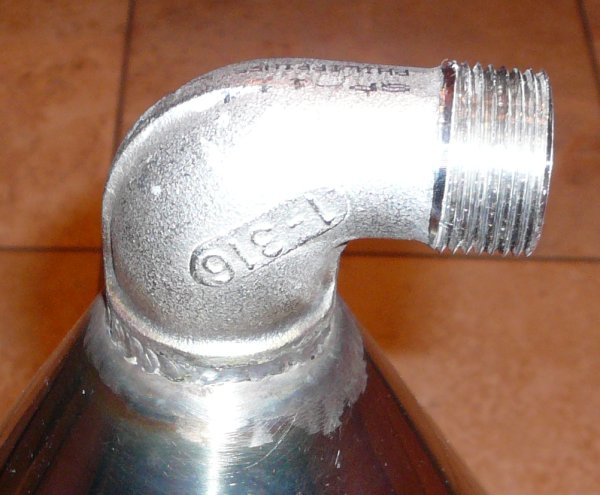
No problems at all so far! I love it for sampling - no mess, easy to get just the right amount for a gravity reading. I'm about to use it to keg the batch I brewed last week. Yup, I know, green beer. But I have nothing on tap.

EDIT: Just finished kegging - I only kegged 5 gallons, the rest is still in the fermenter. I force carbonated it, and it's clear and tastes pretty good already!
 
Yuri_Rage said:
EDIT: Just finished kegging - I only kegged 5 gallons, the rest is still in the fermenter. I force carbonated it, and it's clear and tastes pretty good already!

now thats cool!
 
Is this at 1 week old? What beer did you make? Ever since the guy at troegs told me they only keep the beer in the fermentor for 7-10 days has me curious..
 
I bought my 24.2 gallon hopper from TMS today! I've still got lots of equipment to procure for my 20 gallon setup, but its getting there! :rockin:

Yuri, you mind giving me some details on your racking tube? At what point are you drawing from? What led you to placing it at that height? You think I could get away with just the vavle on the bottom of the tank?

Thanks!
 
I bought my racking arms from Austin Homebrew - search their site for "rotating racking arm." I followed their directions and placed it 6" from the bottom of the fermenter. I probably lose less than a pint between the bottom of the racking arm and the bottom of the fermenter. You could certainly just use a single valve at the bottom. I elected to use two so that I could have a massive dump valve at the bottom and a smaller transfer/racking valve for finer control.
 
i'm sitting here reading this post for the first time and i got to thinking, i my have a solution for your leaky lid. i work in the medical field fixing medical equipment. dealing with sterilizers, heat and hi pressures, i think the lid lock you need is about 4 to 5 sets of tabs welded to the edge of the lid, the same amount of (this will be hard to explaine) threaded, swing down bolts and a few nuts.

so, you have 5 screws welded to the sides of the fermenter, those swing up to fit between the "prongs" on the lid, then you take the nuts and just screw the lid down until its secure. with that kind of down force on the lid, you will have no troubles pressuring that baby up enough to force carb the entire batch i'm sure.

just my thoughts. also, i was thinking about your airlock, why not just fab a little metal airlock thats all one piece with the screw on attachment at the bottom. then just make a little metal bubbler cup or use one of the ones for the plastic air locks. once again, just my 2 bits. very nice work BTW. gonna have to start buggin my father-in-law to start teaching me how to weld!!!! :rockin:
 
justbrewit said:
the lid lock you need is about 4 to 5 sets of tabs welded to the edge of the lid, the same amount of (this will be hard to explaine) threaded, swing down bolts and a few nuts.

why not just fab a little metal airlock thats all one piece with the screw on attachment at the bottom

I agree that your solution for sealing the lid is a good one...great even. I think I've managed to simplify it, though. After looking at several conical fermenter designs, I think I'm going to secure the lid like the fermenters at More Beer. Those are just a single arm that runs across the top of the fermenter with a big wing nut/screw that applies pressure at the lid center.

I like your airlock idea except that it's a lot of work for little gain, IMHO. I think I'll stick with the ball valve on top that allows the option of attaching a blow-off tube or plastic airlock.

EDIT: Please don't take this as my being dismissive of your ideas...I'd already decided on the lid design, and the airlock would just be too labor intensive to put into practice. Thanks for the input, and please keep watching the thread!
 
Yuri_Rage said:
EDIT: Please don't take this as my being dismissive of your ideas...I'd already decided on the lid design, and the airlock would just be too labor intensive to put into practice. Thanks for the input, and please keep watching the thread!

like i said, just my 2 pennies. not gonna hurt my feelings, i just got a working fridge for free today lol now i can start my first keg fridge. one of 3 i'm planning lol:ban:
 
Yuri_Rage said:
Awesome - have fun with the fridges. They're REALLY simple once you get a plan together.


Do the B3 Conicals hold any pressure? I was under the impression only the fermenator does.
 
Yuri_Rage said:
I agree that your solution for sealing the lid is a good one...great even. I think I've managed to simplify it, though. After looking at several conical fermenter designs, I think I'm going to secure the lid like the fermenters at More Beer. Those are just a single arm that runs across the top of the fermenter with a big wing nut/screw that applies pressure at the lid center.

I like your airlock idea except that it's a lot of work for little gain, IMHO. I think I'll stick with the ball valve on top that allows the option of attaching a blow-off tube or plastic airlock.

EDIT: Please don't take this as my being dismissive of your ideas...I'd already decided on the lid design, and the airlock would just be too labor intensive to put into practice. Thanks for the input, and please keep watching the thread!

Thats what I plan on trying with my 24 gallon conical (showed up on my doorstep the other day.. just need some stainless valves) HOWEVER.. unlike the one on MoreBeer, I plan on making mine a cross with 4 fastening locations.

I dont plan on force carbing in this bad boy... it takes some serious integriy to hold 30psi. I do however feel as though the 4-way will be more than adequate, just need to make a gasket.

Yuri, what do you use for gasket material?

EDIT... Yuri, I find that when placing the Toledo lid on the hopper, it seems to seat better in the upside down position. I will probably build another one of these down the road, so at some point I may try and fab up a lid out of stainless sheet stock. Nice and thick, and cheaper than the Toledo lid. What do you think?
 
Sounds like a plan, but I'm not sure that you'll need 4 attach points for your lid sealing device, especially if you don't want to hold more than a few psi.

FYI, I didn't design mine with carbonation in mind, I just wanted the ability to transfer the beer using CO2 pressure.

My first attempt at a gasket was simply a very large o-ring. It didn't make a very good seal. I'm now using 3/4" wide x 3/16" thick silicone tape (available at McMaster-Carr). It seals pretty well, and I think with the addition of the pressure device, it'll hold plenty of pressure.

The Toledo lid is a little disappointing - it doesn't fit with a very tight tolerance. I'd rather have made one out of 1/8" or 3/16" plate (no lip, just a flat circle). Perhaps turning it upside down will work - I don't think it makes much difference.
 
I ran a few quick calculations.....

If you take the 12.2 gallon hopper and fill it with 10 gallons, you have 2.2 gallons of headspace. At 231in^2 per gallon, that leaves 508in^2 of headspace. Since this particular conical is 16in diameter, that would leave 2.5 inches of headspace.

Do you think that 2.5 inches of headspace is enough room for a primary fermentation?

Thanks in advance


PS. A second less actuate calculation.... you mentioned that a max of 18 gallons could fit in the 21 gallon hopper. That would leave 14.2% for headspace. For a 10G batch that would be a total volume of 11.42 gallons.

I guess the less techical way to ask this question is..... WILL IT WORK? :)
 
The 12 gallon hopper will likely work for 10 gallon batches - just remember to always use a blow-off tube.

My 18 gallon figure for the 21 gallon fermenter was a rough estimate. I think as long as you have an inch or two at the top along with a blow-off tube, you'll be just fine.
 
Yuri,

I just wanted to let you know that all of us that do not have access to a lathe, machine shop, welder, etc...


WE HATE YOU!!!


HAHAHAHA

great builds brutha! You are my personal hero

John
 
Nwcw2001 said:
Yuri,

I just wanted to let you know that all of us that do not have access to a lathe, machine shop, welder, etc...

Many a night I have dreamt of having access to the equipment and supplies Yuri has. :rockin:
 
Nwcw2001 said:
I just wanted to let you know that all of us that do not have access to a lathe, machine shop, welder, etc...

WE HATE YOU!!!
I hate you, too, John, but your bank will love you when you realize that your dream shop is just a credit card away...

In fact, I do not have access to a machine shop - all of those tools are jammed into half of my two-car garage. I just have an unhealthy tool addiction, a very understanding wife, and a budget that allows me to save for a few "luxuries" on occasion.

Thanks for the ego boost fellas - HBT rocks! :rockin:
 
Ok, you guys have a great thread going here, but I have a question about a lid for my proposed project. My question to you guys is, would a 14ga SS sheet the same diameter as the fermentor(conical from toledo with their standard 1/2" lip) seal with one of those open drum clamps. I realize you would probably have to find the right size since the easily found 55 gallon drum ones are everywhere but would be to large(maybe not, hopefully not, but). My thinking is it would clamp down as it is closed like a tri-clamp fitting would be. Anyone think something like that would work? I bought a hopper from Toledo before and it fit right on top of a 55 gallon open headed drum barrel, and clamped on with the standard drum clamp, but that was another project and need a smaller diameter now on the old hopper. Interested to see if anyone has the info on finding the smaller clamps I am looking for, cause if I can I like the idea.
Appreciate any info as after reading this thread and having some of my own ideas is pure curiousity at this point.:tank:
Thanks guys
 
The clamps you mention are often called "v-band" clamps. One company is clampco. They will custom make them to any size, but of course price is a big problem.
 
V-Clamps, thanks I had no idea what they were called other than lever-lock clamps. I bet that they are expensive. This lid business is tricky. I have always heard that the Toledo lids can’t get a “good” seal without a lot of help. I would really like the ability to carbonate, transfer, or whatever without all the clamps around the edge of my pretty stainless fermentor. Then again, I am just going to cover the thing with insulation anyways.
 
did you ever think about building a chiller right into the lid? you could connect a copper pipe chiller to the inside of the corny valves, with the water being controlled by a thermostat, like the one in this picture. you could even have quick connect hoses to the outside of the corny valves

3144-Chillerandfermenter.jpg


Of course, then you might also like to install a thermometer on to the side of it. And if your going to do all that, you might as well install a tubular burner around the sides of the conical so its an all-purpose boiler-chiller-fermenter (primary and secondary after you drop the trub) :)
 
So, I'm finally getting around to finishing the other FOUR fermenters that I've had laying around in the garage. I made some improvements. Here's what I have so far:

The elbow fitting for the dump valve is welded directly to the fermenter. I machined the female threads out of it to keep it easy to clean.

4688-dumpelbow.JPG


Here's a view of the elbow from the inside:

4688-dumpweld.jpg


Now for the lid... I decided not to weld the corny top to it like my previous design. Instead, there's a fitting for a gas-side ball lock disconnect and a 1/2" NPT nipple so you can install a blow-off tube (via a ball valve if you intend to pressurize the fermenter).

4688-conicallid.JPG


A close-up of one of the fitting welds:

4688-lidweld.JPG


I plan on sealing the lid with a thick silicone gasket, then applying pressure via a screw-down type assembly to push on the center of the lid.

Here are the rest of the specs:
21 gallon capacity
1/2" rotating racking arm
1" dump valve
3 powder coated legs
Powder coated lid sealing assembly

Critiques? If you were gonna buy one of these, what would you want?
 
Looks...so...shiny :D. I'm no welder; is that screen around the fitting weld or a product of the welding?
 
Ahhh, so that's scratches from the sanding! From this angle, some of it seems to be almost 3-dimensional, especially that top part.
 
I have a few questions for you Yuri... Why did you decide to leave the corny-top off? I feel as though that would have some greatly added benefits.

What are your opinions now of the toledo lids? Is it sealing ok?

How did you end up attaching your legs?

kvh
 
kvh said:
I have a few questions for you Yuri... Why did you decide to leave the corny-top off? I feel as though that would have some greatly added benefits.

What are your opinions now of the toledo lids? Is it sealing ok?

How did you end up attaching your legs?

kvh
Well, the corny lid was nice...except that the liquid out port isn't really necessary at all when you have a racking port, and the removable lid was too small for nearly every dry hop application - a big bag of hops doesn't fit into it very well. That leaves the gas port as the only useful option...and I found some gas port fittings that I can weld onto the existing lid.

The Toledo lids are fine - especially for the price. Ideally I'd use some 1/8" or 3/16" plate, but that's REALLY expensive.

I welded some mounting points onto the sides of the fermenter for the legs.
 
I also have another quetsion for you Yuri...

Have you done any internal polishing? I have been discussing with some local engineers in Melbourne about making either just the cone, or the whole unit and they are fairly insistant that I need to polish the internal surfaces to avoid oxidation of the fermenting beer. They said that this is standard for anything to do with the food and beverage industry, but it seems to me that it may not be necessary for the brewing industry beaucse there will not be any oxygen around for most of the ferment. They also want about $AUD500 (roughly $USD400) for the polishing of inside of each one which is outrageous.
 
Never really considered it. I clean them really well and go over them with a ScotchBrite pad, but that's about it. So far, mine's working just fine, and I've noticed no oxidation.
 
SenorWanderer said:
maybe that's why they're so insistent!

Yeah, well luckily I'm not that stupid as to say...ooh ok well if it has to be done, I'll pay you whatever it costs.

Thanks, that will save me about $1500.
 
Was the quote for polishing the inside "Electropolishing" or mechanical polishing and passivation? Might be able to get a better quote for electropolishing the inside which would make cleanup and sanitazation a lot easier.
 
nabs478 said:
I also have another quetsion for you Yuri...

Have you done any internal polishing? I have been discussing with some local engineers in Melbourne about making either just the cone, or the whole unit and they are fairly insistant that I need to polish the internal surfaces to avoid oxidation of the fermenting beer. They said that this is standard for anything to do with the food and beverage industry, but it seems to me that it may not be necessary for the brewing industry beaucse there will not be any oxygen around for most of the ferment. They also want about $AUD500 (roughly $USD400) for the polishing of inside of each one which is outrageous.


Yeah, that's crap. Don't believe them. Where the hell's the O2 going to come from just from a non-polished surface?? It doesn't make sense, and it doesn't add up.


I own two conicals, and neither have been "polished" and I've never had a problem. Its all bunk.
My. .02 worth.
 
Biermann said:
Yeah, that's crap. Don't believe them. Where the hell's the O2 going to come from just from a non-polished surface?? It doesn't make sense, and it doesn't add up.


I own two conicals, and neither have been "polished" and I've never had a problem. Its all bunk.
My. .02 worth.

I think it's crap too. If there's no oxygen, or oxidisng agents, then I'll be fine. But things that have microscopic sharp edges, like an unpolished surface, can catalyse reactions, which is why I wanted a second opinion. Now that I have about six other opinions I know what to do.

BTW, I asked them how they would do it, and he said, in a very technical way, that they stick some pads in a drill and buff the surface....$500?? I have a drill, what's a polishing pad worth?
 
Brewing Clamper said:
So what's the final word on these? I'm just curious so I can live vicariously through ya'll since I can't afford one just yet!
100 gallons and going strong...only one bad batch that I think I can attribute to a weak yeast starter. No problems whatsoever with the fermenter.
 
Back
Top