CPVC Manifold questions

Homebrew Talk - Beer, Wine, Mead, & Cider Brewing Discussion Forum

Help Support Homebrew Talk - Beer, Wine, Mead, & Cider Brewing Discussion Forum:

This site may earn a commission from merchant affiliate links, including eBay, Amazon, and others.

mrgrimm101

Well-Known Member
Joined
Apr 1, 2014
Messages
1,344
Reaction score
139
Location
Lansing
I am putting together a 48qt cooler MLT and I have the cpvc parts cut out and put together for the manifold. I want to use cpvc cement on some of the pieces and adhere them together, but I was concerned that it might have negative effects. Would I have any problems from using the cemented cpvc manifold in the mash?

I've attached a photo of the design I went with. I bought 3/8" parts for the outside and the cpvc is 1/2". I bought a brass coupler that converts 1/2" to 3/8". Could this brass piece cause any issues?

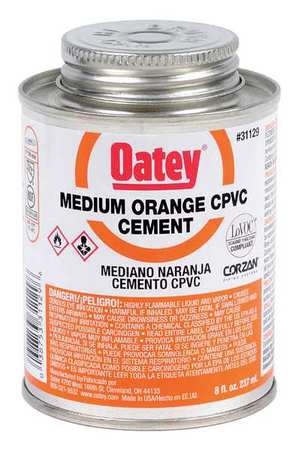
Here's a photo of the cpvc cement I got.

Thanks for looking.

1425256365924.jpg


29FH93_AS01.JPG
 
I have almost the exact same cpvc manifold and a copper reducer, been using it for about 3 years, nothing wrong with what your doing!
I have 5 long tubes, and I only glued the t's and the 90's together. The long tubes all are removable for easy cleaning. I batch sparge, You?
 
I have cemented parts for my manifold before. I'd recommend letting it dry for a day or two then dumping some boiling water in there and then letting it soak for a half hour and then dump and then you should be good to go.
 
Very similar set-up and I chose to NOT cement my pieces together. Have never had a problem with them coming apart during a mash and they are much easier to clean when they can be taken apart.
 
Great to hear. I plan on gluing the T's and some of the corners..leaving the long pieces unglued. I plan on batch sparging
 
Just a heads up that glue really stinks ! Another thing you can do is not glue anything and just put a piece of thread tape on the connections to hold it together tight. Makes it really easy to clean
 
I've actually used Teflon tape to add a little extra tightness to the CPVC connections in my manifold. This gives me extra assurance it doesn't come apart (which it has in the past), yet you can still take it apart to clean.
 
My plan was to cement the pieces where I circled in red. I figure doing the T's and 90's on the shorter sides will still leave me able to pull it apart the long ways and it should still be easy to clean everything. The rest of the connections I will use the teflon tape while in use just for extra tightness.

1425256365924555.jpg
 
Put the glue where it won't come in contact with any wort. That means, about midway through the fitting's connection.

Personally, I just wouldn't use any. Try it that way once and see how things go.

MC

That was my main concern..the wort coming into contact with any residual glue. I guess I would just be careful not to put glue toward the edges of each piece.

I might just try wrapping teflon tape on the connections and giving that a shot.

Is there any benefit to gluing the pieces together, other than it won't fall apart during the mash?

Not really, no. But that one benefit is a big one. It's not fun when a fitting slips during the mash and you get a stuck sparge because of it. Not fun at all.

I'd do a test with hot water and your mash paddle or spoon or whatever you use.

Put your manifold together and fill it with hot water and then stir the dickens out of the water without looking into the mash tun. Try your best to simulate stirring the grains in between the tubing. Stir it for a few minutes all about and then drain the water and see if any fittings came loose. If none did, then you might not need to glue anything.
 
I still have to cut slits into the cpvc, but I will do a test as soon as I do that. I ordered a cheap rotary dremel style tool from ebay for about $15 and it should arrive today, so I'll hopefully be able to do it this weekend. My plan was to cut slits perpendicular to the pipes and then use a small drill bit and drill holes in the T's and 90's.
 
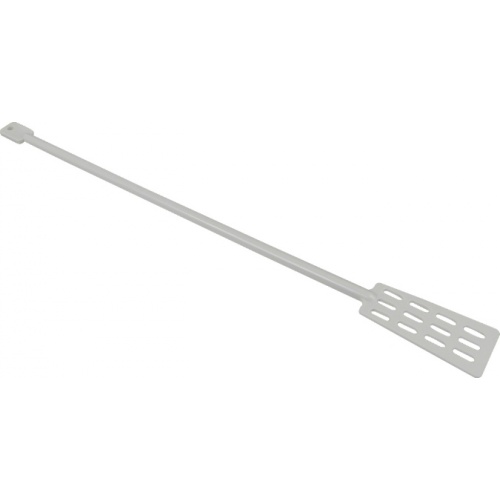
Also, I still have the plastic stirring paddle that came with my Brewers Best kit. Would I still be able to use this with the mash, or should I get a stainless steel spoon or wooden mash paddle?

9625.jpg
 
I still have to cut slits into the cpvc, but I will do a test as soon as I do that. I ordered a cheap rotary dremel style tool from ebay for about $15 and it should arrive today, so I'll hopefully be able to do it this weekend. My plan was to cut slits perpendicular to the pipes and then use a small drill bit and drill holes in the T's and 90's.


Good luck, that was the biggest mistake I made . Took me two hours Because the cheap Dremel had no power . Got mine from harbor freight
 
I don't think I would bother drilling holes in the fittings, the slits in the pipes will be plenty. If you aren't getting enough flow, you can always add more slits.

I am also in the "don't bother gluing" camp - you do have to be careul though that you don't catch your mash paddle in the manifold and accidentally pull it apart, causing a stuck sparge. I made that mistake my first time using my cpvc manifold and have been more careful since then and haven't had it happen since.
 
I wouldn't bother with the glue, I've done numerous batches with my CPVC manifold and I actually have trouble pulling it apart at the end of the brew day and that is without any tape or adhesive. I've even given it a good whack or two when being a bit over enthusiastic trying to get all the dough balls and it has held up like a champ.
 
My plan was to cement the pieces where I circled in red. I figure doing the T's and 90's on the shorter sides will still leave me able to pull it apart the long ways and it should still be easy to clean everything. The rest of the connections I will use the Teflon tape while in use just for extra tightness.

That is what I did, and just friction fit the long pieces and have had no issues yet. If they loosen up just add a little Teflon tape.

I particularly like they way you went with 4 long tubes and dealt with connecting them to the drain! Pretty clever. :mug:
 
Thank you. Its not my design, but after doing some research I decided on this one.
 
Good luck, that was the biggest mistake I made . Took me two hours Because the cheap Dremel had no power . Got mine from harbor freight

Wow I had not anticipated this problem. The cheap Dremel does cut through them, but it takes forever..it keeps getting caught up and stopping itself. It's not powerful enough to go through easily..so I had to sit and chip away at it. Some of my cuts looked reallly bad..they got better the longer I sat at it. I might be replacing some of the cpvpc lol.
 
So back when I was building the bulkhead, I did a test and found that it leaked slightly from where the metal washer comes into contact with the cooler. I was thinking about getting some removable silicone to help adhere and seal the washer and the cooler. My thought was that if I got removable silicone, I could remove it in case I needed to take the bulkhead apart, and it wouldn't damage any of the parts or the cooler.

Does anyone have any reason why I would not be able to use this on the outside of the cooler?

http://www.acehardware.com/product/...730&KPID=5591225&kpid=5591225&pla=pla_5591225
 
Wow I had not anticipated this problem. The cheap Dremel does cut through them, but it takes forever..it keeps getting caught up and stopping itself. It's not powerful enough to go through easily..so I had to sit and chip away at it. Some of my cuts looked reallly bad..they got better the longer I sat at it. I might be replacing some of the cpvpc lol.
I cut mine by hand. Then I got stupid and did both sides. That quickly resulted in poor drainage. So, I had to recut. Should have gotten a Dremel to start with.
 
I had initially planned on using a hacksaw, but many people here were saying that would take hours to do.

The dremel works, it's just that the one I got was not very powerful so it catches and stops all the time..I have to sit and chip away at the same spot. It does make a nice, mostly even slit though. Some of them are a bit hacked up..but I think it'll be ok.
 
The hacksaw resulted in a very messy cut, requiring SIGNIFICANTLY more burr clean-up inside of the CPVC than what the rotary tool did.

That's something else I was wondering about..how do I go about cleaning up the burrs on the inside? I already teflon fitted the connections and didn't want to take it apart until I needed too.. I was going to soak it all in hot water when it was built..I was hoping that would help clean it up a bit.
 
I had a small bottle brush that I used. It cleaned up some, but there was a lot that simply wouldn't pull off. I didn't want to scratch the CPVC too much.
 
I had a small bottle brush that I used. It cleaned up some, but there was a lot that simply wouldn't pull off. I didn't want to scratch the CPVC too much.

Scratchs won't hurt anything. Every thing that comes out of the mashtun is boiled. In case of a mouse turd or grasshopper body part in the grain. Actually if you take a hack saw blade and rough up the fittings and may the pipe ends just a bit they will fit very tight.
 
I agree with not gluing anything. I sized mine to fit snugly in the bottom of my 52-quart. I used an actual Dremel on mine, so I didn't have any power issues. I batch sparge and stir the crap out of my grain bed and have not had a stuck sparge or had any of the CPVC come apart (used 1/2" with no Teflon tape or glue). To clean the burrs from the inside, I took a tube brush and gave it a thorough brushing, filled the tun with hot tap water and let it soak for 45 minutes to check for leaks, drained it and ran the brush through it again. It has been nearly a perfect transition (cut some pieces too long at the start, so had to fine adjust those). Even saw a small (3% to 5%) increase in my mash efficiency from my SS Sink Braid (only problem was doing nearly 30lbs of grain crushed the unreinforced braid).
 
Band saw is what you really really want.

+1. I did mine with a bench vise and a hacksaw, it's always a pain in the shoulder. Literally. :)

I also did not glue this one together (my last one I did) just because I wanted to be able to remove and disassemble it for cleaning every once in a while. We'll see if I ever actually DO, but it's nice to have the option.
 
Wow I had not anticipated this problem. The cheap Dremel does cut through them, but it takes forever..it keeps getting caught up and stopping itself. It's not powerful enough to go through easily..so I had to sit and chip away at it. Some of my cuts looked reallly bad..they got better the longer I sat at it. I might be replacing some of the cpvpc lol.


Yup sorry buddy I went threw the same thing took forever, broke like 10 cut off wheels. They were so cheap you couldn't even put them on without breaking them
 
+1 on the band saw, if I had my plans again I could build a new one in 30 minutes or so if I had a bandsaw I'd bet. Even adjusting for things on the fly and not having built one I didn't spend more than an hour building it cause of the bandsaw.
 
I WISH my slits were that uniform and perfect. I'll upload a photo when I'm done, but some of them are hacked up a bit. I don't think the openings are too big, but maybe they are..
 
Back
Top