Whirlpool 15cuft Keezer Build

Homebrew Talk - Beer, Wine, Mead, & Cider Brewing Discussion Forum

Help Support Homebrew Talk - Beer, Wine, Mead, & Cider Brewing Discussion Forum:

This site may earn a commission from merchant affiliate links, including eBay, Amazon, and others.

Summoner12

Well-Known Member
Joined
Dec 17, 2014
Messages
53
Reaction score
10
Location
Riverside
Hi guys,

This is my first Keezer build, but last year I built a kegerator, so this isn't totally my first time doing something like this. :)

I have been wanting something that can hold a 1/2 barrel ever since I called about getting New Belgium's Side Trip beer in a keg..... it only came in a half barrel :(

Later on down the road a buddy of mine came across a 6 tap T tower and some odds and ends to go with it...

I started to research which freezer chest to buy. At first I had my eyes on the GE 10cuft as it seemed big enough for a half barrel. But then I started thinking about it. If I had a half barrel in there, I couldn't get more than maybe 2 or 3 other kegs in. Not to mention, there was a good sale going for the 10cuft, but the price shot up just as I realized the limitations of the freezer. I was glad it worked out that way.

The freezer I ended up with is the Whilepool 15 cuft, model: WZC3115DW

I really liked that this unit has a very small hump in it. In fact it only takes up one corner of the freezer.

I had gone back and forth on what kind of top I wanted for the keezer. I ended up going with a maple butcher block 'table top" sold at Uline. I got the 60"x36" top and cut it down to size.

So enough blabbing, here are some pics.


Just delivered.


The insides...

The top, uncut:


The T tower


As I should have known from my previous years of word working.... don't bite off too much...


Had issues with the maple splintering... Didn't care while it was in the middle of the cut out..... but lost a corner here.
 
Here is a test fit with the tower in place. Now I understand why they make trays with the tower cut out in them. The tray will catch dripping beer from the tap it's just very close. Maybe down the road I'll upgrade... I had my eyes on a tray that has the glass rinser in it. It's slightly bigger than this one, I think 6" instead of 5".


I kind of wish I had planned far enough out that I'd miss the light... but to be honest, I don't need a light inside. and if I decide I need light, I'll rig up LEDs or something.


Here we are with the top all cut down and tower and tray in place.


So the tower has glycol tubing to maintain it's temp... I plan to use it. :D So here is my chilling coil that will be placed on the inside. of the freezer. I will be using an old aquarium pump I had laying around to circulate the coolant.


In the stuff I got from my buddy there was a FOB detector. Only one was salvaged from the rescue operation. I jumped on ebay and found someone selling 5 units (the ones on the left) I made an offer, we settled on $60 shipped. :ban::rockin: I also found a brand new one with cracked acrylic lens (I had extras) so I ordered it, $18 shipped :D.

I realize these aren't really needed in my system, and I hope they aren't a PITA... but they're pretty cool.

I made a bracket to hold them since I didn't have all of the original brackets. I also wouldn't have used them had I had them. I needed them to be angled outward, staggered like they are in order for the beer line to fit.


Since I have no idea where the coolant lines are, and I don't want to find out the hard way. I am not drilling into the side of the freezer, at least not holes, maybe some screws.

So in order to get hoses and cables through to the inside I am going through the lid. My method was to router out a passage through the bottom of the table top and then cut a hole into the lid.


I went a bit over the top with three.... but I might need them. (I will cap the unused holes to cut down on condensation buildup.)


Alright. things are getting closer to finished. Today I did some work on the glycol cooler fins and reservoir assembly.


The suction and return to the reservoir will be on the bottom. I originally was going to have the return come from the top, but figured I might get bubbles. So, clear tubing is the site glass... copper tubing is the heat exchange.


I also did work on the tap tower. I had bend the hard lines and then realized they wouldn't fit. Today I cut them down in order to do my new plan. The plan is to use push to connect fittings at the base of the tower. Today I cut them all down and made little indents in the SS for the fitting to grab onto.
 
I did a mock up assembly of the inside panel. I had t make the hard lines between regulators shorter for better fitment. I am also replacing the gauges since the old ones were really corroded. After the mock up I also had to figure out where holes would be drilled for the bottom of the regulators... photo will better explain, but there is a pressure relief that sticks out oddly from the bottom. Once the holes were made I did a coat of clear coat. I was able to get two coats on tonight.


Here are some updates....

I've been running the freezer with a couple of empty kegs and a partially full keg with my Inkbird controller. I think it's been running since I purchased the freezer. Well I was doing some fitment testing today and found some unpleasent rust at the bottom of the fridge. I let the freezer thaw out and sprayed some clear coat over the exposed metal. I am hoping this solves the issue...


I have found that small amounts of air movement make a big difference. These two are for the glycol cooler... but I have have several of these fans mounted on the lid blowing downward to keep the air moving.


Here is the panel installed.


Working on the inkbird controller box. This is a 4"x4"x4" outdoor junction box, modified...


I like what you are doing here and I'm interested in the glycol coolant.

My Perlik tower also has coolant lines and I'm just running a 3 gallon bucket filled with water that is inside of the freezer as coolant. Honestly, it doesn't work too well during the middle of the day when the sun is beating down on the tower.

Is the black PVC (?) just a reservoir or does it have another purpose? Are the copper coils just to increase heat exchange with the air?? Sight glass?

I thought about adding some copper coils and pushing them up against the freezer wall. I run a glycol system for my fermenters and have also thought about running a line all the way over to the bar...

Hi Jason,

The black piece is a piece of ABS pipe that acts as the reservoir for the glycol. I have four fittings (5 holes) connected to the tube. Three fittings at the bottom, one fitting on top, with a fill hole. The bottom three fittings are: 1- pump feed, 2- tower return and 3- sight glass. At the top, the fitting is for the top end of the sight glass tube. i an guessing you understand how the sight glass works? Fluid enters the tubing from the bottom and can do so because the top of the sight glass is open to the air space at the top of the reservoir.

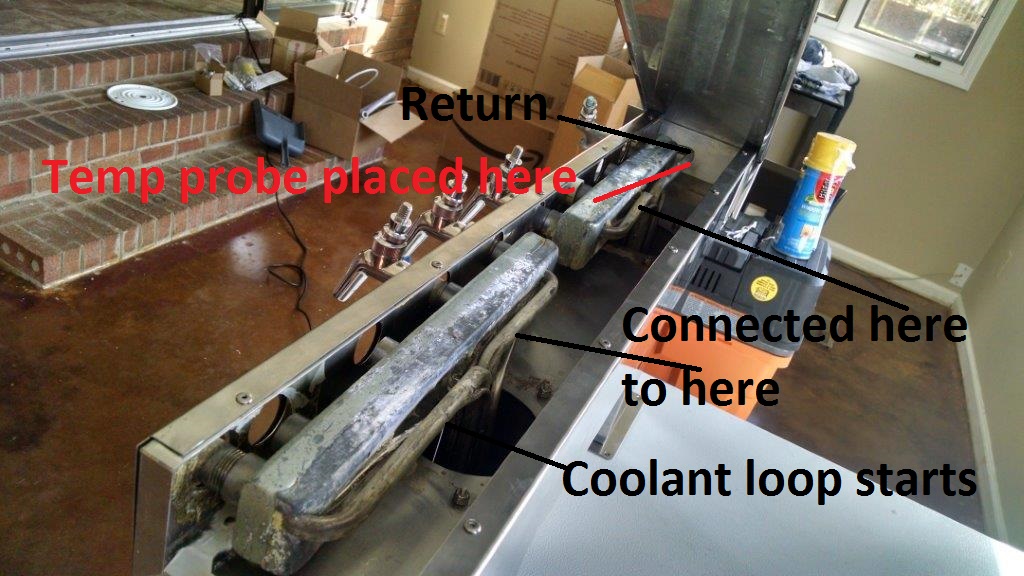
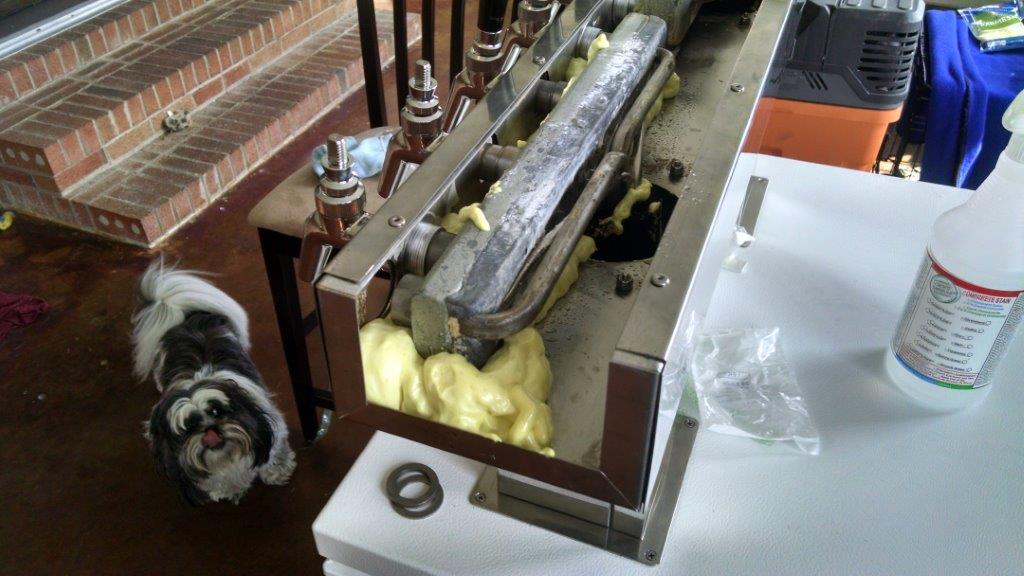
So my issue now with the tower cooling system is to properly detect the tower temperature. last night I pushed the probe inside of the tower base and stuff some insulating foam behind it. The idea is to try and isolate that area from the keezer air to get a good idea of how warm the beer lines in the tower are. This morning the tower was feeling fairly cool to the touch, but not cold. I think once I power the 'radiator' fans on the reservoir I'll get cooler temps. Plus, once I have kegs in the keezer the air inside will maintain better.

Here are current status photos:

Picked up an intertap faucet to test, nice, but I like perlicks a bit more.


Nice that's what I thought you were doing.

Using about 3 gallons of water solution I find that I have to set the temp point about 10°F higher than the keezer set point or during the summer (when the tower is in direct sunlight) I would hit a point where the "off" point would never get reached and as the pump continued running the coolant water would start to slowly warm up. Works great in the winter and spring, but during the summer I always get a foamy first pour.

Just a warning you may need to check the temps you can get before you seal everything up pretty in case you need a larger reservoir.

Pictures below are a mess and before I installed all of the insulation.

2015-03-29 15.30.00.jpg


2015-03-28 17.45.41.jpg


2015-04-03 15.06.38.jpg
 
Oh cool. I wish I had pulled the tower apart to place the probe. But I figure if the base is isolated from the keezer and is pressed into the trunk line, I'll be alright.

When I got home just a bit ago the tower probe was reading 56* with the keezer temp at 35.7.

I'm not going to stress too much until I get the fans powered and a couple of kegs installed to help balance the temps inside the keezer.
 
Air recirculation may help you. Honestly I never tried it, just insulated the entire thing and called it good!!! Was cold out and I didn't get the foam issues (which still isn't too bad) until the summer.

I think if you disconnect that screw right under the tee you should be able to pull the whole rest of it up, no?
 
Last night I hooked up fans. There are 4 that are along the front mounted to the lid blowing down. I think I need bigger spacers though, they don't flow as much as the ones in my kegerator did.

Lowest I've seen the tower temp is 49.7. Still have work to do on that I think.
 
blew through an entire 5# CO2 tank this weekend.... I had checked for leaks on both sets of regulators.... found that one of the three on my second set had a leak. It didn't seem.... THAT BAD........ but yeah, it ran the whole thing out. :( I should have removed that one regulator as it's not really needed. Oh well, live and learn.
 
blew through an entire 5# CO2 tank this weekend.... I had checked for leaks on both sets of regulators.... found that one of the three on my second set had a leak. It didn't seem.... THAT BAD........ but yeah, it ran the whole thing out. :( I should have removed that one regulator as it's not really needed. Oh well, live and learn.

At least it was only a 5#'er that dumped. Could have been worse.

The engineering on this thing looks damn fun to play with. Really fun looking at it.
 
Any update? Eyeing this one myself, given that my attempts at a commercial unit have been a disaster to say the least, and this for $400 out the door at my local HD is too good to pass up.
 
This is a nice project. unfortunately I can't see all the pics :(
I made a quick and dirty 7.2 keezer with a tower mounted directly to the lid. It's served me well for about 3 years, but now I want something more! LOL
I'm seriously leaning towards this exact freezer. how many cornys do you think you could squeeze in there? You mentioned in your OP that it has a small hump in the corner, Do you think 8 or 9 cornys can fit in the space?
I'm thinking of having 5 beers and a rootbeer at all times with a few on deck and ready to roll.
Cheers!!!
 
Any update? Eyeing this one myself, given that my attempts at a commercial unit have been a disaster to say the least, and this for $400 out the door at my local HD is too good to pass up.

I'll post an update soon. I had written this huge update and then my computer rebooted or something :mad:

I'd say, buy it. The reviews I've seen about the freezer being loud are starting to mean something to me now.... but I think it's an easy fix. The compressor sits on rubber bushings, they use pins to lock the compressor in place. These pins aren't locked in place so they rattle against the metal they are pushed through. My solution would be to use a different style or even remove the pins as long as you put them back before transport. The compressor won't go anywhere as long as the freezer is flat on the ground. The compressor itself is a bit noisy when it first turns on, but to be honest, it's not that noticeable over your TV, unless you watch TV on low volume. Even then, its just that sound compressors make at startup as it pressurizes the lines, then it seems to get quieter or I just get used to it. You could pretty easily make a sound barrier with some foam if you are sensative to that sort of thing. My plan has always been to install this into an island or place out in the garage (run a trunk line and DIY glycol cooling system :D). I also don't mind the sounds it makes. I am a mechanic by trade, sounds help me understand if things are working or not.
 
This is a nice project. unfortunately I can't see all the pics :(
I made a quick and dirty 7.2 keezer with a tower mounted directly to the lid. It's served me well for about 3 years, but now I want something more! LOL
I'm seriously leaning towards this exact freezer. how many cornys do you think you could squeeze in there? You mentioned in your OP that it has a small hump in the corner, Do you think 8 or 9 cornys can fit in the space?
I'm thinking of having 5 beers and a rootbeer at all times with a few on deck and ready to roll.
Cheers!!!

If you don't put anything inside of the freezer, besides kegs... You might get 8 kegs? I feel like I can have 7 in there with all of my stuff, if I tried.

I'd like to give a shoutout to my buddy and his build that he's working on right now. It's a insignia 5cuft. He made a deck so the entire bottom is even with the hump. I think he'll be able to fit 3 kegs, but is doing a dual tap for now. :mug:


Thanks! I'm sure 8 kegs should do fine for me and the GF LOL
Now, to get into a new pad so I can take all the ideas I've garnered from you wise men and put them into practice. Stay tuned, 2017 will be my year of the bitchen bar

cheers!
 
Well it's been a while since I last updated this build thread.

The keezer has been taken apart in efforts to make it even better. So since I build this keezer originally my wife and I have purchased a home. And we have a perfect place for this tower to be mounted in the kitchen. Our kitchen isn't very big, but there is an area of counter top that isn't used much that is near the back door to our somewhat large deck. So it's a "central" location in terms of when we have people over because some people are outside while some are inside. This location is also closer to my garage that is not attached to the home.

So the keezer... or maybe my unused fridge will become the "cooling space" for the beer. I have not decided if I will use the fridge or the freezer. I can do either. I have already insured that the fridge will hold 6 5g kegs. I have even trimmed down the plastic nubs and shelves and what not to make it fit. The only reservation I have for using the fridge is that if I want a 15g keg it will eat up a lot of space, more so than my freezer... but In the 4 years I have had beer on tap I have never purchased a 15g keg.

I'll find a way to put pics on this post.... anyone know of a good host these days?
 
No need for an image host if you have the images on your phone or computer, just paste them into the editor (see the "Upload a File" button below)...

Cheers!
That is/was a sick build, can’t wait to see the revamp! As for the pics, is there a reason you don’t want to load them direct?


I did not realize you could! Is that new?? I will upload direct then!
 
Here is a link to a question I have for my new build of this keezer setup: Link

I need to figure out the cooling and then start figuring out the trench I am going to dig.
 
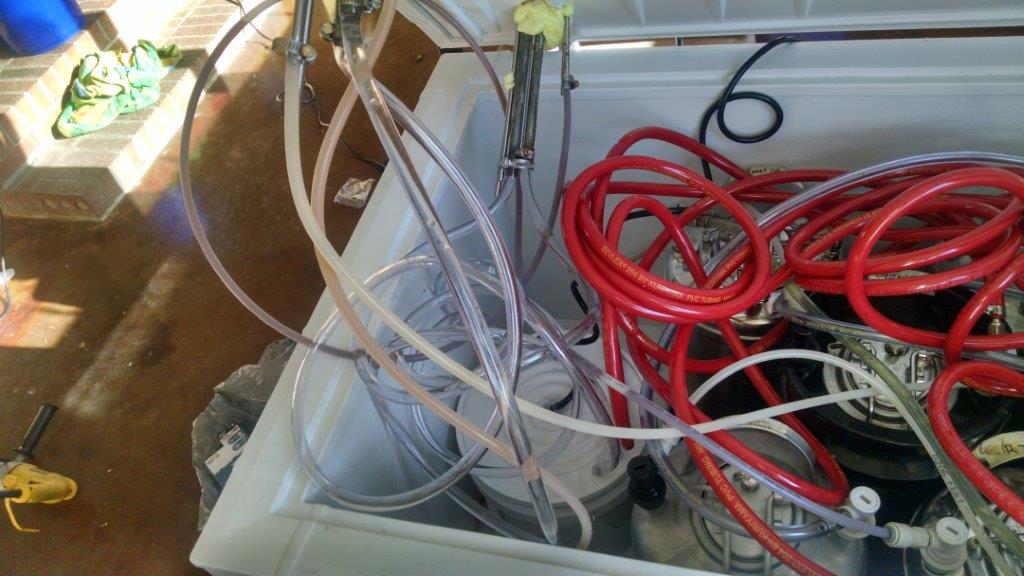
Here is the keezer all apart. Stuff getting washed, the keezer top removed, the old glycol chiller and temp control mess, the keezer through the back door (had to take hinges off) and the tower in it's proposed new location.

586262-5dad4f2733a5ec82562654f33c8515ff.jpg
586259-9ff71737edc6c2356bbe5b8d787d218f.jpg
586260-0e620da09ccdc6a16b2428a54620cbb4.jpg
586258-40b2e6b4ce9d496968e2fe4b539537dd.jpg
586261-e0f811fc07d63fd3730741d01af25026.jpg
 
That will look great! How far are you piping everything? Can I take the trench as you are taking it underground?

Yes, there will be a trench from the garage to the house. The trench will be about 20-22'. Then it will need to come up the side of the house about 6-7' and go into the house about 12-16". On the garage side the line needs to enter low so it gets as little sun exposure as possible. That wall faces west and has no sun protection in the afternoon. I want to give myself lots of room at that end for being able to move the freezer or fridge around. So overall length I am thinking I'll need 40-44' of trunk line. I spoke with Micro Matic and they said I'll need to get beer pumps to go that far or need a gas blender. I would prefer pumps because it'll be a little cheaper and I can run those on compressed air in the garage. That way I am not buying gas all of the time.

I will need to put the trunkline into a pipe of some kind, obviously. I need to figure out how big the pipe needs to be and then I'll make the decision on type; ABS or PVC. I was looking into ABS because of the different types of fittings. The pipe will enter the house from the outside wall and pass into the house through the kitchen cabinet. This portion of my house where this will be is on the side of the house where my driveway is, but near the back, behind a tall fence. So this isn't seen from the street, and not really seen when in the back yard. So I am not super worried about how it looks. I want it to be clean, but I don't care if it looks like toilet plumbing to the wall HAHA. Who knows, maybe I'll build a box around it... it would help with keeping the sun off of it. That is one downside to this portion of the home, the house faces south, so this is the east side of the house. The sun won't hit this area until maybe 8am and then until noon. But out here in the IE it gets HOT in summer.
 
Wow, that is quite the undertaking (but should be totally worth the effort)!!
You might look at PVC conduit to run the line set through. Long sweep elbows in the electrical world are longer and more gradual than the plumbing versions and may help when feeding your lines through.
 
Back
Top