Walkin Cooler TX Build

Homebrew Talk - Beer, Wine, Mead, & Cider Brewing Discussion Forum

Help Support Homebrew Talk - Beer, Wine, Mead, & Cider Brewing Discussion Forum:

This site may earn a commission from merchant affiliate links, including eBay, Amazon, and others.

Phischy

Well-Known Member
Joined
Oct 20, 2011
Messages
82
Reaction score
19
Location
Houston
My dad and I are going to be building a walk in cooler in my garage this month. This build will be a bit different from the NM build since it'll be in an extension to my garage and will be built using spray in foam. I'm also going to be building 2 side chambers for 14 gallon conicals. The idea is they will draw cold air from the cold room to chill the fermentation and also have heaters. Ideally this will reduce the footprint and power consumption from lots of fridges and chest freezers.

The cooler will have 9 taps off one side. I read Izzy's thread and will draw ideas from it and from the coolbot website, which I will be using as well.

Currently we're installing radiant barrier in the existing 2 walls that are the garage. The floor has been epoxied and we have the insulation in hand. We're finishing the rest of the garage, this weekend hanging sheetrock on the ceiling, then float/paint it and install a lower run of FRP board before starting on the cold room itself.
 
I moved to Houston. Guess I need to update my info. I will add pics. This weekend we are hanging sheet rock, cooler build will begin maybe next weekend.
 
Should have some warm weather, if a little rainy, next weekend, but you'll be inside anyway. A little rain won't affect you. Have fun, and include pics.
 
This build is actually several things at once. We're finishing the garage, adding water and sewer for a sink, finishing the floors and building a cooler. My wife is very understanding and her only request is she parks her car in the garage. Ok, done.

This is what the garage looked like when I bought (trailer is my Dad's for demo, and he's helping a TON with the work on the condition I keep his kegerator stocked with beer):

b58a232b-6929-4a2a-b536-3b7567cf0ed0_zpsxciienrz.jpg


71a7167b-8b87-4016-82de-4d7da2f912d1_zps0ycjhxla.jpg


In the back of the garage is a 9' deep, 14' wide extension with a window off to the right. You can't see it, but that's where the light is coming from. The cold room will be back there. Along the right wall of the main garage will be a restaurant sink. We had to have a plumber come in to replace the old galvenized steel plumbing with PEX. And since he was there I had H/C water brought to the garage and another C line to the rear of the garage. Meanwhile we had to trench for the waste out to the main sewer connection. Which thankfully ran out the rear of the house.

Before all that started, the garage floor was poured in '78 and was in bad shape. So I decided to epoxy it. I have spent countless hours rubbing, brushing, degreasing and powerwashing that floor. All before the acid treatment to open it up. And then powerwashing it again.

Before (and my camera was stuck in some weird filter)

garageempty_zpswgox0nul.jpg


And after 4 1 gallon kits of 2 part floor epoxy from Sherwin Williams. Only buy this stuff when it's on sale.

garageepoxy_zpshjbbyhoi.jpg


Once that was done and it took forever due to needing the garage for all the work going on in the house. We replaced the rear window with a door for access to my brewing area.

garagewindow_zpsheoywi1m.jpg


And to keep a million photos from being published, this is what it looks like after we started the drywall. And before the drywall happened we had an electrician come out to put more power to the garage. Which required a new and upgraded panel and meter. Ouch, that sort of hurt the budget. But I had several new 110v/20A circuts plus 2 220v/30A circtus, one for the AC and the other for my tablesaw. I had to do a LOT of rewiring and moving lights inside the garage and adding 3 sets of floods outside. As of this posting, that's all done. As is the wall drywall and this weekend we do the ceiling.

reargaragedoor_zpsdooyswmb.jpg


Walls will be painted and a row of FRP will be attached lengthwise on all surfaces with a plastic baseboard, basically making the interior able to be washed out with a hose.

Then we trenched for the sewer:

trencher_zpskan4fp32.jpg


Made narrow cuts, but it cut the smaller roots and made clearing it out easy.

brickup_zpsu9jmj9v8.jpg


Bricks up. We've yet to replace them, that's March's project.

trench1_zpsktq5pwiv.jpg


9ef87934-034f-4352-859c-c43e135dcf88_zps9ihey8lg.jpg


We ran into all sorts of old stuff including water lines for the sprinkler system, the power lines for it and not to mention at one point the was a hottub in the backyard and we ran into all that plumbing. It was a real PITA. But it's done.

Now back to the cold room. I'm using a spray in foam called Foam it Green which is a closed cell, fire retardant and vapor barrier. In TX with the humidity this seemed the better way to go. Using true 1.5x4" boards which we cut down to give a 4" wall cavity for an R28 value. Using the CoolBot website plus the other posting here to figure out the build. We will being making it airtight. 5.5'x8' foot print. To make matters complicated, there is a beam across the opening for the garage expansion and we're going to have to build that into the box itself.

So construction is going to be....interesting. And 2 individual fermentation chambers off the side of the coldroom to draw cold air for fermentation using PC fans and PVC ducting. I'm also looking into BrewPi to build controllers to also log fermentation temps. Just so I can see if the damn things are working.

A whole lot going on.
 
This weekend we finished drywall, next weekend is painting and FRP around the garage and then time to start building the cold room. I need to find an AC stat!
 
9a93b089-d31c-4b49-b4f1-d5853017484b_zpsubmzefva.jpg


The area in the back left is where the cooler will go. The radiant barrier, with kleats between the AC placement. May have to move electrical around but not a biggie. Difficult to see but there's also Cat 5e cable dangling for a future BrewPi install to monitor the fermentation chambers and cold room temps.

8013e8be-c3d4-413e-af47-cb4b4c5a128f_zpsvtoktc6v.jpg


Picked this up at auction. Brand new and scored it at 40% off. 3 bins, 5' wide. Not installed in this photo, lots to be done first. This weekend will be priming, painting and it'd be pretty sweet to get the FRP board up.

I know these aren't the posts you're looking for, but it's getting there.
 
Next 3 weekends will be construction of the cooler. Finally. Saturday we are building ceiling, floor, and 2 walls. Sunday getting those in place. Turns out absolutely no one carries window AC units in the middle of winter locally. Well, unless they have a heater and that's an unnecessary additional cost. I found 1 online store which carries what I needed and it's on a truck. I don't expect it by this weekend. I do have the plans so we should be cutting the exterior garage wall and framing out for it. Not in a huge hurry to get this done right. Due to the cost of the insulation we are taking our time.

Garage has been painted. Hopefully get the FRP board up this Sunday as well so I can figure out how to install the sink. Moving right along.
 
Can't wait to see how this will work in the Houston heat and humidity. I had thought about this but changed my mine due to the fact that inside my garage it gets close to 95-100 degrees in the summer. You are about 50 miles from me. I will be working on turning one of my garage bays into a beer room with insulation in the wall to have my fermentor, keezer and most of my brewing supplies in there. Still have yet to make the keezer, just bought a 9.0 cu ft freezer at Lowes. And so the saga begins for me... Good luck with your build!:D
 
This is why we are over building it and went with a much more expensive insulation. There is the possibility it'll fail, but having done a lot of reading on the store it cold website, I'm confident we can pull it off. Others have so there's no reason to believe we cant. We've been designing this and thinking it through for months now. The biggest issue is how often you go in and out, during the week there will be nearly zero entries. The biggest failure point is the door and the gasket.
 
Pictures coming. 9 hours of work today, probably the same tomorrow. We blow insulation in, and start to put walls and ceiling in place. Pretty stoked, but man this is work.
 
Alright, made good progress this weekend. To recap had an electrician run new power. Then epoxied the floor, then finished the garage. In between the studs we put cleats, then a radiant barrier. Ordered the GE AC unit but it hadn't arrived, so we looked up the install instructions and went 1/2" larger than minimum size opening, then we framed out for where the AC will go.

Because we are building into an existing structure for 2 walls, we added 6mil plastic sheeting to act as a vapor barrier. This is overkill as we also used Foam it Green which is a closed cell spray in foam. Which is also a class III vapor barrier and fire retardant. Which is my garage burns down then the cold room might be the last thing standing. The extra barrier is just added insurance in TX, no idea if it's actually worth it but it's cheap. We started high and draped down.

3072f2bb-18aa-45eb-a720-824d0ce46ccd_zpsvsphfmqg.jpg


TO make things interesting we just construction adhesive to make a mess, but to also keep the plastic in place.

0bfdb3b4-e9b5-443d-9af3-c5ec477c8c63_zpsp8wqjyed.jpg


Floor, ceiling, and the left wall, which is in 2 parts because of the beam going across the opening for the garage expansion. From here I sprayed the insulation. We used a thin hardboard which is the inside of the cold room. This way we are able to spray the insulation against the corners to prevent all gaps and because the foam expands the 'ugly' side faces out. All the excess had to then be cut down since these walls will fit flush against the existing wall or the floor. On the ceiling we put more radiant barrier so likewise it had to fit flush.

5180af84-a307-46f5-8992-e4a9ff799989_zpsyts0ejxd.jpg


Spraying this stuff sucked. It's more designed to be sprayed into vertical walls and as such you need to be within 12" away, so the center cavities were more difficult, and you're supposed to spray 1/3" thick and then it starts to expand, fairly quickly. You use a fan tip on the 2 part bottles and it shoots with some force, so as it hits the floor and the wall, that builds up quickly and expands faster. So basically it took 4 rounds to fill these and the end result was a lumpy mess.

It wouldn't have been so bad, but walking on the studs, balancing in a full hazmat suit, respirator and goggles made it difficult. This is not how the product is meant to be installed so we just rolled with it. And then cut off the excess with old school crosscut saws.

b39934fa-2ece-40c4-b763-db4c1d7080fc_zpsc8j0azvi.jpg


2 guys from my homebrew club showed up to help out, thank god they did as it turned into a more time consuming mess than I expected.

And lastly, fitting things together. The left wall went in first and was screwed into place. Then the ceiling lifted into place and the ceiling will sit on top of all 4 walls. Floor isn't in place because we have to build the back wall first, and then we're going to spray that one in place vertically.

Each panel also had the same 6mil plastic sheeting glued and stapled to the back. Over kill, but do it right and do it once. This was a pure pain to get into place:

95ebc16b-7b33-47c9-8926-ead8bb86d0b8_zpsx0qn1jsy.jpg


Every point where two walls join will be caulked with cold temp caulking. The ceiling is currently 1/4" high off the top wall and will be lowered later.

The interior will then be sheathed in impermeable sheets of plastic, similar to FRP but smooth. And glued into place. All seams will be caulked. The floor will be epoxied. This week we're figuring out how the next 3 walls will be assembled. AC should also arrive and we'll work on getting that in place as well as running wiring for lights.
 
Thinking about this all day, decided to add 1.5" of rigid insulation to the left wall. For a few reasons, I'm not super happy with the spray insulation job I did on some of those panels and they were the first ones I laid down. I'm very happy with the ceiling and floor. Adding the extra insulation will and R8 value to it, and it will help tighten the wall up. The pale board you see in between the narrow portion and large width is a 4x6 stud used to support the beam. I'll spray insulation there since it's shallower than the walls, but adding more to the exterior will calm my jitters over 3" vs full 4" of insulation.
 
9.5 hours of work last weekend (x2 since it was my dad and I).

First we built the back wall and moved the 110v electrical. Next we moved the floor which we had built the previous weekend.

aa078a50-4d30-4a99-9cec-0bfcd596cb9e_zpsrhq2kryl.jpg


Next we built the right wall. Due to the beam we had to build this in place. This took about 4 hours, sort of blew my mind, but the other issue is the floor sloped and of course nothing was square. We also put caulking at every butt joint, and caulked every joint. This added a lot of time.

882c1a4e-7213-41d8-af5f-de94744d764b_zpstogd5hsq.jpg


Next was the front wall with door. The floor sits inside the walls, the walls extend to the concrete. so, we had to build up for the door to be level with the interior. It's a 32" out swinging exterior door. We built installed the bottom sill, left and right beam and the top plate. From there we laminated a bunch of 2x4's together to go under the door, to make sure it was level, we ran it through the tablesaw to get the perfect height. Then we installed the king stud to the left of the door, then caulked the bottom and left stud, installed the door and screwed it into place, installed the right king stud (caulking the HELL out of it) and screwed it into place, then the top in the same manner. Then caulked every joint. Again, and again.

Then we framed out where the taps will go. 24" inside the next 2 studs to accommodate a drip tray from ACU Metal Fab. I've bought quite a few products from them and the quality is top notch.

51231ec4-bfd7-4158-8341-e094e0016bc8_zpsozekfxsf.jpg


Next up was to cut and install hardy board so we had something to spray against. We didn't want plastic sheeting because it would bulge. Hardy was cheap and we caulked every stud. Any chance we had to seal a joint, we did it. We are going through tubes at an alarming rate.

In this photo we still had 1 panel to install.

cb330c50-1a05-4367-b081-2aefc5079336_zpsswwzvz7n.jpg


And now time to spray the insulation on the back wall, right wall and front wall. Goal is to spray 1/3" at a time and let it expand, wait 15 minutes, then respray. You start by hitting the joints so its nice and tight, no gaps. But as the back and side walls expand, it turns into a real mess. This took 4 cycles to get it done and we should have over estimated the product we needed by 20%. So there were so areas where it wasn't 4" deep (for an R28). Since the interior is actually larger than I planned for, we're going to install rigid insulation which is R7 for 3/4" sheet.

Spraying in progress, can't remember if this is the 1st or 2nd pass:

1c38d573-5e37-4b1f-8fd9-3082a230f956_zpskjazr0e1.jpg


And after 4 passes:

165015c1-64fe-4ca4-8b68-d6840fbe4239_zpsy546fbce.jpg


Let it cure over night and then use an old school cross cut saw to cut it flush.

88e1f69c-3af1-4099-9dd8-d6716c77d0eb_400.jpg


Now the insulation cut down:

a8804221-d75c-4404-9c70-2178b5a28e13_zpsknt9evd9.jpg


Not sure why it's black and white, came from my dad's phone.

This week we're folding up the vapor barrier and adding wiring for lighting (actually done before we sprayed the insulation) and then finish all the dry walling. This weekend we skin the interior, then install the rigid insulation and seal it up. Then start framing out the fermentation chambers, and start adding the FRP board to finish the garage and the exterior of the cold room. The interior will be skinned in recycle plastic rigid sheeting. Which is 1/2 the price of FRP.

For the 2 fermentation chambers we're building will be insulated with rigid insulation as we crushed through all the spray in insulation. Shooting for an R25 factor. Once those are done, I'll epoxy all the floors. AC unit was delivered and we'll install it this weekend as well. I estimate another 2 weeks for it to be fully finished.
 
My dad and I are building this at my house and he is a retired engineers and furniture maker. For the most part this is just construction grade carpentry. However, we spent a lot of time selecting the straightest boards we could find, then milled them via a jointer and planer to make them as square as possible. He also does work on it while I'm at my job. To date there are over 70 man hours involved in this. Just in case anyone is curious is wondering how long. Most of this has happened in the last 2 weekends where we work 9 to 10 hour days. It's been exhausting.
 
Cool build. A wire saw may be easier for trimming up the extra foam if you can find one long enough.
 
For sure. My garage doesn't have the same tool stock as my dad's cabinetry shop. You really only need a saw long enough to touch both studs at the same time while sawing. The studs act as your guide. We built this mostly on 18" centers. For the cavities where the foam isn't 4" thick were treating the worst of it with the small cans of Great Stuff. And then 3/4" rigid insulation to finish it out. We also have to add insulation to the door. Lots of work yet to be done.
 
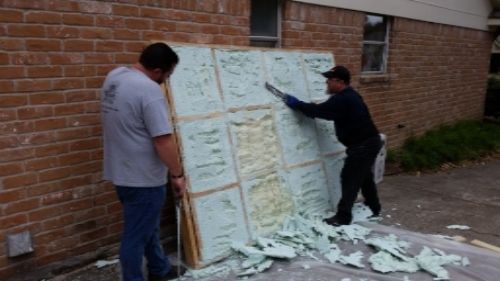
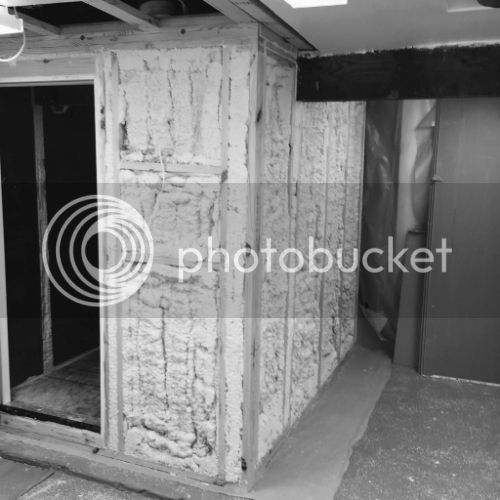
This past weekend was putting the FRP up, stuff uses a LOT of glue, applied with a V notch trowel. Boards are fairly heavy and awkward due to their flexibility. And the cement, although water based, is just an absolute mess. However, it finishes nicely.

29877701-d5ac-42a0-9b7f-fb461128bd98_zpssji9m4bp.jpg


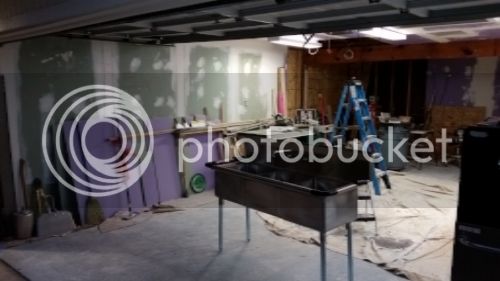
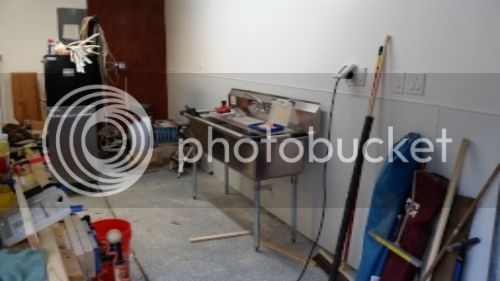
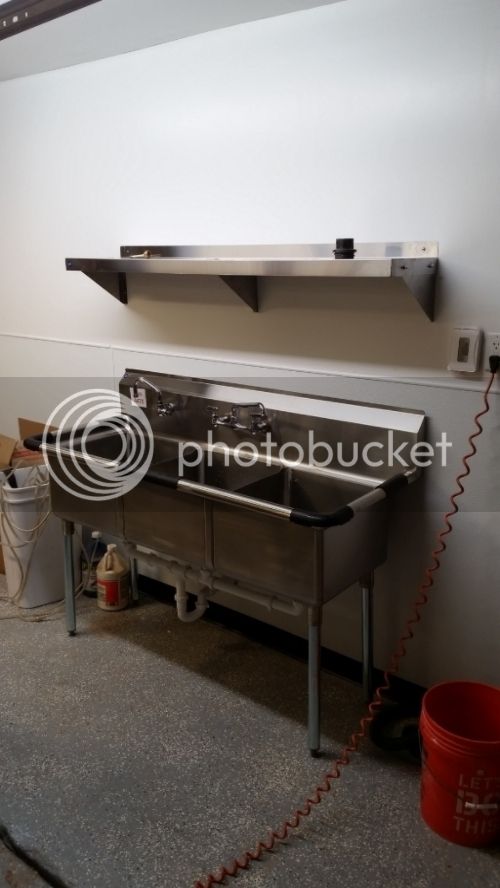
And it looks like I'll have enough room on the far side of the sink for my big chest freezer. With any luck this will be I start to do sour beers.

The FRP was heavy and had to be cut with a carbide tip blade, so it ran through the tablesaw and skill saw easily. You could use a utility knife but it just took awhile. FRP is $32/sheet.

Due to cost, we went with a recycled plastic sheet, basically the FRP without the FR (Fiberglass Reinforced). This stuff was much easier to cut, but was extremely flexible, which made it a huge PITA to work with, but it was able to adhere with liquid nails, vs the more expensive FRP glue. We decided to use this in the cold room. It's also impervious to moisture.

Start with the ceiling, but the glue doesn't adhere instantly so we had to cut a sheet of 3/4" rigid insulation, put the plastic sheet on it, glue it up, then use the insulation to press it against the wall, although with 4 cleats kicked into place.

225d902d-ca8b-4d28-bd4e-a7ec3ab438ee_zpsfp1hzcbn.jpg


These were made from the leftovers of cutting the 2x6's down which we constructed everything else with. Dad's idea, worked out pretty great.

Press it into place, leave for an hour, then the other half:

2bf95629-dadb-45de-84d0-29623454fb6a_zpshgvhwuua.jpg


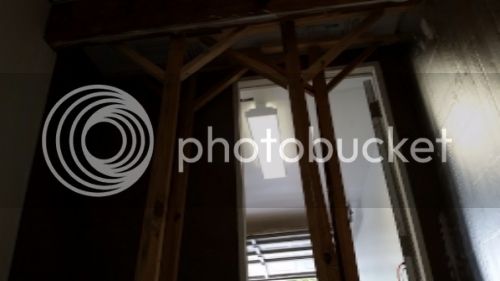
And finally the last little piece on the other side of the beam.

f839137b-aeb3-45e5-a0df-7e7187fbd5f8_zpsk7zwn5o6.jpg


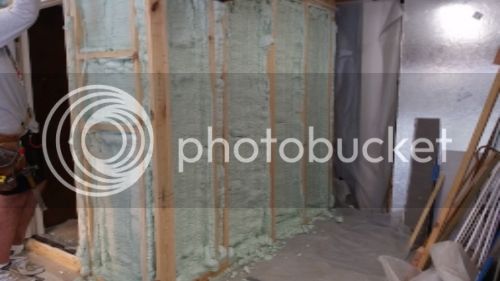
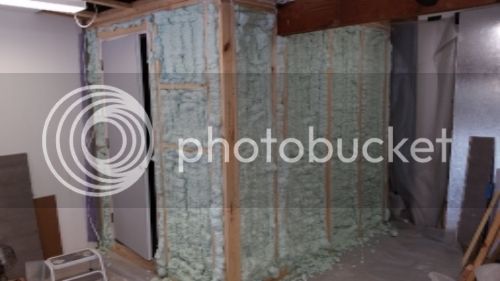
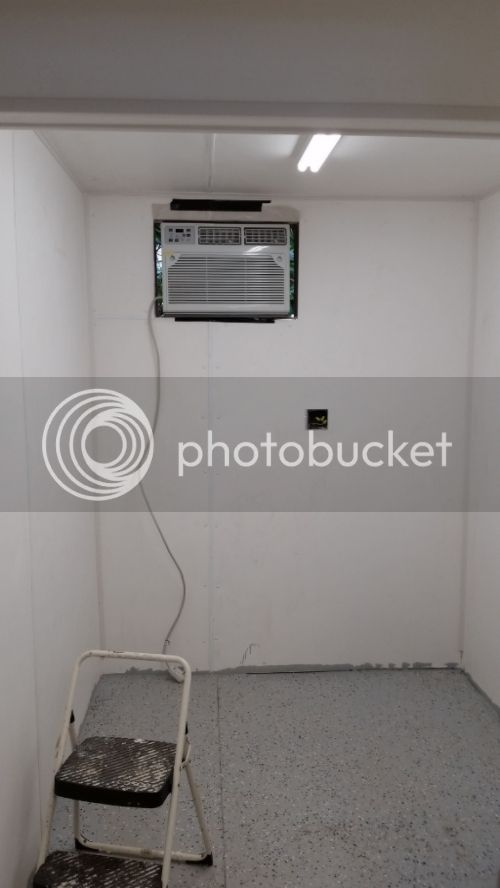
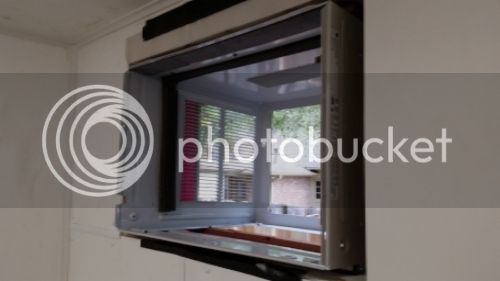
And that room is well insulated, 2 men 6'3" and 6'7" 250lbs+ each...it got hot in there FAST. I wish we had the AC installed so we could have had turned it on.

Last:

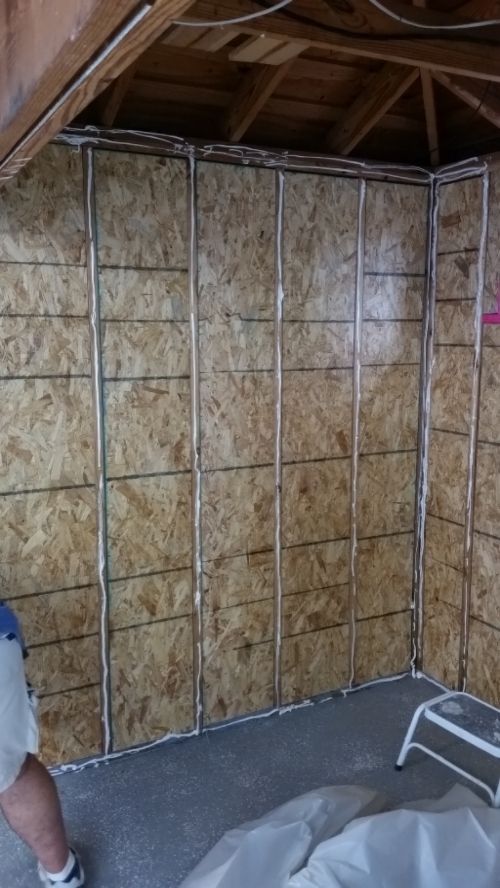
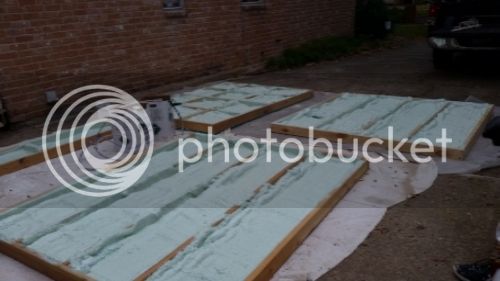
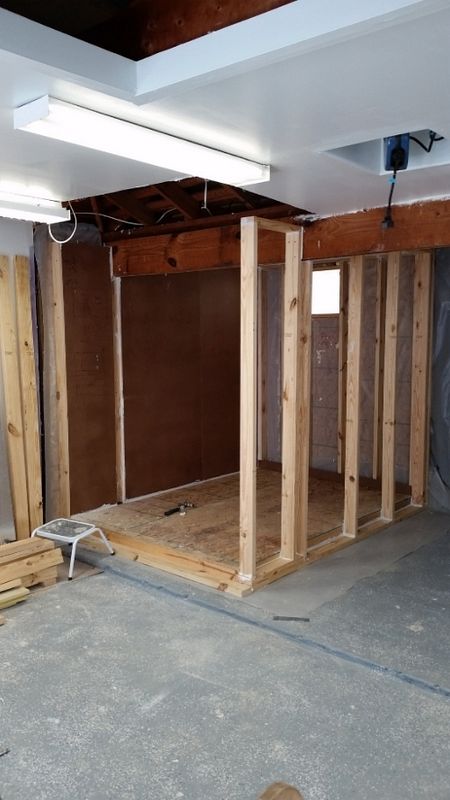
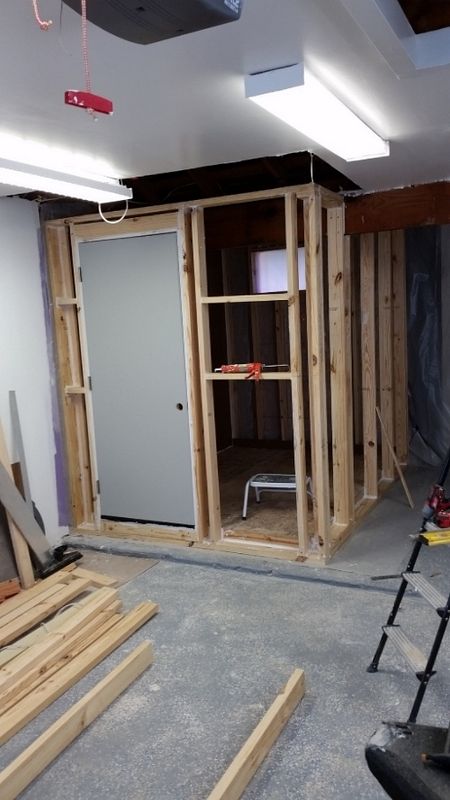
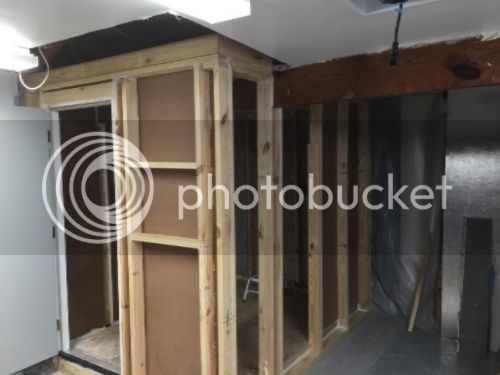
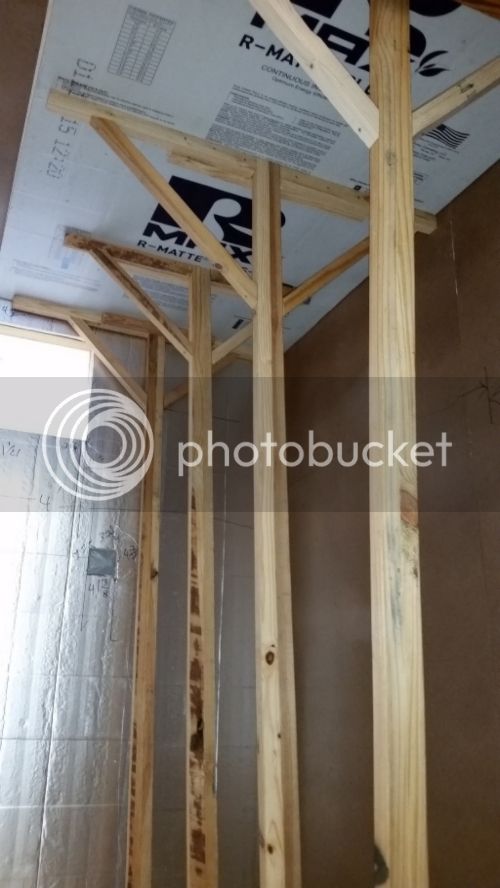
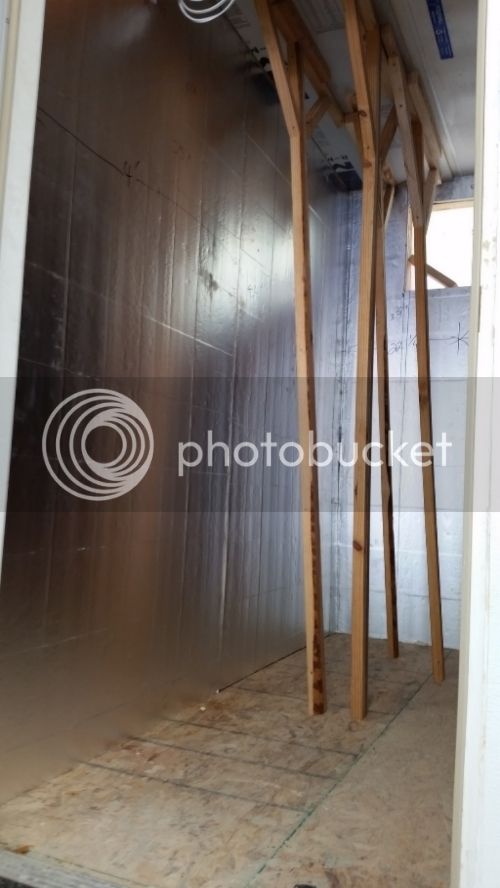
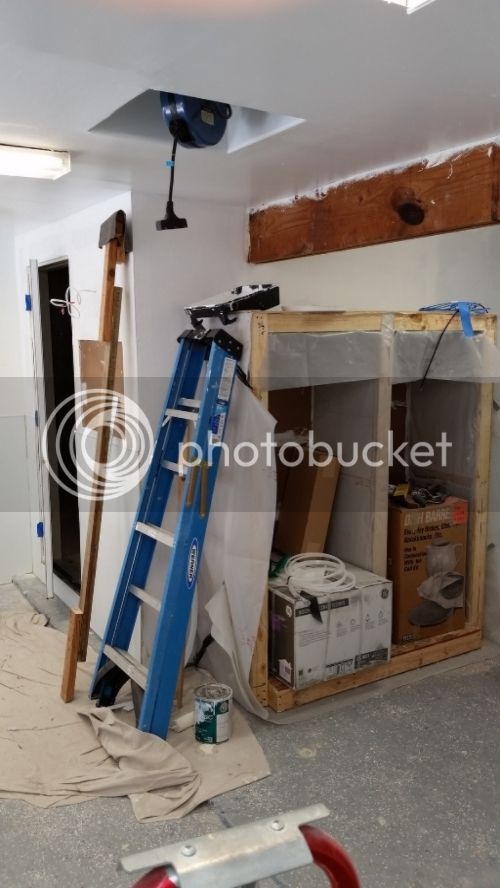
Fermenting Chambers, still need a lot of work, but the frames are up and insulated. R20 for these using the rigid insulation. We've figured out door design, just need to find a gasket that will work to determine some depths of the rabbits which need cut. Anyway, where ladder is leaning, the 2 chambers are recessed from the front wall of the cold room to allow for a glassware cabinet. Simple shelves and doors with plexiglass to make sure it won't shatter.

21597897-1bdd-4c89-8eda-2554f840877c_zps2e6ndzvt.jpg


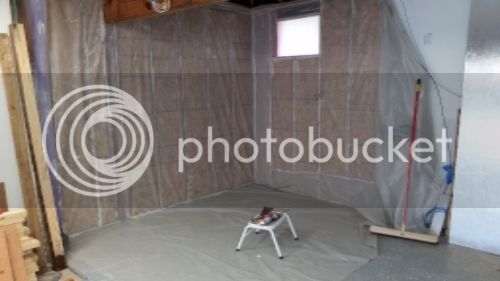
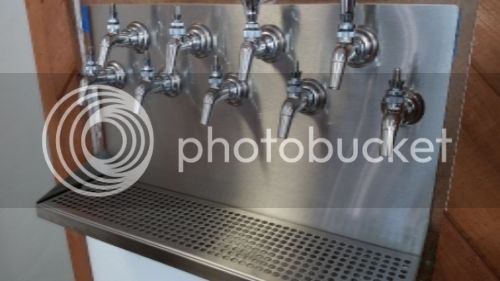
I didn't snap any photo's in the cold room, the room is far from square so we have to put trim on all corners and once that's done, I'll epoxy the floor. That'll be done before the weekend. AC install on Sat. Still need to add insulation to the door and of course, start to mount the drip tray and shanks, which I've yet to buy the latter.

So damn close to having this thing done and the rest of the garage. Also need to put the rubberize shoe molding up.

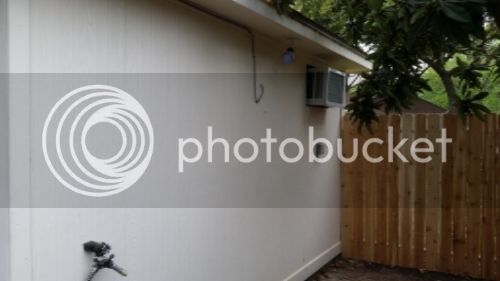
Tonight I epoxied all the floors, tomorrow we get the baseboards up and my dad is building the face fram and doors to the FV chambers. Need to insulate the door and buy the shanks. On Sat we install the AC and pretty much turn it on. The exterior still needs to be trimmed out and the tap areas built and lights installed. But it's FINALLY coming to a close.

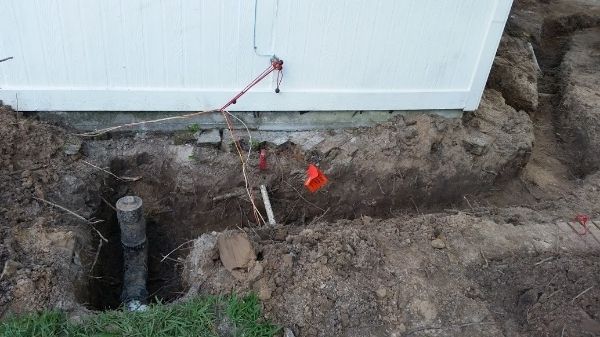
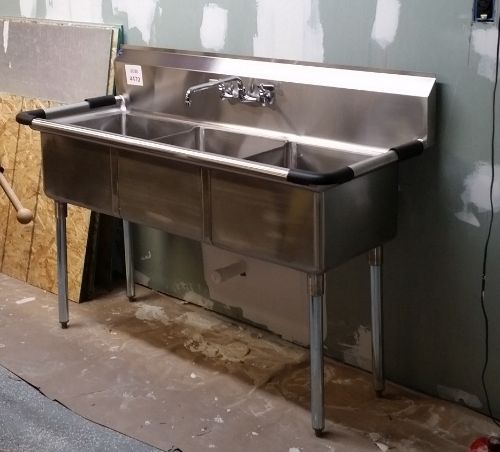
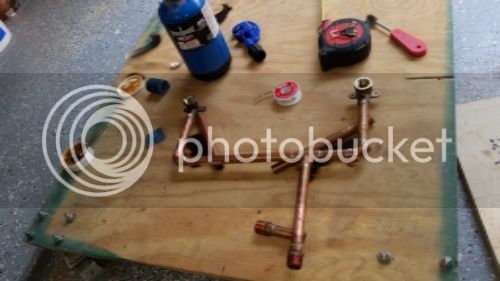
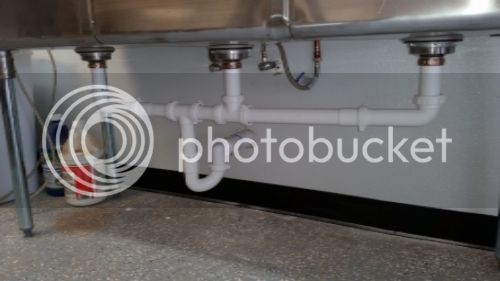
And I need to figure out how to plumb in the sink, waste will be easy, water will be more difficult since it's not designed for a bottom up water supply, but out of the wall supply. Good times. 2 more weekends and this thing should be finished.
 
Got the AC installed last Sat, but need to wire it up and insulate around it. Also got a 4' LED light installed. This weekend we work more on finishing it out

For the fermentation chambers we are building our own door and found a gasket manufacturer who welds all the corners together and builds custom 1 pieces gaskets. We are putting the gasket on the face frame vs the door since we are building 'flat' doors with the insulation going into the 4" opening. In the end he's sending us samples so we can play around with the design. This part we're totally on our own and I'll explain in better detail once we figure it out.

You mentioned the use of computer fans to cool your ferm chambers. Care to elaborate? I used a similar technique on my first ferm chamber and i could never keep my fermenters at consistent temps without the use of 2L ice bottles sitting next to them. Here's my crappy build thread. I ended up insulating a lot more than what's shown, but still had issues. Hopefully you'll have better luck than I did!
 
I haven't fully thought that out yet but I have the idea in my head. The first thing I notice is I will have a ton more cold air to draw from. I think part of your issue is your chest freezer is packed leaving not much cold air to draw and your drawing from the top which is the warmest part. Depending on where your sensor is, you could just be recycling warmer air.

My cold room and fermentation chambers will share a common wall. So the piping I'm using is only 5" long and it's straight. My thought is to have an in and out, with 2 fans pushing air to really turn the volume over. I also plan to have a reducer from the fan to the pipe to really channel the forced air.

The hard part in my mind is designing a flapper on the end to close off the pipe when the fan is off to prevent cold air waterfalling and crashing my yeast.
 
The hard part in my mind is designing a flapper on the end to close off the pipe when the fan is off to prevent cold air waterfalling and crashing my yeast.

Perhaps using a dryer vent exhaust would work? There are a few types... these louvered types and a baffle type (with a swinging flap).

417Uq-4C3vL.jpg


Swinging flap may work best though.
31f8KMZf98L._SX355_.jpg


Either way, your fans should have no problem opening the louver/flap... you'll need one each for supply and return air. Both will shut when the fans cut off, effectively closing the fermentation chamber.
 
Last edited by a moderator:
I was concerned about 2 things, 1) those things are way bigger than I need and 2) because they are so big I don't think the louvers will close tight enough to prevent the rooms equalizing. I have a friend with a commercial nano brewery and that's what he's using for his 3bbl fermenter but those are way bigger than my 14 gal conicals.
 
df474888-9df7-4e74-a490-1b64722a02bd_zpsnt7vm0uy.jpg


AC installed, but not insulated or trimmed out from last week.

5b05900b-86e2-4083-bbcb-9767bb99f305_zps6eng99kx.jpg


And the shell which mounts first and get that square and level, then the AC unit slides in and is screwed in.

6380d3fc-3e98-49ac-b53d-4c512a87cf66_zpsswitjlsw.jpg


Tomorrow we insulate the AC unit, install the plugs, get the cold bot in place and get the extra insulation on the door on. We're going to repaint the outside since it got sorta dinged up and scratched and gray sucks so...
 
Get some neoprene or rubber gasket material sheets or something similar. Cut your pipes off just a little bit proud of the wall, not much just a little. And then screw the sheets above the pipe into the wall to flap down and seal the pipe. Make sure you sand the leading edge of the pipe smooth. I think that should work
 
I was going to do something like that, but cut the pipe at a 45d, with the cut facing up, that way the flap will fall down and rest on the cut. The weight of the flap ought to be enough to 'seal' it. This will take some trial and error to figure out once I have the setup to see how hard the fan can blow. Should start that next week.
 
I was going to do something like that, but cut the pipe at a 45d, with the cut facing up, that way the flap will fall down and rest on the cut. The weight of the flap ought to be enough to 'seal' it. This will take some trial and error to figure out once I have the setup to see how hard the fan can blow. Should start that next week.

10°-20° off vertical would probably be plenty of slope to rest a flap against. 45° may be too far to horizontal and your fans may not be able to push the flap up sufficiently.
 
Long time to wait for an update but between family visiting etc... it's taking FOREVER to get the last 5% done.

And, haha, this post has nothing to do with the cold room. Lulz.

For any brewers looking to improve the quality of their brew area, any SS tables, sinks, shelves etc... you should check your area for restaurant supply co surplus auction sights. In Houston there's Main Auction Services where I picked up a 3 basin sink, shelf and faucet. I bought a single faucet from Chicago Faucet Shoppe. The single faucet will have a bottle rinser. Basically, if you're going to do it, do it right.

I used a titanium step drill and cutting oil to create a new hole for the 3rd faucet. Now, what made the project difficult, in a commercial setting the plumbing will come out of the wall horizontal, my plumbing was traditional with valves coming out a foot above the floor, and above the drain. Also, in a commercial setting the drain will be a floor bucket and won't be hard plumbed into the sink. So I had to improvise, which actually wasn't that difficult.

Since I had a hot and cold supply and 2 hots and a cold in the sink, I sweated some copper and made this:

edc72995-2feb-470d-bfea-f51ee71879c3_zpspkiasofe.jpg


This split the hot side, those are 90d drop ear fittings, 1/2" slip on the bottom and threaded coming horizontal. They just screwed into the FRP and I used pipe brackets at several places to really keep it tight.

Drain setup:

1366e2a7-4815-439d-82d0-fa8bed209c23_zpsu3p6ikpb.jpg


All off the shelf.

The sink:

195a8006-d70c-406d-82a7-ae3810a7924b_zpscs9k2agg.jpg


As for the cold room the drip tray and faucets are installed. Tonight I put up the rubber floor moulding. Tomorrow I have to finish the electrical and install the housing to protect it. And that's it. I tried to buy shelving for bottles but HomeDepot was sold out. Need to bring all the gas line stuff over, and that'll be next week. I have 1 light I need for above the faucets but it'll look better with 2, and then we can finish the decorative housing.

Faucets, needing trim work:

cec856fb-b220-4294-b90d-9c25c725f8fa_zpsfjtcquo1.jpg


More photo's tomorrow as the last of the cold room is finished.
 
Back
Top