Will319
Well-Known Member
Lets see if the pictures work here:
I wanted to do a write up of a brewery I just finished. First of all I want to thank everyone on the forum for all of the help, either directly, or for me stealing your ideas. I also want to give a big thank you to Boerderij Kabouter for building the control panel, for their 2P-Twent-E design that my build was based off of, and fielding all of my rookie questions.
A link to that the original design is found here: https://www.homebrewtalk.com/f170/2p-twent-e-new-brouwerij-boerderij-kabouter-160970/.
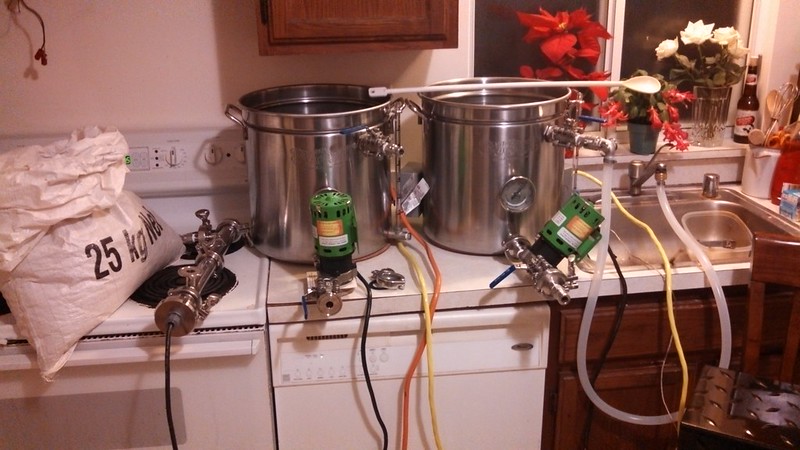
So before moving further my goals: were to have a countertop 5 gallon system based off of the Brutus 20 design. I wanted it to be electric and run off of 110v 15A service. I wanted some sort of temperature control that would be easy to clean, so I settled on a RIMS System. I tried to go with the better parts when possible.
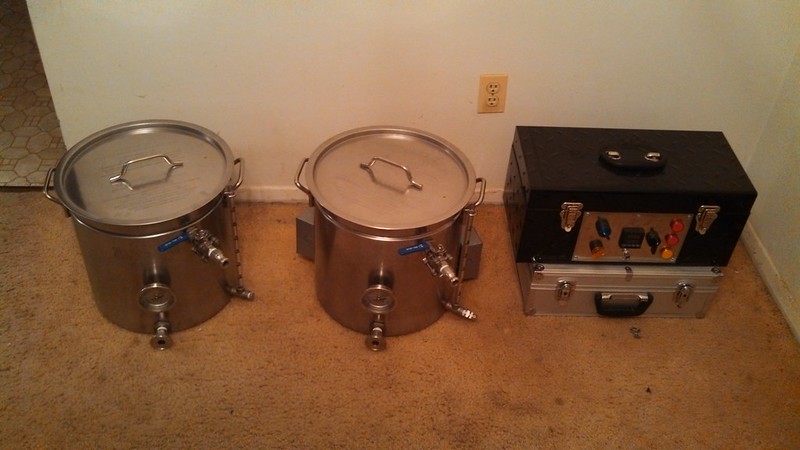
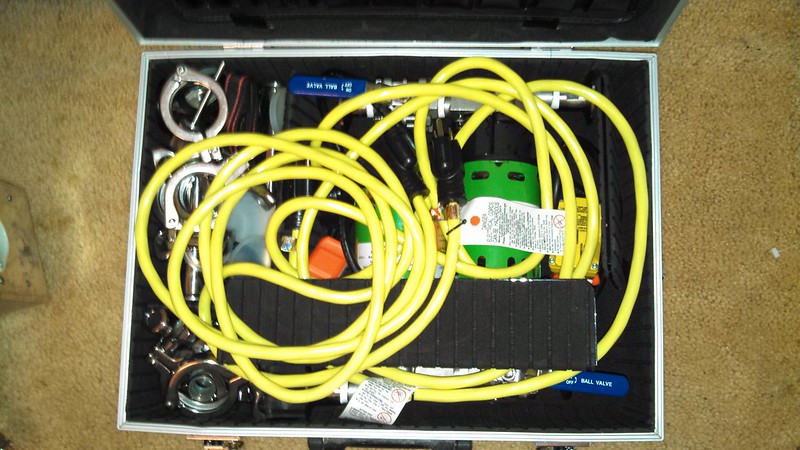
Here is a shot of the brewery packed up

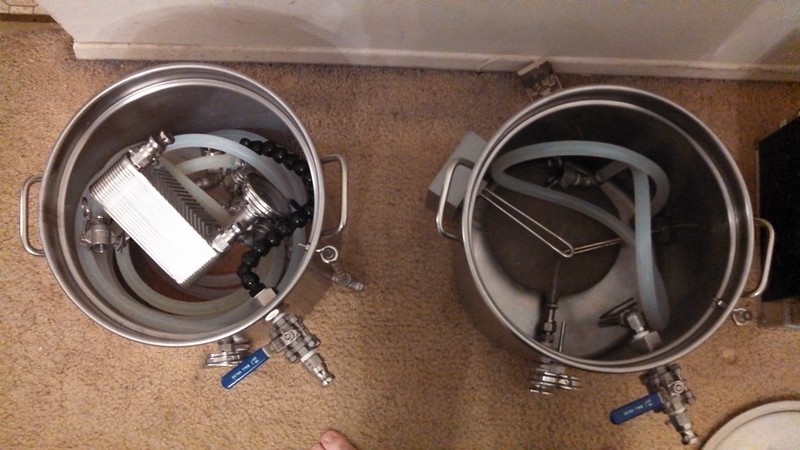
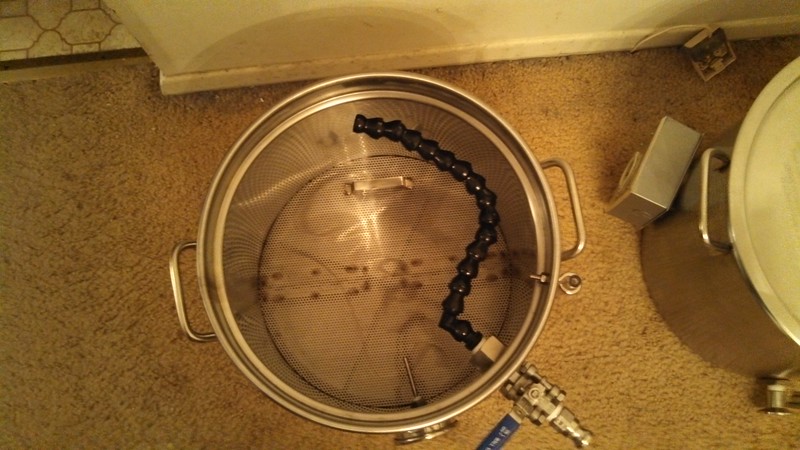
Here is a shot of inside the pots packed up

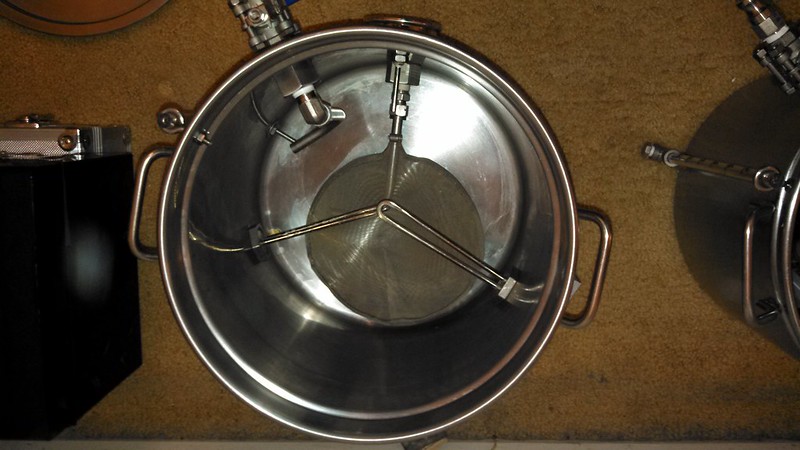
Here is a shot unpacked of the brewpot

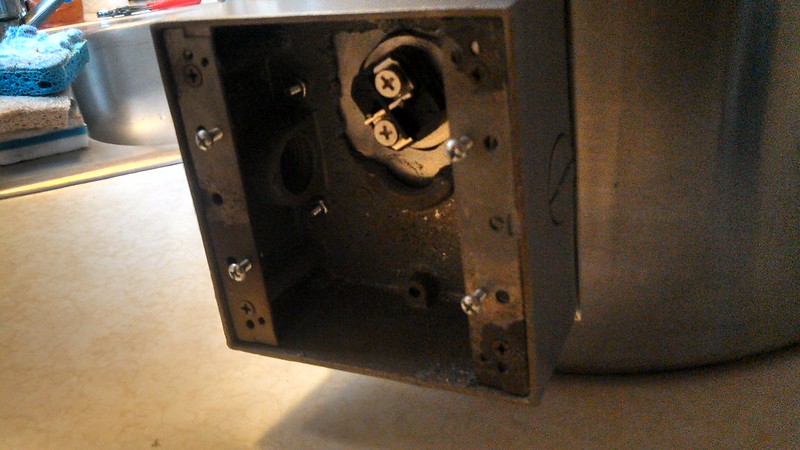
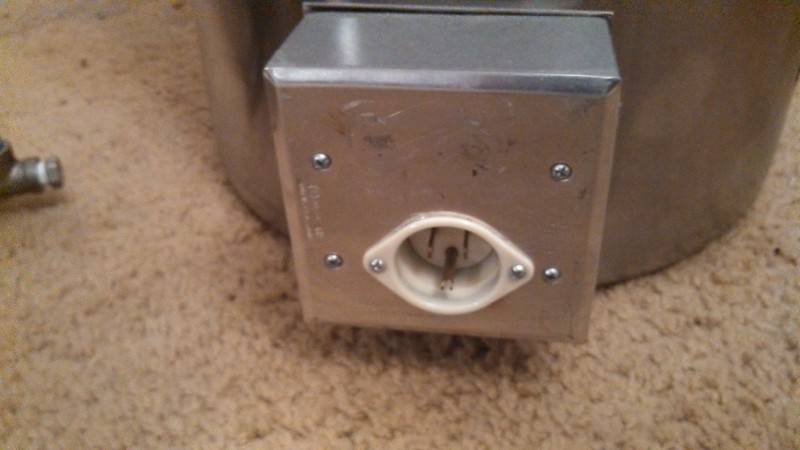
I decided to go with 2 electric elements installed via the Kal method, the only thing that I changed was that I plasma cut out one end of the box and mounted the element at one end and a recessed male plug in the lower half. This allowed me to have the depth to use the recessed male in order to be cordless, and pack up tidily.


I used the heavy duty Bulkheads from Brewers Hardware because I am mounting pumps directly to the outlets. I chose to use a Hopstopper screen in the kettle because I am using a plate chiller. There is a compression elbow in the inlet with a diptube attached in order to whirlpool the kettle. I also have a Bobby M sightglass and a Auber RTD installed in the sightglass. A Blichmann Brewmometer is also installed.
Here are 2 images of the Mash tun

With False Bottom removed

The Mash Tun is made with a Jaybird false bottom. I cannot recommend the material this is made of enough, however it arrived a bit larger and with a bent handle and no response from Nor Cal. The handle is cosmetic and I quickly grinded the false bottom down to a perfect snug fit. The false bottom is supported by a 2" stand from Nor Cal. I had to use a 2" stand to get above the Brewers Hardware bulkhead. The Mash Tun also uses a Blichmann Brewmometer and Bobby M Sightglass. I use a Loc Line for a return.
I use Camlocks and street elbows for hose fittings

I stole this concept from Bobby M and added a Stainless Oetiker clamp to it. This takes the strain off of the hose, helps to prevent kinking and has a better rate of flow over a hose barb connection.
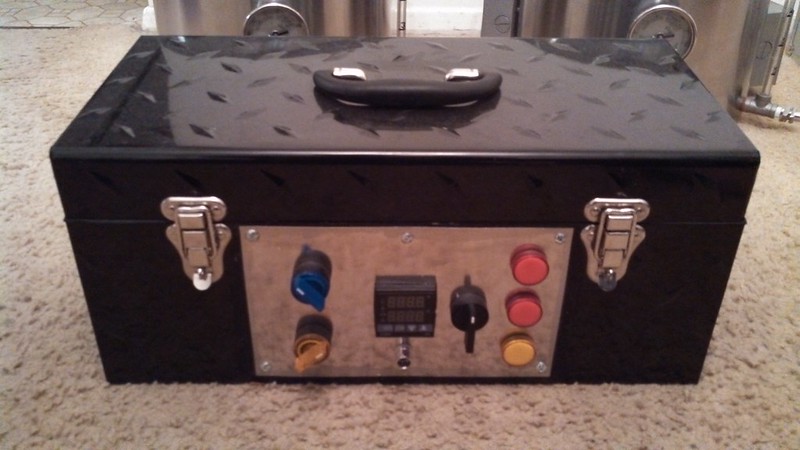
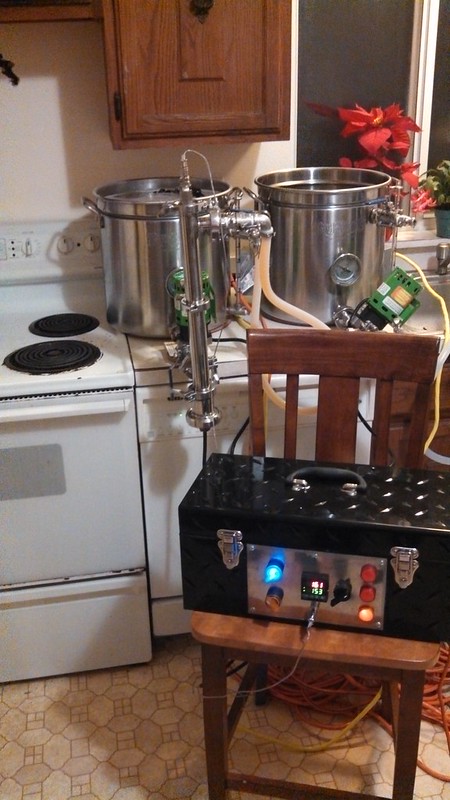
Next is the control panel


The control panel was made by Justin AKA Boerderij Kabouter and is a excellent panel. It uses 2 circuits, however can run on one and produce a 4 gallon batch if only one circuit is available. If 2 are available it can boil 5+ gallons by the second circuit directly going to a SSR and out to the secondary element. The panel uses a 3 way switch to run the RIMS system while mashing. We went with the recessed male plugs to avoid cords. The RIMS system is a Tri Clamp from Brewers Hardware running a 5500W ULD element at 110V putting out 1375w.
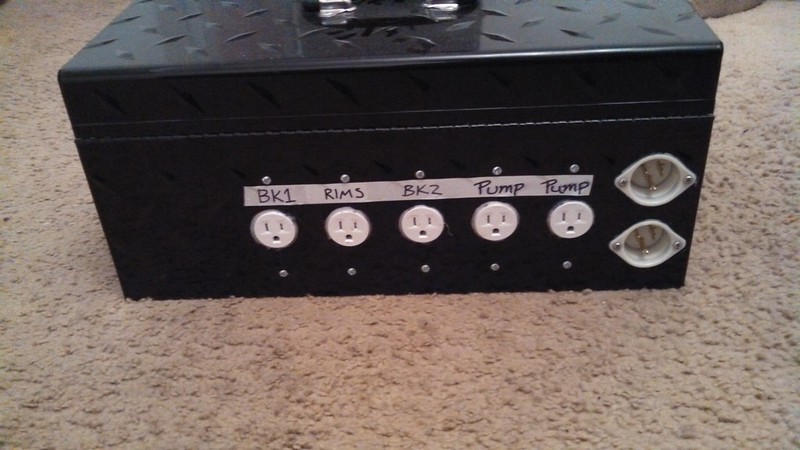
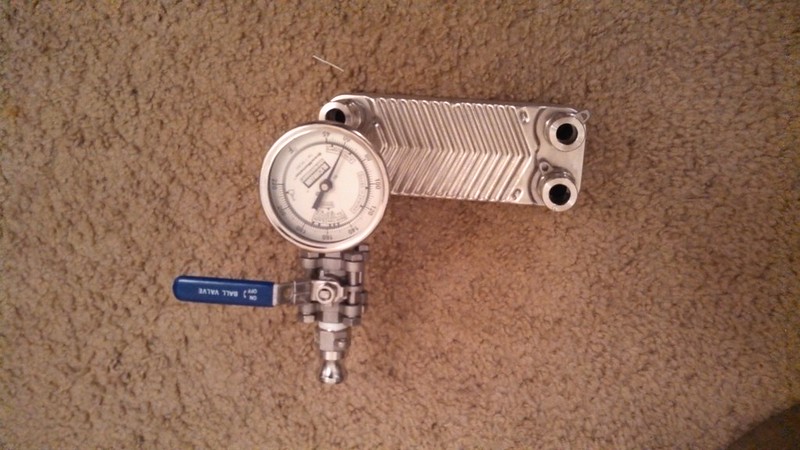
Here is a picture of the Accessory Box

The box contains all of the Tri Clamp hardware, the RIMS tube, and both pumps. It also holds some of the power cords.
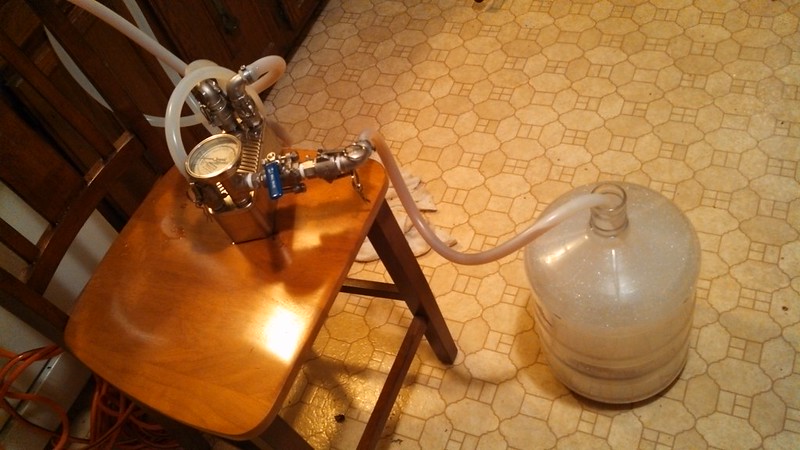
I use a plate chiller to chill

I have a Brewmometer off of a tee to dial in the pitching temperature.
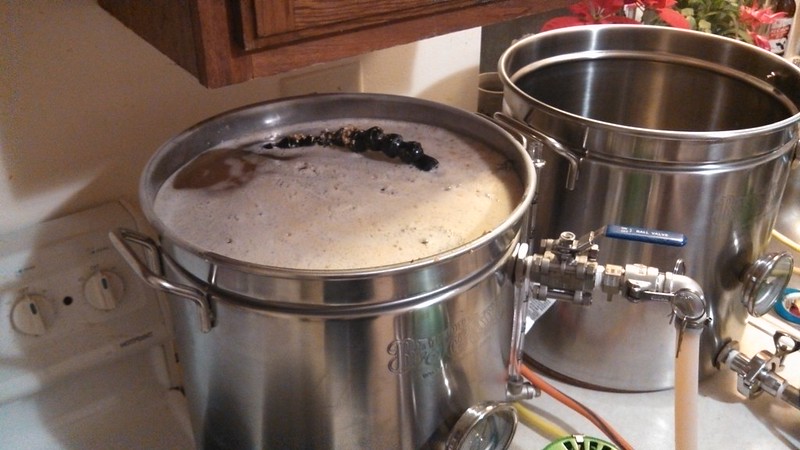
Here are some shots of the brewery in action:
Heating Strike Water

Mashing

RIMS Recirculating

Wort Chilling

I wanted to do a write up of a brewery I just finished. First of all I want to thank everyone on the forum for all of the help, either directly, or for me stealing your ideas. I also want to give a big thank you to Boerderij Kabouter for building the control panel, for their 2P-Twent-E design that my build was based off of, and fielding all of my rookie questions.
A link to that the original design is found here: https://www.homebrewtalk.com/f170/2p-twent-e-new-brouwerij-boerderij-kabouter-160970/.
So before moving further my goals: were to have a countertop 5 gallon system based off of the Brutus 20 design. I wanted it to be electric and run off of 110v 15A service. I wanted some sort of temperature control that would be easy to clean, so I settled on a RIMS System. I tried to go with the better parts when possible.
Here is a shot of the brewery packed up
Here is a shot of inside the pots packed up
Here is a shot unpacked of the brewpot
I decided to go with 2 electric elements installed via the Kal method, the only thing that I changed was that I plasma cut out one end of the box and mounted the element at one end and a recessed male plug in the lower half. This allowed me to have the depth to use the recessed male in order to be cordless, and pack up tidily.
I used the heavy duty Bulkheads from Brewers Hardware because I am mounting pumps directly to the outlets. I chose to use a Hopstopper screen in the kettle because I am using a plate chiller. There is a compression elbow in the inlet with a diptube attached in order to whirlpool the kettle. I also have a Bobby M sightglass and a Auber RTD installed in the sightglass. A Blichmann Brewmometer is also installed.
Here are 2 images of the Mash tun
With False Bottom removed
The Mash Tun is made with a Jaybird false bottom. I cannot recommend the material this is made of enough, however it arrived a bit larger and with a bent handle and no response from Nor Cal. The handle is cosmetic and I quickly grinded the false bottom down to a perfect snug fit. The false bottom is supported by a 2" stand from Nor Cal. I had to use a 2" stand to get above the Brewers Hardware bulkhead. The Mash Tun also uses a Blichmann Brewmometer and Bobby M Sightglass. I use a Loc Line for a return.
I use Camlocks and street elbows for hose fittings
I stole this concept from Bobby M and added a Stainless Oetiker clamp to it. This takes the strain off of the hose, helps to prevent kinking and has a better rate of flow over a hose barb connection.
Next is the control panel
The control panel was made by Justin AKA Boerderij Kabouter and is a excellent panel. It uses 2 circuits, however can run on one and produce a 4 gallon batch if only one circuit is available. If 2 are available it can boil 5+ gallons by the second circuit directly going to a SSR and out to the secondary element. The panel uses a 3 way switch to run the RIMS system while mashing. We went with the recessed male plugs to avoid cords. The RIMS system is a Tri Clamp from Brewers Hardware running a 5500W ULD element at 110V putting out 1375w.
Here is a picture of the Accessory Box
The box contains all of the Tri Clamp hardware, the RIMS tube, and both pumps. It also holds some of the power cords.
I use a plate chiller to chill
I have a Brewmometer off of a tee to dial in the pitching temperature.
Here are some shots of the brewery in action:
Heating Strike Water
Mashing
RIMS Recirculating
Wort Chilling