GoodDogShelby
Well-Known Member
^^ how do you keep the beer in there? ^^
Fixed it!!!

^^ how do you keep the beer in there? ^^
Thanks. 180F is the cutoff for mine as well. However, I find it works best (and pretty consistent) when I am
In the 165F to 170F range. I agree, it's one of the best additions to the brewery. I believe it saves quite a bit of propane as well but haven't verified.
Sent from my iPhone using Home Brew
How many of you guys with propane setups brew in your garage? My driveway is not level so I can't brew out there. Was wondering about brewing at the edge of the garage with the door up.
How many of you guys with propane setups brew in your garage? My driveway is not level so I can't brew out there. Was wondering about brewing at the edge of the garage with the door up.
I added a cantilever 80/20 shelf to hold my MLT & control panel.
Build in progress
Forever developing


These pics are a few months old. I got the rig primed and should have the painting done within a few weeks I hope. I will post the finished product as soon as she's done. I have put about 2 years of thought into this rig and left plenty of room for expansion for after the first time I brew with it. lol. Thanks for looking!!!!
Running of my houses natural gas, and there's a giant vent hood (air/moisture tight) with a hydroponics vortex fan venting gases and moisture. Nobody upstairs could smell the boiling wort.

Is that a Hoff-Stevens keg in the middle? If so, can you post some detail pics of how you modified it? I have 2 that I want to convert. Thanks!


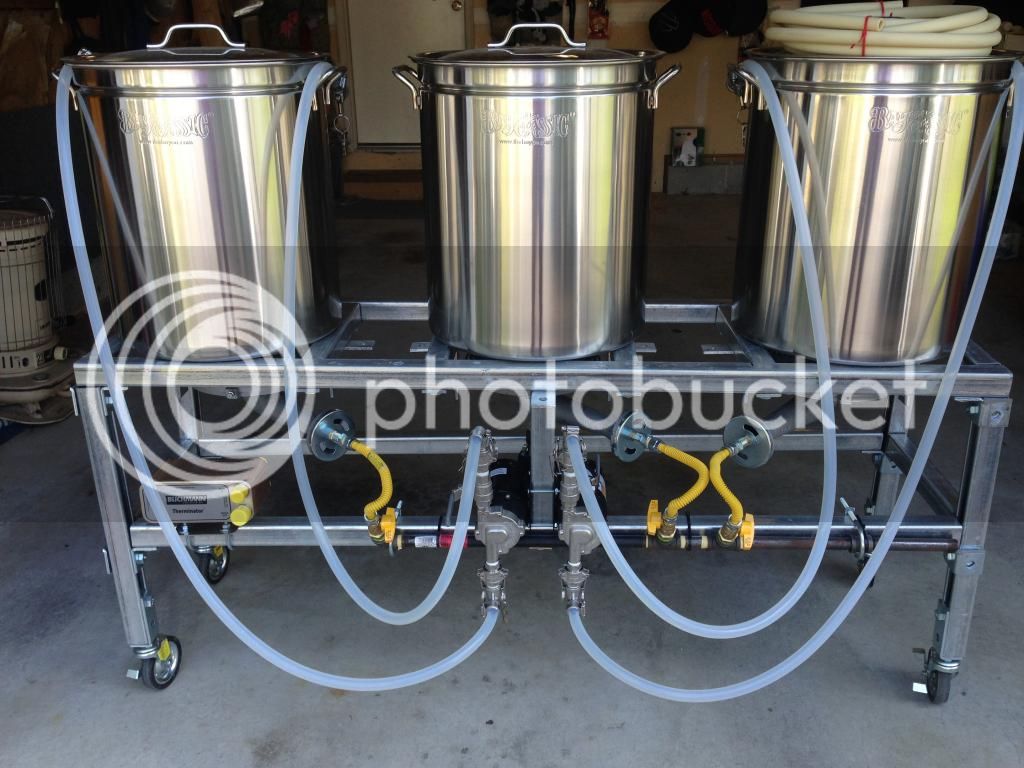
Here is my rig. It turns out the guy who owns my LHBS also runs a panel shop that makes control panels for all kinds of industrial applications. He was kind enough to let me use a work bench at his shop as well as any equipment I needed. Thanks JB! Anyhow, it is an E-HERMS controlled with a PLC (Programmable Logic Controller). The PLC turns the elements on/off to control temperature, runs the pumps and has the ability to integrate a timer into the controls. This is great for mashing because 45 min into the mash the PLC turns off my mash recirculation pump at the same time ramps up the temp in my HLT for mash out. Once 60 minutes is reached the mash pump turns back on and mash out is complete a few minutes later sounding a buzzer. Learning how to program the PLC was quite a challenge for me but it adds some capabilities to the rig I could not have otherwise.
I sourced parts and materials all over the place including Bobby M and Jay Bird from this site. They were both a pleasure to do business with and stand behind their products.
.jpg")
What's that rod with the weight looking thing on it in the boil kettle for?
Sent from my iPhone using Home Brew
It serves the same purpose as a sight tube. The rod has a groove turned in it that corresponds with each gallon in the kettle. The weight is held in place with a thumb screw, so it can be moved up and down the rod.
I heat the wort as it comes into the boil kettle and by the time I have collected 11-12 gallons it is being held at 208 Deg F. I have found that, due to thermal expansion, this is nearly 2 quarts more volume than the same water cold. I place the bottom of the weight on the volume I want in the kettle then I sparge until the wort flows over the top of the weight. This compensates for the thermal expansion.
I did not want to use a sight tube on the boil kettle because I was worried that with electric the wort inside would never boil and unwanted bugs might not be killed (I use an immersion chiller). I also thought a sight tube would be more difficult to clean. The fact that I am less likely to break a stainless steel rod is nice too.


I needed my setup to be easy to store, and I did not want to work in a ladder most of the time. Also I did not want to use a pump. So I built this baby. I use the boat winch to raise the shelves once it's time to transfer from one vessel to the next. I always work at a normal work height, and transferring the wort is fast because of the difference in height. I am very happy with it. I brewed two batches with it so far, one five and one ten gallons.
Cool idea!
How do you transfer water into the mash tun? It looks like the boil kettle is always lower than the MT? Do you batch sparge or no sparge?
Sent from my iPhone using Home Brew
Thank you all for the kind words! Well, the thing is my toy budget has been dead for a few months now! I will buy another stainless steel pot and another burner to mount on another mobile "shelf" above the mash tun. For the time being, I overshoot my water temperature a little, and transfer to the mash tun using a clean pail. Same thing for the sparge. Just before I am ready for the sparge, I prepare my sparge water and pour it in my pail, then use the kettle for the boil. The trick is to overshoot the temp just enough so the loss during transfer is accounted for.
Userzero great job. Love the simplicity. Got a better picture of the top of the mast and the pulley setup?
Sent from my iPhone using Home Brew


Enter your email address to join:


")

