Running water lines through keezer lid

Homebrew Talk - Beer, Wine, Mead, & Cider Brewing Discussion Forum

Help Support Homebrew Talk - Beer, Wine, Mead, & Cider Brewing Discussion Forum:

This site may earn a commission from merchant affiliate links, including eBay, Amazon, and others.

abeasst

Well-Known Member
Joined
Dec 17, 2013
Messages
384
Reaction score
28
Location
Raleigh
I have a pump in a 5-gallon bucket in my keezer that pumps cold water to my chiller in my fermenter. Currently the lines just run below the lid under the seal so the keezer doesn't seal all the way causing ice build-up. Does anyone have a suggestion on how to run the water lines through the lid? Specifically any fitting suggestions?

Not interested in building a collar.

Thanks
 
Doesn't your keezer have a collar to run them through? Using picnic taps inside?

I think the hump is free of refrigerant lines, you could probably route them through that, but it may be too low for your use.
 
The lid has nothing important in it as far as drilling goes so you can drill right through it if you want. Probably through the back of the lid so you don't have hoses everywhere when you open and close the lid.
 
fwiw, I ran a CO2 line and a nitro/beergas line through the back edge of my keezer lid.
I used a close version of the 1/4" MFL-MFL bulkhead to go through the sheet metal

04C03171.jpg


then added Firestone gas post adapters
Adaptor%20-%2015E04451.jpg


and Firestone gas posts, so I can just snap the lines on using standard gas QDs.
This pic shows one of the assembled posts as I was building the keezer.

brewpints_40.jpg

One can run all kinds of stuff through the back edge of the lid...

brewpints_43.jpg

Cheers!
 
Here's another thought:
You can chill your bucket with water in the keezer as you planned, then take it out when ready to chill. Maybe even add some ice to it for good measure.

I assume you use tap water to get it close to your ground water temps, then the chilled water to get it down the last 20-30 degrees.
 
fwiw, I ran a CO2 line and a nitro/beergas line through the back edge of my keezer lid.
I used a close version of the 1/4" MFL-MFL bulkhead to go through the sheet metal


Cheers!

That is a nice setup.

I will probably run the CO2 line the same way. Not planning a nitro system but might do the rough in for that too.

Few questions
1.looks like your freezer did have the undercover mounted with screws. Mine just seems to be glued or held in place by the expanding foam. Any hints on removing it ?
2. What kind of lines you used for gas ? I see they are reinforced.
3. How did you minimize stress kinks in the gas line every time you open and close the lid ? I would have to think about how I do that for the beer lines - my tower is outside of the freezer.
 
The lid liner had one sheet metal screw in each corner, and a plethora of plastic pop fasteners (had to be nearly three dozen of 'em). They were obscured under a fold in the gasket, so I'd encourage you to dig a bit. I'd be surprised if the lid was glued in place somehow...

I use that reinforced Tygon tubing for all my gas runs, it's clear enough to see beer if it ever backs up the lines, is very flexible at room temperature, and not too bad inside the keezer or my three fridges, either. As a result there are no issues wrt fatigue.

That was an older picture of the keezer back, here's a better shot showing all three gas lines. There's no interference from the QDs hitting the chassis when the lid is fully opened - they're close but don't make contact...

keezer_gas_mod_05.jpg


Cheers!
 
Thanks! So obviously, you don't have issue with the gas posts getting in the way... Do you have a picture with line arangement inside to get a better idea ? I will have to run beer lines inside and I don't thing I'd do it with quick connects as they have to be insolated.

I love the gas posts idea. is exacty what I am going to do will do 2 one for nitro one for CO2.
 
Wish I had taken more/better pics, but here's what I have.

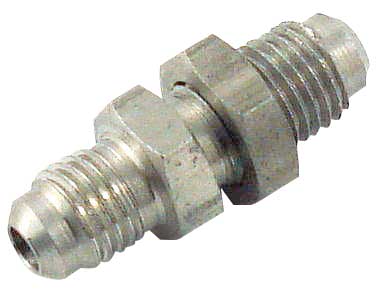
This was taken before I added the second CO2 line. The first CO2 line terminates at the input to the 1:6 manifold; I had to use an elbow at the manifold input as the turn would have been too sharp for the Tygon tubing. The beer gas line is over at the right side; it just pokes through a grommet and ends in a flare fitting.

The second CO2 line (again, not shown) is just above the nitro line and also just pokes through the liner with a grommet. My intention was/is/? to add a 1:2 manifold to that line as I often have a couple of sprightly carbed beers on tap (I run the original CO2 line pressure at ~11 psi and the second line at ~16 psi or higher, depending) but there are days I think a double or triple bank of secondary regs might be the better move. So I'm on the fence ;)


brewpints_47.jpg


So here's the lid. Surprisingly the freezer came with just a batt of 2" fiberglass insulation stuffed in the lid (my old keezer had foamed-in-place insulation). After tossing that I lined the lid with two layers of high-R rigid foam board. Then I carved out slots for the two wooden risers and epoxied them to the lid sheet metal. The riser on the far side is what the 1:6 manifold is screwed into, the near side riser would be where the second manifold or secondary regulator gang would attach. The box in the middle is for all of the flow meter and temperature sensor plugs and jacks. Not seen (as it's at the bottom of all that foam) is the large section of 3/4" plywood epoxied to the lid to receive the tower mounting screws and keep the lid from distorting when the lid is opened.

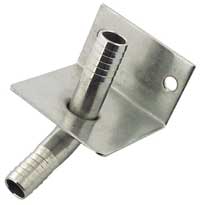
You can see the two gas lines coming through the back edge. The third line went in between the first two. The threaded brass stub just under the beer lines is from the drip tray and runs to a catch bottle inside the keezer.

The trickiest bit to all of that was getting the position and height of all the wood pieces right so they would just touch the convoluted lid liner once it was in place. But even with all that going on I was able to keep the dome light fully functional (winning! :))


brewpints_40.jpg


Hope this gives you some ideas!

Cheers!
 
Last edited:
Very interesting and insightful. I take it that you have a fan that pushes cold air up the tower. This is helpful!
 
With the risk I am going to piss you off with too many questions - what kind of flow meter you used ?
 
lol - no worries, always happy to help where I can.

Those are SwissFlow SF800 meters I installed just over four years ago now. I was lucky to get in on an eBay seller than had around 150 of them in barely used condition for $20 each. Once RaspberryPints gained flow meter capabilities that eBay guy sold out in a couple of weeks.


taplist_01may15_01.jpg


Cheers!
 
lol - no worries, always happy to help where I can.
...
Cheers!

Can I pick your brain on few things ?

1. how many inches the gas post and quick disconnect is protruding out ?
2. I am planning to feed in the beer thru the side and I am debating what's the easier way and cheaper way. The concern there is not restricting the flow and protecting the beer line.
  • I could do the same bulkhead on the outside but I don't be able to insulated it well.
  • another way is to use a beer wall bracket for each line
    04C03362.jpg
  • get all 4 lines thru one whole/small pipe secured similarly as the bulkhead to avoid any line cuts and still insulate the lines. the major issue with tie is that there is no easy disconnect. the good par is that I can push cold air in.
The first two options are problematic due to the lack of insulation and also would be hard to blow cold air as the lines would be separated at the entry point.
 
I'm away from home for a few more days and will try to remember to take an actual measurement when I get home.
But you can get within a ~1/4" if you attach a disconnect to a keg then measure from the keg at the base of the post to the top of the disconnect. My bet is you'll be 1/4" shy of my actual assembly length.

The keg post adapter only adds a bit of over all length, and the stubby "panel" version mfl bulkheads I used ends up almost entirely inside the adapter so not much length added there, either...

Cheers!
 
Back
Top