
So after the last thread got a bit too long for me, and after reconfiguring the entire setup procedure, I have decided to start a new thread.
StrangeBrew Elsinore An Opensource Brewery Controller
Strangebrew Elsinore Server
Java Server for Strangebrew Elsinore
The purpose of this project is to create a Java application that can run on small systems such as the RaspberryPi and the Beaglebone series
Since these systems run on Linux, that is a requirement to using this.
The system is based off the Dallas One Wire protocol for the temperature probes (expanding to analogue inputs too), and Straightforward GPIO outputs for SSR control
Setup Instructions
Beaglebone Black
RaspberryPi
The above instructions will tell you how to setup your systems for Elsinore
Startup Instructions
Clone this repository:
Move to the checked out Directory:
Run:
Wait, what happened to the old instructions? Well I found that people weren't following them well. So I rewrote the UI, you can now setup everything (almost) from the UI.
If you have a DS2450 (or don't want to use Analogue inputs for reading the volume, BBB is 1.7V so not very good for reading the analogue inputs. You will see a request for OWFS, please use OWFS if you can, it's better in general.
Then you can use the web UI.
The standard view you'll see at the start is an un-named display, such as:
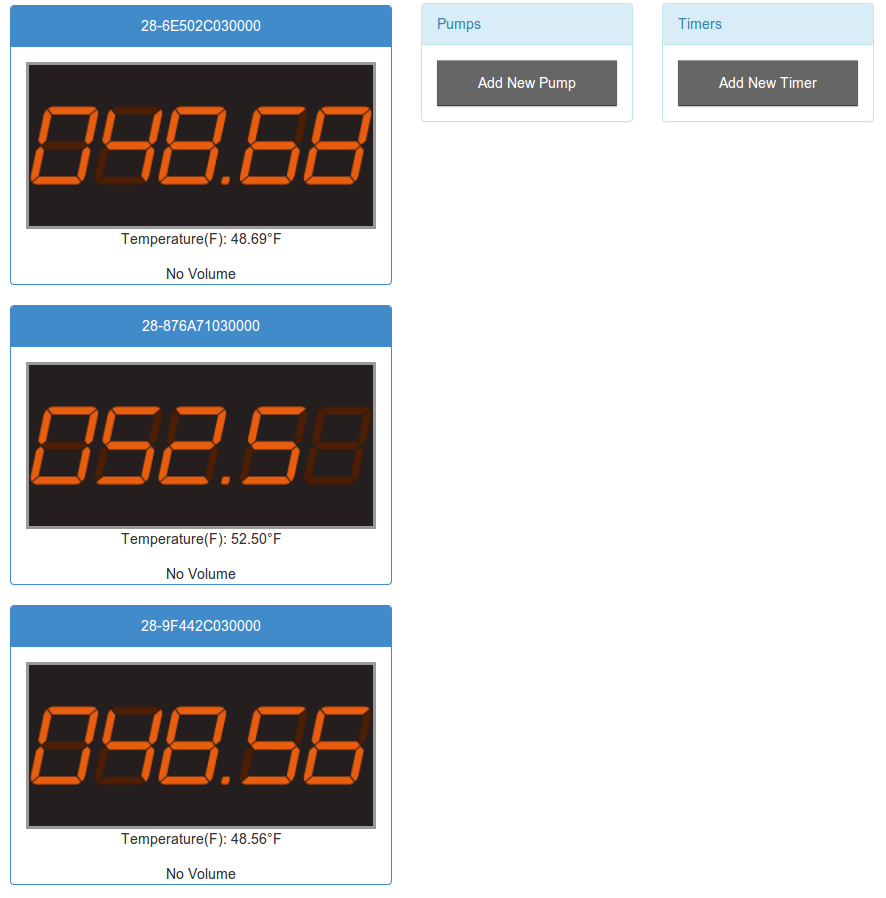
The probe 'names' are their addresses, double clicking them allows you to set them up* You can set just the name (which will leave it as a temperature probe)* A GPIO pin (which will set it up as a PID controller)* And if you use a GPIO Pin you can set an Aux pin at the same time, allowing you to use an auxilliary ouput.

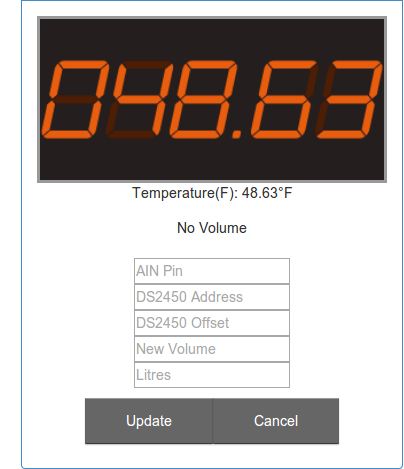
You can also setup the volume reading from the web UI, double clicking on the volume box will show you the input.
* You can set the Analogue input PIN (for BBB and RPi), but these are normally voltage limited
* Or you can set the One Wire address (for a DS2450, which is what I use) and the offset for the input which will give you up to 5V.
* You can set the Volume Unit (this doesn't matter since there's no conversion between values at the moment)
* Adding a volume point will add a new data point to the system. When you have three or more the system will be able to calculate the volume.
RaspberryPi or Beagleboard?
The BeagleBoard Black does have a big advantage over the RPi, it has onboard analogue inputs, but these are 1.8V.
The RaspberryPi works fine with the existing software, the only thing you need to do differently is naming the GPIO Pinouts.
One Wire & OWFS
One Wire is fantastic (in my opinion) each sensor or device has a full 64 bit address, and you don't have to worry about the order and you can chain them!
One Wire devices can be chained, with only one Pullup resistor before the first connection to a device. I currently have 4 Temperature probes on my circuit, and a ADC, connected using XLR jacks.
OWFS is a much better One Wire Implementation, it is highly recommended to install it, and it is REQUIRED if you use One Wire based Analog inputs (like the DS2450
Install it using your standard package manager, then you need to set a mountpoint up (I use /mnt/1wire) and set
server: w1 in the OWFS configuration File (/etc/owfs.conf by default), you can chose the ports as you want for OWFSHTTP and OWServer, the configuration tool will setup OWFS if it can.
To manually setup OWFS, use the option -owfs when starting up Elsinore
Cutoff Temperature
After the incident I decided to add a cutoff temperature, in my case I have a temperature probe on my SSRs, and when they go over a certain temperature I want to kill the server so it doesn't get badly damaged
This is to come in the updated Web UI setup.
System Temperature
To enable the System Temperature reading, please add
In the <general> section of the configuration file.
Timers
Use the web UI, click on "Add Timer" to create a timer.
Pump Control
To add a pump, use the "Add Pump" button on the Web Interface
Config File
This is now automatically controlled, you shouldn't need to do anything to it, except for backing it up.
Control Interface
Visit
to access the webUI, which works on mobiles too:
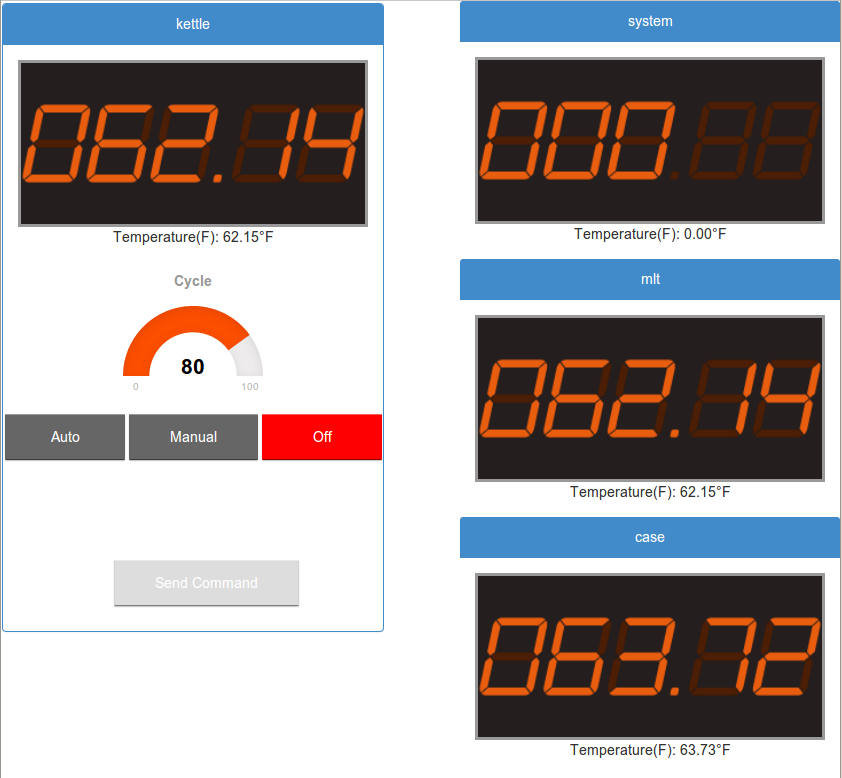
Album of the UI Progress
This is an example of the PID control interface, temperature probes are displayed on the right hand side as LCD displays. On the Raspberry Pi you'll also get the system temperature (this isn't enabled on Beagleboard yet)
There is also a Android Application which is not currently in development, search my repositories to check this, but it's not deprecated yet, I haven't changed the JSON output from the system to it should continue to work.
Thanks For reading this, if you have any queries please contact me or file a bug.
StrangeBrew Elsinore An Opensource Brewery Controller
Strangebrew Elsinore Server
Java Server for Strangebrew Elsinore
The purpose of this project is to create a Java application that can run on small systems such as the RaspberryPi and the Beaglebone series
Since these systems run on Linux, that is a requirement to using this.
The system is based off the Dallas One Wire protocol for the temperature probes (expanding to analogue inputs too), and Straightforward GPIO outputs for SSR control
Setup Instructions
Beaglebone Black
RaspberryPi
The above instructions will tell you how to setup your systems for Elsinore
Startup Instructions
Clone this repository:
Code:
git clone [url]https://github.com/DougEdey/SB_Elsinore_Server[/url]Move to the checked out Directory:
Code:
cd SB_Elsinore_ServerRun:
Code:
./launch.shWait, what happened to the old instructions? Well I found that people weren't following them well. So I rewrote the UI, you can now setup everything (almost) from the UI.
If you have a DS2450 (or don't want to use Analogue inputs for reading the volume, BBB is 1.7V so not very good for reading the analogue inputs. You will see a request for OWFS, please use OWFS if you can, it's better in general.
Code:
./launch.sh
Starting Elsinore as elsinore
[sudo] password for elsinore:
May 17, 2014 8:29:23 PM com.sb.elsinore.LaunchControl main
INFO: Running Brewery Controller.CFG IS NULL
DOC IS NULL
Detected a non temp probe.20-00000008dc9e
Do you want to switch to OWFS? [y/N]
y
Creating the OWFS configuration.
What is the OWFS server host? (Defaults to localhost)

What is the OWFS server port? (Defaults to 4304)
Then you can use the web UI.
The standard view you'll see at the start is an un-named display, such as:
The probe 'names' are their addresses, double clicking them allows you to set them up* You can set just the name (which will leave it as a temperature probe)* A GPIO pin (which will set it up as a PID controller)* And if you use a GPIO Pin you can set an Aux pin at the same time, allowing you to use an auxilliary ouput.
You can also setup the volume reading from the web UI, double clicking on the volume box will show you the input.
* You can set the Analogue input PIN (for BBB and RPi), but these are normally voltage limited
* Or you can set the One Wire address (for a DS2450, which is what I use) and the offset for the input which will give you up to 5V.
* You can set the Volume Unit (this doesn't matter since there's no conversion between values at the moment)
* Adding a volume point will add a new data point to the system. When you have three or more the system will be able to calculate the volume.
RaspberryPi or Beagleboard?
The BeagleBoard Black does have a big advantage over the RPi, it has onboard analogue inputs, but these are 1.8V.
The RaspberryPi works fine with the existing software, the only thing you need to do differently is naming the GPIO Pinouts.
One Wire & OWFS
One Wire is fantastic (in my opinion) each sensor or device has a full 64 bit address, and you don't have to worry about the order and you can chain them!
One Wire devices can be chained, with only one Pullup resistor before the first connection to a device. I currently have 4 Temperature probes on my circuit, and a ADC, connected using XLR jacks.
OWFS is a much better One Wire Implementation, it is highly recommended to install it, and it is REQUIRED if you use One Wire based Analog inputs (like the DS2450
Install it using your standard package manager, then you need to set a mountpoint up (I use /mnt/1wire) and set
server: w1 in the OWFS configuration File (/etc/owfs.conf by default), you can chose the ports as you want for OWFSHTTP and OWServer, the configuration tool will setup OWFS if it can.
To manually setup OWFS, use the option -owfs when starting up Elsinore
Cutoff Temperature
After the incident I decided to add a cutoff temperature, in my case I have a temperature probe on my SSRs, and when they go over a certain temperature I want to kill the server so it doesn't get badly damaged
This is to come in the updated Web UI setup.
System Temperature
To enable the System Temperature reading, please add
Code:
<system />In the <general> section of the configuration file.
Timers
Use the web UI, click on "Add Timer" to create a timer.
Pump Control
To add a pump, use the "Add Pump" button on the Web Interface
Config File
This is now automatically controlled, you shouldn't need to do anything to it, except for backing it up.
Control Interface
Visit
Code:
<ip of your system>:8080/controllerAlbum of the UI Progress
This is an example of the PID control interface, temperature probes are displayed on the right hand side as LCD displays. On the Raspberry Pi you'll also get the system temperature (this isn't enabled on Beagleboard yet)
There is also a Android Application which is not currently in development, search my repositories to check this, but it's not deprecated yet, I haven't changed the JSON output from the system to it should continue to work.
Thanks For reading this, if you have any queries please contact me or file a bug.
")
