My Ugly Junk- Corona Mill Station...

Homebrew Talk - Beer, Wine, Mead, & Cider Brewing Discussion Forum

Help Support Homebrew Talk - Beer, Wine, Mead, & Cider Brewing Discussion Forum:

This site may earn a commission from merchant affiliate links, including eBay, Amazon, and others.
A follow up question for those that grind their grain separately, do you change the setting of the mill for each?

Nealm


While in theory this sounds like a perfect way to proceed, I think a more practical approach is to set the mill fine enough for your smallest grain and lock it down tight.

These are rough, crudely built devices, not scientific instruments :)

IMO, I wouldn't bother with test mashes, but would just adjust the mill such that close to zero whole grains remain, and that close to all kernels are well fractured. If in doubt, tighten the mill and crush finer.
 
I got one of these Corona-style mills for Christmas. I was skeptical, but I used it for the first time yesterday and loved it!

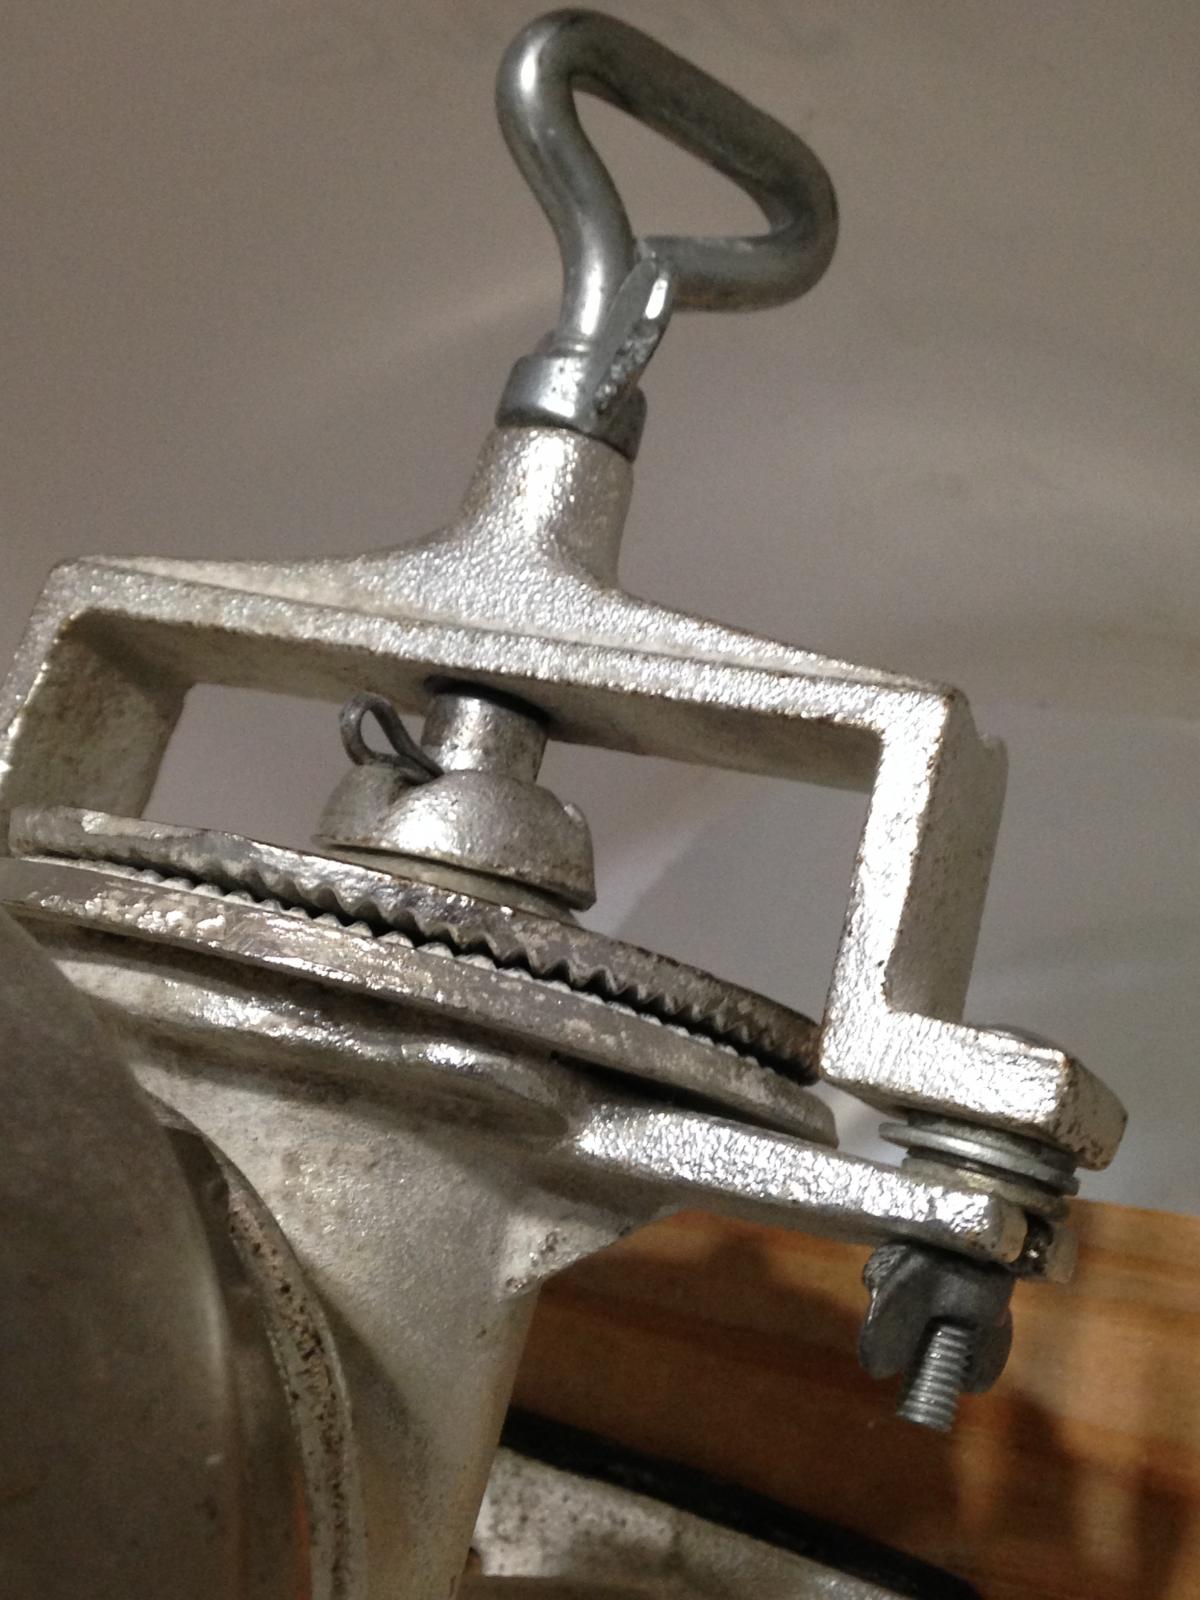
I knew I wanted to motorize it, so I just tossed a few washers in the gaps where the bolts are, inserted a bolt with the head sawed off where the handle usually goes, and whala! Motorized mill. My electric drill clenched down on the sawed off bolt no problem, and the mill was great. I just draped a little plastic grocery bag over the top to keep grain from flying everywhere, and it all got in my bucket. No mess, no dust. I got 73% efficiency the first try!

I'm really excited to be buying bulk grain now!
 
There seems to be a lot of available different brands of corona mills out there. Can someone link me to one that is for sale and that they have had success with?

Thanks
 
There seems to be a lot of available different brands of corona mills out there. Can someone link me to one that is for sale and that they have had success with?

Thanks

http://www.discounttommy.com/p-189-...er-for-wheat-grains-or-use-as-a-nut-mill.aspx

or

http://www.amazon.com/dp/B000U5NZ4I/?tag=skimlinks_replacement-20

That seems like a couple bucks more than I paid for mine, but I don't remember for sure. Discount Tommy is the way to go whether you go direct or through Amazon.
 
Last edited by a moderator:
Quick question, got the great northern popcorn mill from discount Tommy for Christmas and in the care instructions it says to spray with food grade oils after cleaning.

So my question(s) is what kind of oil would be good (veg oil?) and won't oil on the grinder coat the grains and get into the mash?
 
I would keep your corona mill clean and dry, I would not oil it between uses as the instructions read.

Oil in your grain and beer would not be good....I do nothing to my mill between uses and it appears fine after several years.

Fwiw I don't even clean the grain dust off between uses, it stays in the bucket waiting to be used again, no worse for wear and tear...
Cheers!
 
Exactly. Don't clean it. Don't oil it. If you can't stand the dust, take it outside and hit it with compressed air. If you do happen to get it wet, go ahead and clean ALL the dust off, then toss it in the oven to dry at 200 degrees or so for a couple hours. No oil.
 
I would keep your corona mill clean and dry, I would not oil it between uses as the instructions read.

Oil in your grain and beer would not be good....I do nothing to my mill between uses and it appears fine after several years.

Fwiw I don't even clean the grain dust off between uses, it stays in the bucket waiting to be used again, no worse for wear and tear...
Cheers!

Ditto. I just slip a plastic trash bag over my junk setup between uses, to keep the dust and bugs out.
 
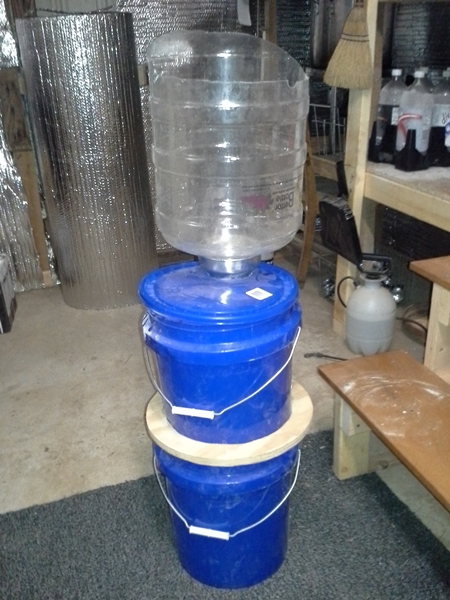
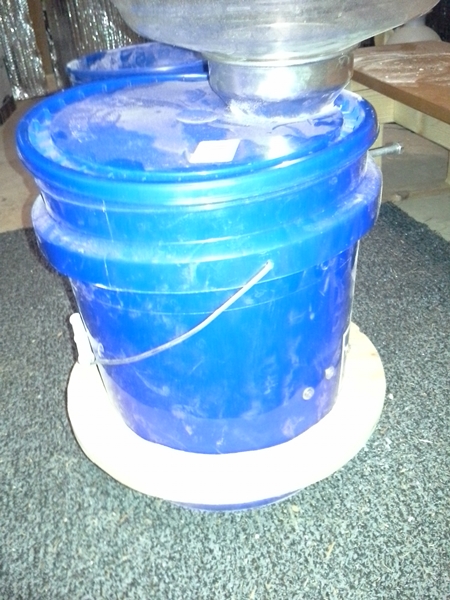
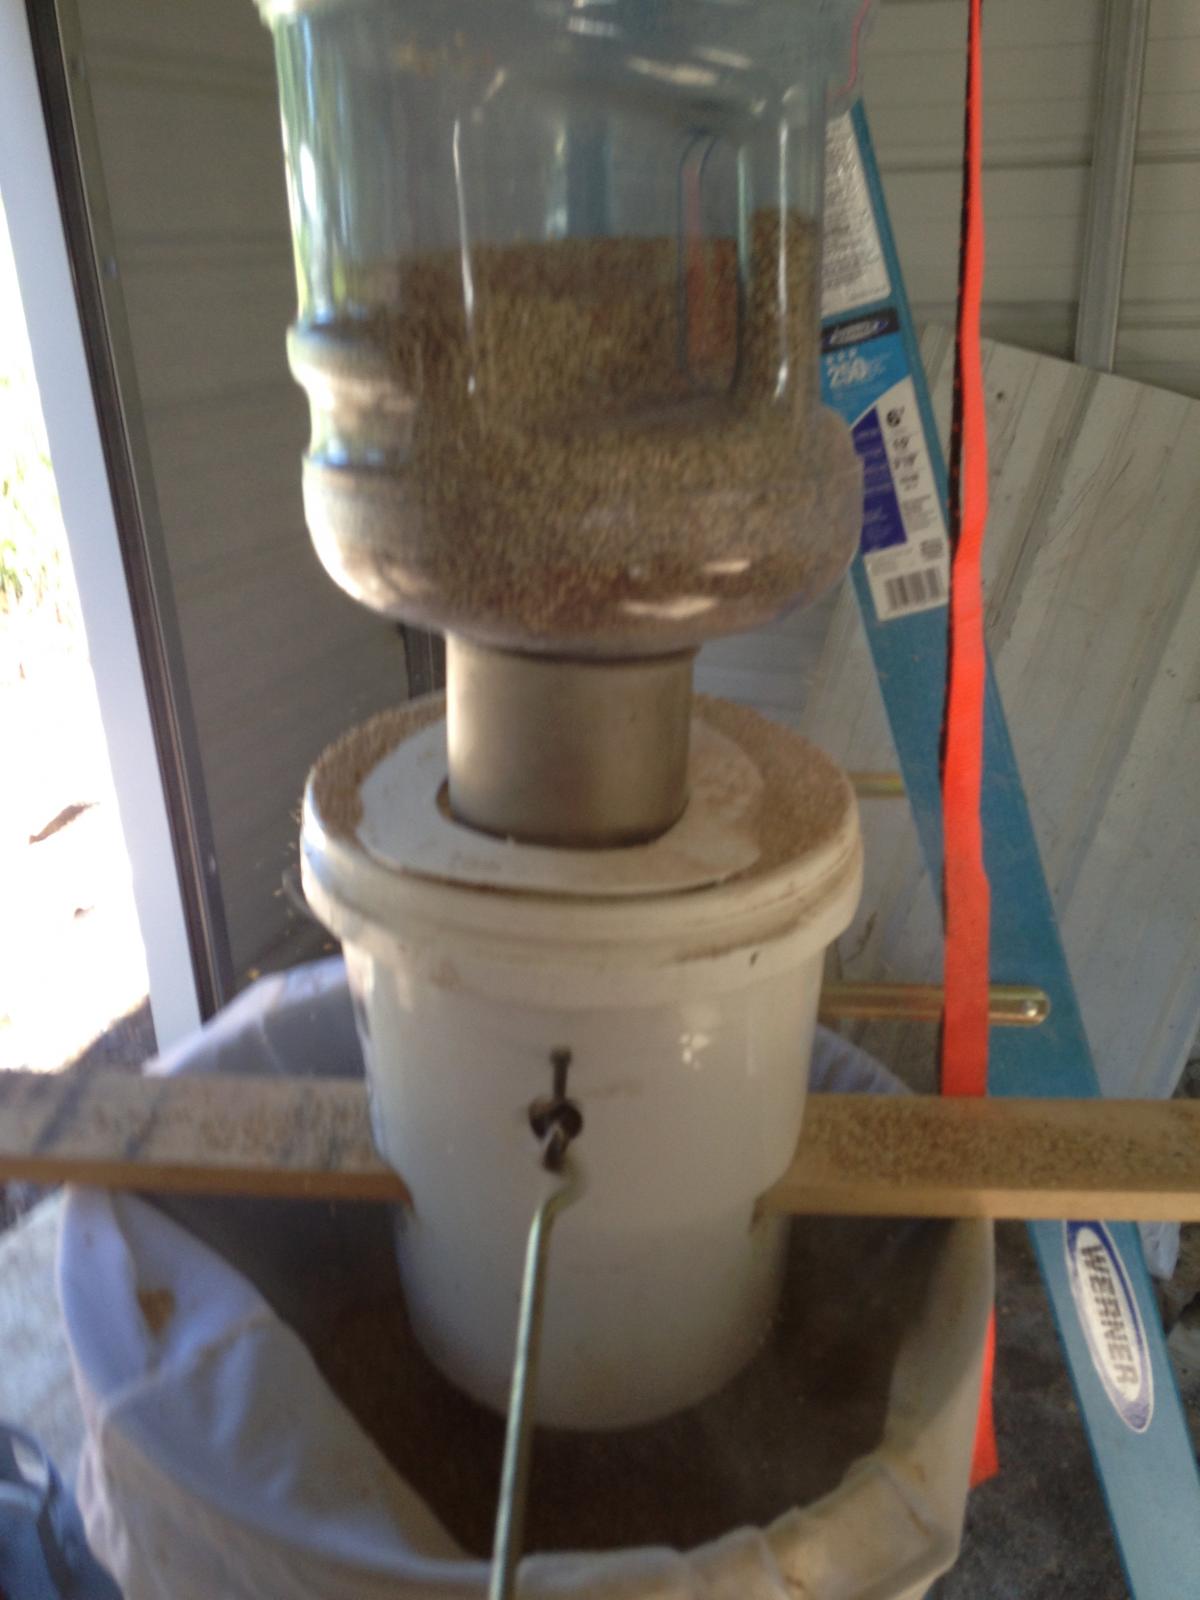
I've been meaning to post a couple of pics for quite some time. I think this is an awesome mill and it has worked perfectly for me for many batches. I have the grind pretty small and it has worked for AG as well as my first BIAB. The mill is mounted as per many others on a single piece of 2x4, then the bottom is cut out of the bucket. I also cut a hole in the lid so that the filler cone fits thru the lid. My 3 gallon water bottle makes a huge grain funnel and works just right. The thing I have done differently is cut a plywood doughnut that slips up from the bottom to fit the grinder bucket...no screws. This allows the entire grinder bucket to sit on top of an empty bucket for catching the ground grain. No dust, no mess, cheap and it does a great job. I power it with a big single speed drill.

grain mill complete small.jpg


grain mill bucket small.jpg
 
I've been meaning to post a couple of pics for quite some time. I think this is an awesome mill and it has worked perfectly for me for many batches. I have the grind pretty small and it has worked for AG as well as my first BIAB. The mill is mounted as per many others on a single piece of 2x4, then the bottom is cut out of the bucket. I also cut a hole in the lid so that the filler cone fits thru the lid. My 3 gallon water bottle makes a huge grain funnel and works just right. The thing I have done differently is cut a plywood doughnut that slips up from the bottom to fit the grinder bucket...no screws. This allows the entire grinder bucket to sit on top of an empty bucket for catching the ground grain. No dust, no mess, cheap and it does a great job. I power it with a big single speed drill.

So the donut plywood, just keeps the bucket from sliding down further? do i understand that right? Nice work.
 
So the donut plywood, just keeps the bucket from sliding down further? do i understand that right? Nice work.

yes. The entire mill is in the top bucket and all grain goes into the lower bucket, but you need a way to prevent the upper bucket from just dropping down into the lower bucket...the plywood doughnut. :mug: I just used to smaller bottom of a bucket to make the inside circle on the plywood, and drew the outside of the circle about 2" bigger than the inside circle. I think this setup is about as good as you can do with this mill- as far as a portable rig.
 
mine is similar, I use three buckets, bucket 1) contains mill like yours, 2) catches the grain like yours, 3) bucket filled with 6" rock to keep it from tipping over. I dont have the donut though I may add one, and I ussually just drape a towel over the top to keep grain in, I may go to the method you use. thanks for sharing your engineering!!
 
thanks. I thought that it might be top heavy, but have never had a problem. I just fill the hopper, sit in a chair, and pull the drill trigger while the mill does it's thing. I did forget about the ledge the inside 2x4 creates once... don't forget to empty the grain off it before you put the mill away... :)
 
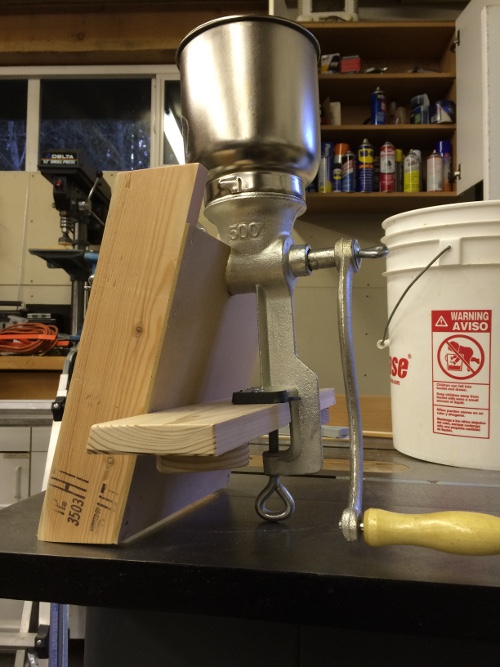
Nothing special here, but it will stand upright outside of the bucket and I thought that was kinda clever

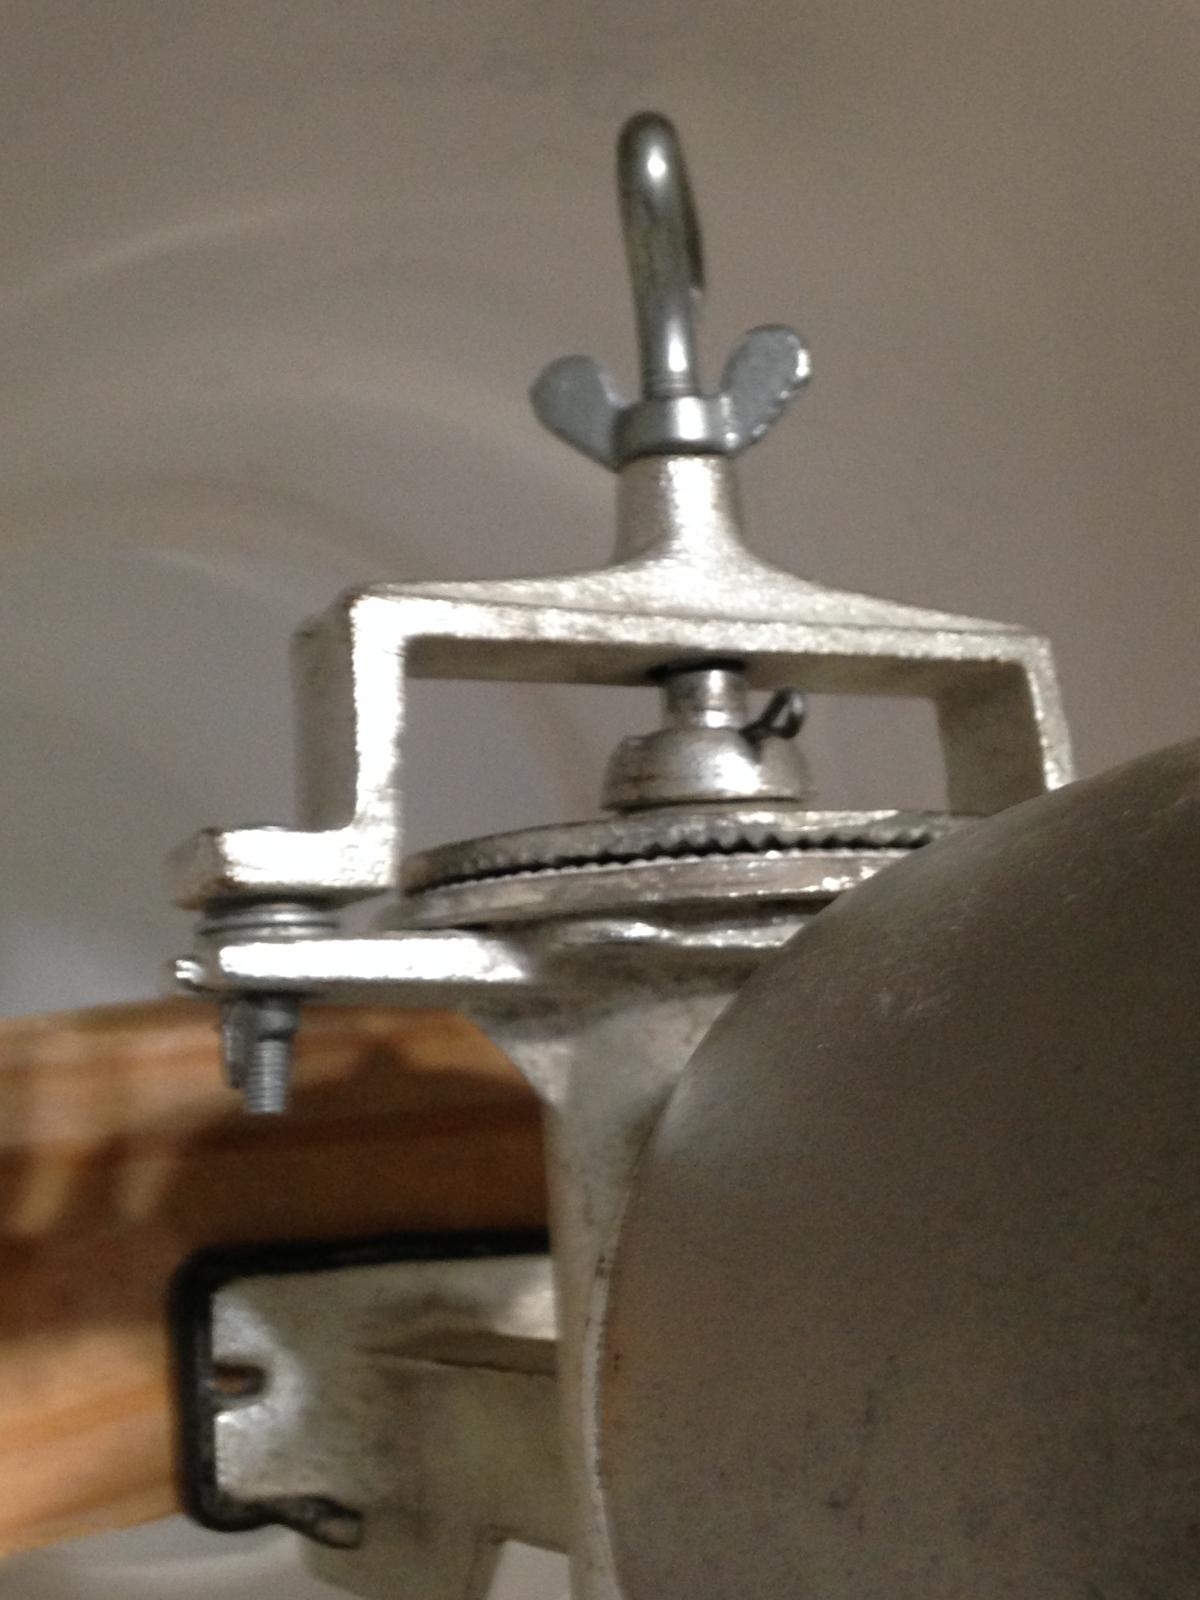
I also sanded down the high spots of my grinding plates and that seems to allow me to get a real fine crush.

junk1.JPG


junk2.JPG
 
......then the bottom is cut out of the bucket. No dust, no mess....

I like this approach, I really do. The only drawback I see is that when you remove the top bucket and set it down, a bunch of grain dust will fall out of the mill and onto the surface that you set the mill / bucket on, no?

Hence the reason I like one bucket, with the mill mounted. It adds a little weight when dumping the crushed grain but less mess potential. JMO and $0.02 cheers and happy crushin?

I only made that mistake once...now I just tilt the top bucket a little, roll the whole thing left/right a bit, and make sure it'd empty before taking the top bucket off... It works great and there is NO DUST while grinding. :mug:
 
I just received my Victoria Mill in mail, have it together but wondering should I give it a wash down prior to use as it has the protecting rust coating on or just giverr.
 
Nothing special here, but it will stand upright outside of the bucket and I thought that was kinda clever
I am totally stealing this design.

How steady is it on the bucket when you're grinding?
 
I just received my Victoria Mill in mail, have it together but wondering should I give it a wash down prior to use as it has the protecting rust coating on or just giverr.


I would wash off the nasty factory oil with hot water and some dish soap, rinse and dry well. I think I placed mine in a warm oven for a few minutes to dry....just don't store wet as it will likely rust....
 
I also sanded down the high spots of my grinding plates and that seems to allow me to get a real fine crush.

how much did you sand them down? did you sand by hand?
As I'm trying to dial mine in, I go from some uncrushed kernels to way too much flour really quick
 
I am totally stealing this design.

How steady is it on the bucket when you're grinding?

It's pretty darn stable. The little cleats on the bottom grip the outside of the bucket, while the clamp bracket site against the inside edge. I'm pretty pleased with it.
 
how much did you sand them down? did you sand by hand?
As I'm trying to dial mine in, I go from some uncrushed kernels to way too much flour really quick

I have a belt sander and I just rubbed them each against that while it was running. If you don't have that, I'd put a sheet of sandpaper on a flat surface and rub the plates against that. It shouldn't take much.
 
I've been meaning to post a couple of pics for quite some time. I think this is an awesome mill and it has worked perfectly for me for many batches. I have the grind pretty small and it has worked for AG as well as my first BIAB. The mill is mounted as per many others on a single piece of 2x4, then the bottom is cut out of the bucket. I also cut a hole in the lid so that the filler cone fits thru the lid. My 3 gallon water bottle makes a huge grain funnel and works just right. The thing I have done differently is cut a plywood doughnut that slips up from the bottom to fit the grinder bucket...no screws. This allows the entire grinder bucket to sit on top of an empty bucket for catching the ground grain. No dust, no mess, cheap and it does a great job. I power it with a big single speed drill.

Seeing yours in person inspired me! I didn't make the "toilet seat" for mine because I didn't have any thick plywood laying around, and already had the 1x4 from my previous setup. I was actually thinking about adding a longer 1x4, and setting the whole thing over my brew pot/bag and grinding straight into strike water. If I have any leftover plywood from any remodeling projects I'm sure I'll make the doughnut though, the 2 buckets don't fit as tight as I'd like with my 1x4.

I did add some washers to mine and that made a HUGE difference, before it wouldn't stay adjusted and the wing nuts would back out while grinding. Am going to pick up a water bottle on the next Wolly World trip to use as a hopper.

Thanks to everyone, really enjoyed reading this thread over the coarse of a couple days. I guess what I love about this ugly mill; is it's one of the few times in life you can spend a lot less money and actually get something that works just fine. Was a fun project that only took 20 or 30 minutes, and used crap I had laying around.

I was going to replace my cheap amazon mill, but just haven't ever gotten around to it, and now I don't think I EVER will. Dunno how long one of these can last but I've already been using mine for years, no telling how many hundreds of pounds have been through it, maybe even thousands by now!

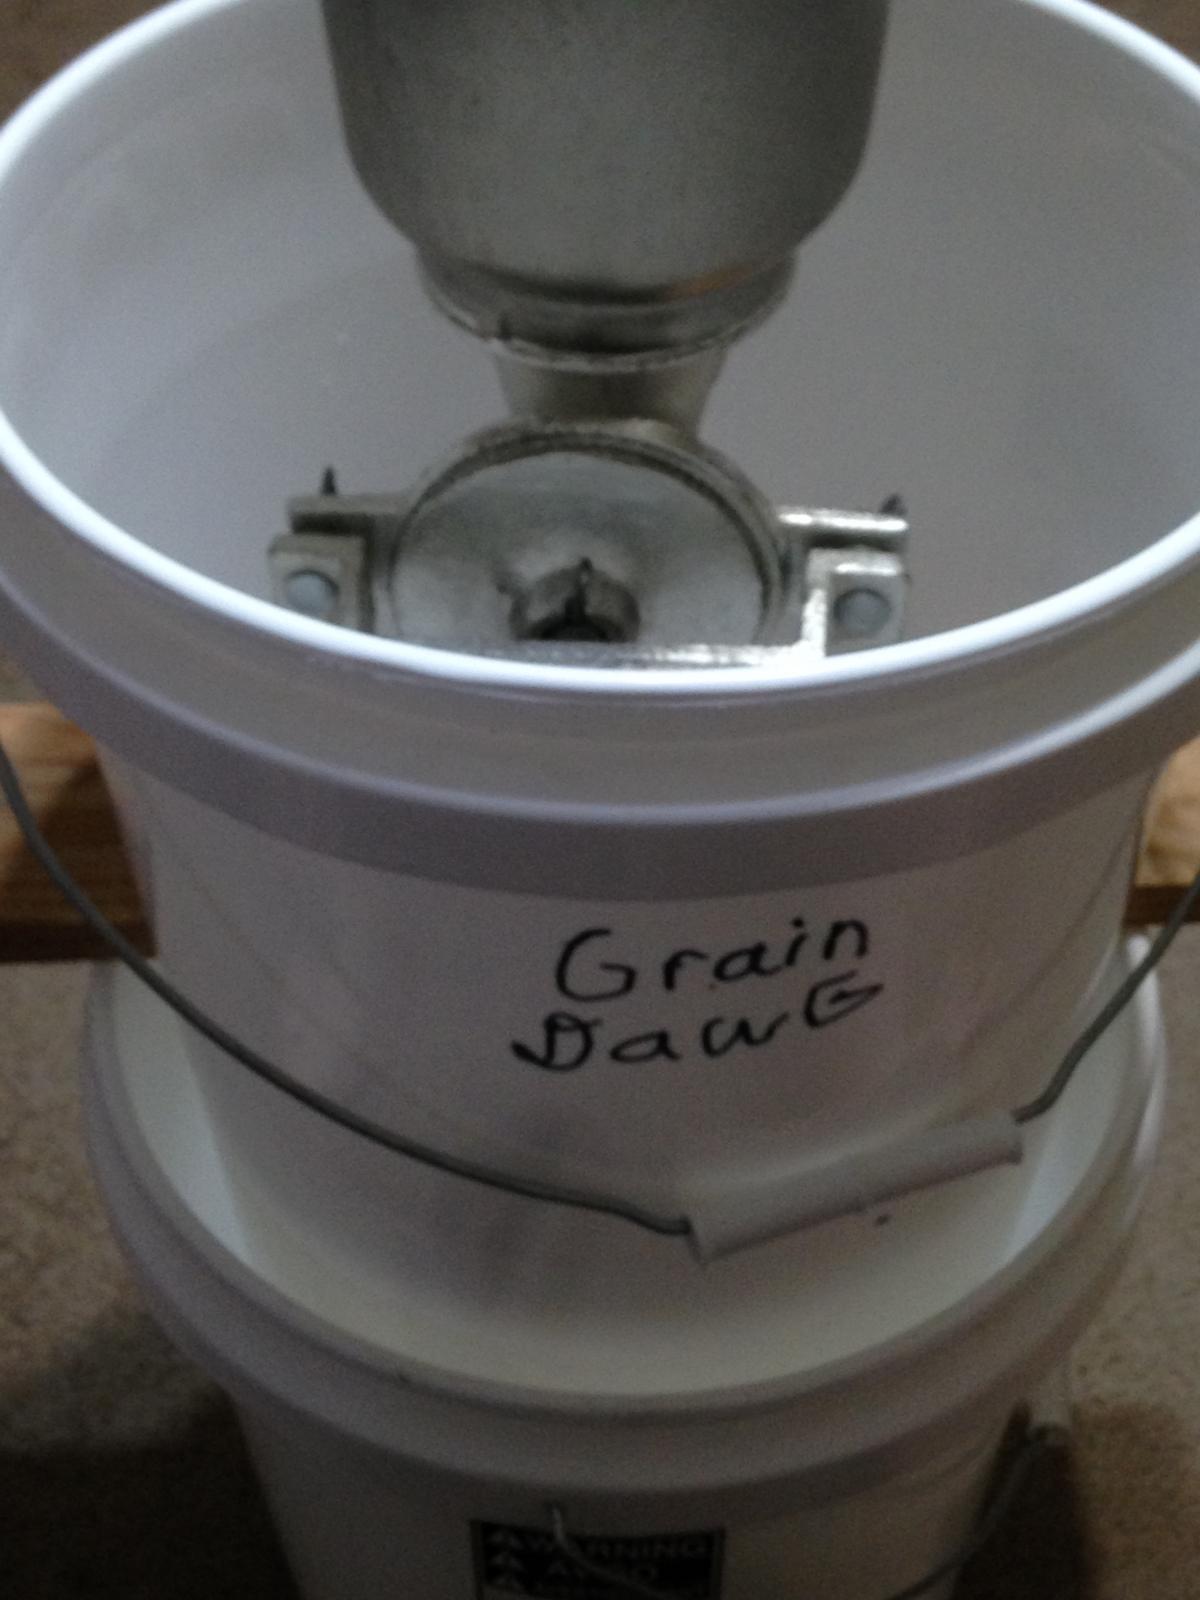
You've heard of "road dogs", well this is my "Grain Dawg"!

IMG_4506.jpg


IMG_4507.jpg


IMG_4508.jpg


IMG_4509.jpg


IMG_4510.jpg


IMG_4511.jpg


IMG_4512.jpg


IMG_4513.jpg
 
Seeing yours in person inspired me! I didn't make the "toilet seat" for mine because I didn't have any thick plywood laying around, and already had the 1x4 from my previous setup. I was actually thinking about adding a longer 1x4, and setting the whole thing over my brew pot/bag and grinding straight into strike water. If I have any leftover plywood from any remodeling projects I'm sure I'll make the doughnut though, the 2 buckets don't fit as tight as I'd like with my 1x4.

I did add some washers to mine and that made a HUGE difference, before it wouldn't stay adjusted and the wing nuts would back out while grinding. Am going to pick up a water bottle on the next Wolly World trip to use as a hopper.

Thanks to everyone, really enjoyed reading this thread over the coarse of a couple days. I guess what I love about this ugly mill; is it's one of the few times in life you can spend a lot less money and actually get something that works just fine. Was a fun project that only took 20 or 30 minutes, and used crap I had laying around.

I was going to replace my cheap amazon mill, but just haven't ever gotten around to it, and now I don't think I EVER will. Dunno how long one of these can last but I've already been using mine for years, no telling how many hundreds of pounds have been through it, maybe even thousands by now!

You've heard of "road dogs", well this is my "Grain Dawg"!

cool Eric! looks great! Now that you are using the bag, We can easily grind your grain at my house next time you come over to brew.. :)
Bob
 
estricklin,

Please report back if you ever try crushing right into the strike water. I'm sorta fixed on dumping the grain bill and mixing pronto, but I'm always up for streamlining the process.
 
cool Eric! looks great! Now that you are using the bag, We can easily grind your grain at my house next time you come over to brew.. :)
Bob

Yep that will make things easier for sure.

estricklin,

Please report back if you ever try crushing right into the strike water. I'm sorta fixed on dumping the grain bill and mixing pronto, but I'm always up for streamlining the process.

I guess the reason why I have been hesitant about is that I don't like all that grain dust in my brewing area, I usually crush outside/away from it. But if I'm mashing there anyway what's the difference? Think I will try it on this next brew just for the heck of it.
 
When you guys talk about astringency is this because to tight a grind or to high a temp during the mash.I pretty much read this whole thread did not get a feeling on one or the other.
 
It has been speculated that too find a grind will result in astringency from the fine husk particles. However, I have had my corona mill cranked down pretty tight since I started doing all-grain 4 years ago and my beers have never had an astringency I would blame on the crush (I am BJCP certified). Some BIAB brewers seem to go pretty much as fine as they can and it doesn't appear to be an issue for them either.

Similarly, it has been speculated that too high a temperature for your sparge water can extract tannins from the husks. I haven't experienced this either, but then I rarely use water hotter than 170 for sparging so I haven't really tested this one.
 
Has anyone used feeler gauge's to set theirs and what did you set it at I have mine set at .030,have not used it yet at this setting.My mastercard is .030 thick so thats what I went with.
 
So I did the crushing directly into the bag, not a bad way to go at all. I'm going to keep doing it actually. I was having a lot of gravity problems when I first started BIAB, (around 50%), but found out I had a bad thermometer, crushed a little bit finer, and hit my target at 72%.

IMG_4597.jpg
 
Back
Top