Measure twice, but your fridge once

Homebrew Talk - Beer, Wine, Mead, & Cider Brewing Discussion Forum

Help Support Homebrew Talk - Beer, Wine, Mead, & Cider Brewing Discussion Forum:

This site may earn a commission from merchant affiliate links, including eBay, Amazon, and others.

Beernik

Well-Known Member
Joined
Jun 26, 2009
Messages
4,193
Reaction score
1,011
Location
Camano Island, WA
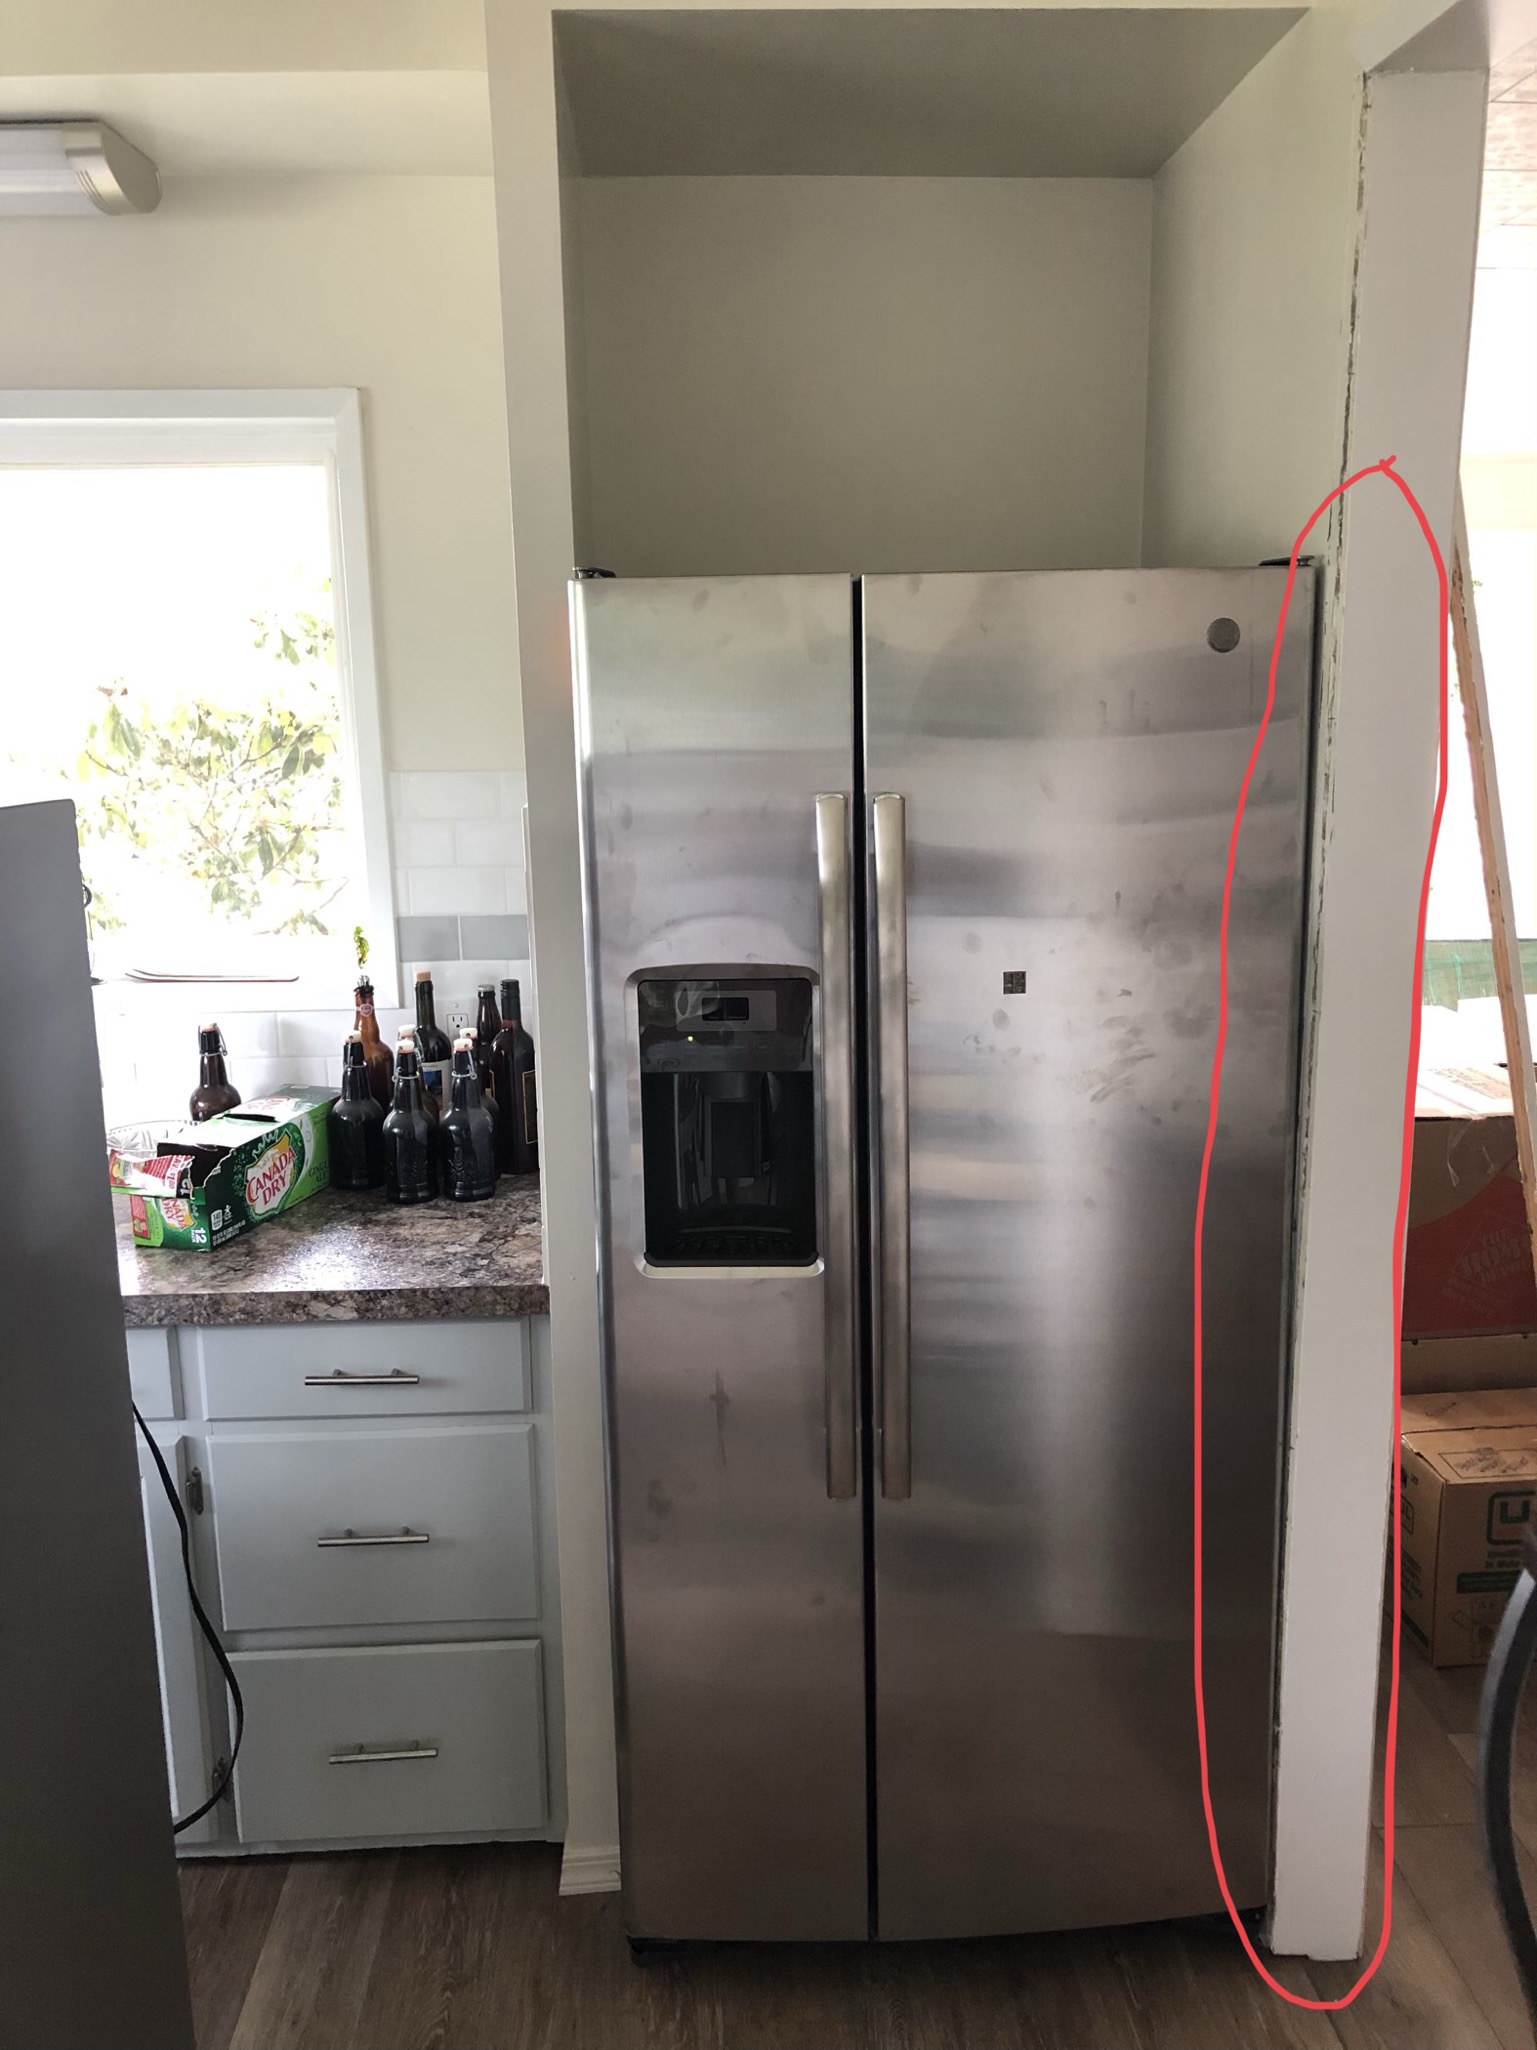
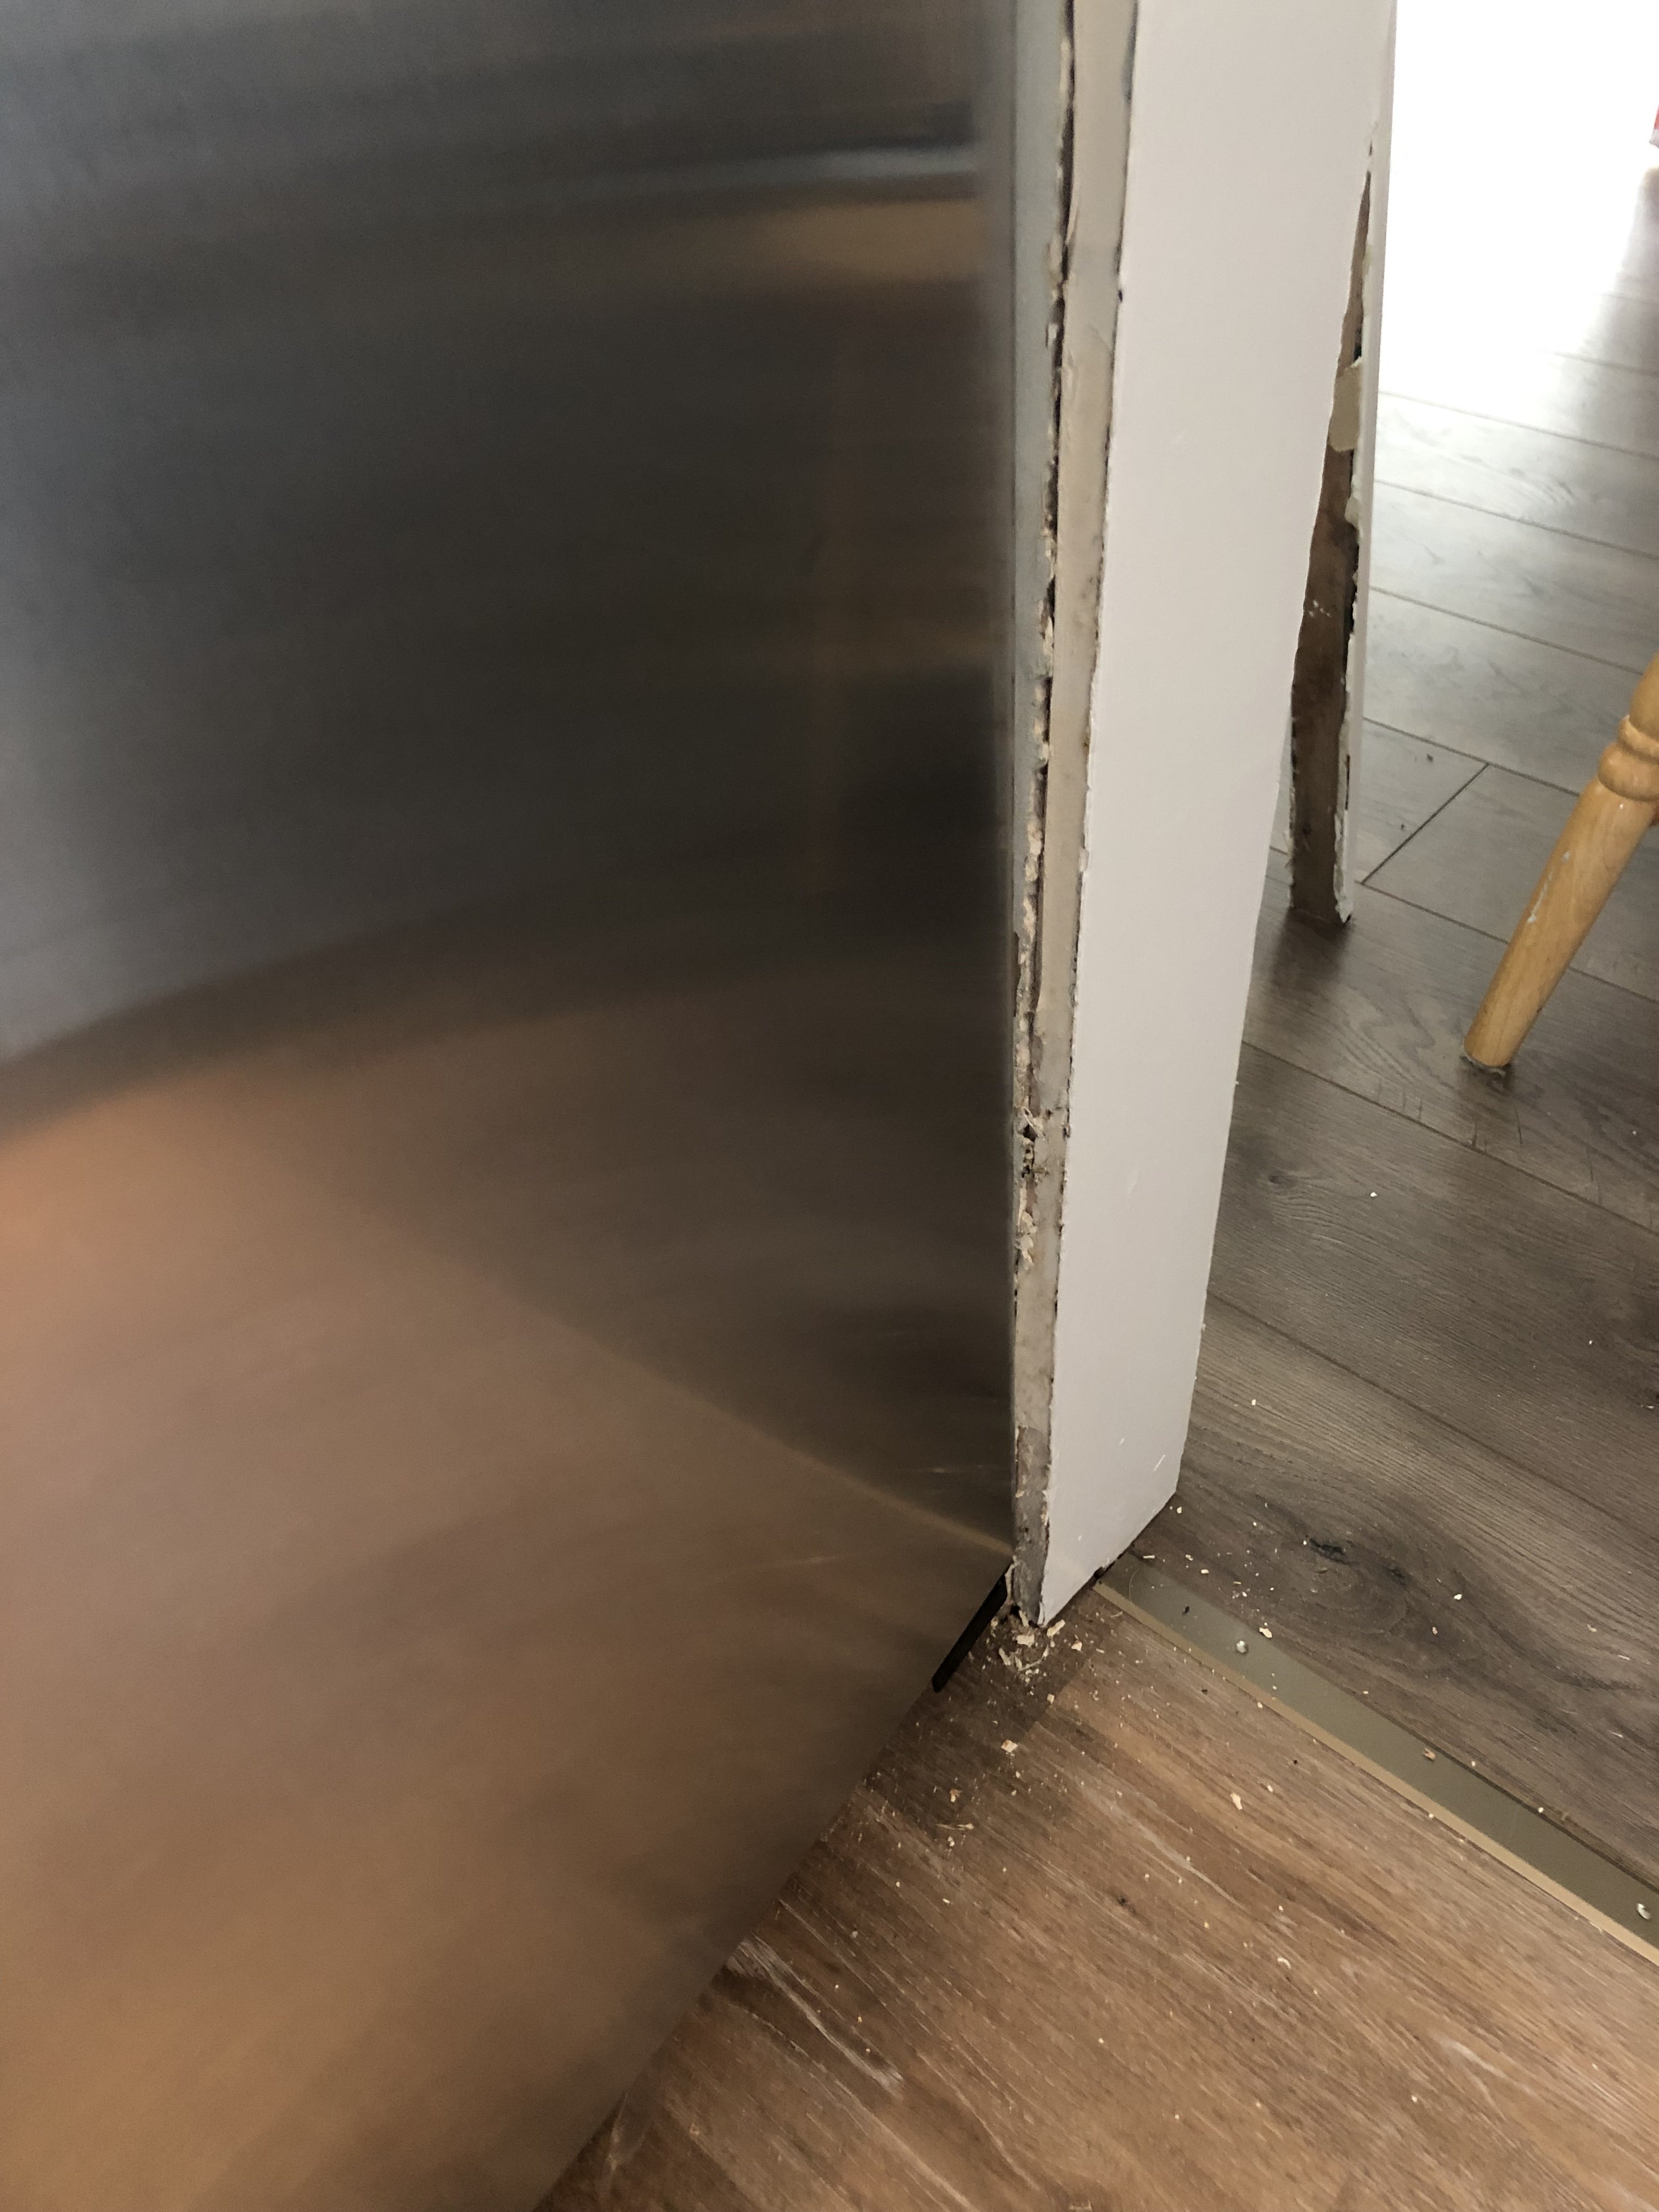
Finally got a fridge in the new house. But stupid me measured wall to wall instead of wall to trim. It also doesn’t help the fridge cubby isn’t square in the back, where I measured. So the trim is off and the fridge is in.

1D6C1D36-6B4F-4E68-84B1-4EFF6E3A94D3.jpeg


What are my options here? Finish it up Door frame like a wall corner? Or do they make an ultra-thin door trim?
 
Last edited:
I think your fridge needs a bit of airflow behind it to stop it overheating? Cramped in that tightly, you're possibly going to damage it. Can you take off that piece of sheet on the side, and either leave it off (tidy up the wall behind the fridge with some trim) or extend the wall a bit behind the fridge and put a new side piece on?
 
Could you possibly post more pictures of your situation? I was a cabinetmaker/carpenter before I retired and I live in a house built in 1840 so I'm familiar with dealing with trying to make modern appliance fit in places they weren't meant to be and walls and floor being out of plumb/square. No guarantee but I might be able to help.
 
I have the fridge pulled out from the back wall as much as I can, about 1.5”. I could mount a little window strip fan on top of it to blow out the hot air.

To the left side, I can’t narrow the wall. It’s only 2.75” wide, I’d have to remove it completely.

To the right (the picture), it’s 4.5” wide. That seems like it’s only room for a stud and a piece of drywall on each side. I’d be a bit nervous about thinning it up because I think it was originally an exterior wall and the kitchen is an add-on.
 
Last edited:
It's hard to tell from the photo.....is the fridge pushed inside the piece of drywall/board (i.e. does the drywall extend past the back of the fridge) or does the fridge butt up the wall?
 
Maybe this picture will provide better context. I’ve circled where I’ve taken the trim off.

The fridge is pulled out about 1.5” away from the back wall for ventilation.

EDIT: I should add that what ever I do to refinish this entryway I’ll have to do to the other entryway to match.

EDIT2: I should also note one of the walls is about 0.75” out of square in the back.

A683AE52-7FDB-4B0D-B68F-0337F47D4E5F.jpeg
 
Last edited:
That definitely makes things clearer!
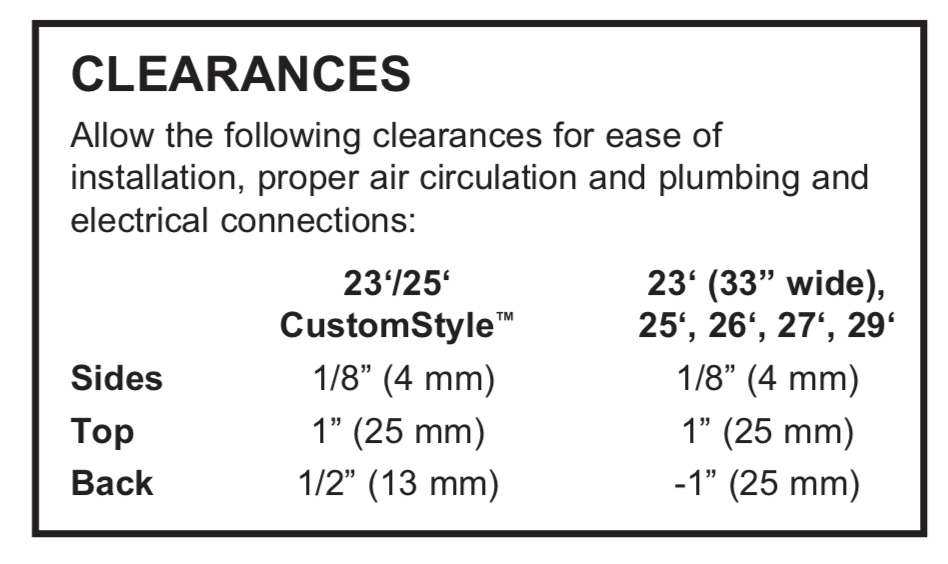
Have a look in your fridge manual/instructions - does it say anything about minimum side and rear clearance?
 
I'd be pulling out the wall between the bench and fridge. Possibly replace it with a sheet of something about 0.75" thick that matches the benchtop. It could also be used to make shelves above the fridge.
 
fwiw, we have a "counter depth" bottom freezer Samsung unit and it's zero clearance on the sides, 2" on top, with just enough space at the back for the line cord and water line - so, maybe a half inch. The key is the condenser is fan driven and exhausts out the front at floor level.

Cheers!
 
View attachment 633872
I took a picture of the manual because it says it it only needs 1/8”. It’s the 33” wide.

That's convenient - mine needs 15mm (over 1/2")! You could use aluminium angle in place of the trim. Either use it around the entire door frame, or just to the height of the fridge, with the existing trim above.
 
I suspect the least painful way out is change the thin partition wall to the left so symmetry issues with the other side (not to mention potential load-bearing issues) are avoided. If the inside of the thin wall is sheet rock it could be replaced with a thinner sheet, for instance, without a huge effort...

Cheers!
 
+1 on getting rid of the wall on the left (between fridge and bench/counter). You could replace with a nice piece of 3/4” wood if you want the separation, or something else that matches/works.

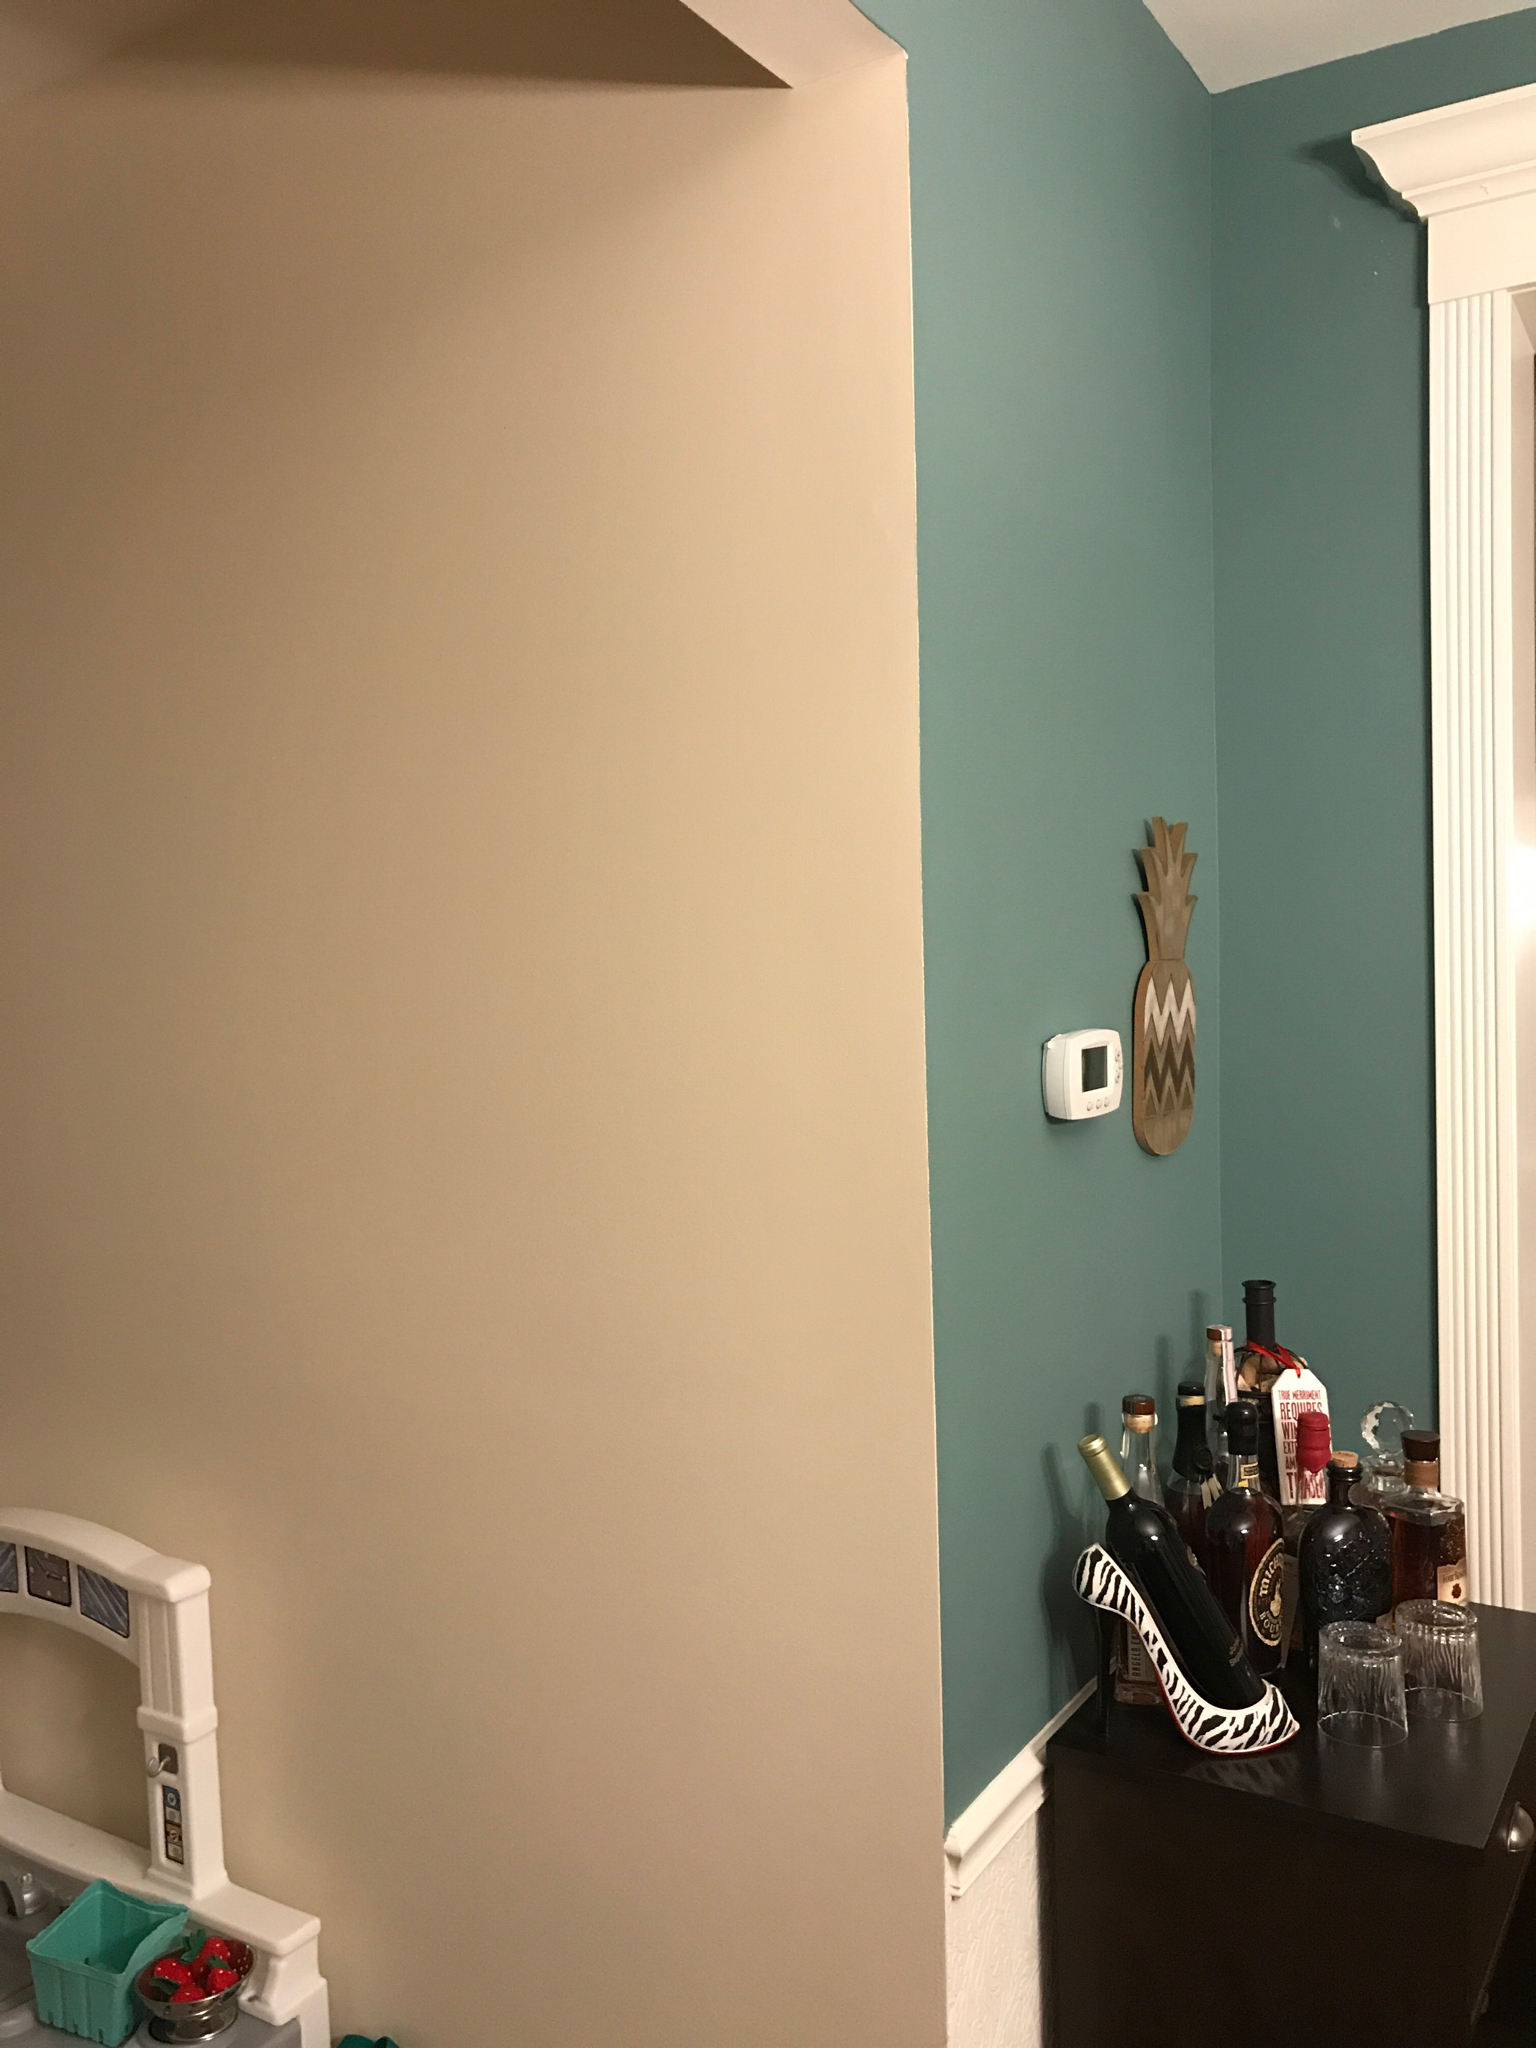
2nd option is to keep the trim removed from the doorway on the right (provided there is no door) and just finish with corner bead all around. A lot of newer construction homes, at least in the Jersey/PA/DE area, don’t bother with putting trim on pass-through type openings:
IMG_0011.JPG
 
There’s a product called Melamine which is widely used in cabinet construction, flat pack furniture, pretty much anywhere a pre finished surface is desired. It's just particle board covered with plastic laminate and comes in a wide variety of colors and patterns.

I'd consider removing the partition on the left side of the fridge and replacing it with a sheet 3/4” melamine in a color that matches or complements what you have now. It could be secured with screws into the base cabinet and the framing of the soffit above the counter.
 
lifetime of being a carpenter here...I'm thinking.... I dont think theres much you can do to the wall on the right but can you make the partition wall on the left a 2x3 or 2x2 instead of the 2x4? that way you dont have to do much floor patching in.
 
That walls already tiny. Its either 2x3 or even 2x4 studs sideways from the looks of it.

I d also vote for either the edge trim in extremely low profile- aluminum angle, etc., or do the corner bead and ditch the trim completely. Although thats a bit more work, paint, etc.
 
Agree the thinner partition is the one thing that could move/be made thinner. To save messing with it all the way up to the ceiling, maybe make a cubby above fridge(leaving plenty of top clearance of course) and just make lower part thinner.

I've seen sheets of Azac that would work too, but that might be a little rough for your nice kitchen(not mine, unfortunately haha)
 
Thanks everyone.

I think my first option is going to be to try to find an ultra-thin trim for this side of the entryways.

Second option will be to do a drywall corner bead. My only concern here is making the entryway more narrow.

Third option will be removing the left wall and replacing it with something thinner.

I’ll hit Home Depot or Lowe’s later today to see what they got.
 
I will.

I haven’t made it to HD yet. We went mattress shopping instead. We’ll hit hardware stores first thing tomorrow morning.

That is assuming I don’t have to stay up until 12:30am to walk the dog because of fireworks.

I gap measures the space I have to work with. Anything more than sheet metal or laminate thickness isn’t going to work as a superficial repair.

It would be a pain in the ass, but I might be able to re-sheetrock the fridge cubby and put this trim back on. On both walls, the wall drifts more than 1/8” to the left down the height of the fridge. Meaning, there is more than 1/8” gap at the top left and more than 1/8” gap at the bottom right.

I guess the question is, “are the studs that far out of plumb too?”

EDIT: File this idea under, So crazy it just might work, or maybe under, I’m drunk:

I could get a roll of wax paper and make a template of the amount of molding that would show and then cut then cut a piece of molding to the template with a jigsaw.

When it comes time to move, if I want to take the fridge with me, I put the original molding on.
 
Last edited:
I will.

I haven’t made it to HD yet. We went mattress shopping instead. We’ll hit hardware stores first thing tomorrow morning.

That is assuming I don’t have to stay up until 12:30am to walk the dog because of fireworks.

I gap measures the space I have to work with. Anything more than sheet metal or laminate thickness isn’t going to work as a superficial repair.

It would be a pain in the ass, but I might be able to re-sheetrock the fridge cubby and put this trim back on. On both walls, the wall drifts more than 1/8” to the left down the height of the fridge. Meaning, there is more than 1/8” gap at the top left and more than 1/8” gap at the bottom right.

I guess the question is, “are the studs that far out of plumb too?”

EDIT: File this idea under, So crazy it just might work, or maybe under, I’m drunk:

I could get a roll of wax paper and make a template of the amount of molding that would show and then cut then cut a piece of molding to the template with a jigsaw.

When it comes time to move, if I want to take the fridge with me, I put the original molding on.
believe me , studs can be that far out of plumb. Ive seen and fixed way worse in my career. you could re-sheetrock that left side with thinner material. it does come in 1/4 inch
 
Not much update on this yet. I made a template of how much trim shows. I went to cut it tonight and 1) I realized I haven’t found the extension cords yet, and 2) the FedEx man delivered 4 more pieces of furniture.

So I’ll pick up an extension cord tomorrow on my way to the post office and then cut the new trim.
 
So what did you come up with..... my vote is to just remove the wall on the left but then you have to deal with the upper cabinet end, counter end and the lower cabinet end plus what ever needs to be covered up on the floor. Second easiest option in my opinion is remove drywall on the left and right and replace with 1/4" that will give you your clearance.
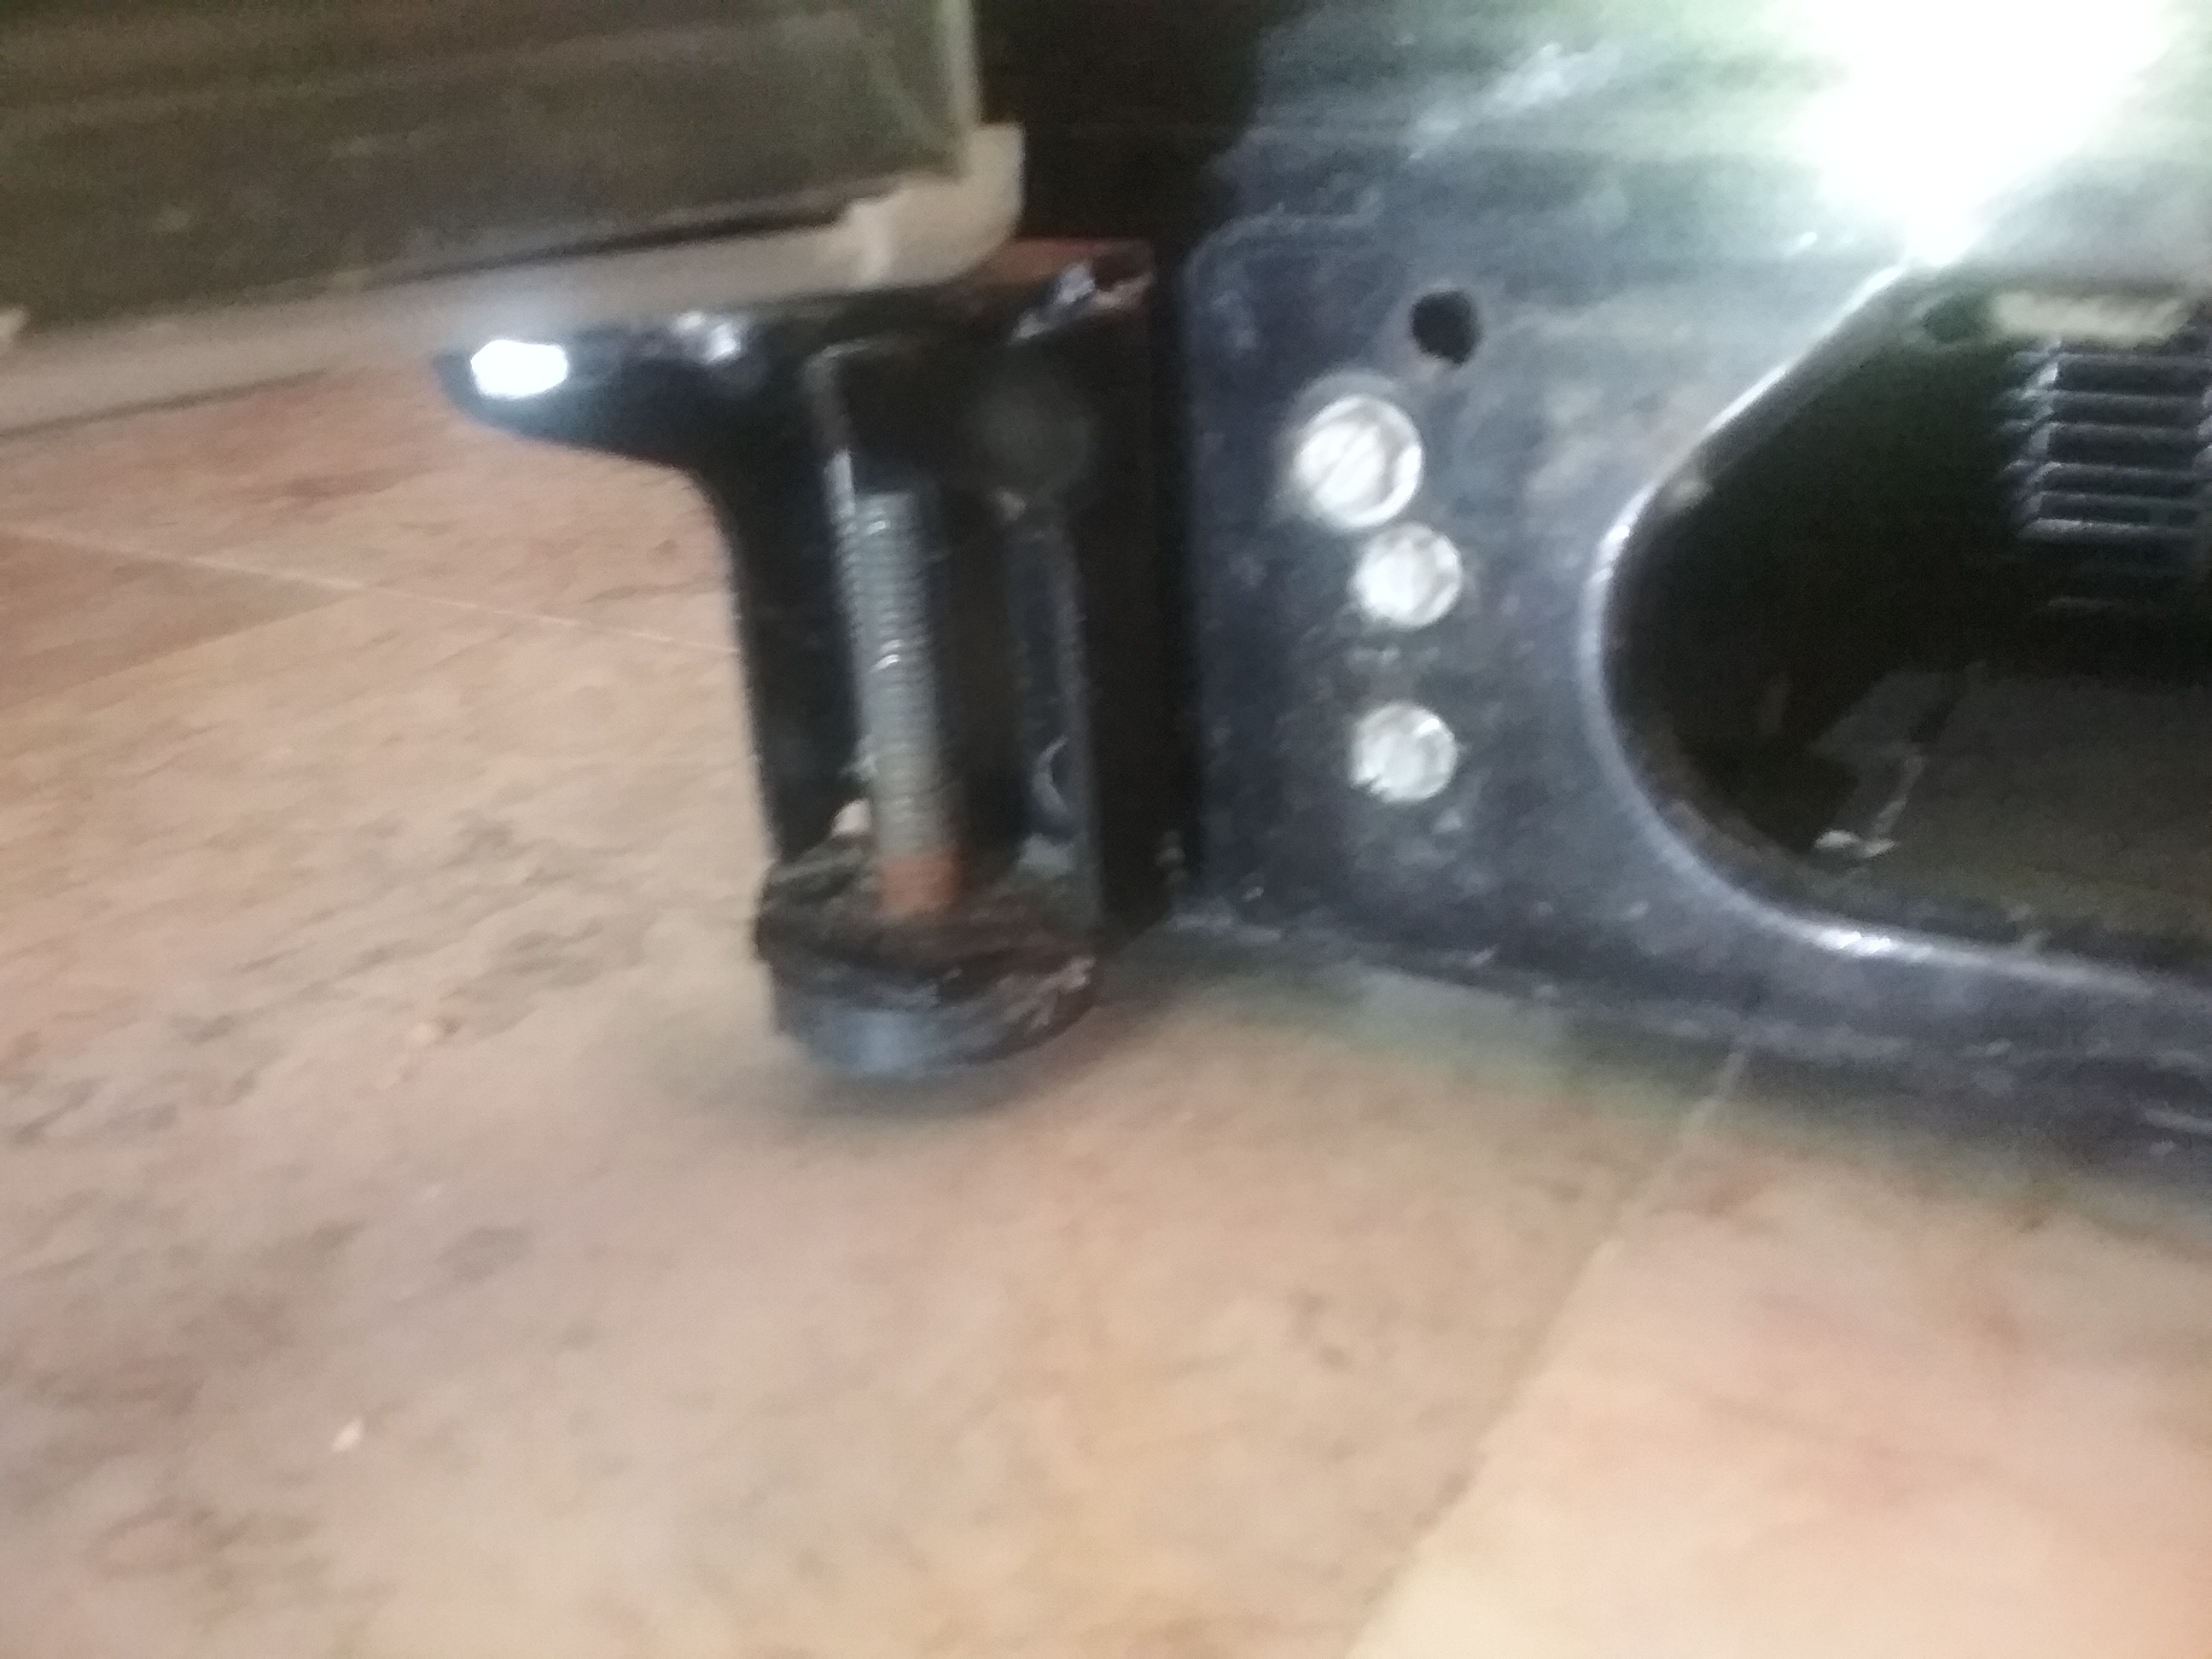
When we moved our fridge we had to put shims under the back because of the slope of the floor, we didn't really have any other option because the floor is marble. On another note there should be leveling adjusters on the front of the fridge. In the front wheels and or feet you can adjust. Mine has both.
20190805_120744.jpg

The top screw is the adjuster
 
Unfortunately, I haven’t gotten to it yet. I haven’t had many nights off from assembling new furniture, hanging curtains, or unpacking boxes.

Since the move, we’ve had 4 guests make plans to visit: wife’s friend & client, wife’s mom, my friend, & my dad. So my wife is freaking out about getting everything unpacked assembled before the first guest arrives next week.

I’m down to 3 tables to assemble, 1 curtain to hang, & almost all the remaining boxes are books (easy to unpack).

It will probably be the end of August (after the first 3 guests) before I get back to it. I still plan on trying to cut a piece of trim to fit as my first attempt. Until then, the trim will continue mock me from the table I have to clamped to every time I walk into the garage.
 
I went through and re read.... So you do have the clearance you need already and from what I read if I understand what they are saying, you don't need any clearance in the back... -1". That means you fridge is ventilated on the front at the bottom both intake cool air and output hot air. The 1/8th on the sides is for the prevention of condensation between the wall and the fridge which would cause mold and damage. The defrost heating elements on your fridge will be around the door seals but on the fridge side not in the door and in the freezer behind the back panel so no overheating chance from those. Anyway back to my point, as long as you have your clearance on the sides and even if that negative sign is a typo you should be good stuffing a thin piece of trim where you want it. Those clearances are not needed where the trim meets the fridge unless you have really tall one like my house....8" high meets the freezer section on my fridge.
If the front adjusters don't get your fridge straight enough try placing a 1/8th inch thick square of plywood (6×6 at least) on the floor where the rear wheel will sit on the side that needs to be raised up. Be sure to bevel the front edge of it so it will be easier to roll your fridge on to it.
For everyone else.... when you go to buy a fridge be sure that you check how far you have to open it to get the drawers open and out because with that door on the right and the wall right there I bet you will have a tough time because that door doesn't open all the way. And speaking of design flaws..... those new French door style are full of them. I have yet to find one that allows you to open a drawer without opening both sides of the fridge.
 
Unfortunately, I haven’t gotten to it yet. [...]
It will probably be the end of August (after the first 3 guests) before I get back to it.

There are several projects that I keep meaning to do from when we bought our house . . .in 2013. . . but the brewing gear is all clean and organized!
 
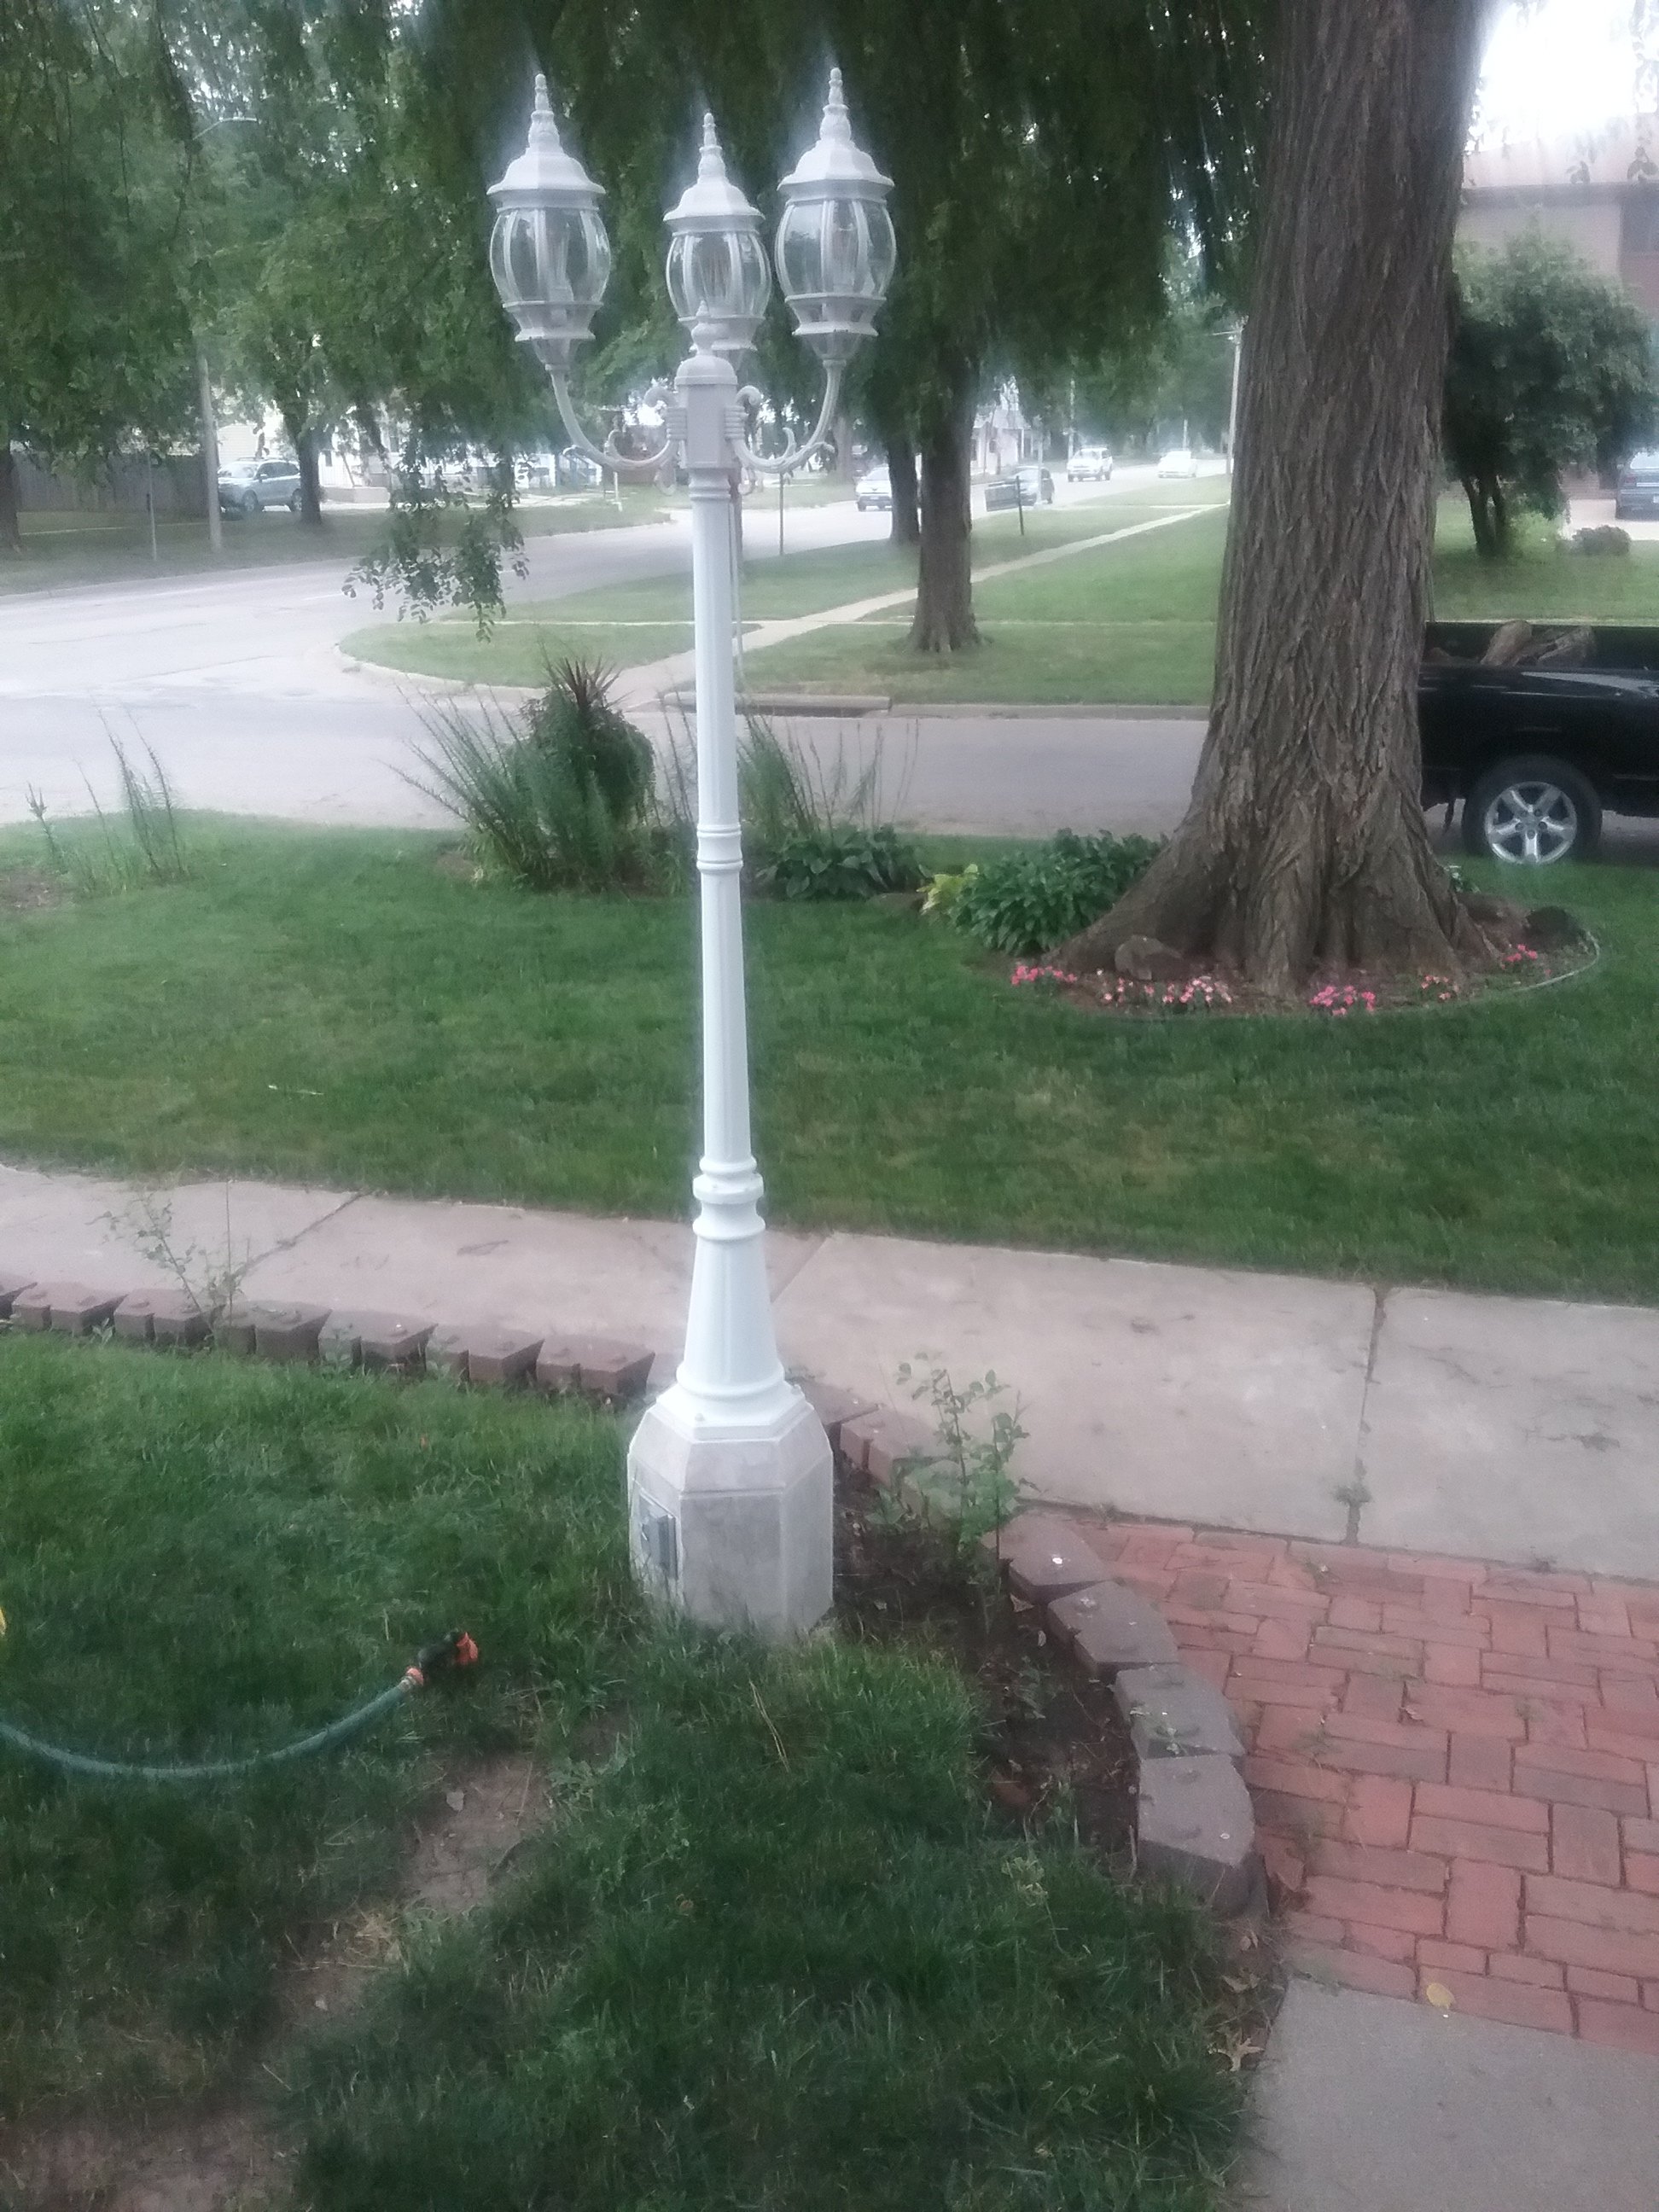
Lol..... 6 years is not bad for delay! I finally installed the lamp post we bought on 06 when we bought our house. I made the marble base for it, I just never got around to burying the electrical, setting the footing, etc etc.
20190805_152648.jpg

Finally got around to that this spring. That and all the baby bushes you see along the retaining wall. I installed the watering system for them the the same year just finally getting around to growing and putting in the bushes.
 
Yeah, at first I thought the hot air blowing out from under the fridge was a reason for concern. But it’s designed to be that way.

I’ve made a template of what I need to cut the trim to. I’m hoping it will just slide right into place. When we move out, I’ll put the original trim back in.
 

Latest posts

Back
Top