Keezer Build - Cedar Collar

Homebrew Talk - Beer, Wine, Mead, & Cider Brewing Discussion Forum

Help Support Homebrew Talk - Beer, Wine, Mead, & Cider Brewing Discussion Forum:

This site may earn a commission from merchant affiliate links, including eBay, Amazon, and others.

RGillette10

Well-Known Member
Joined
Jun 27, 2012
Messages
46
Reaction score
0
Location
Seattle
Hey everyone. Thanks to everyone for all the awesome posts. I'm finally getting going with my keezer. I've painted it black (the front is chalkboard, and the rest is glossy). I'm going to work on the collar in the coming days/weeks. Here are the specs:

GE 7.0 Used and definitely not the ones on the market as of 2013.
4 Taps
1 Stout
3 Perlick SS (will probably use one of these for soda)

I'm going to install all the hardware, but I probably won't have the stout up and running for some time.

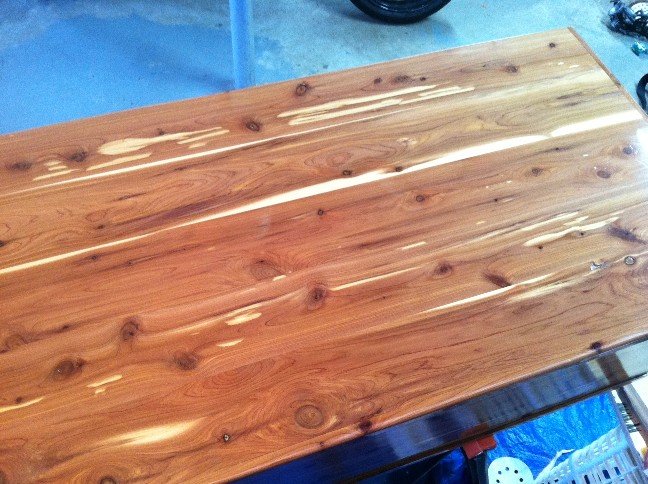
As I build the collar, I'm planning on using 1 x 10 or 1 x 8 cedar. Probably with a red stain. Do most people use a gloss on the collar? I feel like a stain should be sufficient. Anyone have any opinions about using cedar for the collar? I was going to use poplar, but realized that cedar was cheaper and looked just as nice, if not nicer.

You can see the paint drying here:

20130605_201114.jpg
 
As I build the collar, I'm planning on using 1 x 10 or 1 x 8 cedar. Probably with a red stain.

Have you considered eastern red (aromatic) cedar? It'll already have that red look you're after. You could probably pick it up at a hardwood dealer (unless your big box store happens to carry it, mine doesn't) for less than you'd spend on a board and stain from Home Depot. I would wipe on maybe 5-7 thin coats General Finished Arm-R-Seal for protection, although I've used PolyCrylic and a foam brush from the big box stores on ERC without a problem. Spar varnish might be a good idea in this application, too. Once the coats are on for a week or so, just rub it out with some paste wax and 0000 steel wool. It's pretty foolprooof, and sounds more complicated than it really is. Here is a chest I built, it start's off lighter red, and with time will fade to that darker red people associate this wood with.

301690-438x.jpg
 
Ed, that cedar is beautiful. Just gorgeous. I ended up going with poplar. The cedar that they had at HD was pretty beat up. The edges were in bad shape. I was going to have to put a lot of work into it. I spent the extra $10 and got some nice looking poplar board. Probably would have been better off at a lumber yard, but HD's hours worked in their favor.
 
I've got an update from this weekend. I was able to cut the poplar and fit it properly on the freezer. I was using my father in law's tool and he is out of town, so it was a bit of an adventure to find everything I needed. I used a mitre joint, which was probably too ambitious, but I wanted to give it a shot. I used a band clamp, L-brackets, and some liquid nails. The joints aren't perfect, but came out looking fine. I sanded and then stained it red. It looked pretty good while it was wet.

I came back when it was dry and realized two problems. First, the white weather stripping on the lip looked a little odd with the black and red. Second, parts of the collar were looking splotchy, like the stain doesn't absorb properly. I realized later that poplar is not great at absorbing stain; great for paint, mediocre for stain.

Now I had a great excuse to use the belt sander! Took the stain off pretty quick. I don't think I made any serious errors. I was pretty cautious.

Next, wanted to attach the collar to the freezer. I had some GE premium silicone ultra (or something) that I was planning on using. I scored the top of the freezer with a sheetrock knife to make sure the silicone got to the plastic. I also ran the beltsander of the bottom of the collar to make it nice and rough. Also sealed the inside of the collar after i attached it. It seems to be very stable at this point.

I had applied two coats of poly. It dried a little rough on me. I'm assuming this is because of the Wal-mart crappy brush I used. It was during this period that I also I realized I had 1)purchased the wrong finish & 2) really should have been using an outdoor rather than interior product. I'm planning on having the keezer on a covered balcony. I did a light sanding on the poly, which I was planning to do anyway, and applied some spar varnish with a rag, hoping to even it out a little more and give it more serious protection. I'll probably do another coat or so.

20130607_214139.jpg


20130608_081714.jpg


20130609_125758.jpg
 
That box looks good! The miters look good, and hiding the end-grain gives it a more professional look.

That spar varnish is a good route to go for your covered balcony. If you want, once it's cured, you can wet-sand it to your desired sheen. FYI, if in the future you find yourself staining woods that will not evenly absorb the stain (poplar, cherry, maple, etc), you can apply a washcoat before the stain to improve results. Mix a 1lb cut of dewaxed shellac (this would be equivalent to a 1:1 mix of Zinnsers sanding sealer and denatured alcohol), and apply to the surface. Shellac dries quickly, and when it's dry, sand it back to the wood. This will help to fill in the pores and your stain will have more even-looking coverage. Only downside is you may need to apply an extra coat or two of stain.

Crap, forgot I was on the home brewing forum...
 
I know it has been a while, but I wanted to drop a couple pictures of the keezer in its permanent home on my deck. Everything has turned out pretty well. I still need a drip tray and I'm planning on spicing up the temp controller to make it look not so broken.

20130822_201617_HDR.jpg


20130822_201603_HDR.jpg


20130822_201632_HDR.jpg
 
Back
Top