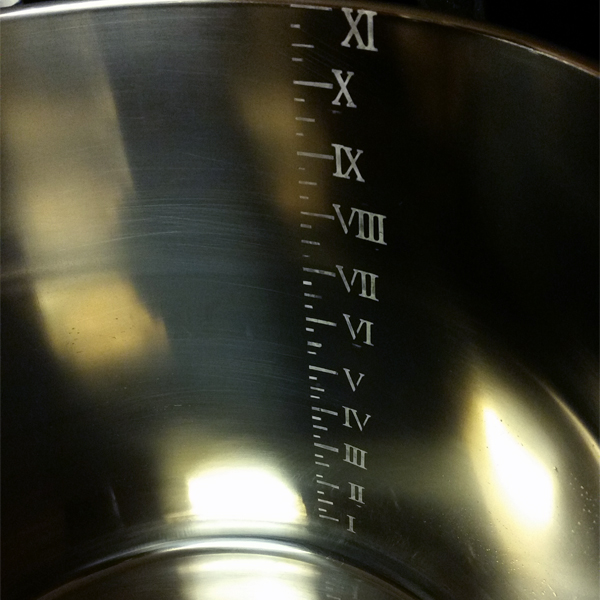
Here is a closeup.
Looks really good. Well done.

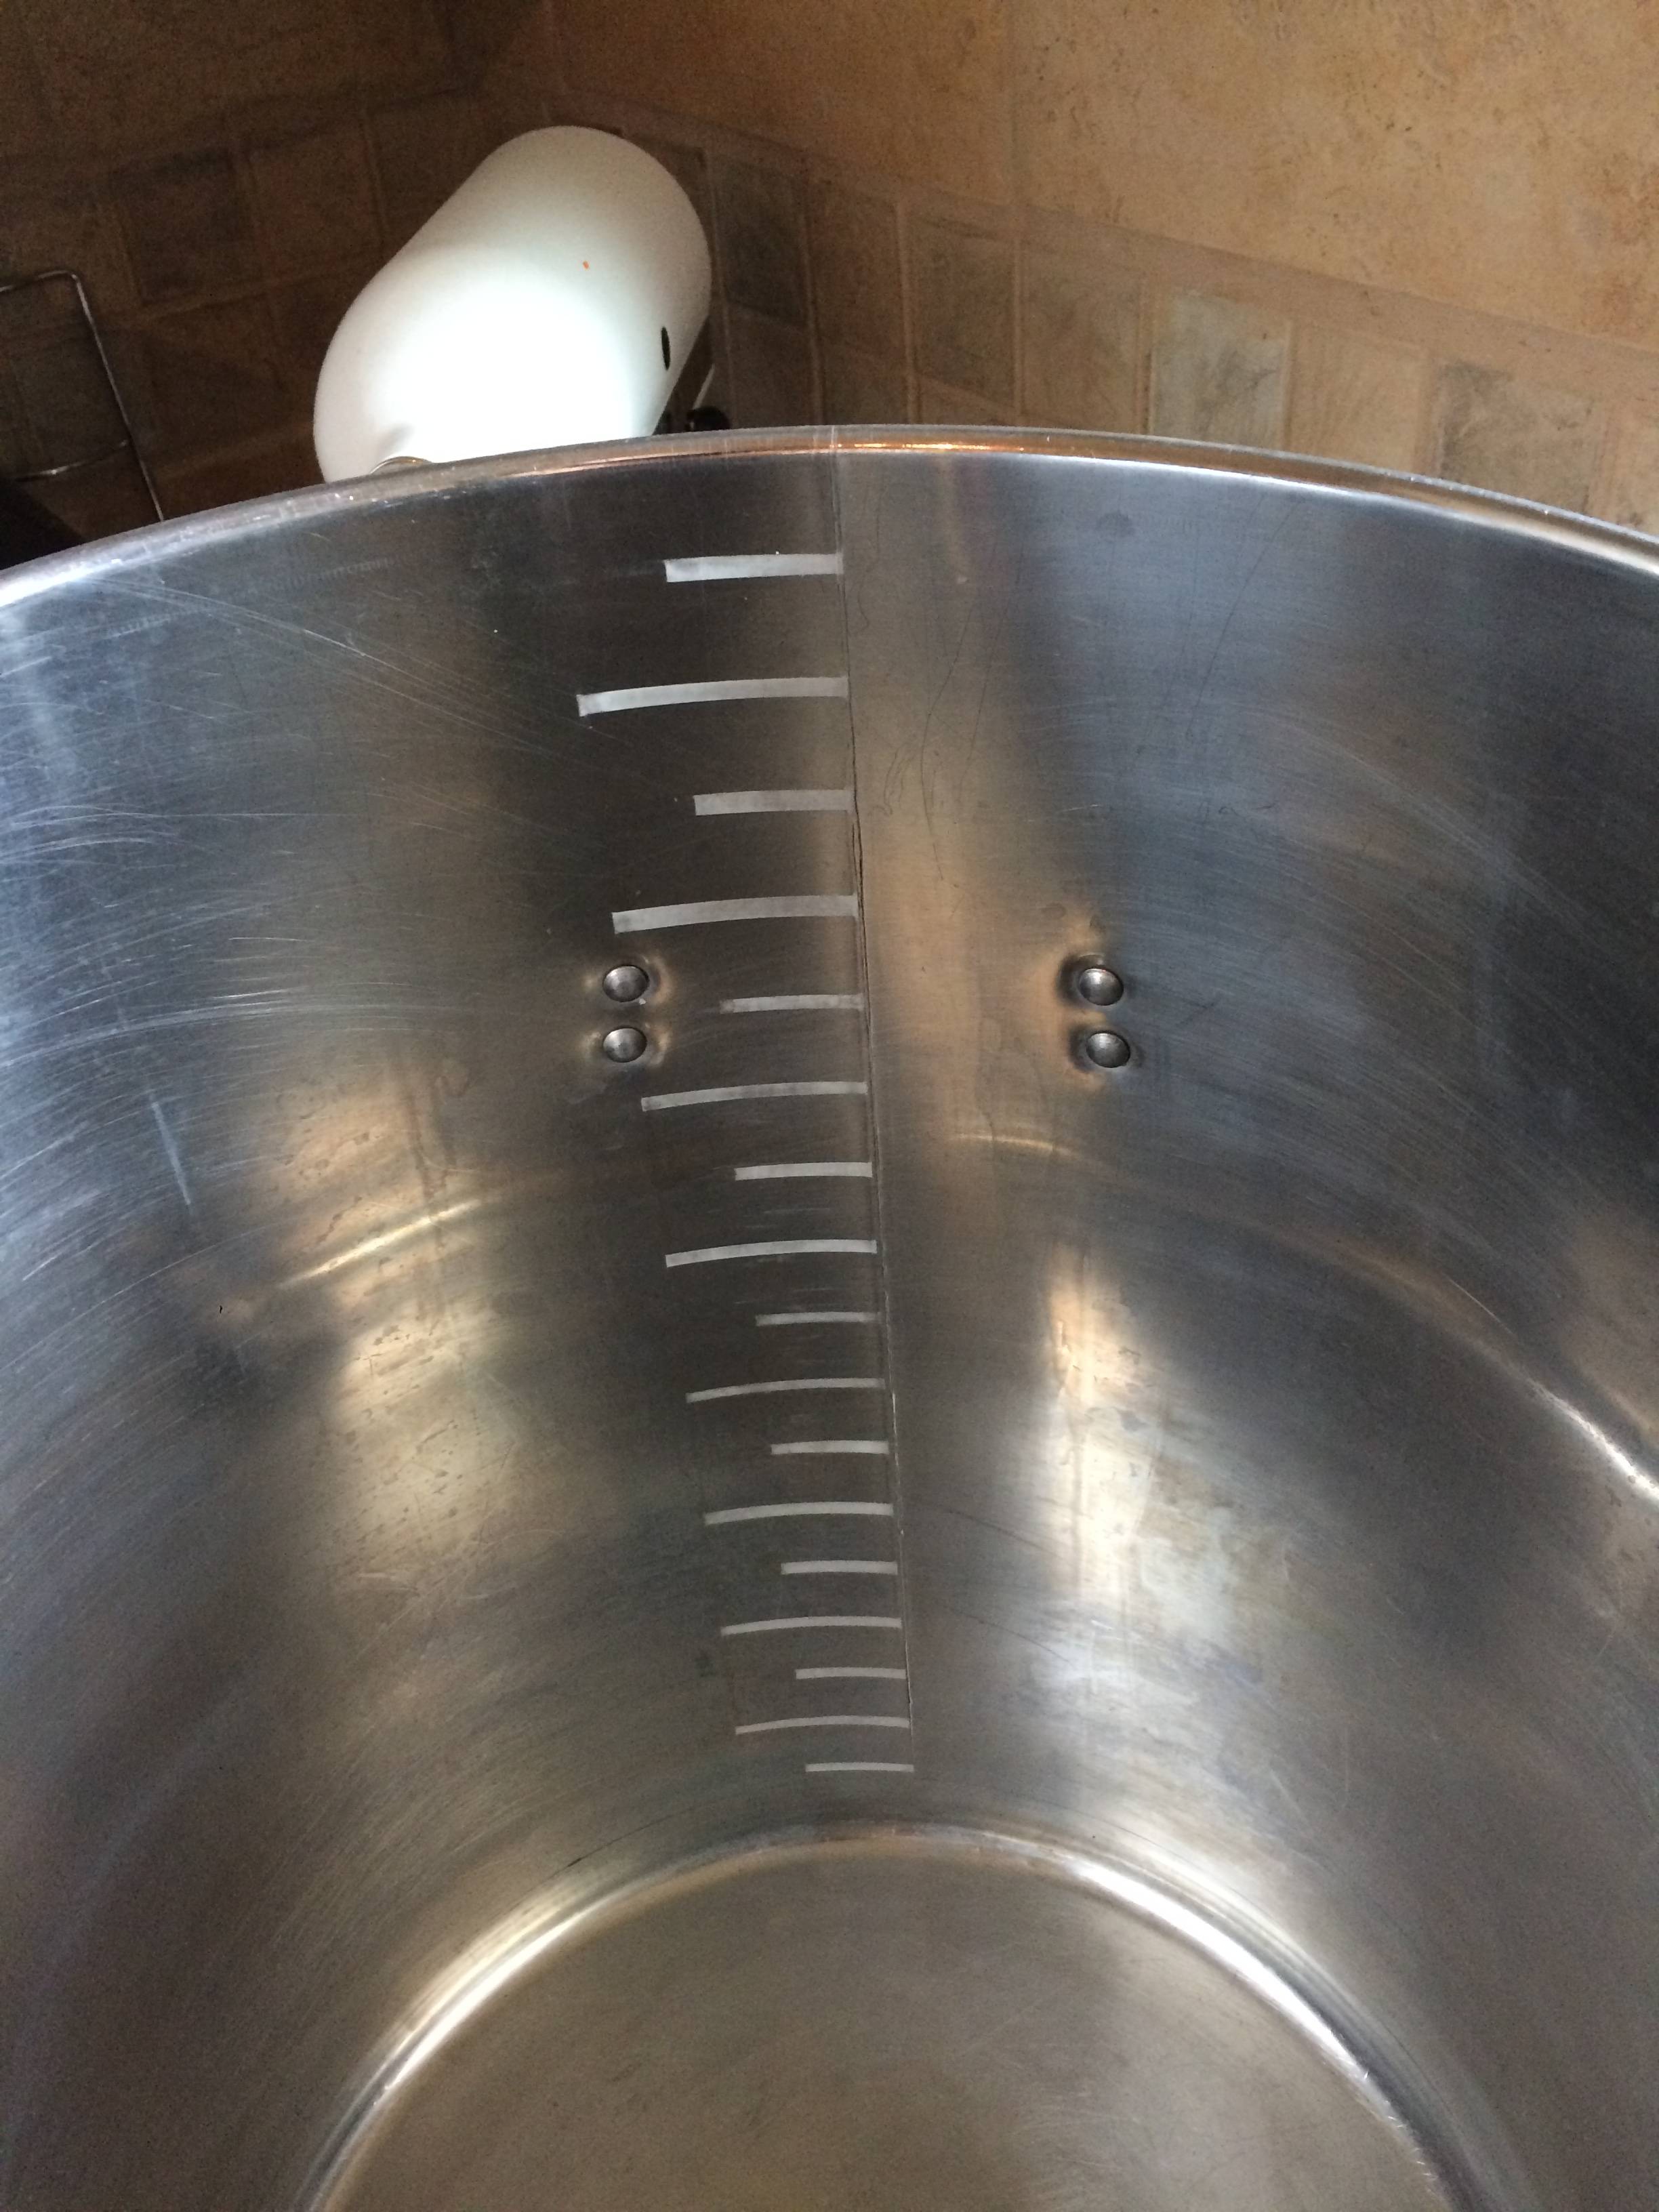
Here is a closeup.
I've been wanting to use this technique to label my kegs. Finally got around to it. Got 8 unused kegs done up today. 4 more to go along with smaller numbers for the corny lids. I found that wrapping a cotton ball around the end of the q-tip helped for my thick numbers. I used a bench DC power supply. I ended up setting it to 12 volts, which got a good sizzle. With the increased surface area from the cotton ball I was drawing up to 4 amps. I am impressed with how much they stand out.
That looks freaking cool! Personally I've got sight glasses on everything and I don't think I would ever change that if I got new ones, but I am very intrigued about putting stuff on the outside and maybe on kegs. Where did you get your vinyl done?
.jpg")
awesome. will be doing this as soon as i convert my kegs!!!


This thread is just what I needed! :rockin:
The Roman numerals someone else in the thread did really struck a chord with me, don't know what happened to some of those quarter hash marks though :/
One thing is the etching wasn't a totally consistent "color", kinda splotchy. Not a big deal, and was probably an issue of skin oils interfering with the solution. Really, I'm just being anal at this point. This was a fun evening!
I also used a 9v wall wart.
THANKS ITSGUS!!

Oh hey, it was your kettle that inspired me. Thanks, man!
Fun project!
This is a great thread!
Has anyone considered etching their aluminum CO2 tanks with their last name or initials to tag it and ensure that they get their tank back?
Has anyone considered etching their aluminum CO2 tanks with their last name or initials to tag it and ensure that they get their tank back?

I know everbody's big on sterilizing there equipment, what might go wrong if some thing happens to get in there? Won't the alchole kill every thing?

Does anyone have photos of the inside of a keggle that was etched?

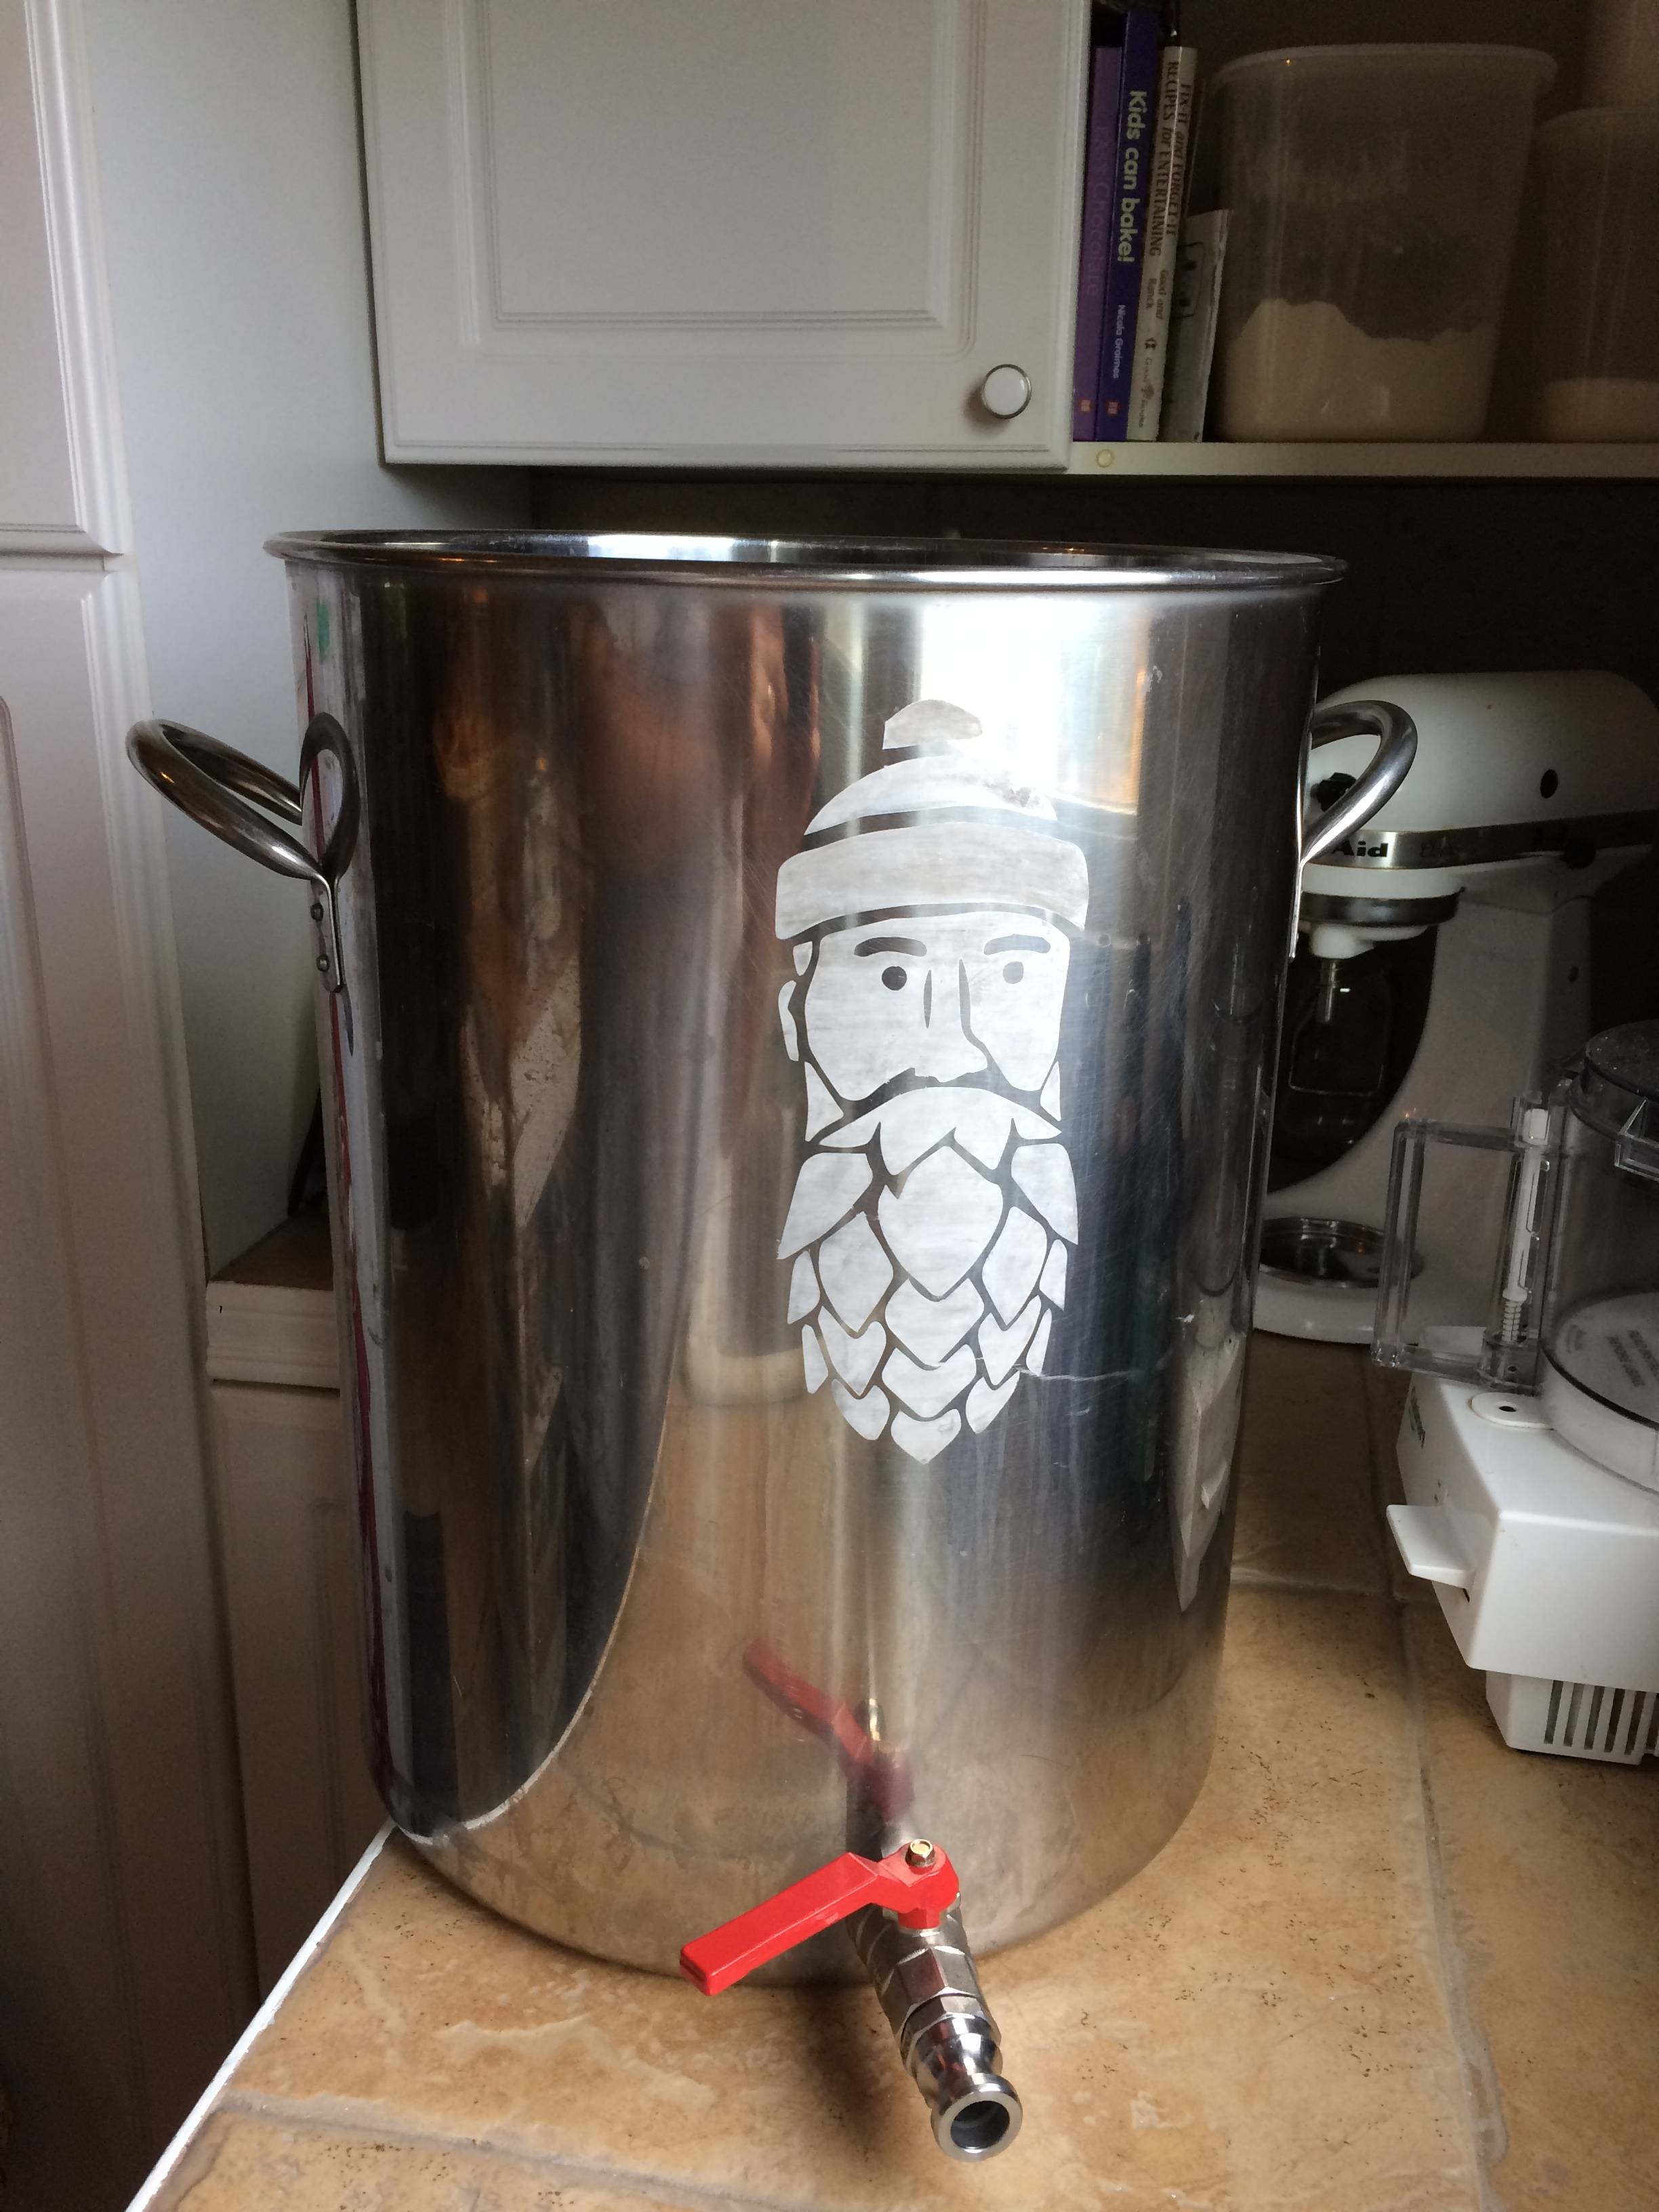
Finished this on my 10 gallon ALUMINUM pot! Turned out pretty good. Although there's no way I'm getting 10 gallons in this thing :/.
I ended up using the 12v power supply from my stir plate. That worked fantastic.
View attachment 333341View attachment 333342View attachment 333343View attachment 333344
Finished this on my 10 gallon ALUMINUM pot!
Although there's no way I'm getting 10 gallons in this thing :/.
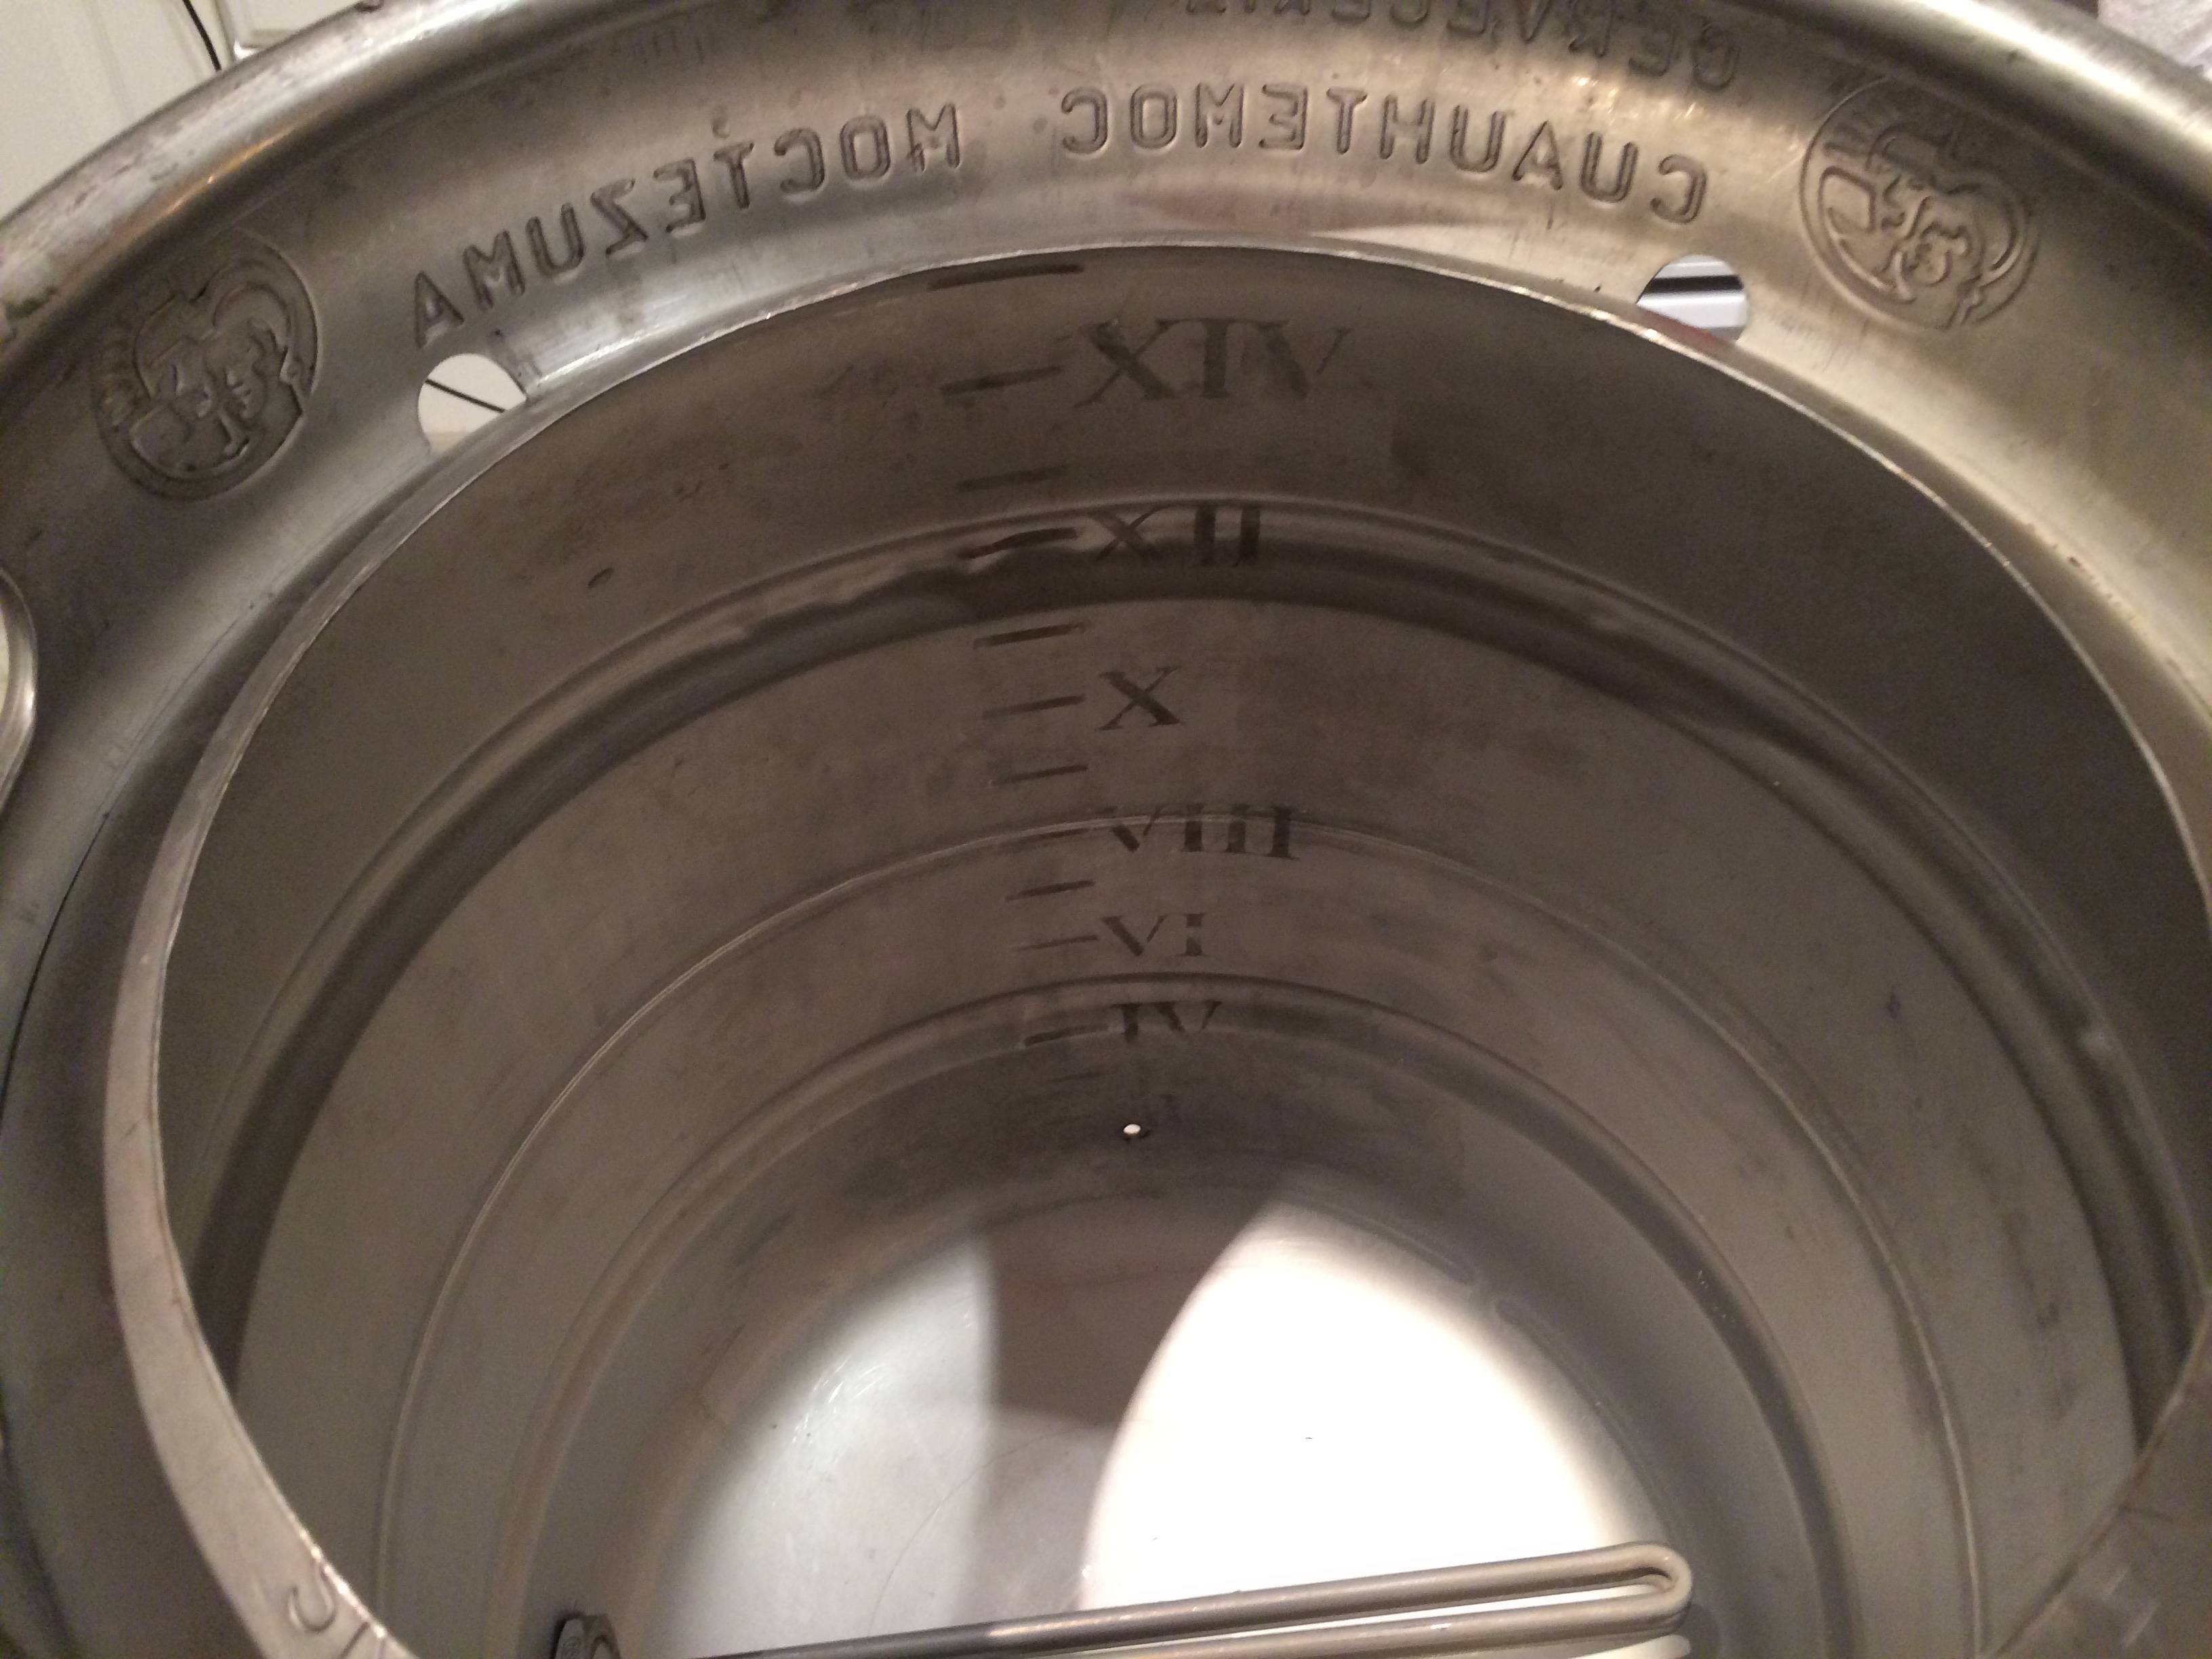
View attachment 333344
Your project did come out great BUT I have to point out that based on the picture that one of two things is true:
1) you don't have a 10 gallon kettle
2) you messed up and mismarked it.
Would this wire (that I cut from and old phone charger) work if i used the smaller split end on a 9 volt battery and the opposite end with the larger split on the q-tip and pot?
Yup.
You can also take a look around your house for a wall charger that has 9 volts (to save your batteries). I found an old remote control car charger was 9V and worked as well as the batteries, but my old 18V laptop charger was WAY faster!
I used a wire like yours, and taped the "battery" ends into and onto the charger plug with masking tape. Worked fine and I can still use the laptop charger when I'm not etching.
Good luck.
I forget what I used, but the OP states 1 tsp of salt, not 1/4 tsp.
Enter your email address to join:


