
As it pains me to say this, I think I have unintentionally become a water expert. I have been a process engineer for many years and in each process I have supervised, there has been some form of water treatment. However, when I started brewing I did not include water treatment for the first couple of years. Why you ask?
Like most home brewers I viewed water treatment as an afterthought. If you read most recipes, they don't include a water profile. I asked about water treatment as a couple of home brew shops in the area. "Just add 50 percent RO to the tap and you'll be good" is the response I would mostly get. This led me to believe that water wasn't that important when you brew.
During recipe formulation, we spend most of our time looking at malt and hops profiles and hashing out how this will come to fruition in our final product. Yet we seem to forget what is in 90 percent of our final product: water. Why is water important? Because it will enhance or take away your desired flavor profile, it ensures a healthy environment for our yeast friends, and it will increase your brew house efficiency. When I brewed my first beer after I selected and adhered to a water profile, I was blown away. Yes, water does make a difference, a big difference.
This article isn't meant to be all encompassing. I would have to write a book in order to do that. I will try to highlight as much as I can in the shortest amount of time. Water can be very easy, or it can be very complicated. I will take you through how I formulate a recipe. You may agree or disagree with how I do it, but at least take the basics back with you.
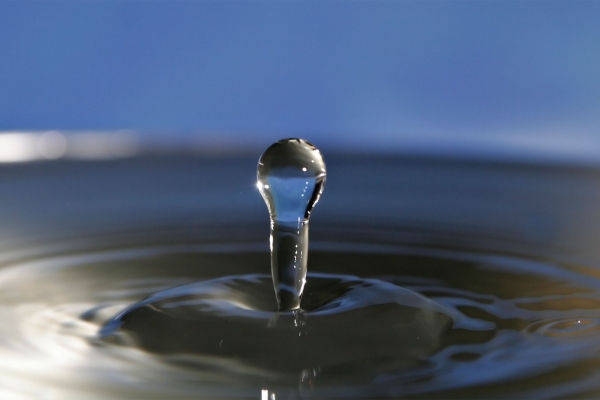
Image courtesy of wiki
First the most important part about brewing water is the contaminants in it. Ions such as calcium, magnesium, sodium, and chlorine are all dissolved in water. Every ion dissolved in water plays a role in your beer whether good or bad. Here is a short list of what each ion will do when brewing a batch of beer.
Ion - Contribution
Bromate - Disinfection and contaminant
Calcium - Fermentation, clarity, mash pH
Chlorine - Disinfectant that causes off flavors
Copper - Oxidation Catalyst
Chloride - Beer flavor that emphasizes malt character
Iron - Off flavor, scale and corrosion risk
Magnesium - Fermentation, clarity, mash pH (supplied mainly by malt)
Manganese - Off flavor, scale risk
Nitrate/Nitrite - Poisonous to yeast (more applicable to nitrites, but nitrate will turn into nitrites)
Silicate - Scale
Sodium - Beer flavor, less is better
Sulfate - Beer Flavor, adds hop character and dryness
Of this truncated list, only five will benefit your beer. The rest do nothing but harm your final product. Most local water supplies have all of these and much more unwanted items. Check your local water report and see what is in it. I did that and decided to use RO or drinking water instead of local. It costs a bit more, but it tastes better. In the end aren't we all looking to make delicious beer?
Of these five wanted ions, next we must look at how much of each we must use. That answer isn't easy as each style of beer has a different water profile. This occurred because of local water supply from the regions that they were invented. It also comes from the mash pH and Residual Alkalinity.
Without diving too deep into a mash pH discussion, the lighter malt you have in your mash, the less effect it has on lowering your mash pH. The crystal or roasted malts will lower your pH. This can be a good or bad thing dependent on what you're brewing. Mash pH at room temperature during the mash should be around 5.5-5.6. With a temperature correction at a mash temperature of 150 F, that works out to be around 5.2-5.3. Having this pH in your mash will ensure a good wort pH and good fermentation pH.
For example, if we are brewing an IPA and using pale malts, the lowest pH we could achieve is around 5.8. We need to get lower to do that we need to add minerals to the water. Gypsum (CaSO4), Calcium Chloride (CaCl2), and Epsom Salt (MgSO4) will bring your pH down. This is where gets a little complicated. There are many online calculators that will adjust this for you once you are putting in your recipe. Remember to look up your water profile for your beer style and stick to it. For an IPA, I like this one:

Bee Cave Brewery Rye IPA - Image courtesy of Edwort
Calcium 88 ppm
Magnesium 26 ppm
Sodium 19 ppm
Chloride 137 ppm
Sulfate 131 ppm
Remember that Calcium and Magnesium will aid in fermentation, clarity, and mash pH. Sodium is for flavor, and your Chloride/Sulfate Ratio will enhance malt flavor, hop bitterness, or dryness. Most importantly Calcium can be no less than 50 ppm. Yeast need that for flocculation and will remain in suspension if there is not at least that amount. Your beer will be cloudy and will obviously taste very yeasty.
For a darker beer we may need to do the opposite as the darker roasted malts will reduce the mash pH. Making a beer with just black malt will result in a pH of around 4.4 (Not that you should try that). For the second example we will brew a stout. After adding my grains to the calculator and looking at the pH, I am around 5.4. This is a little low for me. In order to raise the pH a bit, I can add slaked lime, baking soda, or chalk. I do not recommend adding chalk at any time. It is very hard to completely dissolve and an estimator doesn't account for that. Normally I just use baking soda to raise the pH. It adds a little sodium also and I kill two birds with one stone that way. For a stout, I like to target this profile:
Andes Mint Chocolate Stout - Image courtesy of modernlifeisANDY
Calcium 56 ppm
Magnesium 12 ppm
Sodium 28 ppm
Chloride 83 ppm
Sulfate 68 ppm
I will still need to add calcium chloride, Epsom salts and gypsum to achieve the results I desire. I just need to add more baking soda to raise the pH. The profiles I target can also move up and down depending on how it will affect the pH, but I will not change it outside of the beer style profile.
Now I have my recipe ready and I'm ready to brew. The most useful piece of equipment you can buy when mashing is a pH meter. Verifying your work in recipe formulation is essential. I have saved myself a few times when doing this. If your pH isn't what you thought it should be, maybe you forgot to add your salts or maybe you didn't add the right grain. I had a home brew shop forgot to add 2 lbs of Crystal malts to my grains and that was caught because of a pH meter. If it isn't correct, there isn't much you can do to correct pH in the mashing step. It can take up to 30 minutes for pH to stabilize, but it will correct itself eventually, resulting in a good wort pH and fermentation pH.
To some these steps may seem like a lot of work. There are products out there that are designed to get you the pH you need, so why not worry about the steps and just throw some of that in? My issue with those products is that they do not list the ingredients. You have no idea what your water profile will be and if it adheres to style guidelines. Would you just add any old hop or malt to your recipe if you had no idea what it was? I think not. Taking an extra 15 minutes in recipe formulation for water is really worth its weight in gold. Whether it's a golden ale, or a golden lager, it's up to you.

Like most home brewers I viewed water treatment as an afterthought. If you read most recipes, they don't include a water profile. I asked about water treatment as a couple of home brew shops in the area. "Just add 50 percent RO to the tap and you'll be good" is the response I would mostly get. This led me to believe that water wasn't that important when you brew.
During recipe formulation, we spend most of our time looking at malt and hops profiles and hashing out how this will come to fruition in our final product. Yet we seem to forget what is in 90 percent of our final product: water. Why is water important? Because it will enhance or take away your desired flavor profile, it ensures a healthy environment for our yeast friends, and it will increase your brew house efficiency. When I brewed my first beer after I selected and adhered to a water profile, I was blown away. Yes, water does make a difference, a big difference.
This article isn't meant to be all encompassing. I would have to write a book in order to do that. I will try to highlight as much as I can in the shortest amount of time. Water can be very easy, or it can be very complicated. I will take you through how I formulate a recipe. You may agree or disagree with how I do it, but at least take the basics back with you.
Image courtesy of wiki
First the most important part about brewing water is the contaminants in it. Ions such as calcium, magnesium, sodium, and chlorine are all dissolved in water. Every ion dissolved in water plays a role in your beer whether good or bad. Here is a short list of what each ion will do when brewing a batch of beer.
Ion - Contribution
Bromate - Disinfection and contaminant
Calcium - Fermentation, clarity, mash pH
Chlorine - Disinfectant that causes off flavors
Copper - Oxidation Catalyst
Chloride - Beer flavor that emphasizes malt character
Iron - Off flavor, scale and corrosion risk
Magnesium - Fermentation, clarity, mash pH (supplied mainly by malt)
Manganese - Off flavor, scale risk
Nitrate/Nitrite - Poisonous to yeast (more applicable to nitrites, but nitrate will turn into nitrites)
Silicate - Scale
Sodium - Beer flavor, less is better
Sulfate - Beer Flavor, adds hop character and dryness
Of this truncated list, only five will benefit your beer. The rest do nothing but harm your final product. Most local water supplies have all of these and much more unwanted items. Check your local water report and see what is in it. I did that and decided to use RO or drinking water instead of local. It costs a bit more, but it tastes better. In the end aren't we all looking to make delicious beer?
Of these five wanted ions, next we must look at how much of each we must use. That answer isn't easy as each style of beer has a different water profile. This occurred because of local water supply from the regions that they were invented. It also comes from the mash pH and Residual Alkalinity.
Without diving too deep into a mash pH discussion, the lighter malt you have in your mash, the less effect it has on lowering your mash pH. The crystal or roasted malts will lower your pH. This can be a good or bad thing dependent on what you're brewing. Mash pH at room temperature during the mash should be around 5.5-5.6. With a temperature correction at a mash temperature of 150 F, that works out to be around 5.2-5.3. Having this pH in your mash will ensure a good wort pH and good fermentation pH.
For example, if we are brewing an IPA and using pale malts, the lowest pH we could achieve is around 5.8. We need to get lower to do that we need to add minerals to the water. Gypsum (CaSO4), Calcium Chloride (CaCl2), and Epsom Salt (MgSO4) will bring your pH down. This is where gets a little complicated. There are many online calculators that will adjust this for you once you are putting in your recipe. Remember to look up your water profile for your beer style and stick to it. For an IPA, I like this one:
Bee Cave Brewery Rye IPA - Image courtesy of Edwort
Calcium 88 ppm
Magnesium 26 ppm
Sodium 19 ppm
Chloride 137 ppm
Sulfate 131 ppm
Remember that Calcium and Magnesium will aid in fermentation, clarity, and mash pH. Sodium is for flavor, and your Chloride/Sulfate Ratio will enhance malt flavor, hop bitterness, or dryness. Most importantly Calcium can be no less than 50 ppm. Yeast need that for flocculation and will remain in suspension if there is not at least that amount. Your beer will be cloudy and will obviously taste very yeasty.
For a darker beer we may need to do the opposite as the darker roasted malts will reduce the mash pH. Making a beer with just black malt will result in a pH of around 4.4 (Not that you should try that). For the second example we will brew a stout. After adding my grains to the calculator and looking at the pH, I am around 5.4. This is a little low for me. In order to raise the pH a bit, I can add slaked lime, baking soda, or chalk. I do not recommend adding chalk at any time. It is very hard to completely dissolve and an estimator doesn't account for that. Normally I just use baking soda to raise the pH. It adds a little sodium also and I kill two birds with one stone that way. For a stout, I like to target this profile:
Andes Mint Chocolate Stout - Image courtesy of modernlifeisANDY
Calcium 56 ppm
Magnesium 12 ppm
Sodium 28 ppm
Chloride 83 ppm
Sulfate 68 ppm
I will still need to add calcium chloride, Epsom salts and gypsum to achieve the results I desire. I just need to add more baking soda to raise the pH. The profiles I target can also move up and down depending on how it will affect the pH, but I will not change it outside of the beer style profile.
Now I have my recipe ready and I'm ready to brew. The most useful piece of equipment you can buy when mashing is a pH meter. Verifying your work in recipe formulation is essential. I have saved myself a few times when doing this. If your pH isn't what you thought it should be, maybe you forgot to add your salts or maybe you didn't add the right grain. I had a home brew shop forgot to add 2 lbs of Crystal malts to my grains and that was caught because of a pH meter. If it isn't correct, there isn't much you can do to correct pH in the mashing step. It can take up to 30 minutes for pH to stabilize, but it will correct itself eventually, resulting in a good wort pH and fermentation pH.
To some these steps may seem like a lot of work. There are products out there that are designed to get you the pH you need, so why not worry about the steps and just throw some of that in? My issue with those products is that they do not list the ingredients. You have no idea what your water profile will be and if it adheres to style guidelines. Would you just add any old hop or malt to your recipe if you had no idea what it was? I think not. Taking an extra 15 minutes in recipe formulation for water is really worth its weight in gold. Whether it's a golden ale, or a golden lager, it's up to you.