Help me spank this beer's hiney!

Homebrew Talk - Beer, Wine, Mead, & Cider Brewing Discussion Forum

Help Support Homebrew Talk - Beer, Wine, Mead, & Cider Brewing Discussion Forum:

This site may earn a commission from merchant affiliate links, including eBay, Amazon, and others.

h4mmy86

Well-Known Member
Joined
Mar 4, 2012
Messages
410
Reaction score
43
Location
Cedar Bluff
Hey guys!

So I ordered Northern Brewer's Midnight Beatdown Wheaten Porter PM kit with US-05 ale yeast and I want you guys to help me make this most of this brew!

This will be my 4th brew (2nd partial mash) and I have a few new toys I managed to diy at my disposal for this brew, so I'm pretty excited for this brew day!

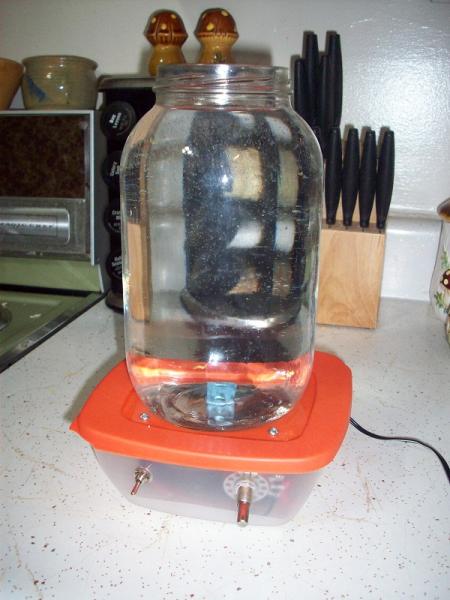
So I built a stir plate and plan get a yeast starter going in a half gallon jar probably 3 or 4 days(?) before brewing. Cold crash the starter the night before brew day, set out on brew day (no stir plate), decant, and pitch.
(I've only done one yeast starter before, so advice is still welcomed!)

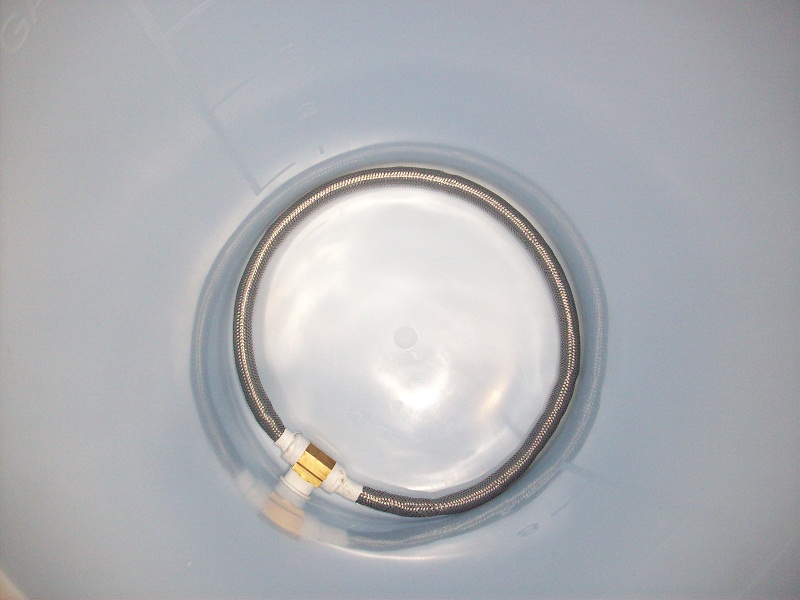
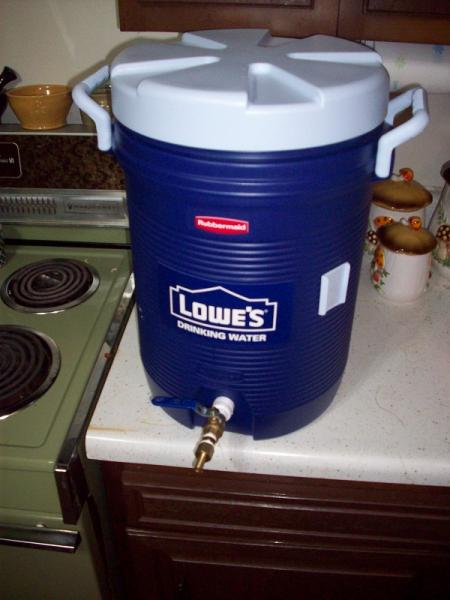
I also built a 5 gallon mash tun that I'm a little intimidated by. I guess I'll probably do a fly sparge(?) but I'm not entirely convinced on any specific way, this just seems easiest to me.
I could really use some advice on this part of the brew as I've never used a mash tun before! (I did a BIAB PM last time I brewed)

Also, my kettle has no spigot, so advice on lifting and pouring my hot kettle into the mash tun is appreciated. ...as of now I plan to put on a sweat shirt or winter coat, something to insulate my arms while I brace and pour the kettle.

I am also prepared for my first attempt at a swamp cooler! I am gonna try it out in front of a small window air conditioner and see how that works out.

...and ummmmmmm, I guess that's all for now. :drunk:
I'm sure I'll have plenty more questions to come!

Wish me luck! :mug:
100_2800.jpg


100_2801.jpg


100_2802.JPG
 
Don't burn yourself with the kettle... Put your mash tun on the floor and use a small table the same height as the tun as a pivot point for the bottom of the kettle. Easy day brother. I have to do the same thing with mine. When you go to cool the wort, put your boil pot in a rubbermaid container from wal-mart that has ice and water in it and stir it like mad. I cool 6 gallons in ten minutes that way. (lots of ice...) As for your yeast starter... I've never used one. White labs yeast kicks off and ferments like a freight train every time. If your beer is a high gravity, a starter is definitely recommended though. Hope that helps some...
 
Transfer water with a pot or pitcher - please dont tip your hot kettles.

I recommend starting all grain brewing with a batch sparge technique - much easier to do with limited equipment required.

Fill your tun with pre heated strike water, mix in grains, steep and wait, vorlauf, drain tun into kettle, fill tun with sparge water, vorlauf, drain tun again, fill kettle up to boil volume, take a gravity reading (if you are doing a full all grain) and start your boil.

Really though, with partial mashing you can just as easily drop the steeping grains into the boil kettle in a mesh bag - remove them after 30 mins and brew as usual - way easier and same result.

But heck - why not go all the way this time with a full grain brew - you have all the equipment?

Use the same recipe you had in mind - just replace your liquid malt with a grain base malt - ask your LHBS.

PS.
A one or two day starter is good - dont decant just pitch it all in - lots of foam is good!
 
have you verified your starter vessel bottomn is flat enough to spin the stir bar and liquid without slinging it off? I've only used a flask which is perfectly flat on the bottom.
 
You don't need/want a starter with dry yeast.

Agreed, US-05 has much higher cell counts compared to WLP001 or WY1056. That and price are the 2 big advantages, for this beer one pack of rehydrated US-05 will work fine.

That kit was the second beer I made, it came out great! You're gonna love it. Silky smooth, richly chocolatey and nice and hoppy.
 
Thanks for all the input guys!

@BadBeaver
I have an ottoman that would be perfect to set the kettle on while its poured into the tun, and with an extra hand it should be a breeze! I'm gonna do a test run later just to be prepared!

@william shakes beer (very clever)
The stir plate does work perfectly (kinda surprising because of the concave on the bottom of my jar), but if you look closely in the pic you can see my "stir bar" at the bottom and notice some air bubbles in the jar in a spiral shape. It was running when I took the pic.
....BUT doesn't look like that matters right now because I won't need a yeast starter! (Thanks afr0byte and zachattack)

I'm feeling more confident. Still unsure as far as sparging goes, but I'm sure it'll all work out fine. If things work out maybe my next batch will be AG! ...Wouldn't it be a little cramped doing a 5 gal batch AG in a 5 gallon tun tho?

ALSO! I made an immersion chiller from 50 feet of .25 inch copper tubing that was given to me.
Is that too long and/or too skinny to be very effective?
...I mean, it couldn't hurt, right?
 
I am inserting my comments in red.

Hey guys!

So I ordered Northern Brewer's Midnight Beatdown Wheaten Porter PM kit with US-05 ale yeast and I want you guys to help me make this most of this brew!

I love Northern Brewer kits I did several extract and a couple of partial mash kits before starting with my own recipes. I still refer to their kits directions/recipes for inspiration.

This will be my 4th brew (2nd partial mash) and I have a few new toys I managed to diy at my disposal for this brew, so I'm pretty excited for this brew day!

So I built a stir plate and plan get a yeast starter going in a half gallon jar probably 3 or 4 days(?) before brewing. Cold crash the starter the night before brew day, set out on brew day (no stir plate), decant, and pitch.
(I've only done one yeast starter before, so advice is still welcomed!)

As others have responded you should not make a starter when using dry yeast. They are formulated for use by just re-hydrating. They actually work less well if you do make a starter.


I also built a 5 gallon mash tun that I'm a little intimidated by. I guess I'll probably do a fly sparge(?) but I'm not entirely convinced on any specific way, this just seems easiest to me.
I could really use some advice on this part of the brew as I've never used a mash tun before! (I did a BIAB PM last time I brewed)

The sparge is not too difficult. Fly sparging is more involved than batch sparging. You need to sparge very slowly. It should take about an hour. I would suggest batch sparging until you get the rest of your procedures down.

Also, my kettle has no spigot, so advice on lifting and pouring my hot kettle into the mash tun is appreciated. ...as of now I plan to put on a sweat shirt or winter coat, something to insulate my arms while I brace and pour the kettle.

I would ladle the water into your tun with a sauce pan, carefully!

I am also prepared for my first attempt at a swamp cooler! I am gonna try it out in front of a small window air conditioner and see how that works out.

I use a swamp cooler. It is a 66 qt Sterilite storage box . I have about 6 inches of water in the bottom and rotate bottles of ice to control the temperature. Remember that you want to know the temperature of the wort, not the air in the cooler.

...and ummmmmmm, I guess that's all for now. :drunk:
I'm sure I'll have plenty more questions to come!

Wish me luck! :mug:
Good luck. Keep reading, you will see lots of different methods. It is a lot of fun figuring out what is the best procedure for your tastes.

I may even try fly sparging some day!
:mug:
 
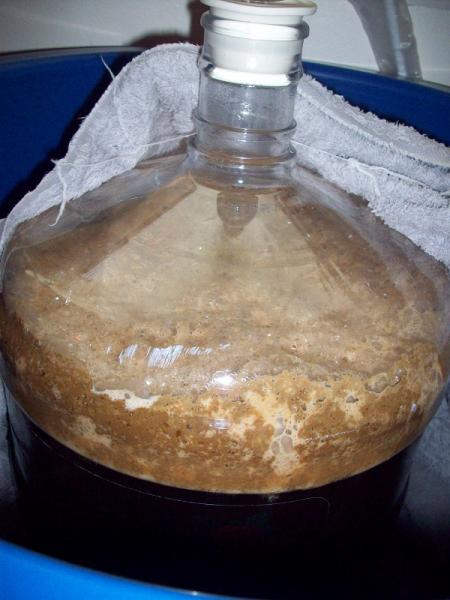
Well if anyone was wondering, this brew is looking pretty great far! She is about 3 days in.

...I wonder if I shouldn't have pitched 2 packs of yeast? Oh well! Whats done is done and so far looking like it was done well, so I'm thrilled :mug:

094.jpg
 
I saw your question regarding a wort chiller. This may not be the best thread to post to, but here's what I did:

I also got some free copper line from a friend in the HVAC business. I used a piece of scrap 1/2" plywood to make a form, and two pieces of scrap furring strips to make a lever to pull the copper over the form. The levers were sandwiched above and below the form with a small piece of scrap to push the tubing against the form. (I'm not sure what the technical terms are...mandrel, die, etc...) I had all the hardware in stock in my garage. It worked pretty good... I ran the tubing through the form several times until I had the shape I was after. I bent about 90 degrees at a time, then moved the tubing.

I have used this chiller on all of my brews to date. I only had about 18' of tubing to start with, so I also use an ice water bath. With 50', you should be good. Hope that helps.
 
Back
Top