Garage home brewery

Homebrew Talk - Beer, Wine, Mead, & Cider Brewing Discussion Forum

Help Support Homebrew Talk - Beer, Wine, Mead, & Cider Brewing Discussion Forum:

This site may earn a commission from merchant affiliate links, including eBay, Amazon, and others.
Another option (maybe not a very good one) for the water would be to plumb the garage for water but make the connection with a hose run from the hose that you only pull out when you need it. You could even add a point of use heater to get hot water.

But agree with Bobby, just dig the trench all the way down and do it right once. You will regret not doing.
 
I think the hose idea is a great one! You could actually leave it connected all the time except for when it drops below freezing in the winter.
 
I couldn't swing renting a back hoe and digging 4' down for a water line. Too expensive, too many questions from the neighbors etc. I would love to have a water line in there, and I can always add one in the future, but in reality I cant justify the cost and work involved right now. :eek:(

Good news is that I was able to dig the 18" trench for the natural gas and electric lines. I went with 2 gauge aluminum rated to 100A because it was cheaper than copper. It fit fine in a 1 1/4" pvc tube. I also got 1/2" tubing for 2 cat6 cables. A 1" gas line (yellow) was put in there as well. Unfortunately it rained all weekend making it very difficult for me to finish digging the trench and get things wired up. After digging for a while in the rain I eventually had to quit and call it a day. I do have everything in the ground though ready for the electrician and gas guy to come connect both ends up.

garage19.jpg


garage20.jpg


garage21.jpg


garage22.jpg


If all goes according to plan then I will have the garage setup with gas and electric this week and can finish up the drywall this weekend! Then all that is left is the ceiling and floor.

Anyone have a suggestion for what to do with the floor?
 
As others have already said, put a 3 or 4" empty conduit in the trench before you backfill w/ a pull cord installed for any future installations. This could also be used for a temporary water connection during mild weather. I might also put in a plastic PEX water pipe even at eighteen inches...I believe they are freeze resistant and at least would allow three seasons of convenient access to water.
 
As others have already said, put a 3 or 4" empty conduit in the trench before you backfill w/ a pull cord installed for any future installations. This could also be used for a temporary water connection during mild weather. I might also put in a plastic PEX water pipe even at eighteen inches...I believe they are freeze resistant and at least would allow three seasons of convenient access to water.

That is an awesome idea!

You could just run a hose through the conduit and even in the heart of winter the hose wouldn't freeze in a brewday like it may outside. That would be a great solution!!!
 
Its easier and shorter for me to run a hose from the side of the house to inside the garage. The water for the hose is on the opposite side of the house that I am running the other lines from. Its only ~20 feet from the front of the garage to the water faucet.

I could also mount a water connection on the front of the garage and then simply leave it always connected inside and just connect and disconnect a short 20ft hose from the house to the garage when I need water, and disconnect in the winter.
 
I'm thinking this is what I'm doing this year too. I just moved into a new place and using a hose is where it's at. Now I need to find a utility sink to hook it too. :rolleyes:
 
Good news is that I was able to dig the 18" trench for the natural gas and electric lines. I went with 2 gauge aluminum rated to 100A because it was cheaper than copper
Looks good.
Just make sure the electrical enclosures on both ends are rated for aluminum wire.


Cheers,
ClaudiusB
 
I might also put in a plastic PEX water pipe even at eighteen inches...I believe they are freeze resistant and at least would allow three seasons of convenient access to water.

PEX is awesome stuff. Put one in, and blow the line out with a compressor before winter. Even if you forget or don't get the water out there's a chance the PEX won't burst.
 
More updates on the progress...

Electrical connection on the outside of the garage
garage23.jpg


Natural Gas connection from the house to the garage
garage24.jpg


The electrical is all but connected to the box in the house. As soon as I can get my electrician back in there to connect a few wires the garage will once again have power.

We did manage to finish up all of the dry wall finally. Here are some pictures of the progress...
garage25.jpg

garage26.jpg

garage27.jpg

garage28.jpg


Now all thats left is to finish the ceiling (and wait for the plaster guy to plaster the walls) then finish the floor.

We took some 3" furring strips to create a ceiling on the tops of the beams. We will then staple R-30 insulation to the top to insulate the ceiling. Hang halogen lights between the rafters, and install a drop ceiling. As soon as the walls are plastered we can finish up the ceiling.

Still trying to figure out what to do with the floor. ~480sq.f to cover
garage29.jpg
 
Question: The yellow pipe in the trench, That is your Natural Gas Line, Correct? Is it the all plastic gas line or is it the plastic wrapped metal flex pipe?

IF it is the metal flex plastic covered pipe I would look into replacing that and not using it. That pipe was outlawed (Kentucky) in my area. It is good, but it apparently has some conductivity issues with lightning or some crap like that. Look and see if it is legal in your area. Are you pulling permits for this electrical and gas stuff?

Also where is your frost line? Is that stuff deep enough? 24 inches here. Used to be 18"

Be safe. but have fun and it looks GREAT. I am so green here.
 
The epoxy floor paints are durable and cheap enough, easy to roll on and you can get the fleck chips if you're into that. Bare concrete is impossible to clean. You need to at least seal it. How about a concrete stain and seal? You can do that yourself, too, and it will have a nice color check out Kemiko Concrete Stains: Kemiko Stone Tone Concrete Floor Stain or Kemiko - Do It Yourself I'm a fan of the stain and seal. The stain will stay, the seal you may need to reapply every several years, depending on the traffic you get.
 
I finally got the plaster guy in and he started doing his thing. Here are some pictures of the base coat of mud. On top of this is going a lime stone coat with a pattern to make it look nice. We ran into a problem with the right side where the roof meets the wall at an angle. It took about 2 hours of messing around until we had the wall board up and it wasnt hitting the top of the garage door when it was open. I dont know what I am going to use to fill in the gap but it will have to be something thin like plexiglass or plastic.

garage30.jpg


garage31.jpg


garage32.jpg


garage33.jpg


The plaster guy is in my garage right now as I am posting this. Hopefully he will be done today and I can paint this weekend


The Yellow pipe is a special continuous gas pipe with a compression fitting done by the gas company. Its all plastic 1".

Thanks for the info about the concrete sealing. I will look into that as well as the epoxy for the floor.

Hopefully we will be finishing up the ceiling by next weekend and then the floor. Another week or two and this should be wrapped up and we can start building the brewing system!!
 
Sometimes words cant describe the amount of jelousy one can feel:) Keep up the good work! Its gonna rock!
 
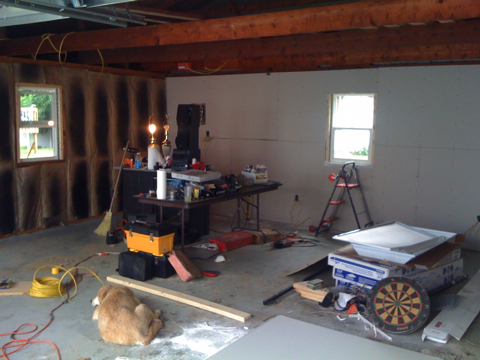
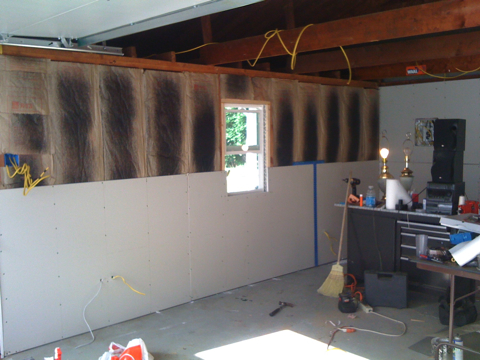
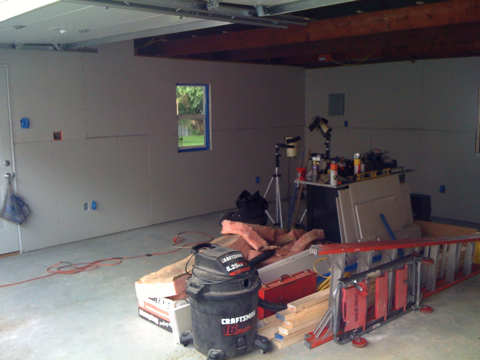
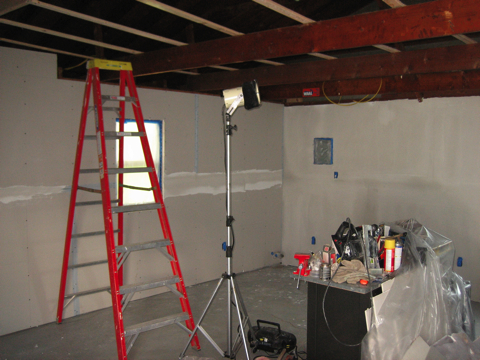
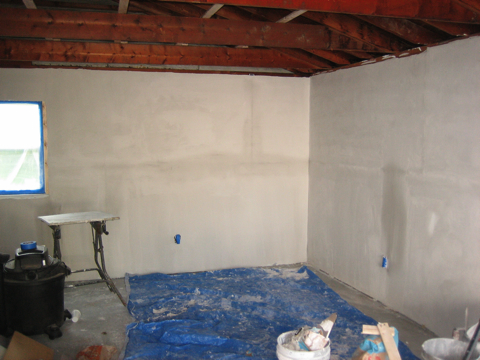
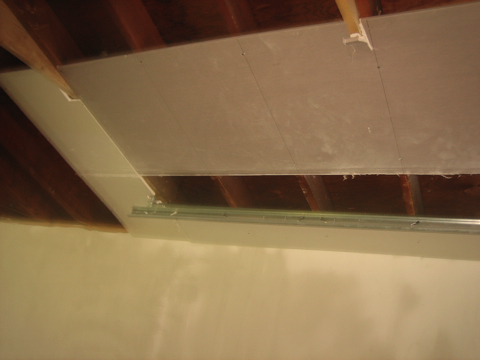
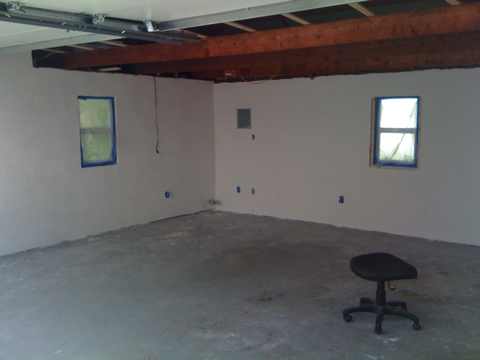
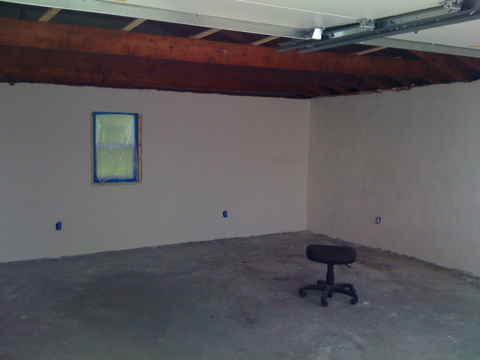
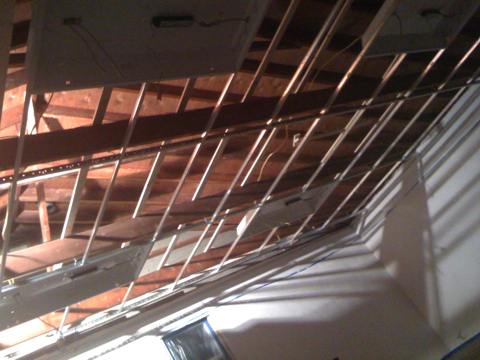
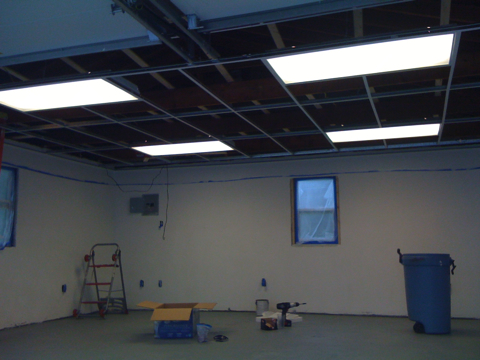
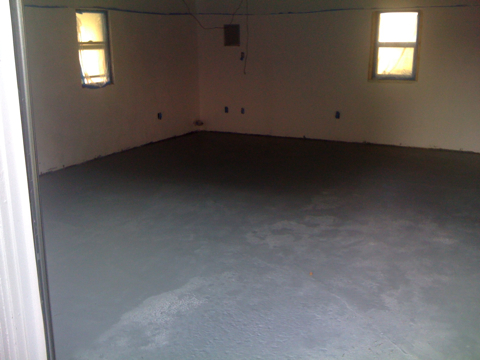
We finished up the dry wall on friday. By we I of course mean the drywall guy. I helped him with the one board on the ceiling and thats about it. Here are pictures of the results. A base mud coat was done followed by a top coat of limestone. $400 for labor & materials. We are all pretty happy that we did not have to do this part ourselves.

garage34.jpg

garage35.jpg

garage36.jpg


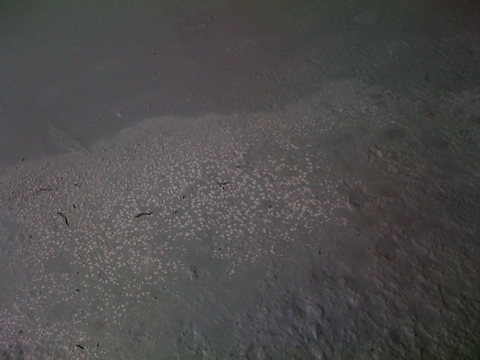
Unfortunately, its going to take 1-2 weeks to dry all of the way. We just spent sunday cleaning everything up. The garage is now completely empty and cleaned up all of the plaster from the floors etc while it was still easy to remove. Here is the plan for this week.

- Clean and seal the cement floor inside and out on the patio.
- Paint on a epoxy floor outside and put in an epoxy or wood floor inside
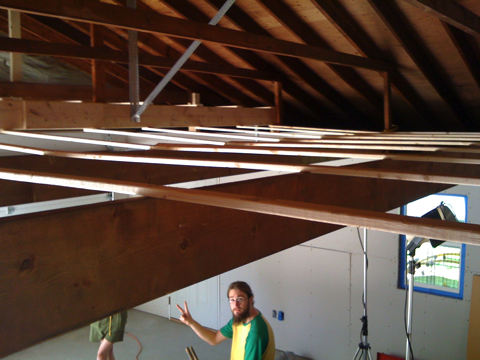
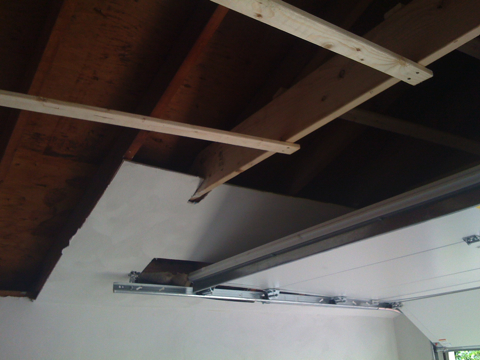
- Buy materials for the drop ceiling + insulation
- Buy paint to paint walls with
- Screen in the outdoor patio

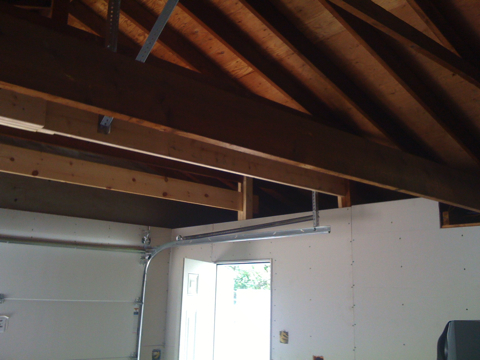
Then this weekend we hope the plaster is dry enough to put up the edges we need for the drop ceiling into the walls. After that only a few minor things like window trim and baseboards remain.

One big decision we have left to make is wether to go with an epoxy floor inside or to make a slightly raised floor from wood.

Wood floor would be nicer to stand on and look nicer. Also it could be insulated underneath. On the other hand it will most likely cost alot more than epoxy, not be as tough on beer spills, and the biggest issue, the ceiling height is currently ~7ft. Reducing it by ~4" to put in insulation/supports for a floor then the wood floor itself would really make the inside start to feel small.

Any thoughts?
 
The wood floor would be so sweet and really dress it up. Can you do an epoxy in the "Work" area that has a higher risk of water and beer spillage and a wood floor in the other parts? Why do you need to raise it so much? the engineered wood floors are tough as nails, stable in temp changes and will sit right on the concrete after you add a vapor and thin insulation layer, maybe 3/4" to an inch higher, Some really good looking thresholds could take care of the transition from epoxy to wood.

Do you have any floor drains? I would look into cutting one in before you seal up the floor. A floor drain in the brewing area and then the epoxy or even better a terra cotta tile in that area could be just the ticket, not to mention cleaner and less chance of mold under the wood floor.

Looking VERY good.
 
Be sure to read the diresctions of your epoxy before you seal your concrete, it may not adhere to the sealer. Believe me, removing sealer is not fun. I would consider staining your concrete. There are now water based stains that look awesome. Check out Butterfield's website for ideas. I did my back patio and it was easy and pretty inexpensive.

Good luck and your Brew Haus looks great!

Mike
 
I did the two part epoxy on my garage floor before I moved all my crap in and the one thing I regret is being too anxious and not applying a second coat. In the areas where I put it on a bit thicker created a nice smooth cleanable surface. The thinner spots are still too porous. I think the flecks make it look goofy, but that's just me. I sprinkled pumice into the still wet epoxy just for mild traction help. If you go two coats, only do it on the surface coat.
 
We got a lot accomplished this weekend! The floor was cleaned with 6 cans of paint stripper to remove 480sq/f of 3 layers of paint. at $20+ a can that stuff adds up fast. We also used Muric acid to etch the concrete to prep it for epoxy. Two coats of a base and 1 top clear coat will be used.

We were able to install the grid work for the drop ceiling. Once the ceiling was up we put in the 4x florescent light fixtures and wired them all up together.
garage37.jpg


Over the patio we put in 3 can lights. We folded Maryana in half and stuffed her in the crawl space to wire up the lights. This should provide some nice outdoor lighting for some late night hanging out and grilling in the dark.
garage38.jpg


A friend of a friend who is about 85+ makes golf course signs. He made us this 3x4' sign. It will be hung outside the garage in the peak of the roof just above the garage doors.
garage39.jpg


I have also been working on plans for a Brutus like stand. Silght modifications are made so that it can do 10gal keg batches now but can upgrade to 30gal batches in the future. Also it will be a 2 tier, 1 pump design. Here is a preview. Currently trying to price out and find people to weld this in SS for me. I think we have found 3 kegs to build the system with. Just have to drive 1.5 hours to go pick them up sometime!
garage40.jpg


That about wraps things up for now. Going to get the electrician in to finish the wiring and turn on the power. Once thats done we can stuff the R-30 in the ceiling and close things up. We also ran all of the speaker wire from the wall outlet to the ceiling. 4 in-ceiling speakers, one by each light, and two outside, will be connected. I'm not sure how yet, but to the brewery pc and remotely controlled from our iPhones via Wi-Fi. There is also talk of a guitar amp hookup for brewing and rocking out at the same time.
 
Looks good. Keep up the nice work, and don't forget to throw in a good brew day every now and then!!

Going to try to brew on wed and thurs/fri. A cream ale and an amber ale. Then in about a month throw a grand opening party with those two + a sweet stout and pale ale that are currently ready to go.
 
Nice, I cringed just looking at the folded woman. Reminded me of repairing a split roof joist and cramming into tiny corner to secure the reinforcement.

Awesome Sign too!
 
Prost is the common salute used by Germans when they drink beer, kind like cheers. It is only used for beer. Also seen as Prosit.
 
I have been getting up early to paint the floor more. It seems every time we put a new coat of epoxy the roller will pick up some tiny amount of dirt. Also there is some 1/2"+ pitting in some areas where the garage was formerly used to house a car. Imagine that, a car in a garage where a perfectly good brewery could be built! The pitting is most likely from the rock salt etc. We went nuts and just poured a gallon in all the bad areas and spread it out.

The floor inside and the patio outside is both looking quite nice now. After 3 coats I think we might be done. Just one more clear coat protectant to finish it off.

The electrician finally made it over to wire up all the lights and OK the wiring. We got the florescent lights connected easy enough but the can lights were again a trouble spot. We had to wait for Maryana to show up to crawl around in the ceiling again, this time to actually wire everything together and close it up. Last time was just running the wires into the box. The electrician supervised and gave orders while she did the actual work. Good news is now everything works! Need to swap out the CF bulbs we bought for some normal ones as they take forever to turn on and will not work well in the cold. No pictures of the outside patio lights right now but I do have one of the inside with the lights on!

garage41.jpg


Also we picked up a fire extinguisher and one of these... it should let us know if we have a gas leak or if the pilot light goes out.
garage42.jpg


Going to put the final coat on the inside floor tonight and let everything harden up over the weekend. 3/4 of us are out of town to Six Flags for a little birthday celebration. Going to finish up insulating the ceiling starting monday followed by painting the inside and putting in the ceiling tiles! Lots more pictures to follow next week.

Thanks everyone for the positive feedback. It is motivating us to complete everything that much faster.
 
Man this is great! You are consistently showing huge progress every week. Very entertaining and envious thread to follow.

we are trying to get done asap because the sooner we are done building the sooner we can get to the brewing.... and the sooner we will be drinking some great beer!

we are taking the weekend off to head to six flags and NYC to celebrate one of our birthdays. More work is planned for next week along with some brewing as well!
 
Ahhh! We hit what has seem to be a major snag. After applying 3 coats of epoxy to the floor over the past few days ( 3 coats x 2 gallons x ~$30/gal ) we left for the weekend. When we came back, all the areas of the floor that had deep pitting (which we poured extra epoxy into) are now cracking, coming up, and have some kind of crystals forming on them. I dont know why this happened now as the 3 coats were applied days apart and had a full day to dry before I left it in perfect condition. Moisture? Heat? Maybe leftover Acid and stripper from the paint removal staid only in the pits and easily washed off elsewhere?

Never the less, we need to fix this asap as it is holding up finishing everything else.... Someone is stopping by when I am out of work today to take a look at tell me what he thinks I should do. Anyone have any ideas on what happened and what I should do now?

On to the horrible pictures.....

garage43.jpg


garage44.jpg


On a happier note.....

We finally found 3 kegs to build our 10gal brewing system with! Breaker Brewing company had just what we needed. They are a few years ahead of where we hope to be. It was great to be able to talk with them and learn a few things. We also got some other goodies like a modified AC unit used as a pre-chiller for water.

garage45.jpg


And for those who havent seen it, this is our working prototype of an all-analog temp control circuit to run our chest freezers at any temp we need. We are working on building a finished version shortly to run both chest freezers off of.

garage46.jpg
 
How old and how thick is the slab?

If it is only a couple of inches thick and not at least 4 inches thick I would say that you have ground moisture pushing up and it is going to screw with anything you put down.

Doesn't matter how good the epoxy is, if moisture is pusing up from the soil under it, it wont stick. The acid cleaning MIGHT have damaged the concrete enough to allow it to wick through.

Let us know what the "Someone" says. It looks like the bondablilty of the epoxy has been stopped from below.
 
It is ground moisture. I had that same problem coming through the cracks in my basement floor before I installed a second sump well.
 
Back
Top