DIY Sparge Arm

Homebrew Talk - Beer, Wine, Mead, & Cider Brewing Discussion Forum

Help Support Homebrew Talk - Beer, Wine, Mead, & Cider Brewing Discussion Forum:

This site may earn a commission from merchant affiliate links, including eBay, Amazon, and others.

wolves63

Well-Known Member
Joined
May 16, 2010
Messages
202
Reaction score
24
Location
Longview
I am looking for a piece of metal or PVC that does a 360 degree distribution off the Sparge arm. I mash in a chest cooler and is am planning on making a Sparge arm specific for what I am using. I like this idea personally over the drip PVC arms. Something like at the end of this. ImageUploadedByHome Brew1399932015.840464.jpg


Sent from my iPhone using Home Brew
 
I think I'm about to give BIAB a go and when I get to the sparging part I'm just goring to use a watering bucket like you'd use for watering the flowers.
 
I tried running the hose on the grain bed, and it seemed to channel down the outside of the bed. Got horrible efficiency out of it. Switched to the siphon sprayer, and worked like a charm.
 
Both Sabco and Blichmann use the simple hose method so that's what I went with. Very high efficiency doing slow fly sparging. No problems at all and simple/cheap/easy to clean.

IMG_8009.jpg


Here's a video of it in action:

[ame]https://www.youtube.com/watch?v=OT6f3zP2IB0[/ame]

Kal
 
I am looking for a piece of metal or PVC that does a 360 degree distribution off the Sparge arm. I mash in a chest cooler and is am planning on making a Sparge arm specific for what I am using. I like this idea personally over the drip PVC arms. Something like at the end of this. View attachment 199062

Sent from my iPhone using Home Brew

Why don't you just make one of those? But out of plastic instead of metal.

Materials needed:
* CPVC 90° 1/2" street elbow
* A decently thick plastic lid, preferably about 6"-8" diameter

Tools needed:
* Sharpie marker
* Step-bit (or a steady hand and a knife)

1) Take the bigger side of the elbow and outline a hole on the underside of the lid with the marker.
2) Take the step-bit and drill out the hole outline that you just made. Take your time and keep checking the hole to see when the elbow can make it through but still be nice and snug.
3) Push the elbow through the lid.
4) Attach your silicon sparge hose to the smaller side of the elbow (which is now underneath the lid)
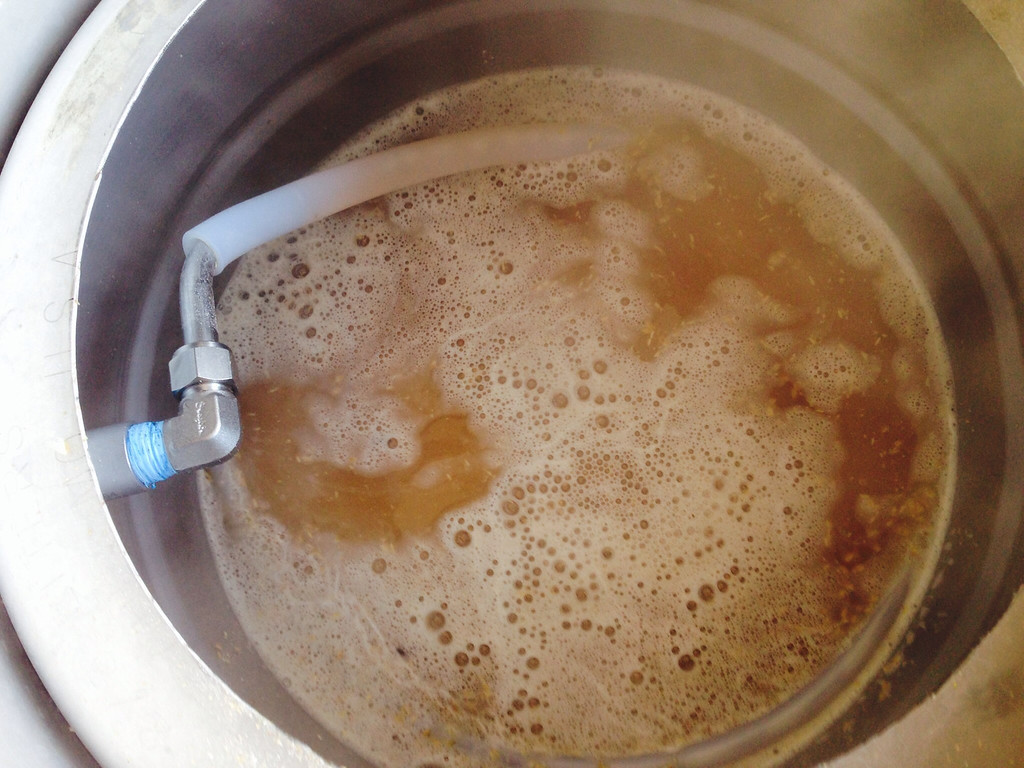
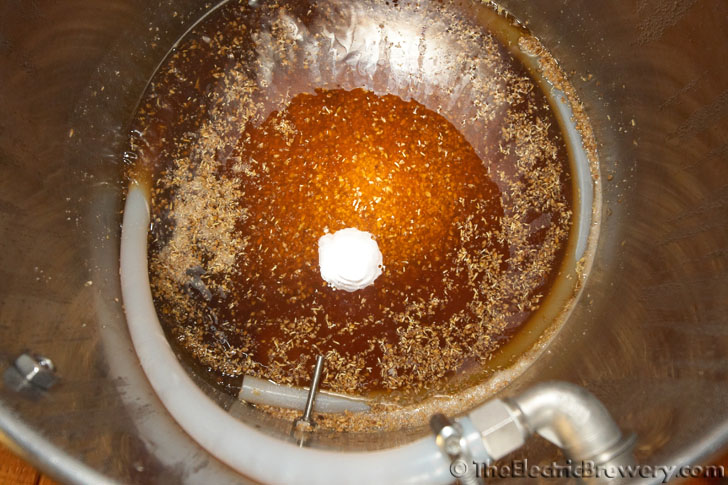
5) Place it on top of your mash.

Bang! Now you have a nice sparging plate that is easy to disassemble and clean. The only thing that this one is missing that your picture shows is the top plate which stops the wort from shooting up too high. If you're sparging at a relatively calm pace, then you probably won't need to worry about the sparge wort shooting up too high. But if you do, then you could take a smaller plastic lid and some stainless steel bolts and nuts and make a top plate for it pretty easy.

This is a pretty good idea. I think I'll try this out for myself.
 
Do you lay it on the bed like I pictured or do you suspend it from above the bed?

I laid it on the bed. Like i said, I got horrible efficency out of it. YMMV. I switched to the siphon sprayer, utilizing a direct fire RIMS system, worked like a charm.
 
Back
Top