Disassembling CO2 connector and picnic tap

Homebrew Talk - Beer, Wine, Mead, & Cider Brewing Discussion Forum

Help Support Homebrew Talk - Beer, Wine, Mead, & Cider Brewing Discussion Forum:

This site may earn a commission from merchant affiliate links, including eBay, Amazon, and others.

Masennus

Member
Joined
Aug 2, 2014
Messages
7
Reaction score
0
Good evening.

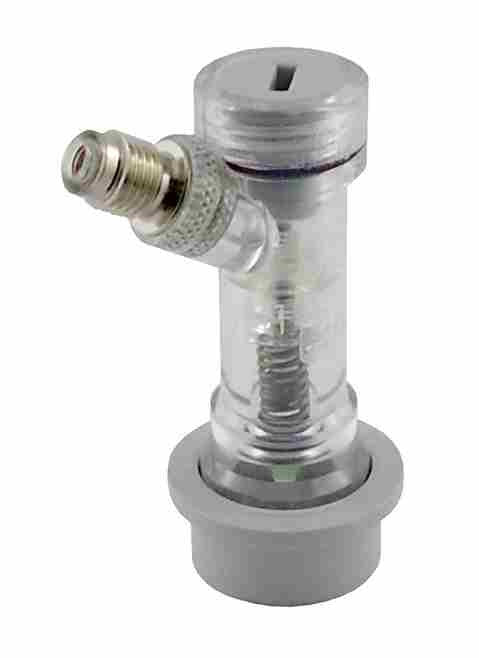
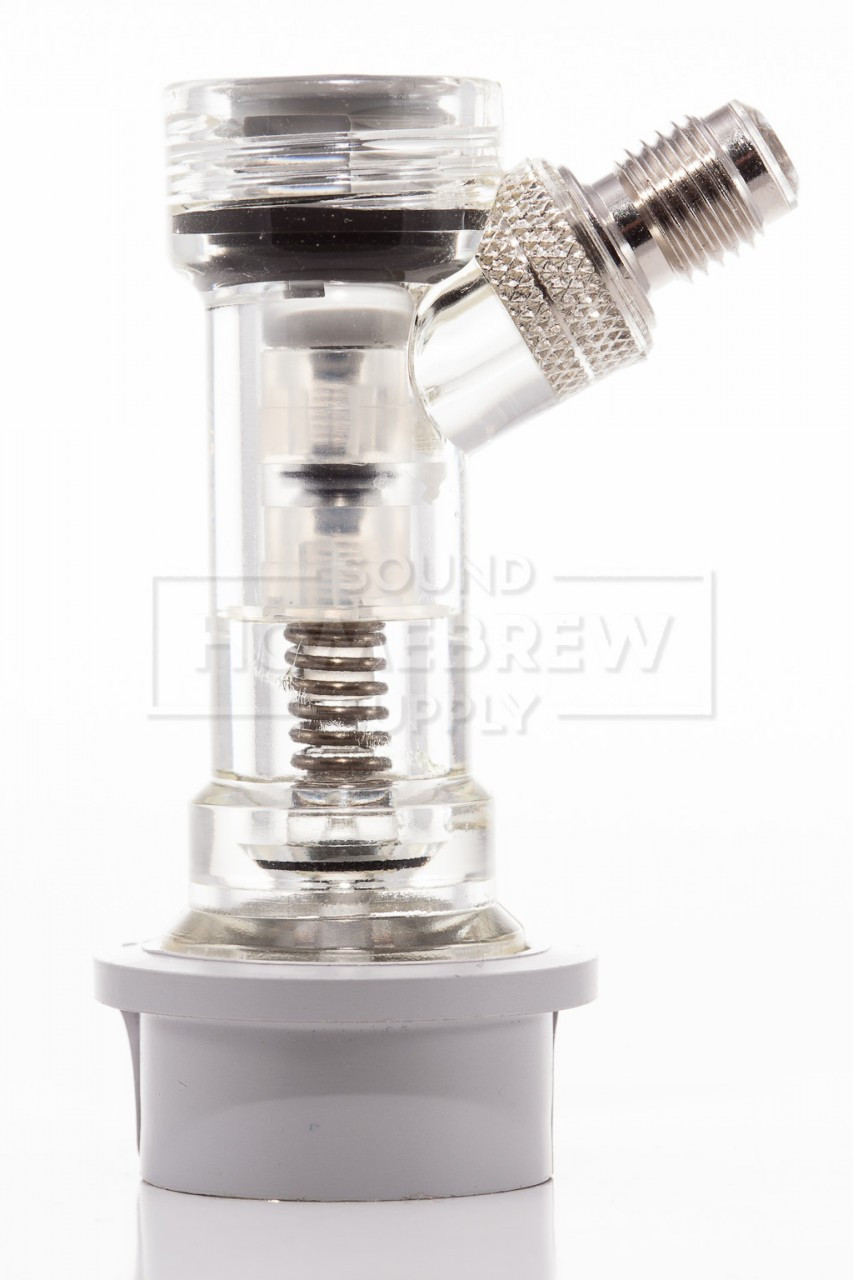
I'll get straight to the point: I need some help with the insides of the CO2 connector and picnic tap.

Last night I were disassembling the tap and CO2 connector and wasn't really minding about how the parts were actually organized inside the taps so I basically just hit them against my hand to get all the moving parts out. The problem is that I thought that there would be some instructions how to deal with the parts but after 2 days of struggling to find any I might have given up.

Does anyone have a link to throw or some guidance to give how to organize the parts in? I think I'm OK with verbal guidance, in which order they go in etc, and I will provide an image with instructions in to this thread after the reassembling is complete so it might save someone.

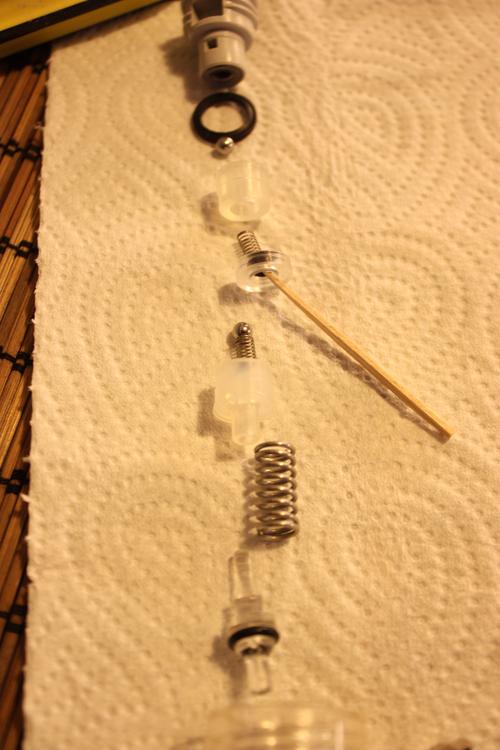
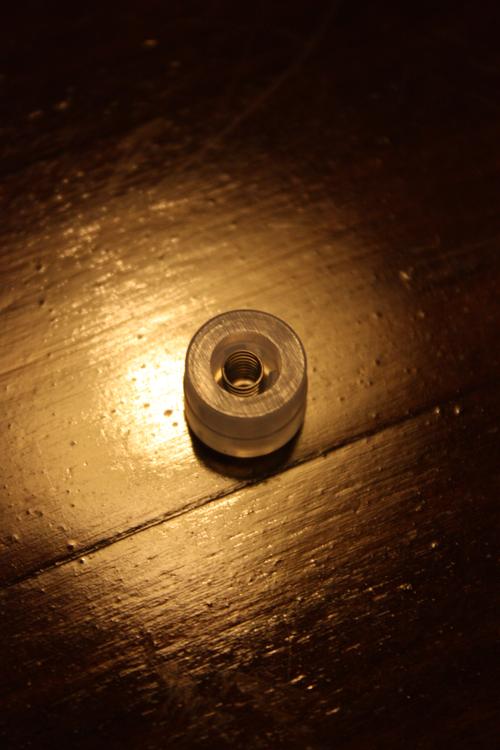
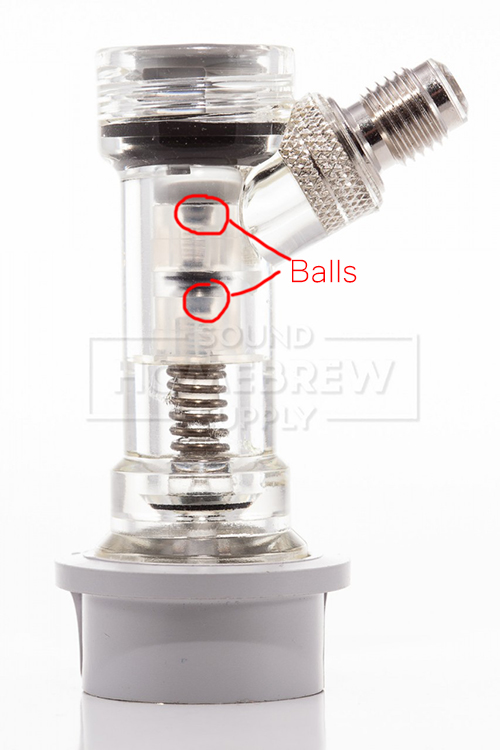
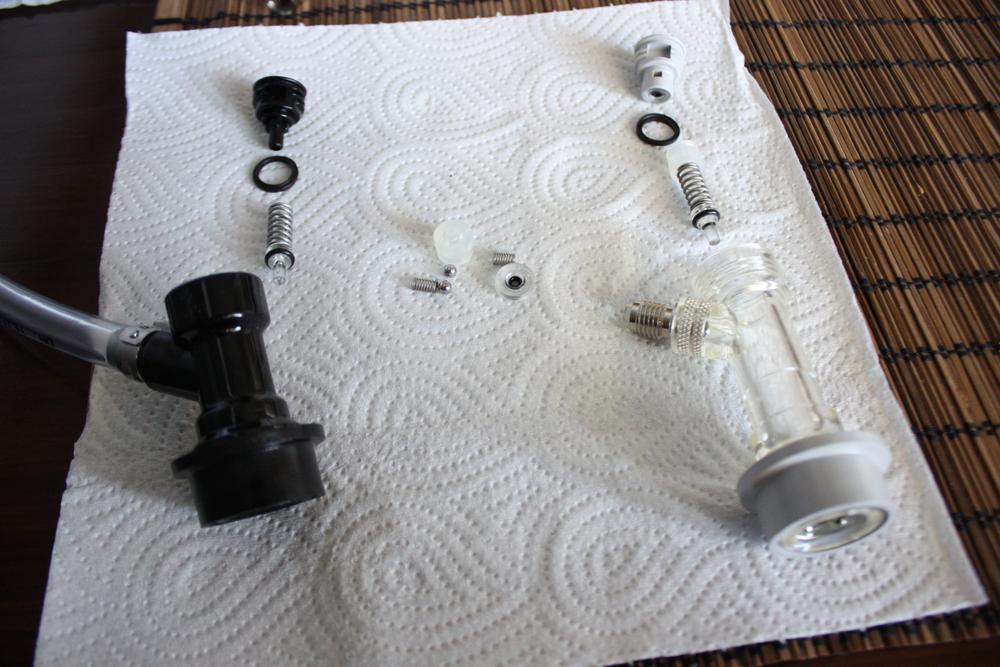
Providing picture with all the parts that came out, basically there are no moving parts anymore in. I have no clue where those 2 balls and springs go.

Whoa how awkward is this :D

Awesome forum, keep it up!
The picture in Imgur:
fGsiu07.jpg
 
https://www.homebrewtalk.com/f35/ball-lock-quick-disconnects-exploded-view-261615/, your liquid QD looks like it is right, just needs to be put into place and screwed back in.

For your gas QD all I can find is this: https://web.archive.org/web/2013031...as-Ball-Disconnects-w-Check-Valve_p_3452.html. Those pieces in the center could be part of reassembling the check valve. Just remember that you want it to be built so that gas can flow from the tubing down through the post.

The ball bearings look very similar to the balls that actually lock onto the post. If not part of the check valve system they might be part of the collar, though I don't know how to pull those off. Same with the springs. Does each QD have 4 balls in it?
https://www.homebrewtalk.com/f35/ball-lock-disconnect-collar-fell-off-ball-bearings-fell-out-312583/
 
Williams Brewing has this blurb under their pinlock:

This German made connector features a one way check valve, to allow gas into a keg, while preventing beer from seeping out. These release pressure at 3psi. For the gas side (usually marked IN) of a pin-lock equipped keg. This fitting is threaded, and fits our D03 and D21 Gas Connectors, as well as our D66 barbed adapter. 3 1/8" tall.

Note: These are precise factory fitted pressure valves, and should not be taken apart for cleaning (internal parts are not available as spares, and an assembly diagram is not available.

Now not serviceable is a stretch for most homebrewers... I could not find an internal diagram either.
 
I can't tell where those ball bearings came from. I know they didn't come from the internals of the black disconnect as far as where beer travels through.

Is it possible that during the "basically just hit them against my hand" step they managed to dislodge from the base on the connector. IE the part that actually holds the quick connect onto the post? If so I'd say at least one of those is pooched.
 
The ball bearings from the push-on lock are very difficult if not impossible to remove. That sleeve does not come off.

I'd say all those parts in the middle are the check valve mechanism. How they fit or work is a mystery. If there's less than 3 psi somewhere (little springs control that?) the plunger valve remains closed. Over that, it opens and allows gas to flow. So something is sensitive to the pressure inside the lock's chamber?

I was unaware the connectors had check valves. I hear horror stories of things going awry and beer entering gas lines. Also all the designated manifolds are advertised as having integral check valves. While I'll be the last guy to argue about redundancy, I just didn't think it was in the connector.
 
Morning, greetings from Finland! Oh, I was unaware that this many people would actually answer! Thank you everyone!

Yeah I thought that the beer tap is ready to assemble but was unsure as I did not find anything. Well it leaves us with those springs'n'all.

For your gas QD all I can find is...as-Ball-Disconnects-w-Check-Valve_p_3452.html. Those pieces in the center could be part of reassembling the check valve. Just remember that you want it to be built so that gas can flow from the tubing down through the post.

The ball bearings look very similar to the balls that actually lock onto the post. If not part of the check valve system they might be part of the collar, though I don't know how to pull those off. Same with the springs. Does each QD have 4 balls in it?
https://www.homebrewtalk.com/f35/ball-lock-disconnect-collar-fell-off-ball-bearings-fell-out-312583/

Correct, that seems to be the exact gas QD I have and I believe I actually figured something out from that image. There seems to be 1 ball above the most-bottom-spring (largest spring). I have a feeling that the balls and springs are going to be connected to the central item that has a small black o-ring attached to it, but I'm unsure how.

The balls are NOT from the connector collar as I checked it for empty holes but all 4 balls are tightly attached to it.

I will continue my investigation and try to figure out how everything is. I'm anyways going to order one more similar gas QD so I can probably check the insides from that. I will keep you updated! The order will probably take a few weeks.

If someone who has this German style(?) gas QD with clear design, please take few pictures from the insides!

Rock on fellow brewers and thank you.
 
I'm confident you can put it back together with an example on hand.

On the other hand, do you need that integrated check valve assembly? I'm not really sure how and how well they work to keep beer out of the QD and line. And if you do get beer in there you will need to clean, sanitize and dry it (flushing it out?). I'd say 99% of us use the simple CMB QDs and have a check valve on the regulator output and/or the manifolds.

Just don't get beer in your lines. Keep the gas connect pointing up and gas flowing, when rolling the keg during force carbonation. I've had beer back up in lines, but that was all from operator error. You learn quickly.
 
Morning, greetings from Finland! Oh, I was unaware that this many people would actually answer! Thank you everyone!


Yeah I thought that the beer tap is ready to assemble but was unsure as I did not find anything. Well it leaves us with those springs'n'all.


Correct, that seems to be the exact gas QD I have and I believe I actually figured something out from that image. There seems to be 1 ball above the most-bottom-spring (largest spring). I have a feeling that the balls and springs are going to be connected to the central item that has a small black o-ring attached to it, but I'm unsure how.


The balls are NOT from the connector collar as I checked it for empty holes but all 4 balls are tightly attached to it.


I will continue my investigation and try to figure out how everything is. I'm anyways going to order one more similar gas QD so I can probably check the insides from that. I will keep you updated! The order will probably take a few weeks.


If someone who has this German style(?) gas QD with clear design, please take few pictures from the insides!


Rock on fellow brewers and thank you.

I'm sorry, are you saying you're going to get another QD so you can take it apart, too? That's funny!
 
I'm sorry, are you saying you're going to get another QD so you can take it apart, too? That's funny!

Maybe he's just going to peek inside from the outside to see which parts go where.

I take my QDs apart, even the gas ones from time to time, to sanitize and lubricate them. Also rinse and sanitize the gas lines once in a while or when I deem needed. It maybe overkill, but if I can see condensation in the gas line, I know something (vapor) is backing up.
 
I'm sorry, are you saying you're going to get another QD so you can take it apart, too? That's funny!

Haha, that's exactly the case!

JK: Not a native speaker/writer so I might mess some sentences up ;) If it's clear design(AKA transparent like the one in the picture) I can just see through it how things are assembled in. Should be a breeze if I just could get one in my hands. I have few kegs and dual regulator so I need atleast two QD's to make proper use of everything. There was some hazzle in the keg order and I might've forgotten to order few pieces.

IslandLizard good that you mentioned lubricants, I might want to add some in the next order.

Thanks for the tips :) I'll keep you updated.
 
Gosh, awesomeness! You're the best.

Well the last picture says it all. Should be a breeze. I'm going to try it out asap ->
 
Maybe it goes something like this:
(Or it could be that the upper ball-spring set needs to be inverted??)

TransGasDisconnect.jpg
 
Maybe it goes something like this:
(Or it could be that the upper ball-spring set needs to be inverted??)

I think one of us pretty close. I'm probably getting a confirmation from fellow finnish brewer this weekend. I think my upmost ball is in the wrong position there and you are closer with the solution, it's probably what you posted but reversed. Feels logical that way but you never can't be sure enough :)

whTiRbP.jpg


and

a5bdz4A.jpg


and

XFSIVJV.jpg


So in the first image I probably should flip the 4th item from the top so the hole actually points upwards. Inside that insert the ball and small spring so that the ball is above the spring.

OR as I did and it seemed logical at the time insert the spring, 4th item from the top so that the hole points at the bottom and the small ball in to the hole. The OR solution now feels stupid as the ball would not do anything with the spring :) Hmm.

Anyways, I used a small toothpick and eating stick to insert the parts. The toothpick was a nice solution as I don't have small pinchers to insert the parts carefully. I just rotated the QD a bit and slid the items in with the pick. Easy and fast and you don't have to "jump the parts in place", the springs were a pain in the ass with so I went with a bit different approach.

Now just to ponder that how the top spring & ball should be. Atleast it looks like it's on top?

VRME7HG.jpg
 
Back
Top