electrolight
Well-Known Member
- Joined
- Sep 19, 2013
- Messages
- 267
- Reaction score
- 66
So I have made apfelwein once. It was a fun experience so I decided to try my hand at brewing. And of course as a novice I couldn't chose to do extract, I definitely had to do an all grain batch. And of course I couldn't choose and "easy" beer I had to go with a Scaldis clone. Well all things considered I think it went pretty well and I definitely had a couple accidental strokes of luck.
I was trying to make a 5g batch using the stove top BIAB approach. The grain bill was 17.5lbs but I got an increased ratio of 19.5lbs in case my efficiency was bad (since it is my first attempt at brewing). As you can imagine this was alot more grain than I imagined it was when I took it home and got it out of the bag. Unfortunately I only had a 6g pot and a 5g pot so on the fly I had to improvise and make two mini batches and was worried silly I already would be ruining the brew before it ever got going (I later learned this was actually a common approach and have since eased my fears).
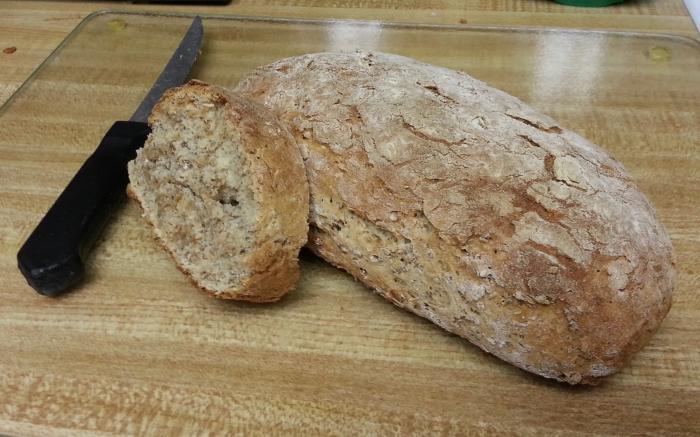
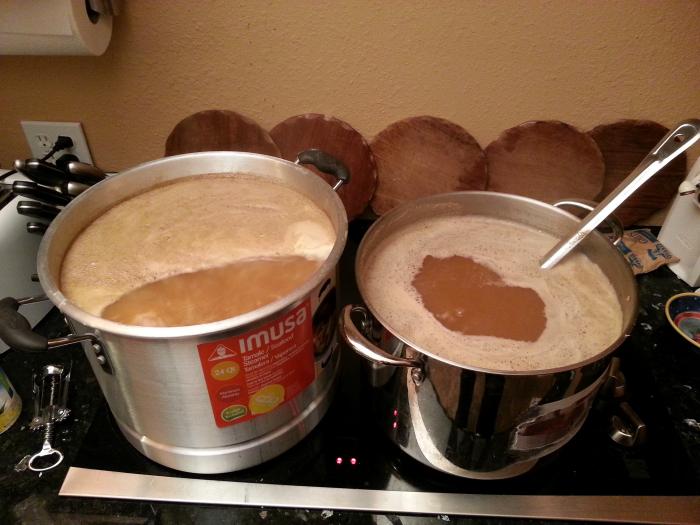
When I was done mashing and sparging? (it was on the stove so I'm not sure it is still called sparging) both batches I was left with about 9g of wort total in both pots [picture 1]. I couldn't believe I had so much because I followed the directions online as far as how much water to use almost to a t. Anyways I set the grain aside to dehydrate with my dehydrator because I remember reading something about making bread with the spent grain [picture 2].
In a pinch I decided to boil off 4 gallons (luckily my stove had no problem with heat and the fact that I had two pots boiling off meant almost twice as much wort). It took two hours to boil off the 4 gallons but I was then freaking out about how long one is allowed to boil. But I had my fingers crossed and carried on. I estimated when the boil-off would be done and added hops accordingly. I was impressed with my calculations and the consistency of my boil-off rate.
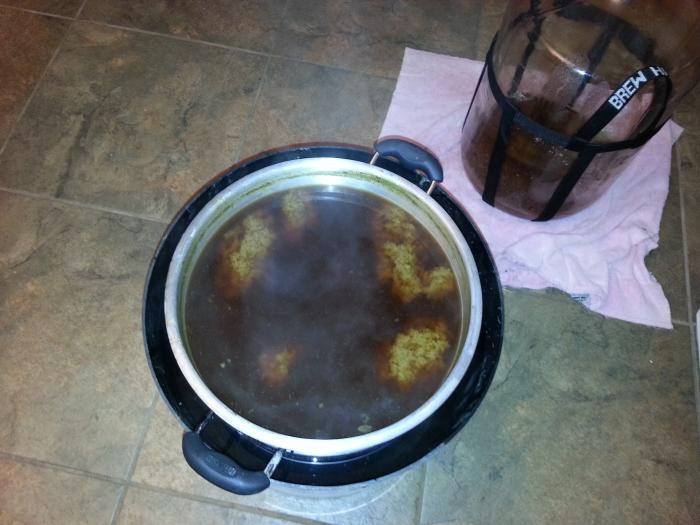
Once done I began cooling and had cooled the wort in about an 1.5-2 hours with my ice and bucket method. I started to worry even more because I got these clouds floating around in my wort [picture 3]. I had no idea what they were but I figured they probably shouldn't be there since I never saw them online. Still I have no idea what they are but I hope the yeast doesn't mind and it just settles at the bottom with the trub after fermentation. The wort at this point was also really sticky once it dried (ask my countertops!).
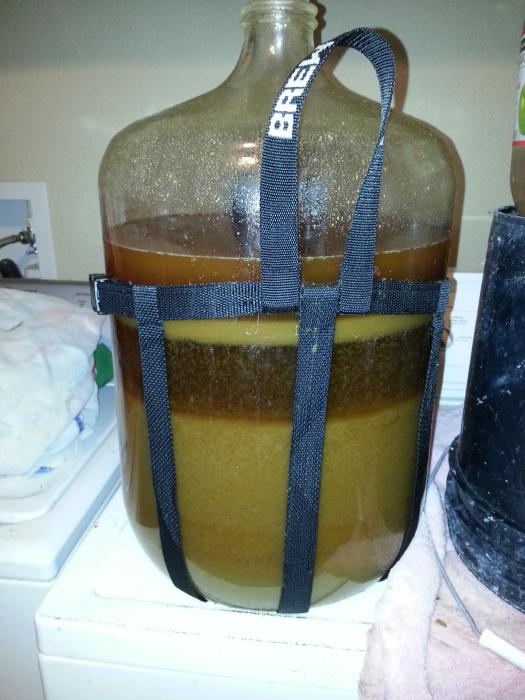
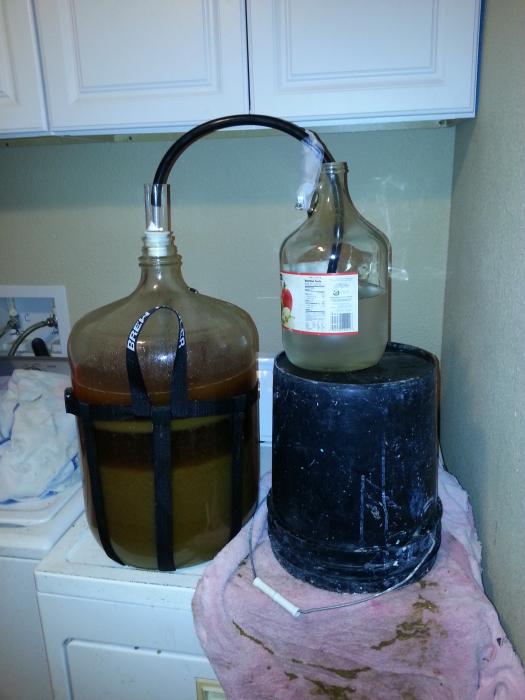
I got it down to about 85 degrees before pitching my yeast I made with a yeast starter. I then totally forgot about a blow off valve and was really disheartened because I didn't have the tools to make one. But I scraped it together and managed to set one up [picture 5]! But I noticed that the wort was separating into layers really badly and I thought that that's it, for sure its game over because I know I've never seen that before online [picture 4].
Anyways, after 24 hours there was a 1 inch krausen and after 5 days there is still a half inch krausen.
But the kicker on this whole adventure is that my OG was targeted at 1.110 and I thought for sure I'd never hit it or be way off. I told myself I'd be happy with 1.090... But I hit 1.111! (I measured more than once with different samples)! I know that is only half the battle but for my first go being within .001 was just so satisfying! Anyways I kept the ambient temp at about 60 for the first two days and then 70 degrees from then on. Its bubble rate on day 2 was about 123 bubbles per minute. It is now down to about 62 bpm on day 5.
TIPS FROM THE PRO: (now that I have a full 1 brew under my belt!)
-Don't brew such a big beer, but if you must, then get big pots! Would have cut my brew from 12 hours to probably more like 6.
-Don't keep wet grains for more than 24 hours! For the grain I did not dehydrate (there was just too much). By hour 40 it had strong smell, by hour 48 it was reaking and not tolerable (and I'm no wuss).
-If you are in the research phase figure out what that cloudy thing may have been and if you need to filter it out (I didn't filter it and wonder If I needed to, back to sticking my nose in the forums).

I was trying to make a 5g batch using the stove top BIAB approach. The grain bill was 17.5lbs but I got an increased ratio of 19.5lbs in case my efficiency was bad (since it is my first attempt at brewing). As you can imagine this was alot more grain than I imagined it was when I took it home and got it out of the bag. Unfortunately I only had a 6g pot and a 5g pot so on the fly I had to improvise and make two mini batches and was worried silly I already would be ruining the brew before it ever got going (I later learned this was actually a common approach and have since eased my fears).
When I was done mashing and sparging? (it was on the stove so I'm not sure it is still called sparging) both batches I was left with about 9g of wort total in both pots [picture 1]. I couldn't believe I had so much because I followed the directions online as far as how much water to use almost to a t. Anyways I set the grain aside to dehydrate with my dehydrator because I remember reading something about making bread with the spent grain [picture 2].
In a pinch I decided to boil off 4 gallons (luckily my stove had no problem with heat and the fact that I had two pots boiling off meant almost twice as much wort). It took two hours to boil off the 4 gallons but I was then freaking out about how long one is allowed to boil. But I had my fingers crossed and carried on. I estimated when the boil-off would be done and added hops accordingly. I was impressed with my calculations and the consistency of my boil-off rate.
Once done I began cooling and had cooled the wort in about an 1.5-2 hours with my ice and bucket method. I started to worry even more because I got these clouds floating around in my wort [picture 3]. I had no idea what they were but I figured they probably shouldn't be there since I never saw them online. Still I have no idea what they are but I hope the yeast doesn't mind and it just settles at the bottom with the trub after fermentation. The wort at this point was also really sticky once it dried (ask my countertops!).
I got it down to about 85 degrees before pitching my yeast I made with a yeast starter. I then totally forgot about a blow off valve and was really disheartened because I didn't have the tools to make one. But I scraped it together and managed to set one up [picture 5]! But I noticed that the wort was separating into layers really badly and I thought that that's it, for sure its game over because I know I've never seen that before online [picture 4].
Anyways, after 24 hours there was a 1 inch krausen and after 5 days there is still a half inch krausen.
But the kicker on this whole adventure is that my OG was targeted at 1.110 and I thought for sure I'd never hit it or be way off. I told myself I'd be happy with 1.090... But I hit 1.111! (I measured more than once with different samples)!
TIPS FROM THE PRO: (now that I have a full 1 brew under my belt!)
-Don't brew such a big beer, but if you must, then get big pots! Would have cut my brew from 12 hours to probably more like 6.
-Don't keep wet grains for more than 24 hours! For the grain I did not dehydrate (there was just too much). By hour 40 it had strong smell, by hour 48 it was reaking and not tolerable (and I'm no wuss).
-If you are in the research phase figure out what that cloudy thing may have been and if you need to filter it out (I didn't filter it and wonder If I needed to, back to sticking my nose in the forums).


