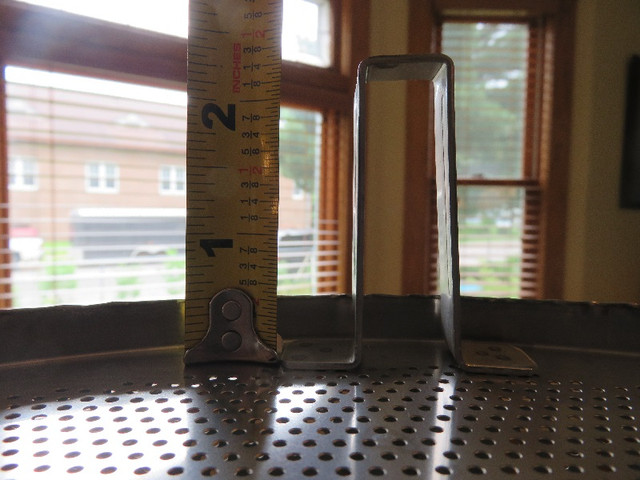
for anyone who has this system...what is the malt tube height with the legs? I would be concerned that with heavy hops, too much trub would get into the fermenter. Rather a hop screen like the hopstopper 2.0 might actually work but it requires 2.0" of height and the dip tube would have to be modified with an angle on it rather than the flat bottom part of the dip tube.
The legs raise the bottom of the malt tube 2.25". The malt tube has a lip/seam that hangs down 0.5" past the bottom screen, and I didn't take note of whether the legs rest on the slightly raised ring on the bottom of the foundry, but if you only need 2" in the center of the vessel you should be in the clear. The dip tube is a separate piece threaded on to the bulkhead, so you can replace/modify it however you need.
Mine arrived Friday and I tested it out today heating water for a PBW soak. Overall I'm quite pleased.
Pros:
-Very easy to use control panel
-Can adjust power in 1% increments (for some reason I thought it was 10% increments)
-Truly all in one. The immersion chiller comes with the vinyl tubing, hose clamps, and even a garden hose adapter. There's even a spare dip tube o ring included. It is clear a lot of planning and consideration has gone into the design and execution.
-Volume markings appear spot on
-Temperature measured within a degree of my thermapen. These were spot checks after a semi decent stir with the foundry probe at the bottom of the liquid and the thermapen at the top so the foundry probe may be more accurate than I measured.
-Double wall vessel should help stabilize mash temperatures and keep the outside slightly cooler to the touch
-The 1/2" hole in the lid is the perfect size for an airlock grommet. As soon as I get a chance to brew I'm planning to try fermenting in it too. One vessel (well okay one vessel, a malt tube and an immersion chiller) to clean from strike to keg? Yes please!
-I have a pre assembled, warrantied, all in one electric brew kettle for under $400. Bobby at Brew Hardware was even kind enough to cover the shipping!
Cons:
-Running at 120 volts it took 86 minutes to heat 8 gallons of water from 59 F to 160 F. However, with the time delay feature I consider this a non-issue. I'm planning to measure my strike water the night before so it's heated and ready to go whenever I want it to be.
-It looks like there's a bit of a gap in the seam between the two walls of the kettle where the bulkhead passes through. I'm concerned any slow leak around the bulkhead will drip down between the walls of the kettle and end up who-knows-where. Hopefully if this happens at least some of it will also run down the outside of the kettle so I can see it and know I need to fix it.
Again, overall I'm quite pleased on first impression and I'm really looking forward to brewing with it! My main goal is to be able to squeeze in brew days without all the planning, set up and cleaning that my current set up requires and I have high hopes it will be perfect for that.