Another E H.E.R.M.S build complete

Homebrew Talk - Beer, Wine, Mead, & Cider Brewing Discussion Forum

Help Support Homebrew Talk - Beer, Wine, Mead, & Cider Brewing Discussion Forum:

This site may earn a commission from merchant affiliate links, including eBay, Amazon, and others.

cacm2226

The Scottish Kilt
HBT Supporter
Joined
May 17, 2013
Messages
64
Reaction score
10
Location
Cypress
Ive been meaning to post my build and story for awhile now, but after some final tweaks and requests from brew buddies, Ive finally arrived to posting such. My build is not unique and is similar to many that have been posted before me. But I figured my posting may benefit those who are considering up grading to electric etc. Ill preface by saying that my build was done on a conservative budget but in the end, it turned out as I had envisioned. I spent many many months reading this forum, searching the web, etc. to figure out how and what I wanted. I imagine that several people who have built electric systems or who are considering building one have their preferences when it comes to brand, model, etc. But again, I tried to maintain a conservative budget yet meet my needs and specs.

Here in Texas, Houston area, we dont have basements so I needed to utilize my garage as best as possible. I started by having my garage floor resurfaced with an epoxy coating, the type that has the flakes in it. Reason being is that it is easier to shop vac and mop, especially around the brewery.

118.jpg

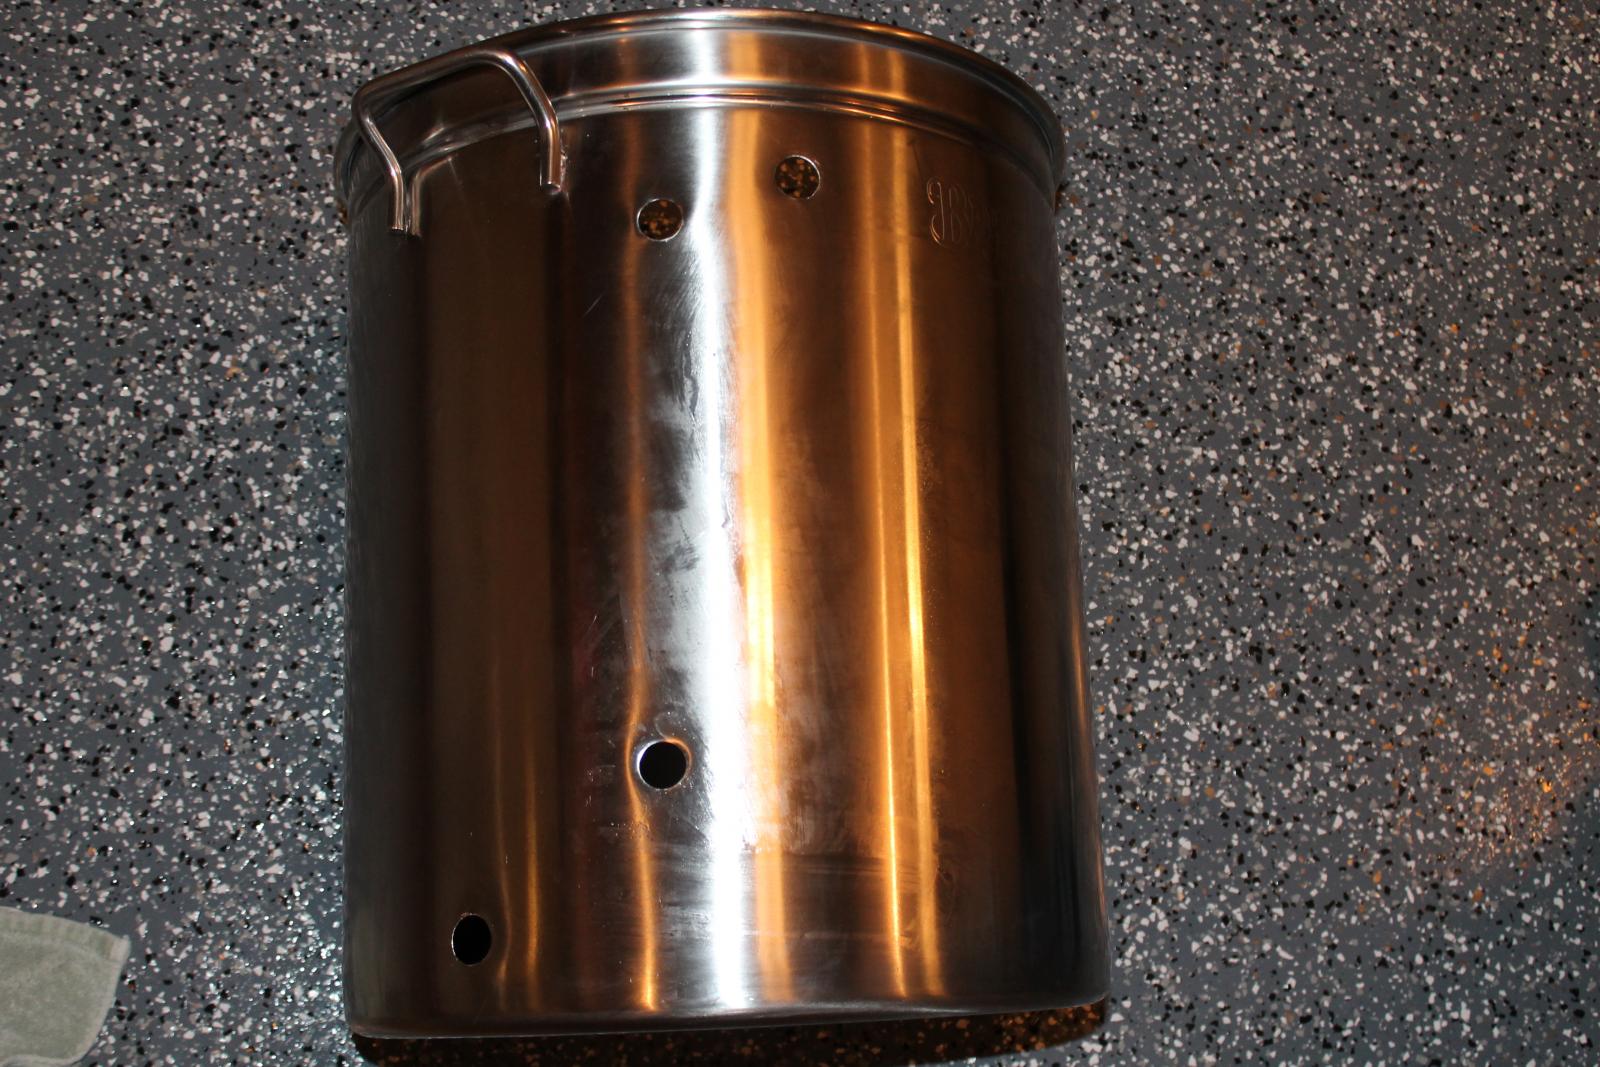
After the floor was completed the SS table was assembled and the building of the kettles began. I went low end and purchased 2 15 gal bayou classic kettle for my HLT and BK and 1 16 gal kettle for my MT. All holes were tapped and drilled to spec.

[/ATTACH][/ATTACH]

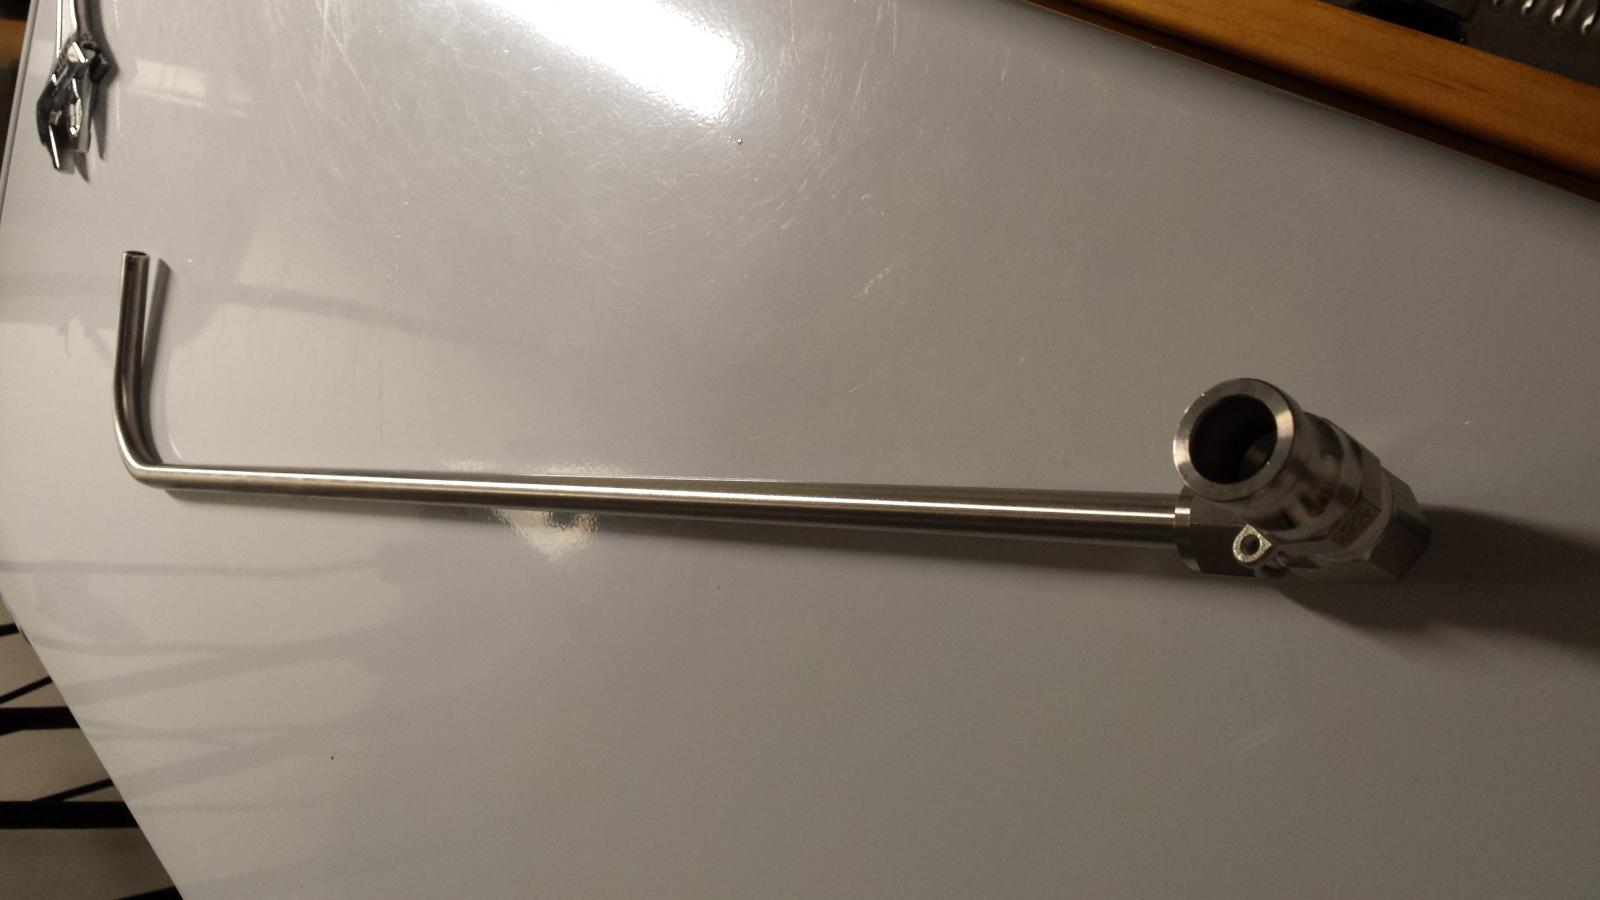
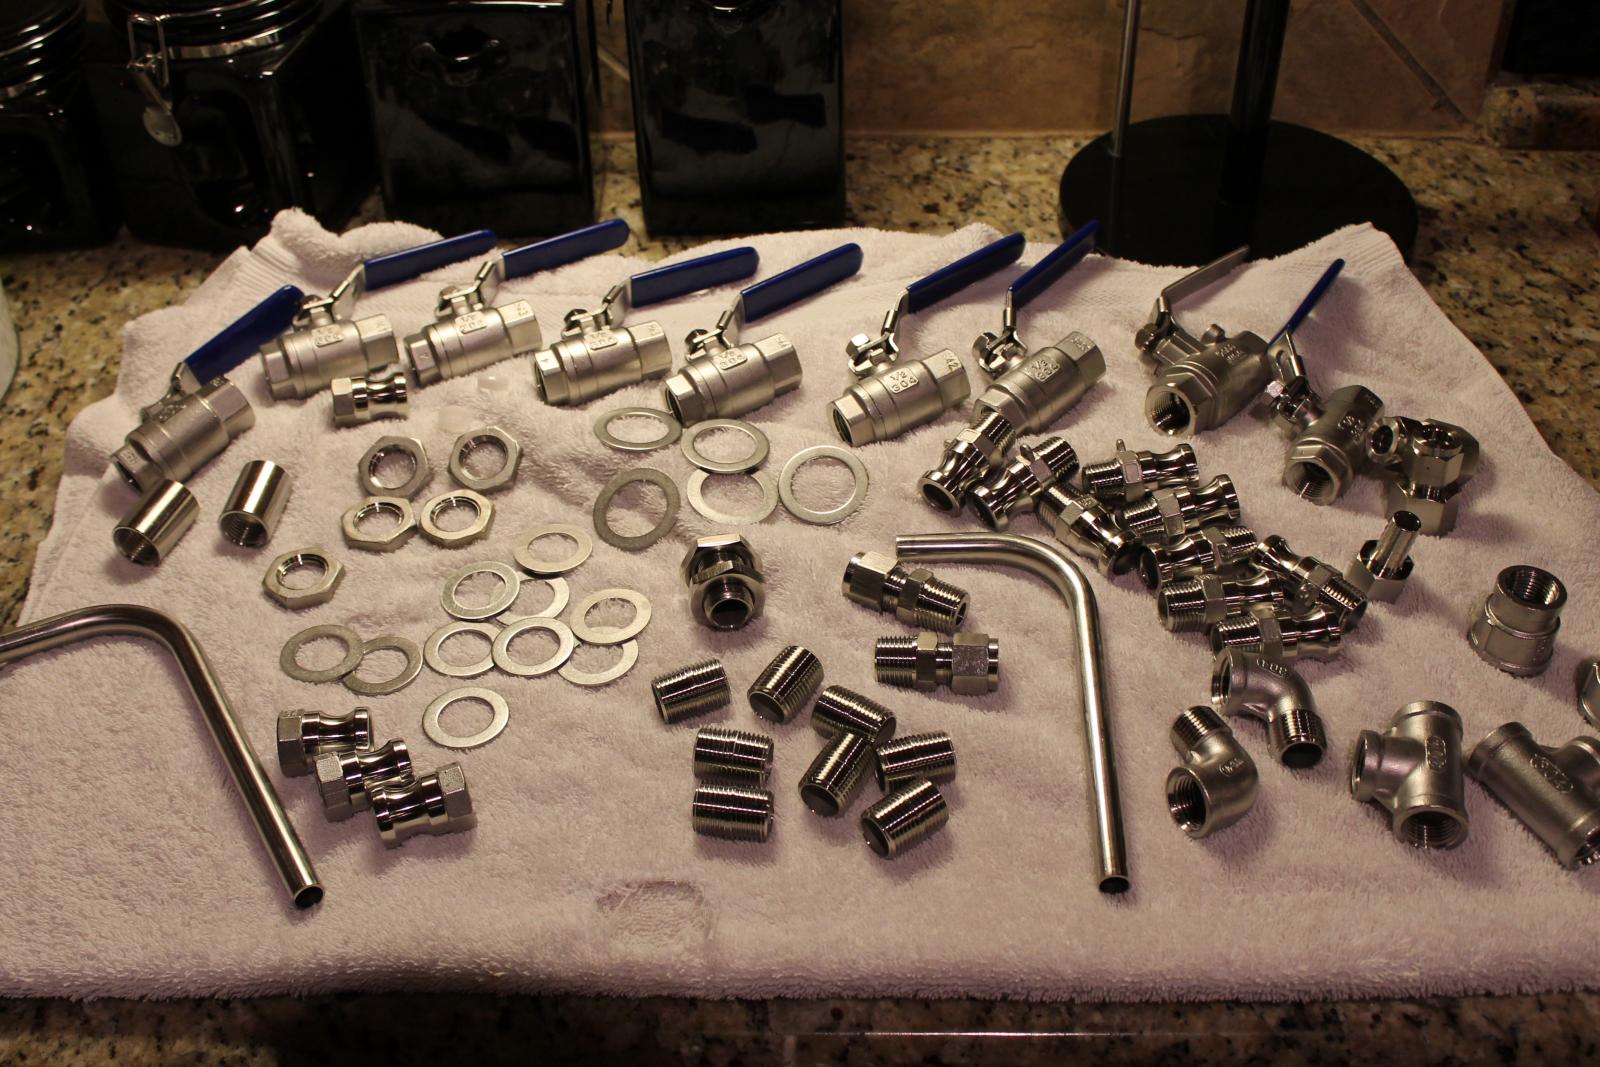
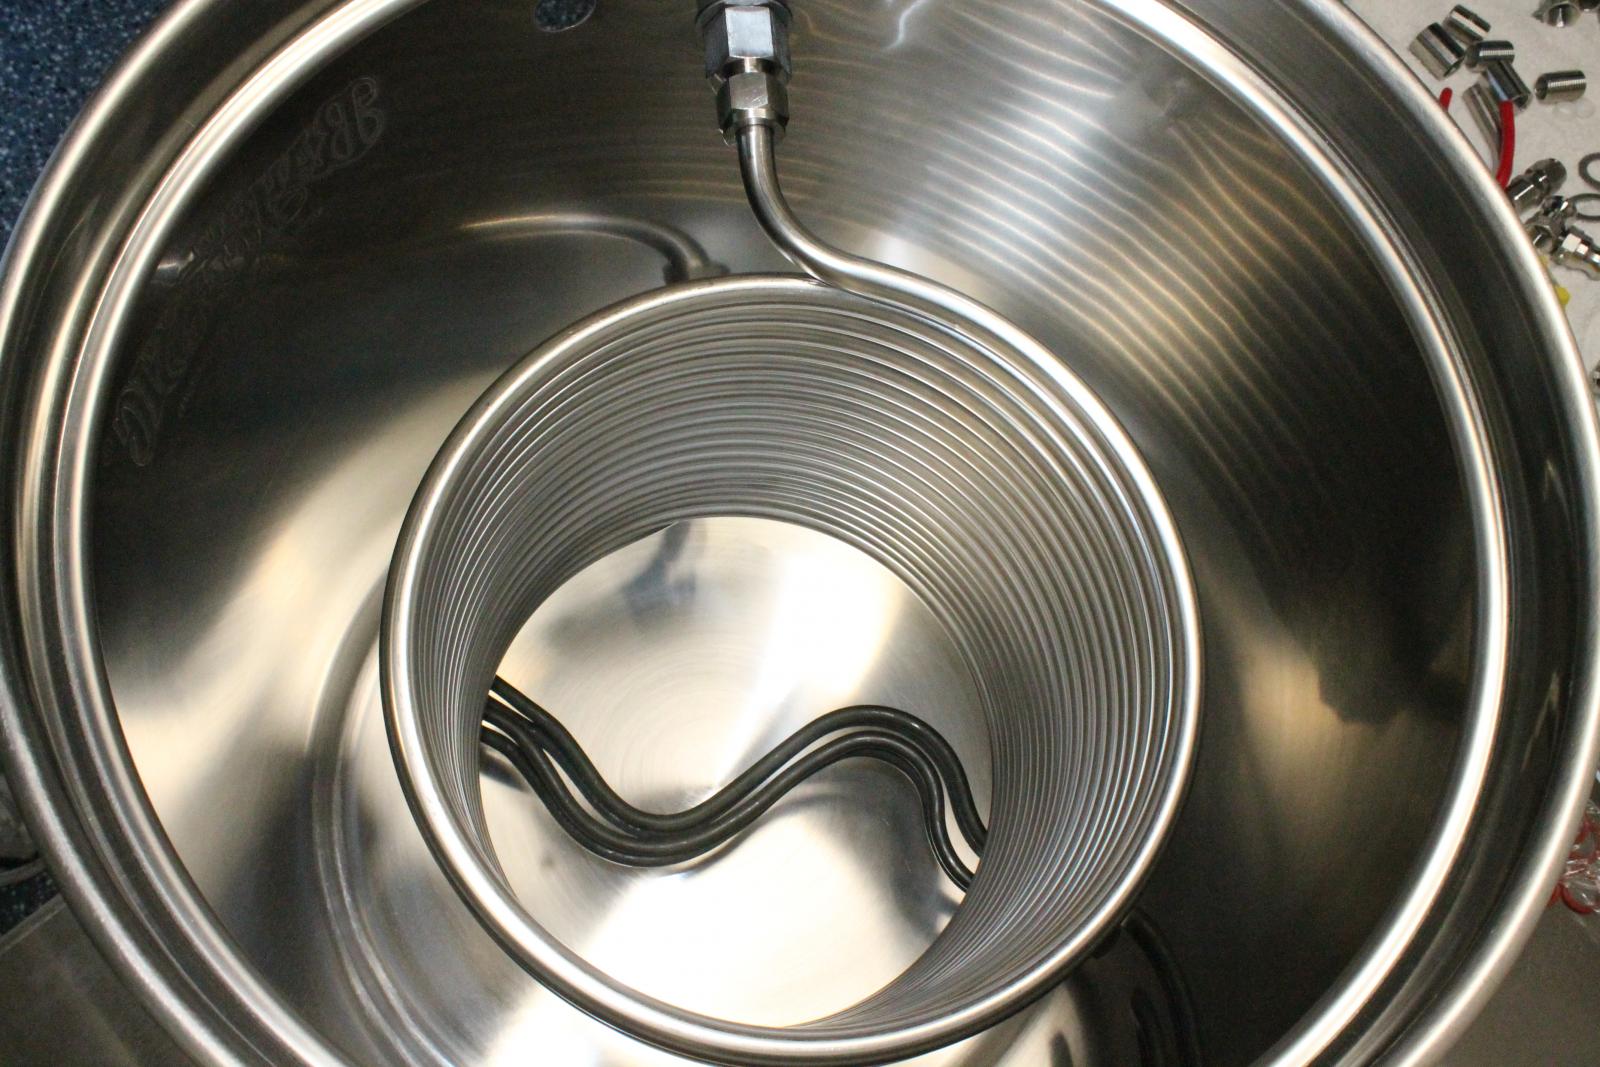
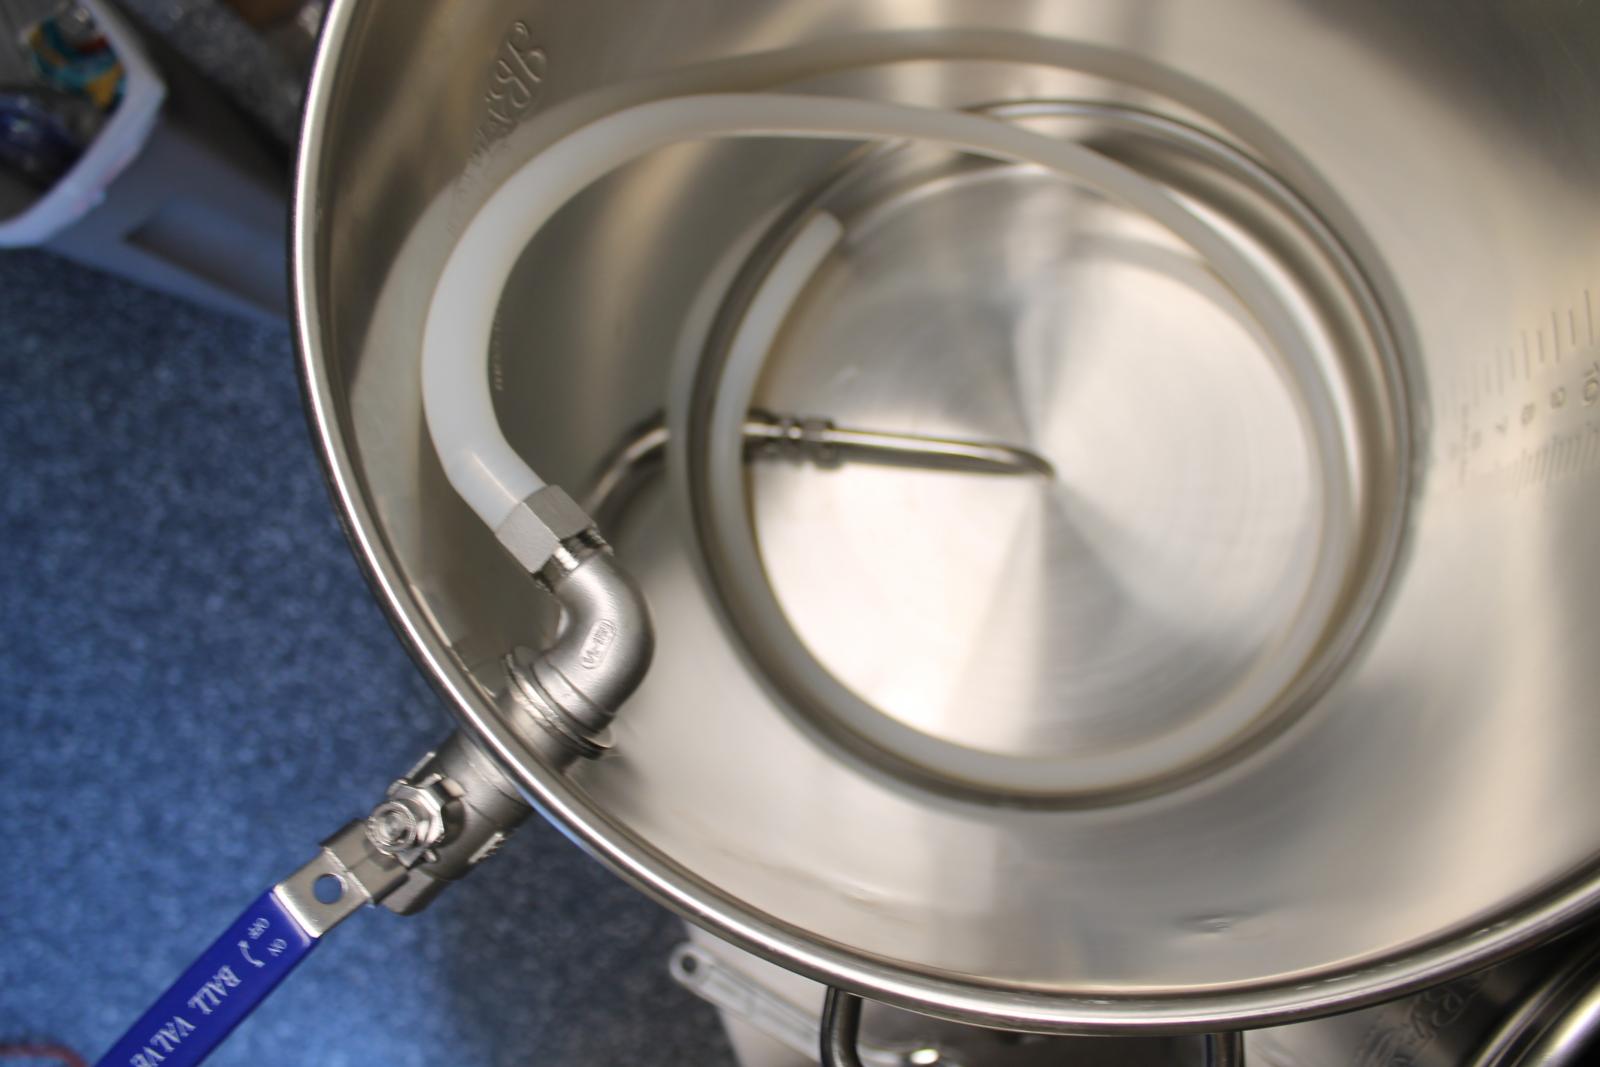
I then assembled the hardware for the kettles and built them out. The parts were ordered from various on line locations. The HERMS coil was ordered via Stainless Brewing.

[/ATTACH][/ATTACH][/ATTACH]

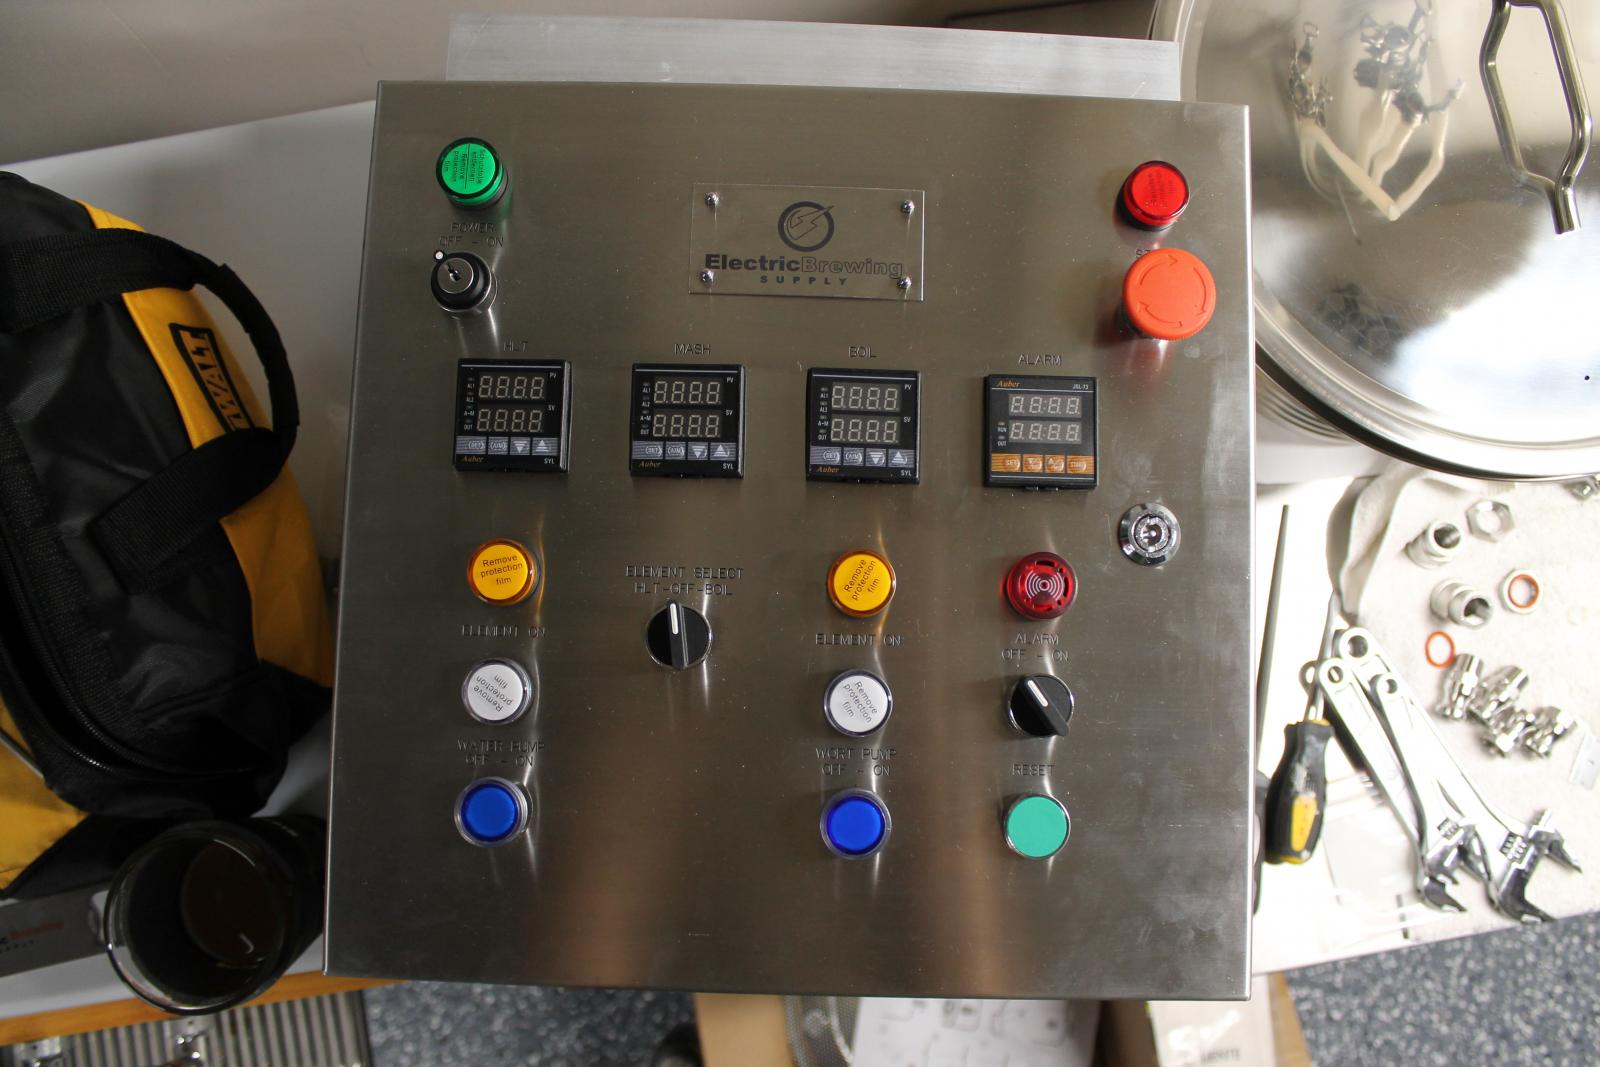
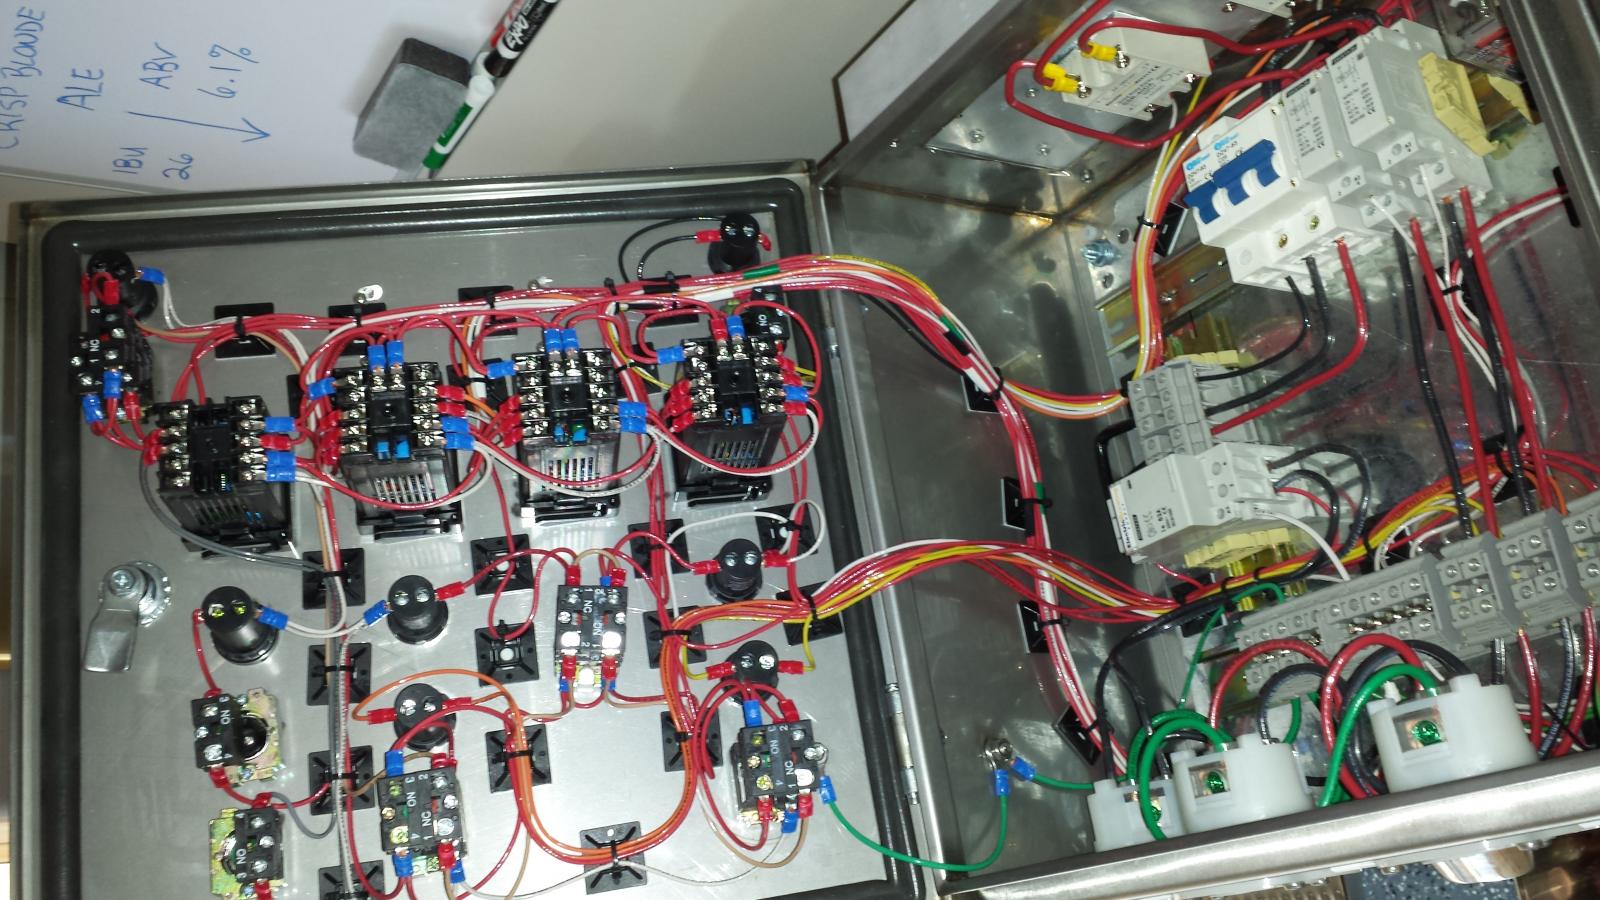
Next was the control panel. My electric panel was built by Ryan and Co. at Electric Brewing supply. Awesome product and super friendly to deal with. Its a 30 amp 2 5500 watt element set up with 3 pids and a timer. RTD temp probes, element and element boxes, and chuggeer pumps. I considered building it my self but didnt want to wait and paid the extra $500. Well worth it.

[/ATTACH]

I apologize as the pictures are out of sequence. Not sure how to fix that.
 

Attachments

  • 125.jpg
    125.jpg
    168.5 KB · Views: 278
  • 124.jpg
    124.jpg
    259.5 KB · Views: 232
  • 126.jpg
    126.jpg
    123.6 KB · Views: 255
  • 127.jpg
    127.jpg
    248.8 KB · Views: 248
  • 134.jpg
    134.jpg
    150.6 KB · Views: 265
  • 135.jpg
    135.jpg
    219.6 KB · Views: 264
  • 132.jpg
    132.jpg
    106.5 KB · Views: 233
  • 130.jpg
    130.jpg
    152.2 KB · Views: 247
  • 20150120_165808.jpg
    20150120_165808.jpg
    233.9 KB · Views: 238
Last edited:
I then mounted the control panel and wired the chugger pumps. Instead of cutting off the plug ends to attach the plug ends for the panel and void the warranty, I bought two extension cords and cut the plug ends off and wired on the panel plugs. The pumps were then mounted onto a wood plat form allowing the pumps to rest below the SS table.

141.jpg
145.jpg
146.jpg
150.jpg

Due to not having the ability to mount a sink in my garage, at least to my ability, I wanted to have a constant supply of water with out having to purchase RO water. So I "T"ed into the cold side supply of the water heater that was located a few feet from the brewery. I then ran a line from the T into a splitter allowing for a dedicated line into a water purifier for brewing and the other for the counter flow chiller. Each controlled by a ball valve. The counter flow chiller was purchased from Z chillers.

169.jpg
171.jpg
174.jpg
 
Next I built out all the hoses to be used for the brewery as well as any "after thought" ideas such as additional fittings, pick up tubes, etc.

I then thought it would be fitting to make my own mash paddle for the brewery out of a piece of oak.

179.jpg
20150214_111826.jpg

As the build was wrapping up, I decided to convert an old fridge we had in the garage into a fermentor. I was already using it for a fermentor that was controlled by a temp controller that I had built, however, I wanted the fermentor to now accommodate a SS conical fermentor. So, off I went (credit to the individual whos name I dont remember who posted on this forum how to convert the exact fridge that I had)

20150222_213145.jpg
20150222_213201.jpg
20150224_210002.jpg
20150224_221556.jpg
20150224_225944.jpg
20150226_175528.jpg
 

Attachments

  • 20150213_212533.jpg
    20150213_212533.jpg
    80.8 KB · Views: 170
Last edited:
The next thing I wanted to do was install an exhaust system. After reading what CFM rate to try to achieve and not breaking the bank, I found an exhaust fan at Home Depot that was rated at 350 CFM. So it was purchased and installed.

20150314_145726.jpg
20150314_163116.jpg

I originally installed a 3 1/2 by 10 inch exhaust connect followed by a 4 inch hose. After brewing for the first time and seeing how much condensation formed, I revamped it with a 10 inch circular attachment followed by the 4 inch hose on a reducer. Much better air flow through the fan and out the vent outside.

So the day came to conduct a leak and wet test on the system. All went well for the most part except for a few leaks here and there that were corrected. Keep a set of crescent wrenches around your brewery, they came in handy.

Then I did my first brew on the system and all went well for the most part. The cons:

my whirlpool arm needed to permanently mounted as just having it clamped was semi successful. moved around a bit.

Dont let your brew buddy toss in hop pellets into your wort after its been cooled to 71 degress. It will clog your wort pump, believe me.

condensation on the exhaust fan (has been revamped).

The pros:

very nice brewing on the system.

knocking your wort down from 215 degrees to 71 degrees in about 8 minutes.

consistent temps through out process.

20150315_154700.jpg
20150315_154651.jpg
 
I apologize if others were replying as I was posting this thread, I was having to submit and reply to my own thread because I was using up all the pic space allowed for each posting.
 
As of date, I have made some modifications and additions as a result of the first brew on the system. I built and added a hop spider to help reduce the amount of debris that enters the fermentor, I plumbed in a pre-chiller using my previous immersion chiller as the ground water will start to warm as we approach summer, drilled another hole and added a ball valve to mount my whirlpool arm, and a storage rack for all the accessories etc. I included a pic of how the brewery looks over all as of date.

001.jpg
002.jpg
007.jpg
008.jpg
003.jpg
006.jpg
009.jpg
 
Edit: are the extension cords you cut being used for just the pumps? Hard to see your element cords. Was worried the wire was undersized on them
 
Nice buildout! Do you still have room for the cars? It looks like you tucked away your brewery in the available garage space based on the design of the cutout spaces in the garage. My garage (also in Texas) is 4 square walls so I don't have any cutout space to nicely position my brewery in.
 
Edit: are the extension cords you cut being used for just the pumps? Hard to see your element cords. Was worried the wire was undersized on them

Yes, just for the pumps. The original pump cord is plugged into the purchased extension cords as recommended by the panel builder. Then, the opposite extension cord end was cut off and rewired with the plug ends supplied by the panel builder. I believe the first picture shows the plug end that was provided by the panel builder that is used to plug it into the control panel.

The element cords were pre-built by Ryan at Electric Brewing Supply. I will post a pic of the cords for you when I get home.
 
Nice buildout! Do you still have room for the cars? It looks like you tucked away your brewery in the available garage space based on the design of the cutout spaces in the garage. My garage (also in Texas) is 4 square walls so I don't have any cutout space to nicely position my brewery in.

Yes, because of the way the garage was built I can still pull two vehicles into the garage if necessary. In reality, the opposite side of the garage from the brewery is only used for a vehicle if need be. Ive noticed others who have had similar issues with lack of garage space.
 
what is the benefit of mounting the whirl pool valve so high up on the BK? They aren't exactly adjustable so why not just mount it at the height which works best for you and cut down on possible point of clogging
 
Lookin good! I like how you mount the chiller.

Copper touching zinc is probably not a good idea. Potential for corrosion, albeit slow corrosion. I'd put some rubber or plastic in between the two metals, just to play it safe.
 
what is the benefit of mounting the whirl pool valve so high up on the BK? They aren't exactly adjustable so why not just mount it at the height which works best for you and cut down on possible point of clogging

Most of the builds that I have reviewed have whirlpool arms mounted at various heights and arm lengths. My primary focus was to place the lower half of the whirlpool arm at a height that would produce better circulation. Im not too concerned about clogging as long as no undissolved pellets get into the wort pump as before. However, I have added a hop spider to combat the issue of any clogging of the whirlpool arm.
 
Copper touching zinc is probably not a good idea. Potential for corrosion, albeit slow corrosion. I'd put some rubber or plastic in between the two metals, just to play it safe.

I wasnt aware of the issue, however, I will add such for precautionary purposes. Thank you for the heads up.
 

Latest posts

Back
Top