All-Grain on a Gas Stove

Homebrew Talk - Beer, Wine, Mead, & Cider Brewing Discussion Forum

Help Support Homebrew Talk - Beer, Wine, Mead, & Cider Brewing Discussion Forum:

This site may earn a commission from merchant affiliate links, including eBay, Amazon, and others.

Obese Chess

Well-Known Member
Joined
Aug 12, 2019
Messages
92
Reaction score
18
Location
Portland, OR
I am aware that this has been asked many times, I'm just looking for guidance as I haven't found anything pertaining to my specific situation. I have been advised to invest in an outdoor propane burner for all-grain brewing, but I live in the pacific northwest where it rains more than half of the year and, perhaps more importantly, I don't really like the idea of lugging propane tanks back and forth - just a totally irrational fear I have of them exploding, honestly. That, plus I just don't want to keep buying equipment until I'm really, really sure I want to continue to pursue this hobby, and if I spend any more money it'll make sense for me to just go out and get an electric kit like an Anvil Foundry or something.

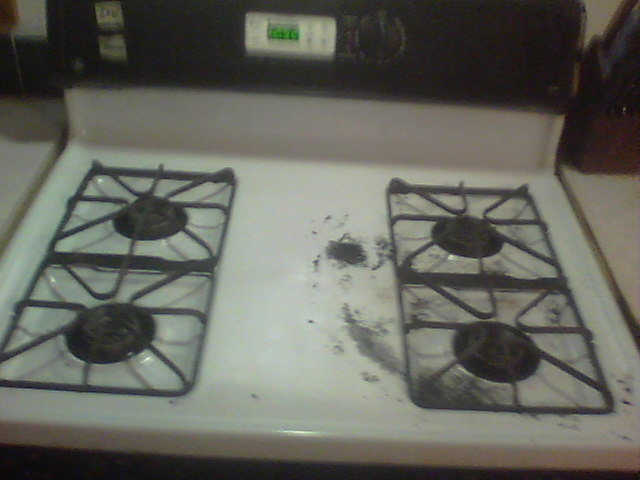
That said - I am looking to do my first all-grain batch, 5 gallons, this coming weekend. I have a large, 5-burner gas grill with one burner putting out 20,000 BTU, this one specifically if it matters: https://products.geappliances.com/appliance/gea-specs/P2B940SEJSS.

In testing my equipment this weekend, it looks like I can get my strike water up to 165 in about 15-20 minutes on the front "high power" burner in a 5-gallon SS kettle. I plan to get an 10-gallon aluminum stock pot, possibly one of the shorter and wider ones rather than the taller and more narrow ones so that I can stick it over more than one burner. Is this getting my wort up to a boil going to be an absolutely arduous, horrible process to the point that I should just invest in a propane burner, or am I going to be fine?

Thanks!
 
I use my kitchen stove, a usually do 2.5 to 3 gallon batches. I brew 5-6 gallon batches a few times a year. I understand you want to heat water quickly, but the kettle you have described is going to have a higher evaporation rate which you will need to take into account.
 
Fortunately I have not purchased the kettle yet and am more than open to changing course on that front!
 
2.5 gallons on my stove is about as much as I would do and it's a fairly new model with a 35,000btu power burner...
Would advise at least 75,000 btu outdoors...can easily be done with natural gas if you get a low pressure burner and bore out the orifice a bit...been researching to do that for myself soon to be closer to the garage kegerator while brewing...also SWMBO isn't a fan of brewing smells
 
I do stovetop brewing (6-7 gallon batches) in a 10 gallon aluminum stockpot for mash and boil. It's the normal sort, taller than wide. You want this for minimum possible surface area to volume. It sits comfortably across two burners, and on my outdated stove they are more than enough. Mash ramps of 1°C/min require care not to overdo it. Comes to a boil quickly. For boiling, I really only use one burner not all the way to full heat, and another on low, heating asymmetrically. All you want is a gentle simmer, lid on, just enough to keep the wort circulating, and a total evaporation rate of 4-8% of original volume. Thermal stress is very damaging to wort and the resulting beer, so the volcanic boils homebrewers used to be accustomed to using are to be avoided. But I could easily do that, and used to before I knew better. Aluminum is a great conductor of heat, far more effective than stainless steel. I highly recommend this option. I honestly don't know that I could get a propane burner dialed down low enough to provide an appropriate level of thermal loading to produce a high quality wort.
 
Just my 2 cents but you can buy a Bayou classic burner at 55,000 btus" for 60 bucks. A twenty lb propane tank is refilled here for $11. I either brew outside or in the garage when it is raining or snowing. Been using the burner for years and does a great job of getting 7 gals of wort up to a boil fast . Never had any problems with the burner or tanks over the years. As mentioned above, you can get burners with the appropriate jets to use natural gas.
Keep the 5gal pot for strike and sparge water, you will need a 10gal pot for boiling the 6-7 gals of wort. Just saying, thats' been my experience. I'm sure you will find what works for you.
 
Hey. A few years ago I wrote this article on apartment brewing and i did all grain on my stovetop with the 10g kettle straddled between two burners and it worked great. Feel free to check it out there. There's a picture of the setup in there. It's not super fun because at least for me, it took a while to heat up, but it's definitely doable. I think it's worth trying on your stove a few times to see if it will work long term, but I imagine you'll end up just buying an outdoor burner.

https://www.homebrewtalk.com/5-tips-apartment-brewer.html
 
I do 5 gallon biab batches on my stovetop, with the pot covering 2 of the burners. It does take about half an hour to heat to strike temp and then another half hour to get up to a boil, but I can always find something to do in my apartment during the down time.
I may invest in a heat stick eventually to shave some time off my brew day, but right now it doesn't really bother me.
 
Are those of you who find it takes a bit of time to get up to temperature using aluminum of SS? Aluminum does have the advantage there.
 
Not sure why you haven’t considered an all in one, like the grainfather or anvil foundry or something similar. You said it rains half the year, so yes, inside would make the most sense. But that stove looks pretty nice. The first mess you have on it and it isn’t going to look so nice.

I hated lugging everything outside, pots, burner, hoses, utensils, etc.. And then couple that from nov/dec to mar/apr, it was even more a pita due to temps and the outside hose bibs shut off to protect from freezing.

Enter the grainfather. Now I can brew, sitting back and relaxing, listening to records, watching a movie, etc. and the app dings at me when there is something to do. And I can brew when it’s 95* and blazing hot or pouring rain or 5* and snowing.
 
How’s a crawfish burner? Would the single jet cause thermal stress? Also any worry using aluminum pots? Does the acidic nature of wart bring aluminum into solution?
 
Are those of you who find it takes a bit of time to get up to temperature using aluminum of SS? Aluminum does have the advantage there.

I use an aluminum 10 gallon stock pot on my stove top. It's taller than it is wide and fits nicely over the largest burner. Which happens to be on the front right. Takes about 45 minutes to heat my strike/sparge water up to temp. Maybe 20 to 30 minutes to heat the wort up to boiling. Not a serious boil, but it works.
 
I boil 4 gallons in my 5 gallon pot on an 18K burner. It works well and I would not want to do any more than that. You mention the boil, and that may or may not be a problem, but the real issue is what to do after. Do you have a chiller and can chill and transfer off of the stove top? This can be dangerous and messy. If not, can you handle a pot that large filled with boiling hot liquid? I opted not to. I get 3.5 gallons into the fermenter and will sometimes do a partial mash if I want a 6 gallon batch. I will also sometimes do two 4 gallon boils in separate pots on the stove top. The other burner is 15K and lags noticeably. I also prefer to use the thin $15 thin gauge stainless steel pots from India I get at the dollar store. I have several really beautiful polished stainless steel 5 gallon pots with the sandwiched bottoms I paid quite a bit more for, but they take much longer to get up to temperature and I have not experienced any adverse effects using the thinner pots, they save time.
 
Not sure why you haven’t considered an all in one, like the grainfather or anvil foundry or something similar. You said it rains half the year, so yes, inside would make the most sense. But that stove looks pretty nice. The first mess you have on it and it isn’t going to look so nice.

I hated lugging everything outside, pots, burner, hoses, utensils, etc.. And then couple that from nov/dec to mar/apr, it was even more a pita due to temps and the outside hose bibs shut off to protect from freezing.

Enter the grainfather. Now I can brew, sitting back and relaxing, listening to records, watching a movie, etc. and the app dings at me when there is something to do. And I can brew when it’s 95* and blazing hot or pouring rain or 5* and snowing.
I plan to make the jump to such a product eventually assuming I stick with this, but I'm currently less than $150 into all the equipment and ingredients for my first batch and don't want to drop hundreds on something like the Grainfather or Foundry before learning the basics on a budget. If I end up loving the act of brewing beer as much as I like drinking it, such a piece of equipment is certainly in the cards.
 
I do all-grain BIAB on my natural gas stove. It does NOT have that 20,000 BTU burner. It takes me about an hour to get 5 gallons to mash temp and another hour to get 7 gallons to boil in my 10 gallon aluminum pot.
 
All you want is a gentle simmer, lid on, just enough to keep the wort circulating, and a total evaporation rate of 4-8% of original volume.

Do you mean lid off? Or lid on but cracked to let steam out? Or lid completely on?
 
I can comfortably brew 3 gallon batches on a single burner on my stovetop, and that's not on high, but I suspect that 5 gallons would be an issue unless I could go across two burners. I'm a messy brewer though, so would prefer to avoid brewing in the kitchen - spilled wort is a PITA to clean up.

Another option you could look at is putting cheap elements into your pot - then you can brew in the garage/laundry/bathroom etc.
 
i brew 10 gal batches, all-grain on mine...gets messy though

100_0579.JPG


i did bore out my orifices a bit on the right side though, and after having to replace the logic board once now use a piece of sheet metal behind the pot as a heat shield...works fine though...

i also have to lay down a few thicks layers of aluminum foil over the counter or it will burn....word of warning for ya...

but brewing on NG is practically free of fuel cost....
 
Do you mean lid off? Or lid on but cracked to let steam out? Or lid completely on?
I mean lid on as far as possible. If you need a crack to prevent a possible boil over that's fine. So is a bit of steam escape. But the more covered, the less heat is needed to maintain a nice simmer and circulation in the wort, reducing total evaporation and, more important, total thermal loading on the wort over the course of the boil. My 10 gallon aluminum pot gets the lid on but ajar with about a 1/4 inch gap. If you're in the now rare situation of having a malt that needs special efforts to form and expel DMS, it can be opened up to ensure steam escapes in the last few minutes, once SMM has been converted to DMS (takes at least 30 minutes on heat at pH 5.4, a bit longer at less ideal pH.) I usually do open it up in the last 10 minutes, and turn up the flame if needed, for good measure, and because I'm tossing in kettle finings, finish hops, etc. anyway.

BTW it takes me about 20 minutes to get the strike water up to temperature, and a bit more than that to get the full ~7 gallons up to the boil. That's with, IIRC (it's an old stove,) a 14,000 BTU burner. Then it goes down to maybe half power to keep the simmer going, off to one side to improve circulation.


PS can't actually remember the last time I had any stovetop mess.


EDIT

I found the manual for my stove, amazingly. The pot sits across a 12k and a 9.5k burner. So for heating strike, mash ramps, and heating to boil, the maximum potential would be 21.5k BTU, but I can't utilize that or some of the flame would be wasted up the sides of the kettle, as the burners are near the edges. I estimate that to maintain the boil I'm using an absolute maximum of 11k BTU (big one on mark 5 of 7, little one on mark 2 of 7. Who numbers a dial 1 to 7?) Whatever any of that means to anyone.
 
Last edited:
i brew 10 gal batches on mine, need a heat shield behind the pot, and a few layers of aluminum foil over the counter....burnt my counter, and had to replace my control board once....

gets messy though,
100_0527.JPG


after cleaning....oven cleaner WILL be your friend!

100_0579.JPG


and yes i bored out the two burners on the right to get a bigger flame
 
I mean lid on as far as possible. If you need a crack to prevent a possible boil over that's fine. So is a bit of steam escape. But the more covered, the less heat is needed to maintain a nice simmer and circulation in the wort, reducing total evaporation and, more important, total thermal loading on the wort over the course of the boil. My 10 gallon aluminum pot gets the lid on but ajar with about a 1/4 inch gap. If you're in the now rare situation of having a malt that needs special efforts to form and expel DMS, it can be opened up to ensure steam escapes in the last few minutes, once SMM has been converted to DMS (takes at least 30 minutes on heat at pH 5.4, a bit longer at less ideal pH.) I usually do open it up in the last 10 minutes, and turn up the flame if needed, for good measure, and because I'm tossing in kettle finings, finish hops, etc. anyway.

Interesting. So you're saying that a boil with the lid on, simply opened for the last few minutes, is adequate to remove DMS? That certainly makes stovetop brewing more doable.

PS can't actually remember the last time I had any stovetop mess.

I always manage to spill something! I got banished from brewing in the house many years ago (electric, not stovetop - the method of heating isn't the issue) because of mess. I still sneak the occassional 3 gallon batch in on the kitchen stove (for spontaneous ferment brews) but always end up with spillage and a cranky wife. I brew in my 'mancave' now - it has concrete floors sloping into a floor drain so spillage is no problem.
 
I brew 5 gals in a 15 gallon alluminum on my gas stove in the winter.
I straddle two burners and the top is just far enough from the vent to put a wort chiller in to sanitize at the end of the boil.
5 gals is all I can safely take off the stove, place on a wool blanket for biab hanging from a ladder and again chilling by the sink.
but it's a PITA.
but then so is brewing in sub 20's outside.
I do have a propane burner I brew with on my patio on nice days and a tarp to put over the deck on rainy days and an old washing machine shell to put around for windy days but that is a pain with the ladder.
i have an old old tappen with 4 burners just perfect for a pot i may hook up in the basement and a window I can vent out of which I may hook up for winter brewing. But that will need new seals before I hook gas up along with the oven bypassed because of the pilot light.
a grill propane tank isn't heavy and lasts for about 5 or 6 10 gallon brews in the summer and slightly less in colder weather. I get them filled for 7$ at the reservation.
I may upgrade to an out door natural gas burner with more BTU's since i'm planing to convert my grill to natural gas.
I'll just do a couple of hook-ups.
 
I brewed all grain on my stove for many years before going electric. Full 5g batches are totally doable, just slow.
 
Bit late to the party and I don't know my stove's BTU output, but I do 6 gallon and larger batches on a single burner. It takes a while to reach temps, but I just find other ways to utilize that time, whether for brewing or other activities. Another option is to use a plug-in heat stick to speed up the process. I've got one that's 1500 watts and can take 15-20 minutes off of the ramp up to strike temp and another 15-30 off of the ramp up to a boil, but I don't always use it because the jackass who wired my apartment put the living room A/C unit and the kitchen outlets on the same circuit so there's a tendency for the circuit to break when I plug it in.
 
Interesting. So you're saying that a boil with the lid on, simply opened for the last few minutes, is adequate to remove DMS? That certainly makes stovetop brewing more doable.

First you need to convert SMM into DMS. Once that is accomplished, all you need is enough circulation for enough time that every bit of wort gets exposed at the surface. Even then the entire kettle doesn't need to be open as long as steam can escape taking volatiles with.
 
I plan to make the jump to such a product eventually assuming I stick with this, but I'm currently less than $150 into all the equipment and ingredients for my first batch and don't want to drop hundreds on something like the Grainfather or Foundry before learning the basics on a budget. If I end up loving the act of brewing beer as much as I like drinking it, such a piece of equipment is certainly in the cards.
Not that you don't already have enough input, but my 0.02 worth...
How long have you been brewing? A few months? A year? How many batches? I get that this hobby (obsession?) may not be for you.
If it is for you, then the amount of money you spend on a burner, pot, propane, etc. may quickly add up to an anvil. I don't blame you for wanting to go slow. It's a lot of scratch. But electricty is usually much cheaper than propane, no trips to refill, and no chance of explosions! Also no by product of burning stove gas too.
Buy once, cry once.
Of course, once you have an easy to use electric wort maker, with easy repeatabiliry, well- you're gonna want fresh grains ($99-$350), want to buy and store bulk grains ($35-$75) and or course you will need a stainless conical fermintor ($250-$700) and then of course temp control ($100-$1200)...
Wait a minute- run!!! Lol.
Ha ha! No, this is my thinking, too. I will be brewing my first-ever batch tomorrow, so I've held off on making any big investments in equipment until I learn whether or not I'm having any fun. As such, I am using gear that I bought for an absolute steal on craigslist, and all told between gear and ingredients I'm just shy of $150 into everything - currently borrowing a 10gal pot but I have everything else. If I decide this is for me, when I decide to upgrade from my craigslist gear, I will likely go for an Anvil. This had been my plan originally because I'd done the same amount of math. "Okay, I'm about $150 in. A good burner, an SS pot, propane, that's another $150 or so... and an Anvil ain't much more than that and is a self-contained unit, plus I could sell all my existing gear to fund a good chunk of that." I think my head is just swimming from crunching numbers and double-checking my work and I neglected to mention it in the original post.
 
Ha ha! No, this is my thinking, too. I will be brewing my first-ever batch tomorrow, so I've held off on making any big investments in equipment until I learn whether or not I'm having any fun. As such, I am using gear that I bought for an absolute steal on craigslist, and all told between gear and ingredients I'm just shy of $150 into everything - currently borrowing a 10gal pot but I have everything else. If I decide this is for me, when I decide to upgrade from my craigslist gear, I will likely go for an Anvil. This had been my plan originally because I'd done the same amount of math. "Okay, I'm about $150 in. A good burner, an SS pot, propane, that's another $150 or so... and an Anvil ain't much more than that and is a self-contained unit, plus I could sell all my existing gear to fund a good chunk of that." I think my head is just swimming from crunching numbers and double-checking my work and I neglected to mention it in the original post.
Enjoy your first brew! You'll be fine! I've done a bunch of all grain 5 gallon batches on stoves. I get a more vigorous boil with my outdoor burner (blichmann burner converted to natural gas) but the stove is my preferred method in the winter when the weather is generally uncooperative. Sometimes I split my strike water into smaller pots to use multiple burners and heat it up more quickly, but sometimes i just use that time to clean things or do something else around the house. Being in the kitchen lends itself more to multitasking than other places, I've found.
 
I do stovetop brewing (6-7 gallon batches) in a 10 gallon aluminum stockpot for mash and boil. It's the normal sort, taller than wide. You want this for minimum possible surface area to volume. It sits comfortably across two burners, and on my outdated stove they are more than enough. Mash ramps of 1°C/min require care not to overdo it. Comes to a boil quickly. For boiling, I really only use one burner not all the way to full heat, and another on low, heating asymmetrically. All you want is a gentle simmer, lid on, just enough to keep the wort circulating, and a total evaporation rate of 4-8% of original volume. Thermal stress is very damaging to wort and the resulting beer, so the volcanic boils homebrewers used to be accustomed to using are to be avoided. But I could easily do that, and used to before I knew better. Aluminum is a great conductor of heat, far more effective than stainless steel. I highly recommend this option. I honestly don't know that I could get a propane burner dialed down low enough to provide an appropriate level of thermal loading to produce a high quality wort.

Where did you get the information about simmering wort instead of boiling and "Thermal Stress" to wort. You need to boil with a good rolling (not volcanic) boil to rid the wort of DMS and other volitals. If you leave a lid on the pot this isn't going to happen and the resulting beer will be of a lesser quality, not better.

Listen to this podcast with Dr. Charlie Bamfort where he discusses the boil and why you need a good one.

 
Do you mean lid off? Or lid on but cracked to let steam out? Or lid completely on?
You need a rolling boil, or at least a good boil, not volcanic. You can leave the lid on to help the wort reach temperature but once it gets there you should take it off. You need to have the lid off to expel DMS and other volitals. This won't happen without a good boil and with the lid on a good boil will be a boil over. If you leave the lid on the wort will not concentrate and you will not get a proper hot and cold break and protein coagulation. You will then probably have issues with chill haze and beer that isn't clear (if it is one that should be).

If there is disagreement with this I would like to see the research.
 
Where did you get the information about simmering wort instead of boiling and "Thermal Stress" to wort. You need to boil with a good rolling (not volcanic) boil to rid the wort of DMS and other volitals. If you leave a lid on the pot this isn't going to happen and the resulting beer will be of a lesser quality, not better.

Listen to this podcast with Dr. Charlie Bamfort where he discusses the boil and why you need a good one.

Any brewing textbook or paper on the subject in the last few decades would be a good start here. Try reading Kunze or Narziß, Briggs, et al., even Bamforth himself has covered this I'm sure. So have recent presentations and podcasts from the MBAA. It is settled brewing science, and at the foundation of modern professional practice. If you want good, fresh flavor as well as physical and flavor stability in the finished beer, with protection against accelerated oxidative staling, limiting thermal stress on the wort is an indispensable factor. A rolling boil is by no means needed to deal with DMS. Most modern malt is very low in or devoid of the precursor SMM, and where it exists, it must first be converted to DMS, after which it only needs to be exposed at the surface of the circulating wort to be expelled into the atmosphere with escaping steam -- thus provision for the escape of steam is only required for a brief period after formation of DMS is complete. In fact, wort boiling is not necessary at all. Experimental systems have been developed which hold the wort for a limited period at sufficient temperature (>180°F) to isomerize alpha acids and convert SMM, using mechanical agitation to coagulate the break, and finally evacuation to remove undesirable volatiles. This of course is not feasible for homebrewers, but they can develop practical means to achieve the goals of properly handling wort. Vigorous boiling is not among these. For a starting point on the damaging effects of heat on wort and beer, search "TBI."
 
You need a rolling boil, or at least a good boil, not volcanic.

No, I used to believe that as well. Now, after wort gets to a boil at full power, I back off to a simmer - just enough to see the surface of the wort moving. I don't have issues with haze or DMS and it means far less condensation in my brew-cave.
 
Settle down, guys. This is the beginners brewing forum. If he can get a decent boil on his stovetop, he’s going to be just fine.
Point well taken, thank you. But to the point of the topic, the OP or any beginner should not be misled into worrying that their arrangement is inadequate if it can do no more than get them a decent, gentle boil. It is advantageous to learn good habits based on sound information from the start.
 
I'm in a similar position as the OP, though my reason for not investing too much is that I'm in a location where I'll be for only 6 months longer.

I found this blog post which got me started with brewing with minimal equipment: https://homebrewanswers.com/minimum-equipment-all-grain-brew/

But I have one extra issue, a pot with a capacity of only 16 liters (20 liters is around your normal 5 gallon batch). After experimenting with adding water to top up the fermenter, I have found the best way for me is to split the ingredients in half and do smaller brews separately and combining in the fermenter. The beer I first did this with (my third brew) worked out the best so far.

I went back to trying to do it all at once for my 4th brew, and while it seems to have worked, it made a much bigger mess and overall was more work than splitting the recipe. And working from home it's pretty easy to do two smaller brews fitting work in during down times.
 
Back
Top