Great Job!
You are using an out of date browser. It may not display this or other websites correctly.
You should upgrade or use an alternative browser.
You should upgrade or use an alternative browser.
2 tier, 2 zone fermentation chamber build (AKA Racer X)
- Thread starter Mtn_Brewer
- Start date

Help Support Homebrew Talk - Beer, Wine, Mead, & Cider Brewing Discussion Forum:
This site may earn a commission from merchant affiliate
links, including eBay, Amazon, and others.
tone_s
Member
That is amazing!
PacificNWBrewer
Well-Known Member
Just an idea. Taking the actual chamber as a guide, I made this.
Doors would hinge on the right side to access. It could fit 8 corny kegs or 5 carboys. I made the lower section tall enough to get a conical to fit inside (most likely have to make a new base for the conical as it is only 39" tall inside). The top will hold the same amount of cornys/carboys plus blowoff bucket/jar.
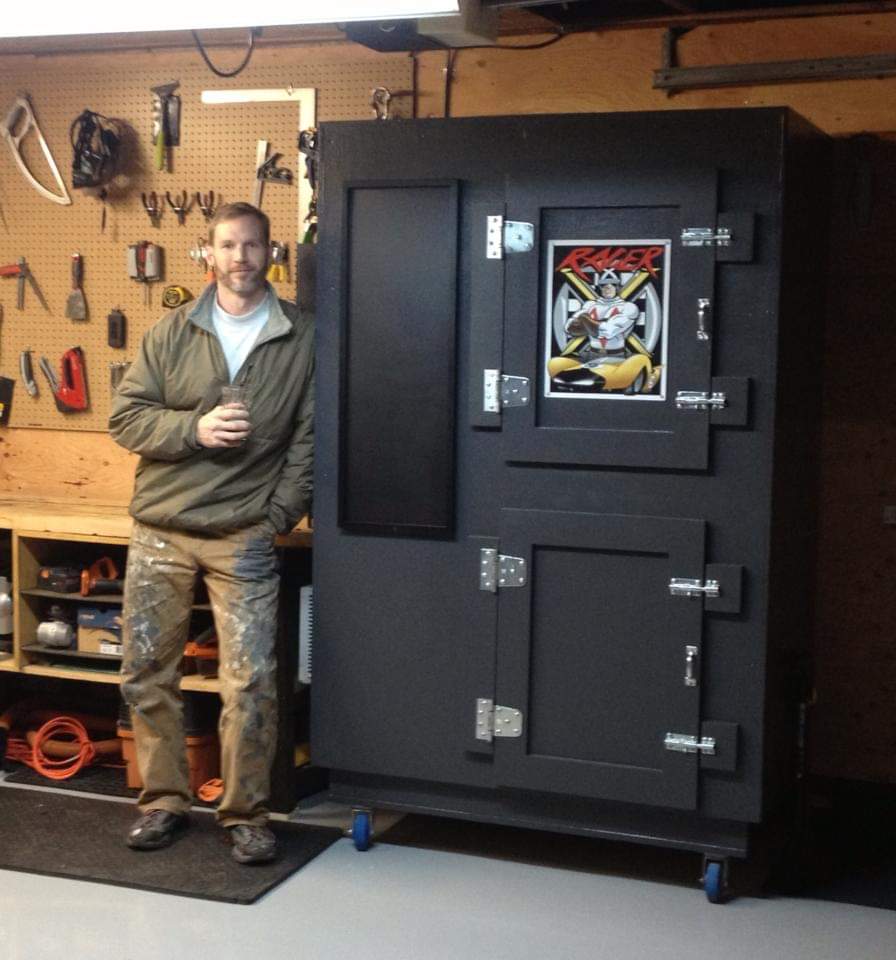
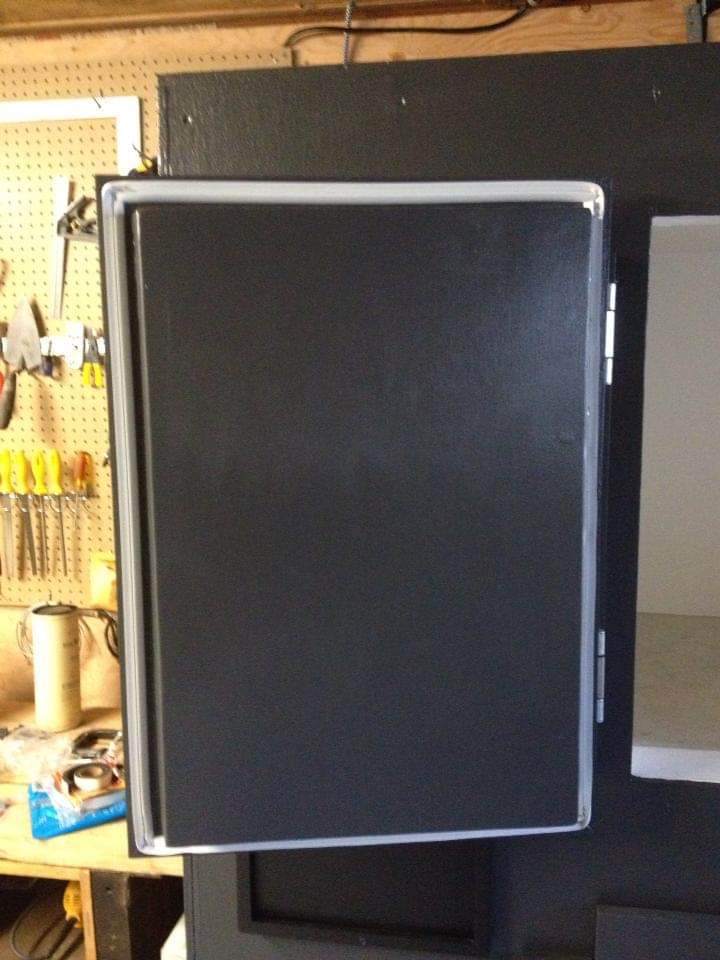
On the front, the chalk board idea is great! I intend to have it swing open (hinge on the right like the doors) and hide all the temp controllers behind it. The left side is about 8 inches think so there is more space for insulation of the duct work, the controllers and hide all the outlets.
The 5 taps installed on the front should clear the chalk board. I'll have a drip tray below them. The CO2 tank will need to be mounted next the to AC unit on the outside.
The AC unit would be on the left side as well as the heaters. For heaters, I would use the lightbulb-in-a-can method rather than wall heaters. The cold air would be drawn from the bottom to the top by a bathroom fan (80 cfm) that plugs into a regular outlet behind the chalk board.
The entire unit stands 7 feet tall by 3 feet deep by 5 feet wide with casters installed. Now, I'm a littler taller than the image of the girl (no jokes ) so it seems like I could still reach everything inside and out. I thought about removing it from my garage if needed and it can easily lay on it's back side should I need to move it somewhere else so I won't make it taller.
Seems like it should work... just a theory though. I still need to BUILD it.

Doors would hinge on the right side to access. It could fit 8 corny kegs or 5 carboys. I made the lower section tall enough to get a conical to fit inside (most likely have to make a new base for the conical as it is only 39" tall inside). The top will hold the same amount of cornys/carboys plus blowoff bucket/jar.
On the front, the chalk board idea is great! I intend to have it swing open (hinge on the right like the doors) and hide all the temp controllers behind it. The left side is about 8 inches think so there is more space for insulation of the duct work, the controllers and hide all the outlets.
The 5 taps installed on the front should clear the chalk board. I'll have a drip tray below them. The CO2 tank will need to be mounted next the to AC unit on the outside.
The AC unit would be on the left side as well as the heaters. For heaters, I would use the lightbulb-in-a-can method rather than wall heaters. The cold air would be drawn from the bottom to the top by a bathroom fan (80 cfm) that plugs into a regular outlet behind the chalk board.
The entire unit stands 7 feet tall by 3 feet deep by 5 feet wide with casters installed. Now, I'm a littler taller than the image of the girl (no jokes
) so it seems like I could still reach everything inside and out. I thought about removing it from my garage if needed and it can easily lay on it's back side should I need to move it somewhere else so I won't make it taller.Seems like it should work... just a theory though. I still need to BUILD it.
Mtn_Brewer
Well-Known Member
- Joined
- Oct 13, 2012
- Messages
- 177
- Reaction score
- 46
PacificNWBrewer said:Just an idea. Taking the actual chamber as a guide, I made this.
Doors would hinge on the right side to access. It could fit 8 corny kegs or 5 carboys. I made the lower section tall enough to get a conical to fit inside (most likely have to make a new base for the conical as it is only 39" tall inside). The top will hold the same amount of cornys/carboys plus blowoff bucket/jar.
On the front, the chalk board idea is great! I intend to have it swing open (hinge on the right like the doors) and hide all the temp controllers behind it. The left side is about 8 inches think so there is more space for insulation of the duct work, the controllers and hide all the outlets.
The 5 taps installed on the front should clear the chalk board. I'll have a drip tray below them. The CO2 tank will need to be mounted next the to AC unit on the outside.
The AC unit would be on the left side as well as the heaters. For heaters, I would use the lightbulb-in-a-can method rather than wall heaters. The cold air would be drawn from the bottom to the top by a bathroom fan (80 cfm) that plugs into a regular outlet behind the chalk board.
The entire unit stands 7 feet tall by 3 feet deep by 5 feet wide with casters installed. Now, I'm a littler taller than the image of the girl (no jokes
Seems like it should work... just a theory though. I still need to BUILD it.
That is a pretty cool plan. The hidden control panel is a nice touch. I wonder if you could use a standard medicine cabinet for this. The bathroom fan I used was 70 cfm with a baffle that stayed closed in the horizontal position. I installed a fan control but I've been running it at full power and has worked fine.
Get on it!
RussH
Well-Known Member
Very nice build, and good 'documentation'. After recently getting into sours I have decided that more fermenter space is in order. Thanks for the inspiration.
Mtn_Brewer
Well-Known Member
- Joined
- Oct 13, 2012
- Messages
- 177
- Reaction score
- 46
Update.
I've run several batches through this thing and it has worked very well. The only trouble I've had was some icing up when I dropped the temp from 50 to 36 on a lager. I did what others have done and installed some computer fans over the grill, which has worked. I only put them on for lagering. For temp control, I decided that using thermowells was too much of a PITA, so I just got the high sensitivity stick-on thermometers for $3.50 a piece from my LHBS. Despite others reporting wide differences between the air and fermenter temps, I found the fermenters were within 1 degree of the set air temp throughout fermentation. I have the Auber controller using the high and low deviation alarms to control the AC and heaters with the alarms at 2, the hysteresis at 1 and the cycle time at 10. This has worked flawlessly.
Hope that helps.
I'm looking at doing a 2 tiered chamber myself. For the purposes of my design, I'd like the tops chamber to be the cooler of the two though. Does this pose any problems?
In an effort to keep the cost down, my "cold" chamber will just be for cooling kegs (no heat needed for this tier) and the "warm" chamber will be for fermentation. My thoughts are to use a single dual stage fermentation controller with a probe in each tier and then use a home thermostat to control the transfer of cooler air to the fermentation chamber. Does this make any sense, or is it too early in the morning for me to be thinking about such things?
Thanks for all your hard work in sharing this project with us!
Mtn_Brewer
Well-Known Member
- Joined
- Oct 13, 2012
- Messages
- 177
- Reaction score
- 46
Noidios said:I'm looking at doing a 2 tiered chamber myself. For the purposes of my design, I'd like the tops chamber to be the cooler of the two though. Does this pose any problems?
In an effort to keep the cost down, my "cold" chamber will just be for cooling kegs (no heat needed for this tier) and the "warm" chamber will be for fermentation. My thoughts are to use a single dual stage fermentation controller with a probe in each tier and then use a home thermostat to control the transfer of cooler air to the fermentation chamber. Does this make any sense, or is it too early in the morning for me to be thinking about such things?
Thanks for all your hard work in sharing this project with us!
Putting the cool chamber on top may require baffles to prevent the cold air from falling and hot air from rising, which would both affect the efficiency of the set up.
The only dual stage temp controllers I know of use one probe and heat or cool based on the temp sensor and hysteresis. I'm not aware of a controller with 2 probes, but I could be wrong.
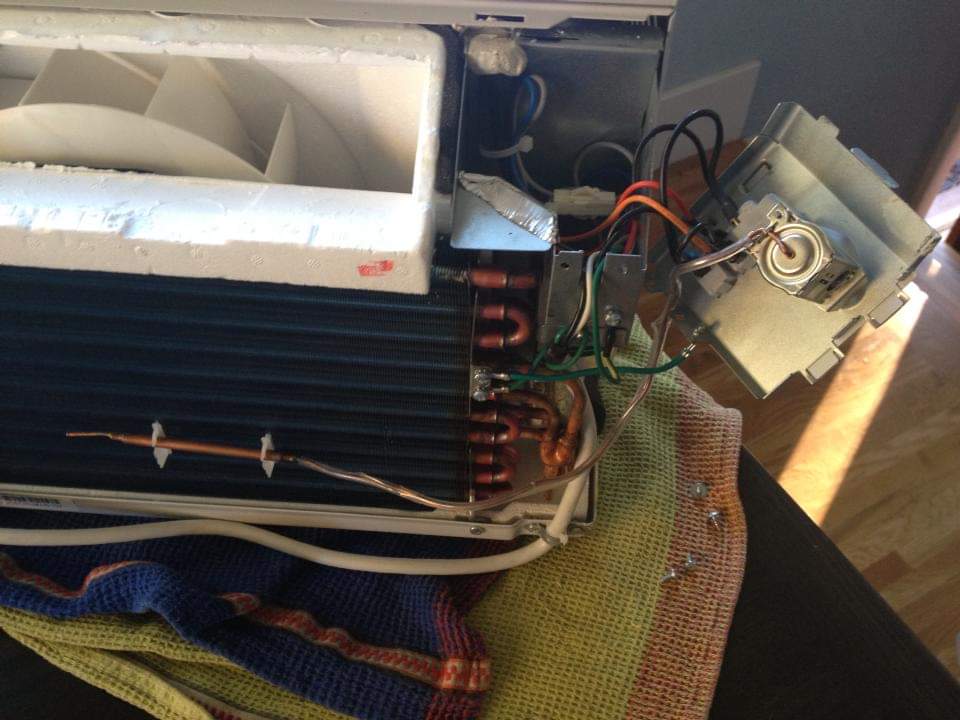
If the cool chamber doesn't need to be less than 50 degrees, then you may not even need a thermostat, depending on the AC unit you choose. The one I got from Home Depot cooled to 50 degrees on its max setting and its built in controller can be used to aim for higher temps. If you are going lower, then you would need a single stage controller or thermostat and then mod the AC unit like I did.
For the fermentation controller, you would need a dual stage controller to run fans to the cool chamber for cooling and to your heat source for heating.
If you are mostly an ale maker, this would be fine. If you want to make lagers, then you would want a more fine tuned control of the cool chamber.
Good luck!
Mtn_Brewer
Well-Known Member
- Joined
- Oct 13, 2012
- Messages
- 177
- Reaction score
- 46
One other thing about temp controllers. Remember to check the amps they can handle. The Ranco dual stage handles less per channel than their single stage controllers, so depending on what you are controlling you may need contact relays.
Mtn_Brewer
Well-Known Member
- Joined
- Oct 13, 2012
- Messages
- 177
- Reaction score
- 46
Cautionary update:
I bought a stir plate and actually started pitching recommended yeast quantities. With the more active fermentation, it became apparent that the air temp probe was not keeping the beer temps low enough. I decided to go the thermowell route, which turned out to be a rough go. Here's how not to do it.
First off, I didn't think ahead with my thermocouples. They weren't long enough and were too big for the 1/4 inch thermowells. They were also too well internalized, so when I tried to use them to pull the new wires through, they didn't budge. I ended up having to drill a new hole up top and use conduit to reach the lower chamber. The conduit was something I should have put in from the start. Once it was in, I decided to also put an outlet in the lower chamber. I connected it to a 3 way toggle switch so it could be on, off or cycle with the cycle timer I have on the circulation fans.
I bought the thermocouples for thermowells sold by Auber. I used their extension wire and connectors. They didn't work at all. The drift/temp swings were up to 15-20 degrees over 24 hours! Nothing I did improved this. I sent an email to Auber and nothing they suggested helped either. Ultimately, I scrapped the system and replaced both probes with Pt100 RTD's from Auber. Once I did this, the temp monitoring was flawless. I could have saved a lot of headaches and expense if I'd done this from the start.
Using thermowells caused my cycle times to get longer and I then had problems with the coils icing up on the AC unit. I tried high flow computer fans, which helped but if I pushed the system hard enough it still iced up. Instead, I used the thermostat on the AC unit to make a Cool-bot like set up. If you look back on how I monkeyed the thermostat to start with, you'll see that I didn't end up bypassing or disabling the thermostat, I just turned the adjustment screw down. This meant the temp control on the AC unit was still able to be used. With the unit at max with both chambers on, I slowly adjusted the dial control with a separate thermometer on the coils. I found that the unit I used has a hysteresis of 5 degrees. I tuned it to the point that it will turn off the compressor when the coil temps reach 34-35 degrees and turn the compressor back on when it goes back up to 39-40 degrees. The AC units fans stay on until the temp reaches the temp set on the control panel, so I took the computer fans out. With this system, I found I could run it full throttle and keep the top chamber at 50 and the lower chamber at 40 with no icing up whatsoever.
Just curious, anybody else follow in Zacc and my footsteps with this 2-tier system?
zacc
Well-Known Member
Sounds like you got it dialed in with the thermowells, I bet those work nicely.
I'm still just putting the probe on the outside with some paper towels behind it to insulate against the air in the chamber. I use a bungie cord to hold it on, this gets a pretty good measurement of the beer instead of the air.
I've thought about using thermowells, I'm sure it would be more accurate. I'm pretty happy with the results from the simple method I'm using now, but maybe someday I'll get around to switching to thermowells.
I always use starters with a stir plate as well. You definitely get a much more active fermentation, I can see why the open air would have been working before if you weren't making large starters.
I've been using my chamber for over a year now and just had my first issue with icing this summer. We had a week or so of 100+ weather and I had the bottom chamber set to about 38F. I got home from work one day and the unit sounded odd, upon closer inspection the coils were completely iced! I defrosted it and turned it up to about 45F and it was fine after that.
I had been running it at that temp for several months without a problem so I didn't bother to make any adjustments to the system. It doesn't usually need to be that cool anyways, so I will just be careful about putting it that cool when we are having a heat wave!
Great to hear that your unit is working out well for you! I'm very happy with how well mine has performed and am glad I went this route.
The thermowells, do you put them into the brews? Or stick them to the side of the fermentors?
Mtn_Brewer
Well-Known Member
- Joined
- Oct 13, 2012
- Messages
- 177
- Reaction score
- 46
Update on heating system.
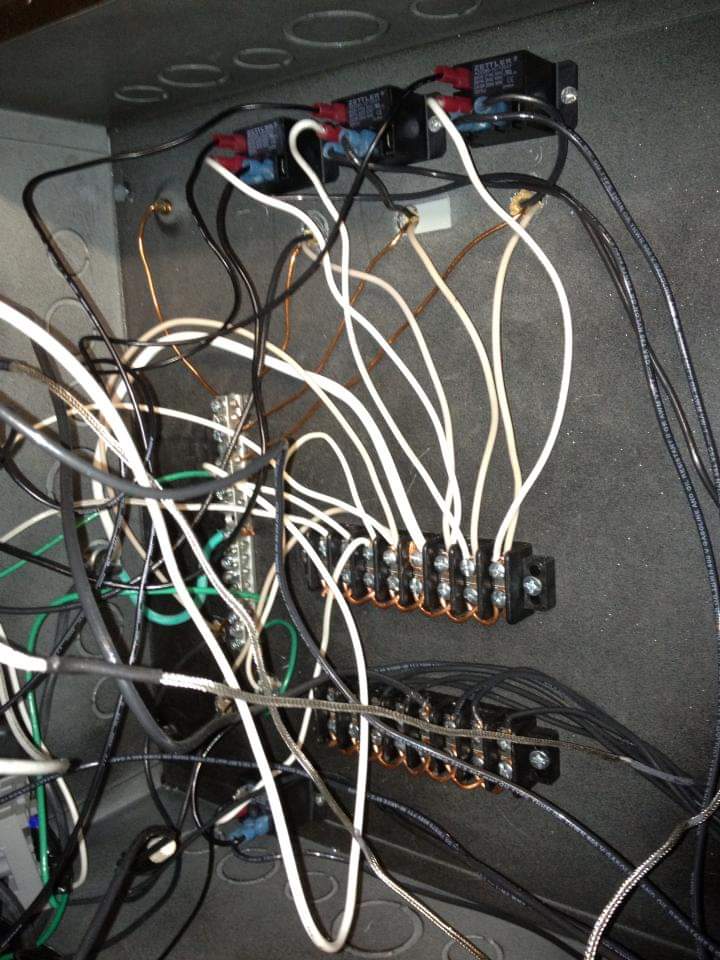
The above mentioned cooling mods are working great. Over the winter, I did some brewing through cold weather and the heaters were necessary to maintain fermentation temps. Because of the thermowells, the cycle times were long and the wall heaters were heating up to 150 degrees and the built in thermal cut offs were tripping. They are manual reset, so the heaters just switched off and stayed off. The wiring is such that the line in has the thermal switch and then the current branches to the fan and the heating coil. Here is my mod:
I found a self resetting thermal switch with an "on temp" of 105 and "off temp" of 115.
I spliced the switch between the current and the heating element.
I kept the stock switch in place.
I kept the wiring to the fan intact.
Now, when the thermowell reads low, the temp controller provides continuous power to the heater. The fan runs continuously but the heating element turns on and off as the air passing through the system fluctuates from 105-115. If the switch failed in the "on" position, the built in manual switch would trip at 150 and the whole thing would shut down.
I have used this system with a converted 15 gallon keg fermenter with a thermowell conversion kit I got from brewers hardware. It has worked flawlessly. It has also worked with this glass fermenter thermowell mod I made. I just replace the dip tube with a thermowell.
Sent from my iPhone using Home Brew
The above mentioned cooling mods are working great. Over the winter, I did some brewing through cold weather and the heaters were necessary to maintain fermentation temps. Because of the thermowells, the cycle times were long and the wall heaters were heating up to 150 degrees and the built in thermal cut offs were tripping. They are manual reset, so the heaters just switched off and stayed off. The wiring is such that the line in has the thermal switch and then the current branches to the fan and the heating coil. Here is my mod:
I found a self resetting thermal switch with an "on temp" of 105 and "off temp" of 115.
I spliced the switch between the current and the heating element.
I kept the stock switch in place.
I kept the wiring to the fan intact.
Now, when the thermowell reads low, the temp controller provides continuous power to the heater. The fan runs continuously but the heating element turns on and off as the air passing through the system fluctuates from 105-115. If the switch failed in the "on" position, the built in manual switch would trip at 150 and the whole thing would shut down.
I have used this system with a converted 15 gallon keg fermenter with a thermowell conversion kit I got from brewers hardware. It has worked flawlessly. It has also worked with this glass fermenter thermowell mod I made. I just replace the dip tube with a thermowell.

Sent from my iPhone using Home Brew
RussH
Well-Known Member
Just went to RONA yesterday and picked up the lumber to start my build. I've been watching this thread since the start, and have been dreaming of the day I could build my own. Finally making it happen. I have redesigned the structure a bit to optimize material, and fit 6 carboys top and bottom, but the overall idea is going to be the same.
Thanks for documenting it.
Thanks for documenting it.
c0bra
Well-Known Member
Love this build. I hope to attempt it soon. I noticed that someone asked for dimensions at one point but I never found a reply. Were they posted and I missed them? It would be some helpful guidance for those of us with less DIY-ability.
RussH
Well-Known Member
Here are the dimensions I am going with, after rereading the first part of the thread, these are probably quite close, as they've been worked to maximize material. I also have some space constraints I am working with, but this will fit 12 6 gallon carboys.


Mtn_Brewer
Well-Known Member
- Joined
- Oct 13, 2012
- Messages
- 177
- Reaction score
- 46
I've been away from brewing for awhile but now I'm back at it. I was wondering how these projects worked out. Post up!
William656
Member
- Joined
- Oct 7, 2014
- Messages
- 21
- Reaction score
- 9
I've heard of issues with dampness and mold. Any problems here? It's been a few years. Curious how this is holding up.
Mtn_Brewer
Well-Known Member
- Joined
- Oct 13, 2012
- Messages
- 177
- Reaction score
- 46
The floors of the chambers are made of solid sheets of linoleum flooring with the edges and corners sealed with caulk. This is the paint I used inside the fermenter:
http://m.homedepot.com/p/BEHR-Premi...e-Semi-Gloss-Enamel-Exterior-585001/100550162
It has held up perfectly without any issues. I've had some overflows and spills but there haven't been any problems with mold or breakdown. It has held up to prolonged lagering at sub-40 degree and Belgian ale fermentation at 80+ degrees without a problem.
I used one of these humidifiers at first:
http://www.amazon.com/dp/B000H0XFD2/?tag=skimlinks_replacement-20
I eventually stopped using it because I found that it wasn't needed.
Last edited by a moderator:
Mtn_Brewer
Well-Known Member
- Joined
- Oct 13, 2012
- Messages
- 177
- Reaction score
- 46
I've heard of issues with dampness and mold. Any problems here? It's been a few years. Curious how this is holding up.
I should add that I live in Colorado and it's pretty dry here. If you live in a more humid place, you may want to install a dehumidifier rod. I sourced this one but didn't need it. I like that it comes in different lengths, depending on the chamber size.
http://www.midwayusa.com/product/11...humidifier-rod-with-detachable-plug-110v-gold
Nice build man! I'm hoping to build a fermenter myself, it wouldn't be climate controlled, yet, because I'm just in an apartment. Whenever I manage to move someplace with a garage I'll definitely add some sort of climate control. For now, I'll probably just make Ales and ferment at the apartment temp. of about 70 deg.
Really nice work though!
Really nice work though!
Mtn_Brewer
Well-Known Member
- Joined
- Oct 13, 2012
- Messages
- 177
- Reaction score
- 46
Update 2017
The fermenter has been heavily used and has performed well through Summer and Winter in my garage that has no temperature control. The bathroom fan that cycles cold air from the bottom chamber to the upper chamber gave out this week. The fan/motor are fine but the attachment was with thin metal that split. I wish I had made a panel on the side to access the fan to replace it easier. I decided that rather than cut into the side, I would try to work from the inside. I took out the old fan, cut a larger hole in the mounting metal and attached a high output AC computer fan. It is not as powerful as the bathroom fan but a lot quieter and it seems to be working pretty well. If it can't keep up with Summer temps, then I will cut into the side and replace the unit with another bathroom fan.
Overall, I'm super happy with this project. The consistency has been excellent and the minor hiccups have been manageable with a little engineering and a casual afternoon (beer in hand).
Catalina Lopes
New Member
[QUOTE = "Mtn_Brewer, post: 4727558, member: 133737"] OK, hora de publicar. Eu entendi essa compilação da compilação da Zacc:
https://www.homebrewtalk.com/f51/2-zone-fermentation-chamber-build-344775/
Utilizei um congelador de caixa e um aquecedor de ventilador controlado com um controlador de temperatura Ranco por algum tempo. Isso funciona bem, mas eu faço muita lágrimas e foi meio doloroso ter que coordenar todas as minhas cervejas. Ter um fermentador com 2 zonas foi a resposta óbvia. Eu usei a idéia da Zacc para o projeto básico e, em seguida, surgiu algumas inovações. Eu decidi que queria que todo fosse tão internalizado quanto possível, incluindo os elementos de aquecimento e resfriamento. Eu também queria que fosse grande o suficiente para não sentir a necessidade de atualizar no futuro previsível. Passei muito tempo projetando-o em um caderno espiral, que precisa de esboço-up? Eu configurei isso para que eu coloquei 6 garrafas em cada câmara e ainda possa fazer painel com 4 x 8 folhas de madeira compensada.
OK, então aqui está a compilação ... [/ QUOTE]
Show
Mtn_Brewer
Well-Known Member
- Joined
- Oct 13, 2012
- Messages
- 177
- Reaction score
- 46
2020 update:
The Good:
The replacement circulation fan has worked great, even during heat waves in the Summer.
The Bad:
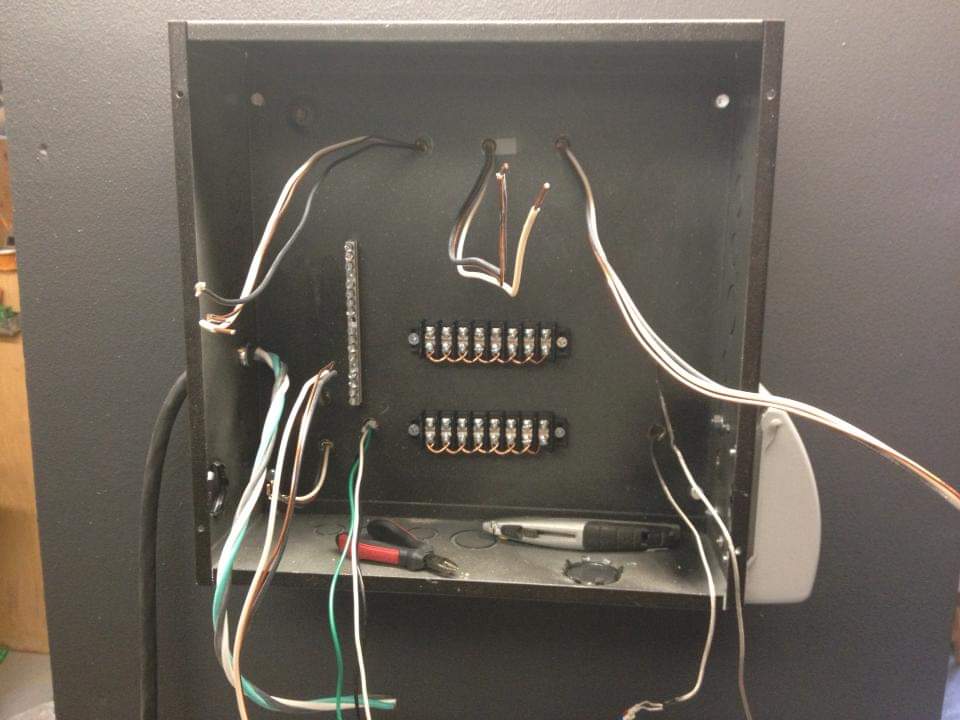
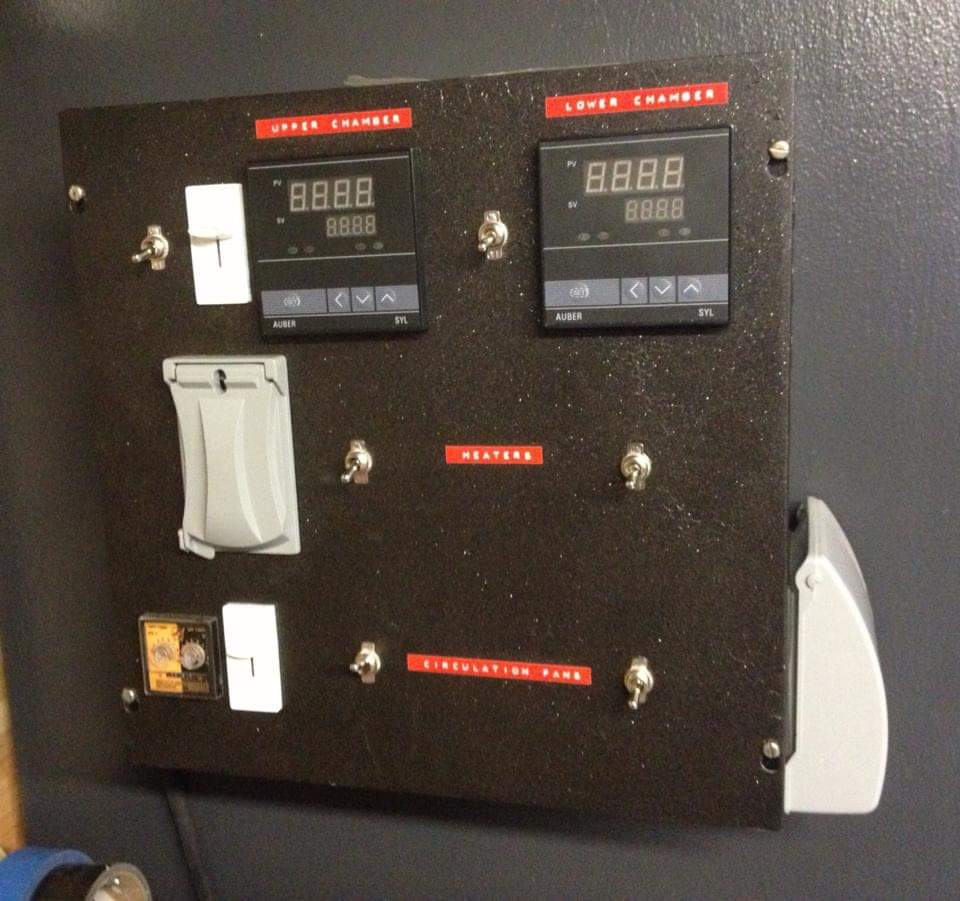
After almost 8 years of heavy use, one of the temp controllers finally gave out. It is an Auber SYL-4342 relay contactor. With power turned on, it looks like this and switches on everything connected to it. It's interesting that it failed into an activation state. I ordered a new unit from Auber. Anyone else have a similar experience?

The Good:
The replacement circulation fan has worked great, even during heat waves in the Summer.
The Bad:
After almost 8 years of heavy use, one of the temp controllers finally gave out. It is an Auber SYL-4342 relay contactor. With power turned on, it looks like this and switches on everything connected to it. It's interesting that it failed into an activation state. I ordered a new unit from Auber. Anyone else have a similar experience?
Transamguy77
Well-Known Member
This is such a cool idea, I’m going to borrow it with some changes, hopefully it’ll come together over the next few months.
Mtn_Brewer
Well-Known Member
- Joined
- Oct 13, 2012
- Messages
- 177
- Reaction score
- 46
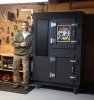
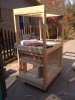
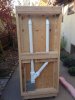
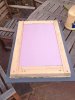
Somebody contacted me about the missing photos. I guess they timed out I will add back some of the original photos for reference.
Attachments
-
 FB_IMG_1594103884304.jpg75.3 KB · Views: 63
 -
 FB_IMG_1594103799218.jpg89.4 KB · Views: 60
 -
 FB_IMG_1594103806438.jpg79.8 KB · Views: 55
 -
 FB_IMG_1594103874375.jpg70.5 KB · Views: 55
 -
 FB_IMG_1594103877694.jpg63.6 KB · Views: 54
 -
 FB_IMG_1594103817397.jpg74.2 KB · Views: 54
 -
 FB_IMG_1594103880510.jpg73.1 KB · Views: 54
 -
 FB_IMG_1594103822078.jpg85.8 KB · Views: 56
 -
 FB_IMG_1594103830316.jpg51.2 KB · Views: 52
 -
 FB_IMG_1594103826269.jpg62.5 KB · Views: 55


Mtn_Brewer
Well-Known Member
- Joined
- Oct 13, 2012
- Messages
- 177
- Reaction score
- 46

Mtn_Brewer
Well-Known Member
- Joined
- Oct 13, 2012
- Messages
- 177
- Reaction score
- 46
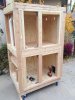
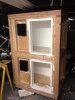
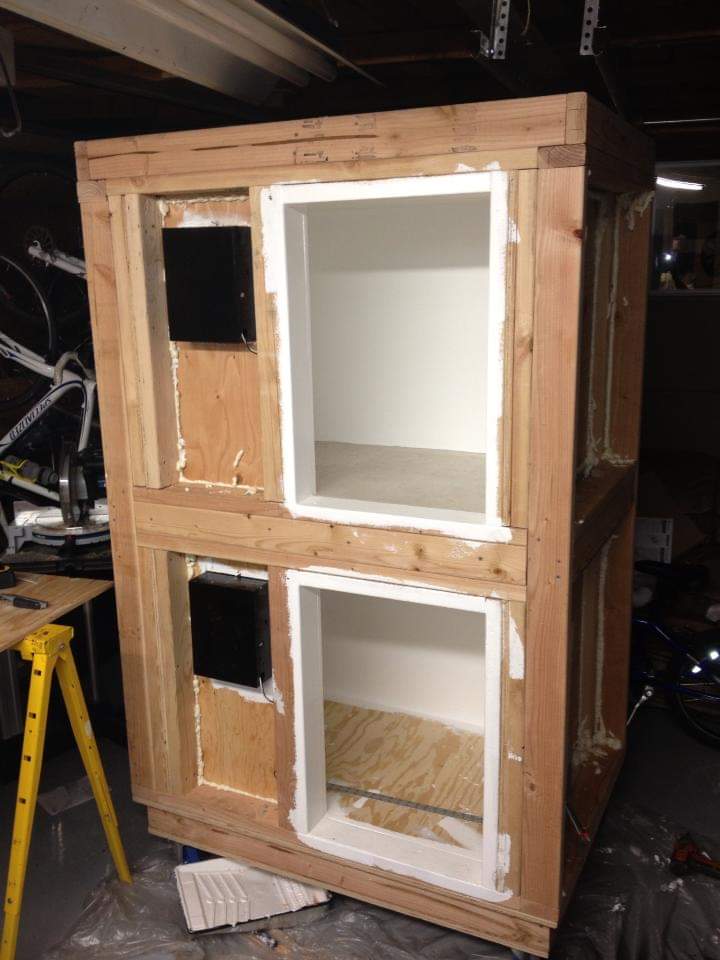
OK, time to post up. I got the idea for this build from Zacc's build:
2 Zone Fermentation Chamber Build
I've used a chest freezer and fan heater controlled with a Ranco temp controller for awhile. It works OK but I brew a lot of lagers and it was kind of a pain to have to coordinate all of my brews Having a fermenter with 2 zones was the obvious answer. I used Zacc's idea for the basic design and then came up with some innovations. I decided that I wanted everything to be as internalized as possible, including the heating and cooling elements. I also wanted it to be large enough that I wouldn't feel the need to upgrade in the forseeable future. I spent a lot of time designing it in a spiral notebook, who needs sketch-up? I configured it so that I can fit 6 carboys into each chamber and still be able to panel it with 4 x 8 sheets of plywood.
OK, so here's the build...
View attachment 91045

Mtn_Brewer
Well-Known Member
- Joined
- Oct 13, 2012
- Messages
- 177
- Reaction score
- 46
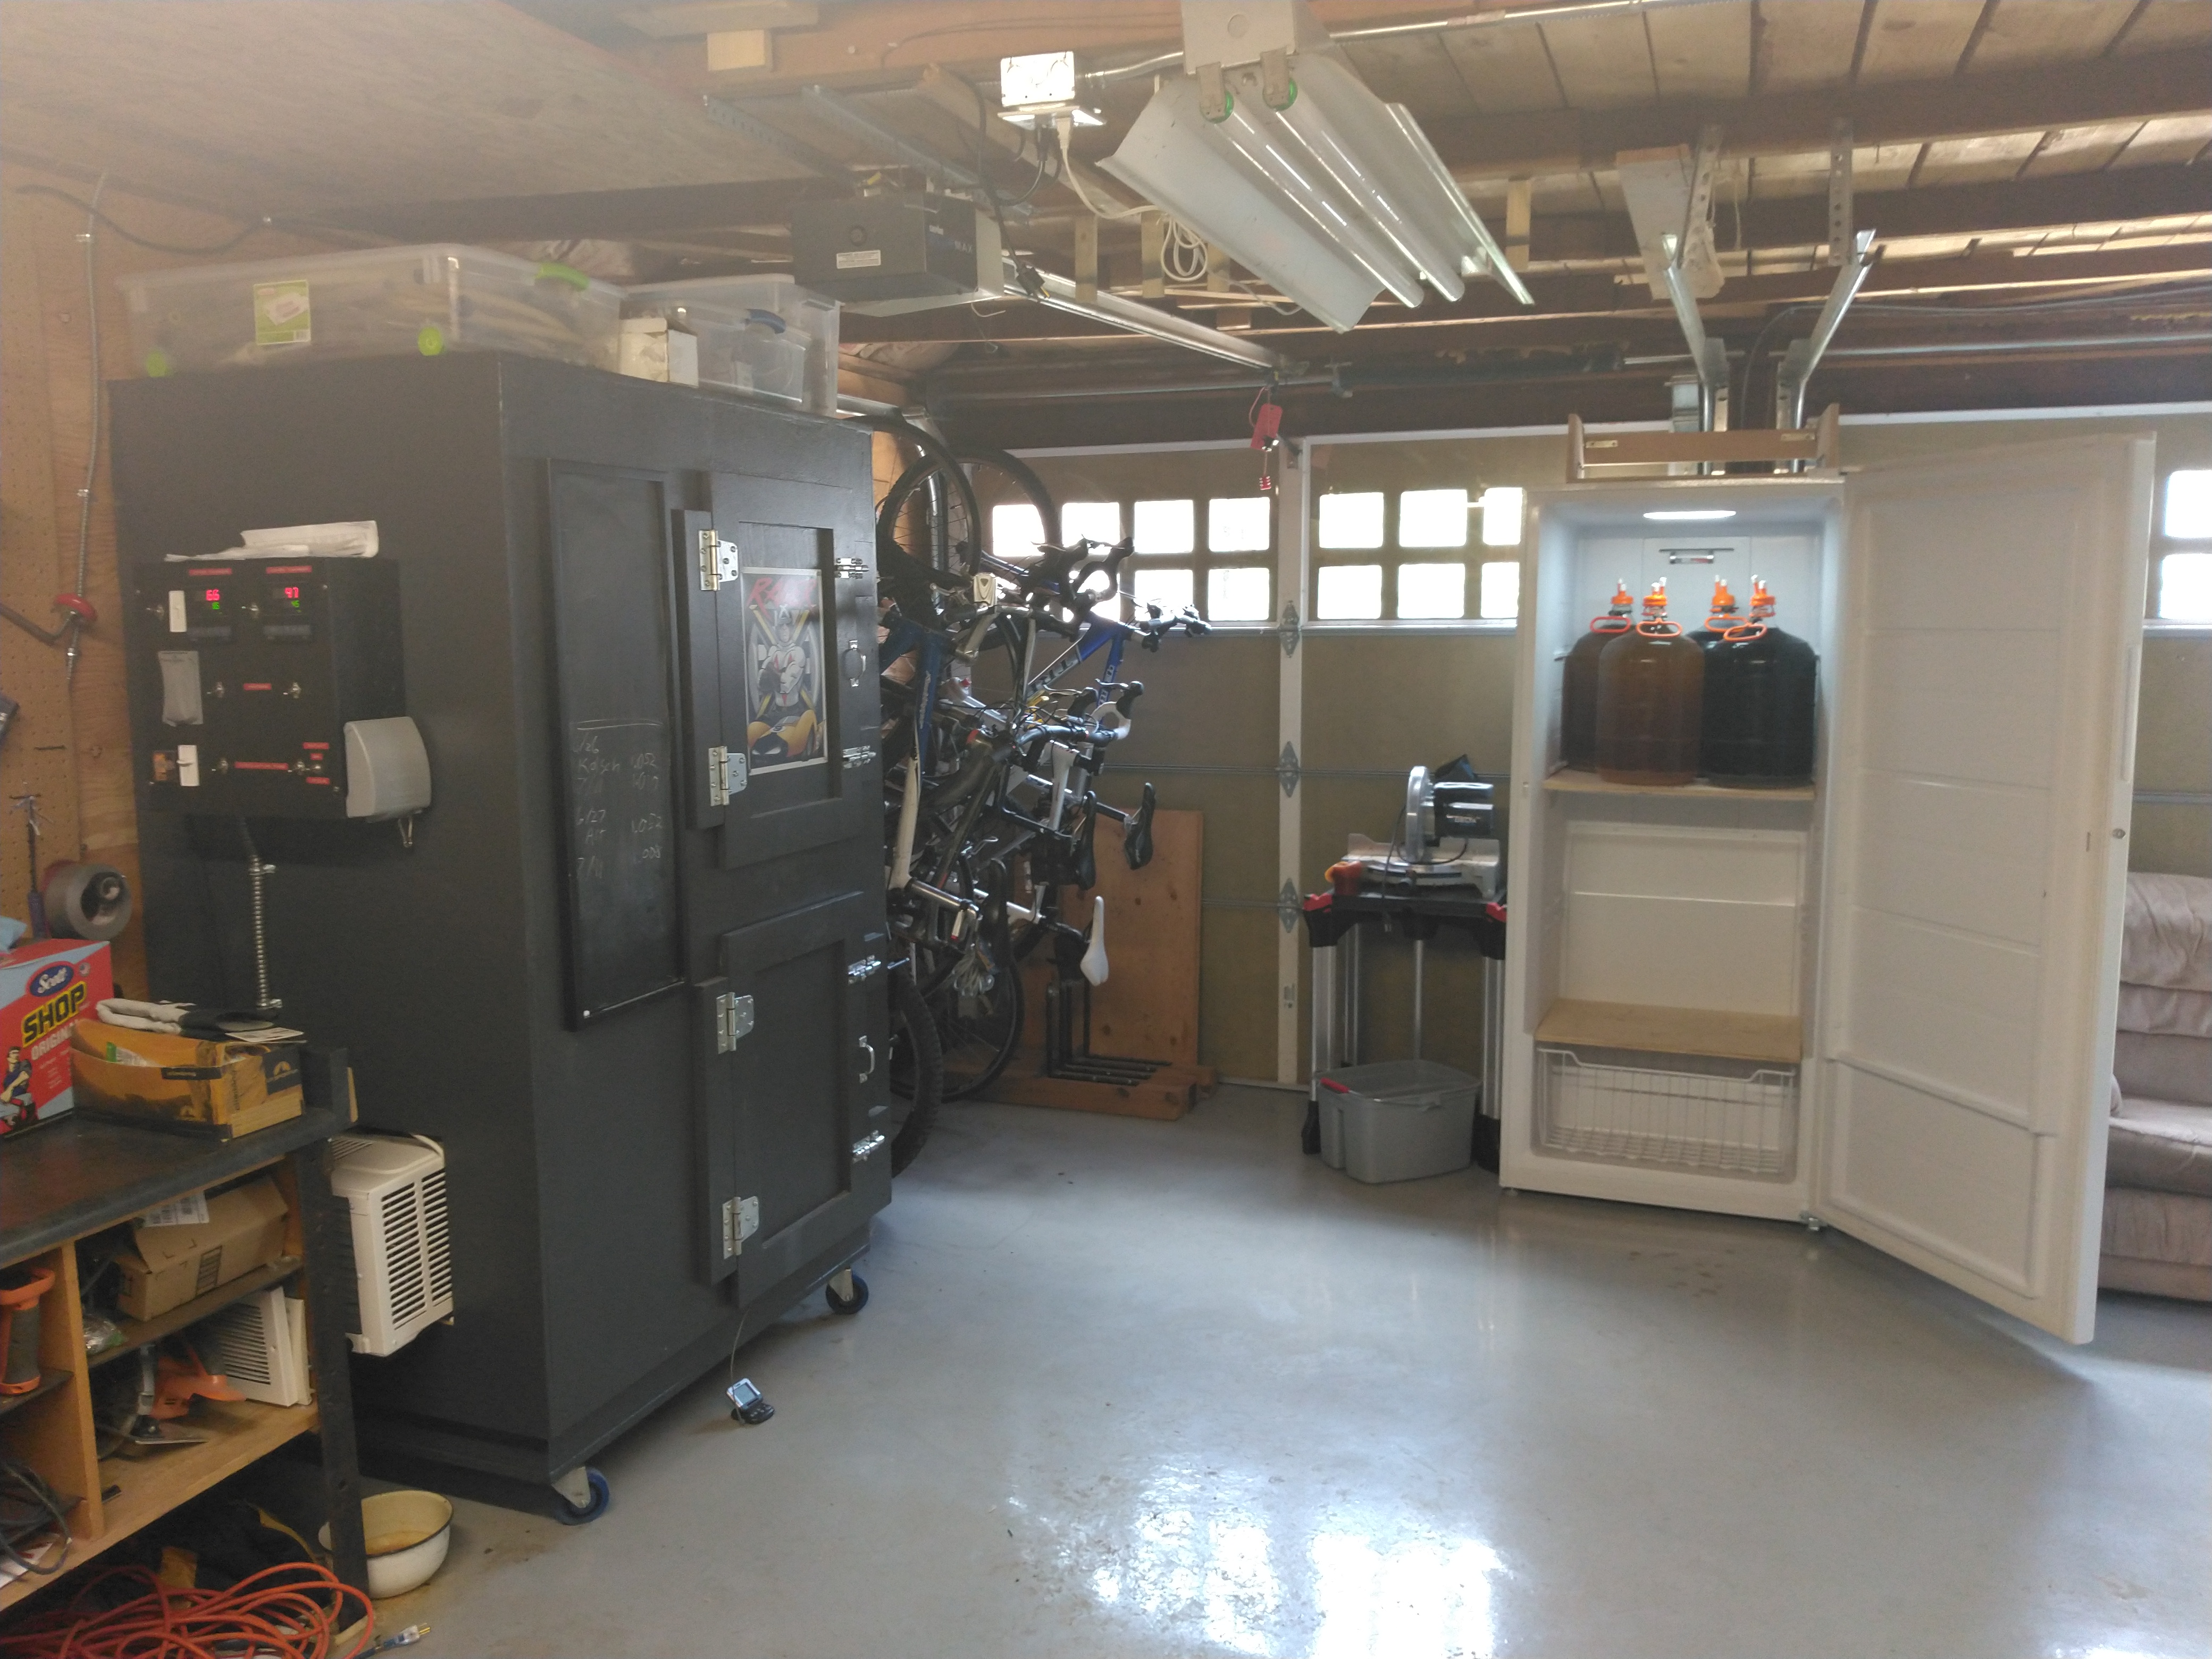
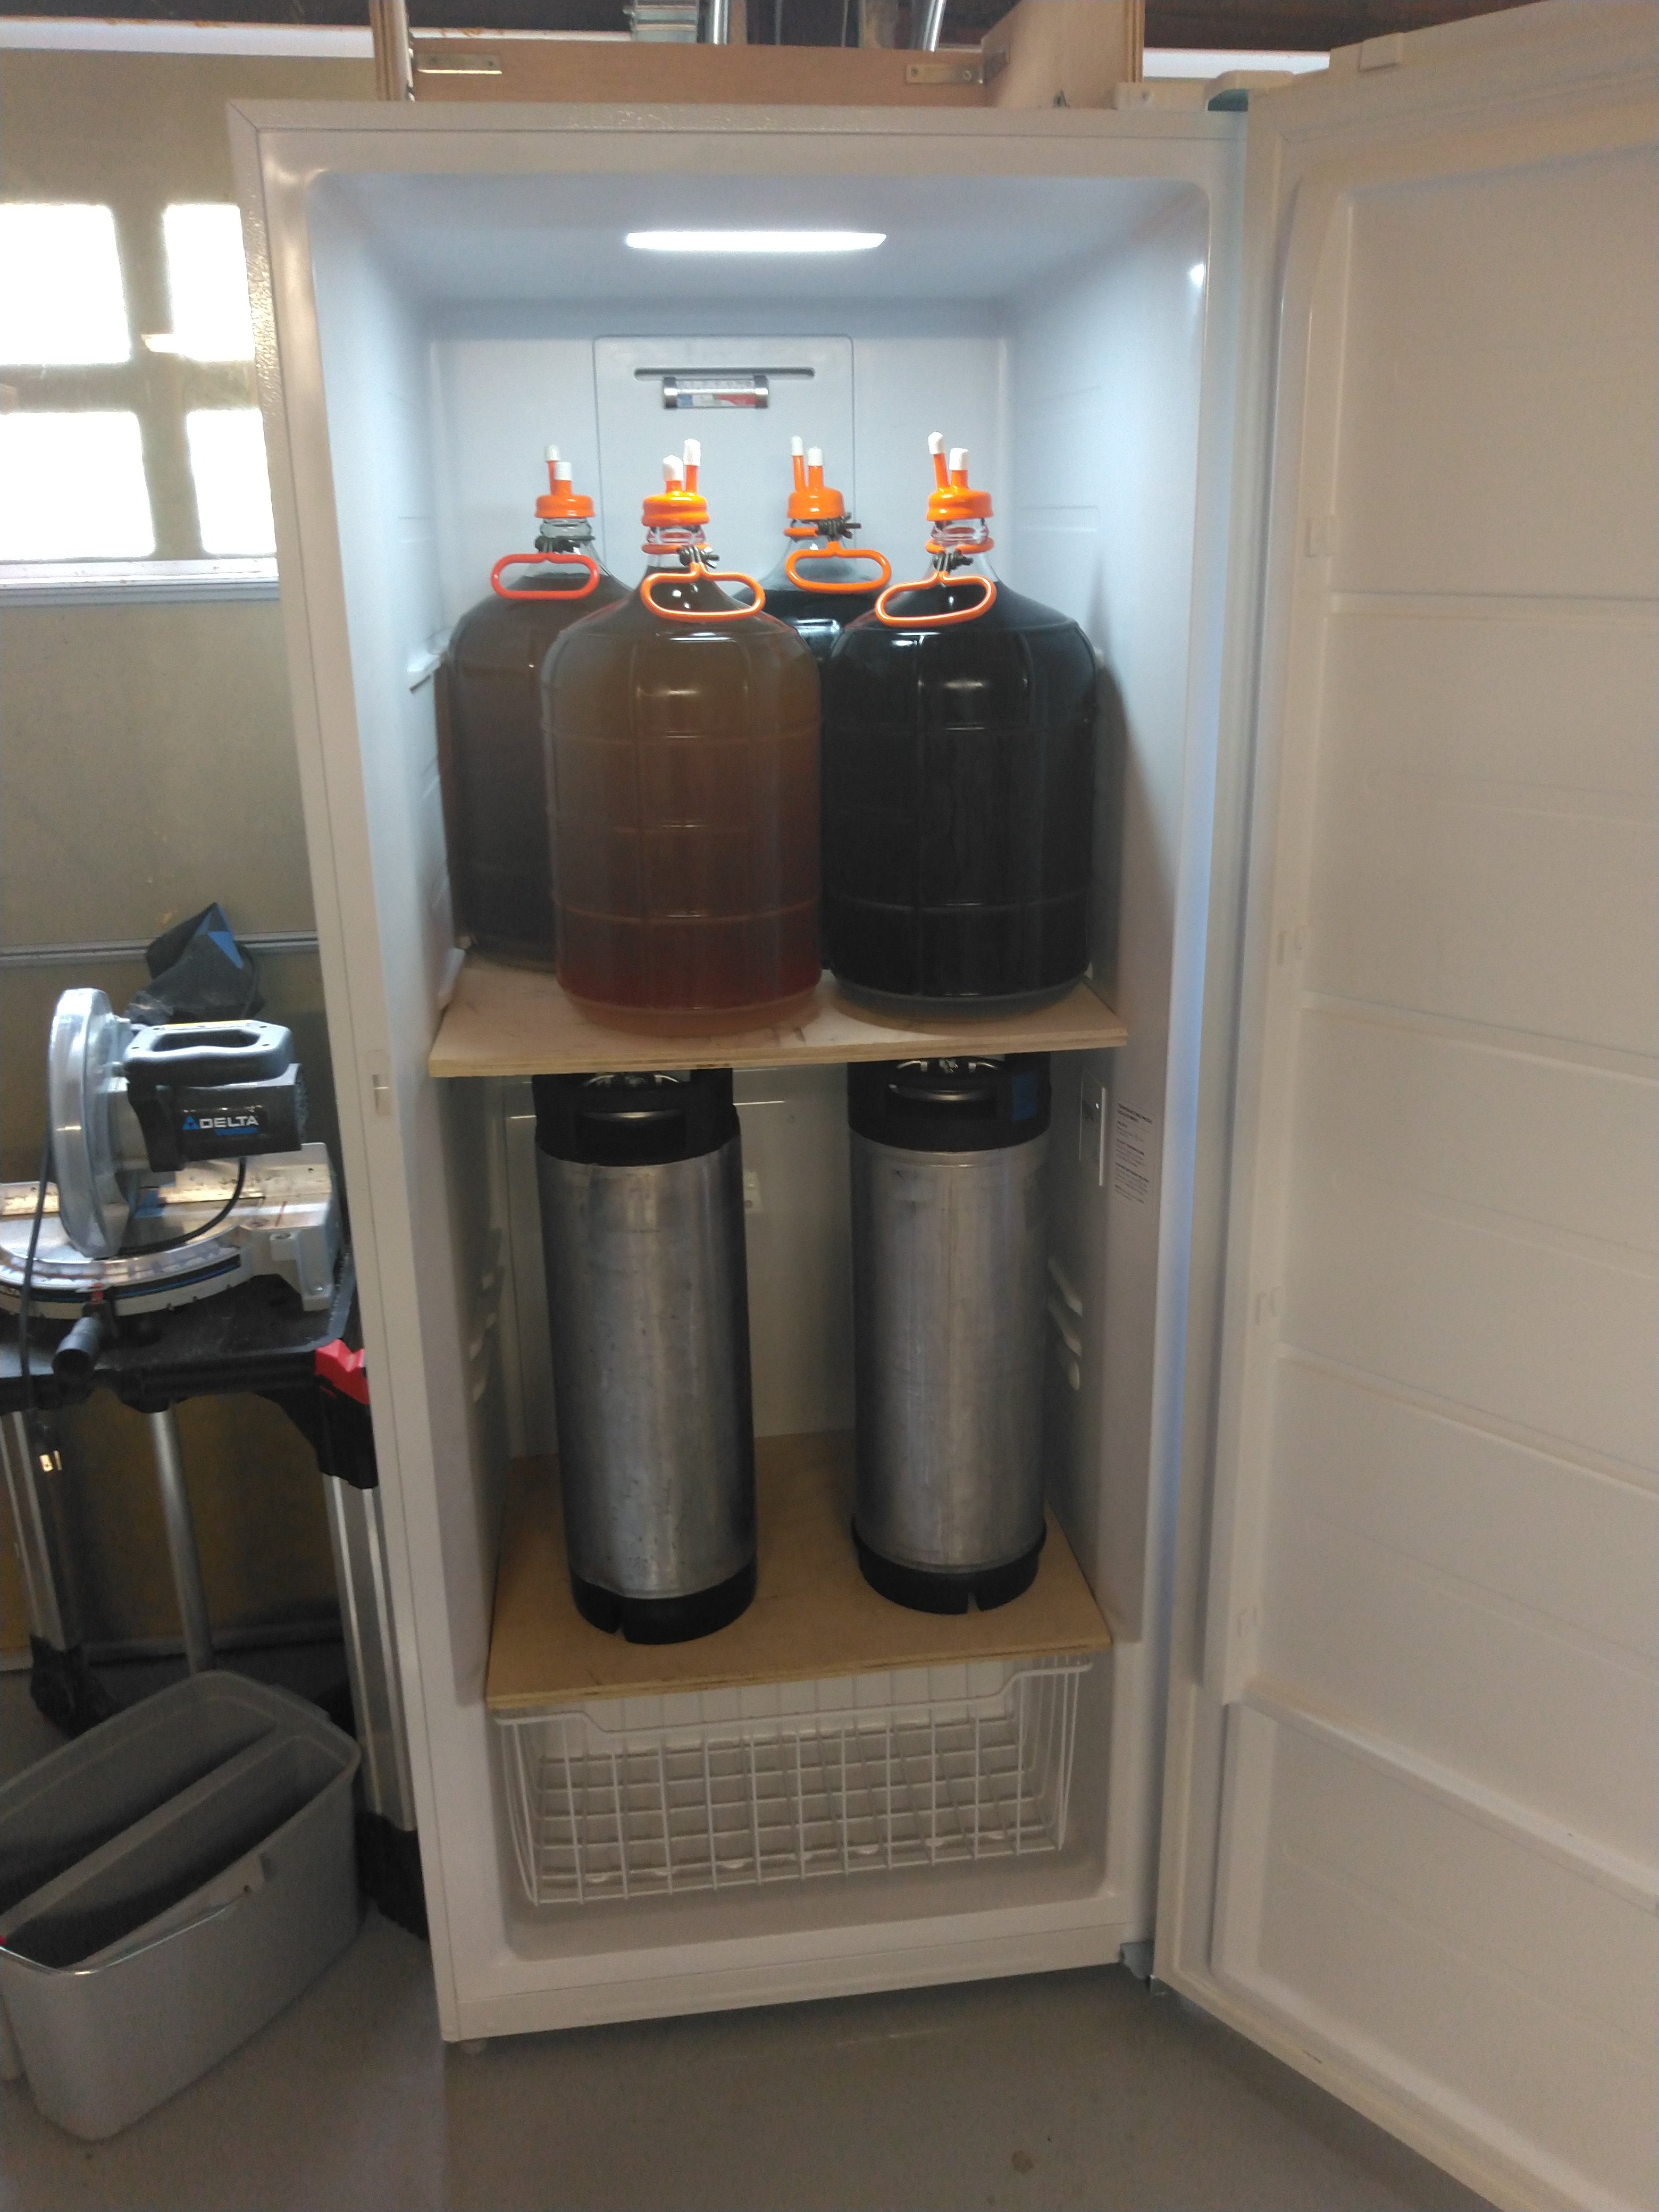
I finally have the set up I've always wanted. The fermenter is still going strong and can hold 2 ten gallon batches in the lower lager chamber and 2 ten gallon batches in the upper ale chamber at 45 and 65 degrees, respectively. I bought a Midea 76" 21 cu ft refrigerator/freezer to use for cold crashing/lagering and keg storage (model MRU21F2AWW). I built my own shelves from 3/4 plywood. I can fit four 5 or 6 gal carboys on the top or three on the bottom. Both shelves can hold 6 corny kegs. On refrigerator mode, it holds at 40 degrees on the coldest setting. If I ever felt the need to go lower, I could buy a temp controller to use on freezer mode. I kept the bottom drawers to hold a CO2 tank for carbonating kegs or ingredients for the next batch. This is an overall more efficient set up and will expand the life of the AC unit on my fermenter.
Attachments
Similar threads
- Replies
- 25
- Views
- 3K
- Replies
- 3
- Views
- 964
