120V Dual Element Brutus 20 Style Build

Homebrew Talk - Beer, Wine, Mead, & Cider Brewing Discussion Forum

Help Support Homebrew Talk - Beer, Wine, Mead, & Cider Brewing Discussion Forum:

This site may earn a commission from merchant affiliate links, including eBay, Amazon, and others.

nab911

Well-Known Member
Joined
Dec 30, 2012
Messages
238
Reaction score
17
Location
Atlanta
I figured this would be better documented in here.

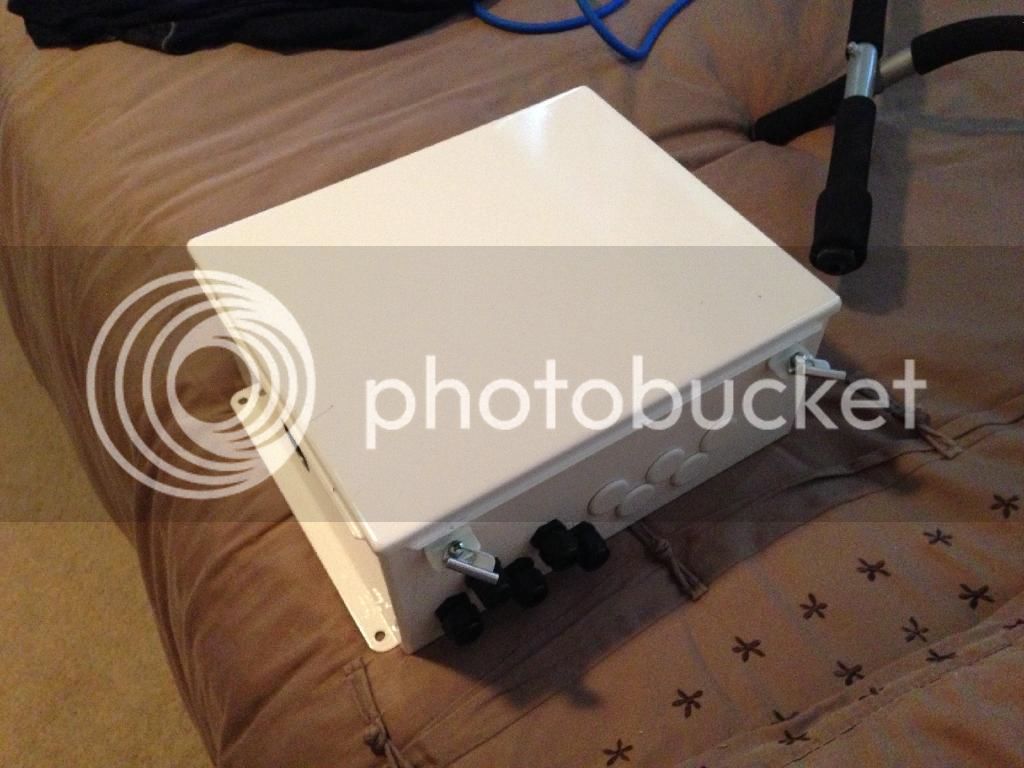
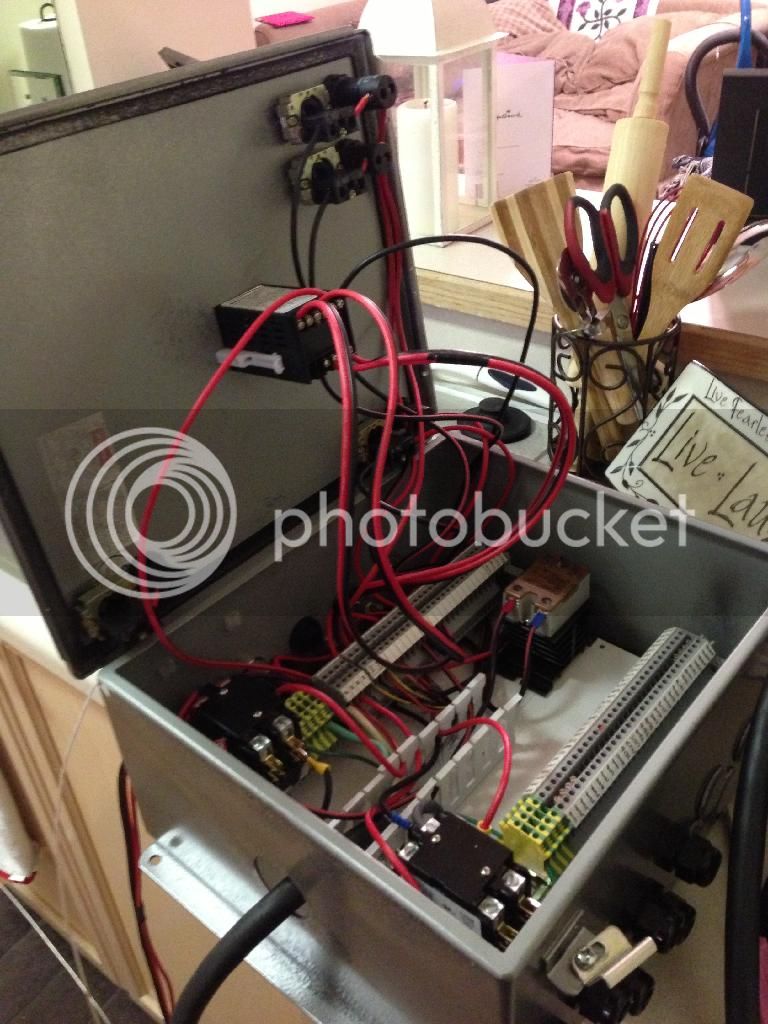
I decided to do this properly. Enclosures are pretty costly and I wanted to only do things once but be able to expand and upgrade as necessary. I scored this enclosure off ebay for $75 shipped. it's 14" x 12" x 6":

B2C62E69-2CA1-45CC-924F-2E1AA71E3AD9_zps4omyigjp.jpg

E96C134F-80E1-4129-82EF-69C534E73CA0_zps73dcoqxg.jpg


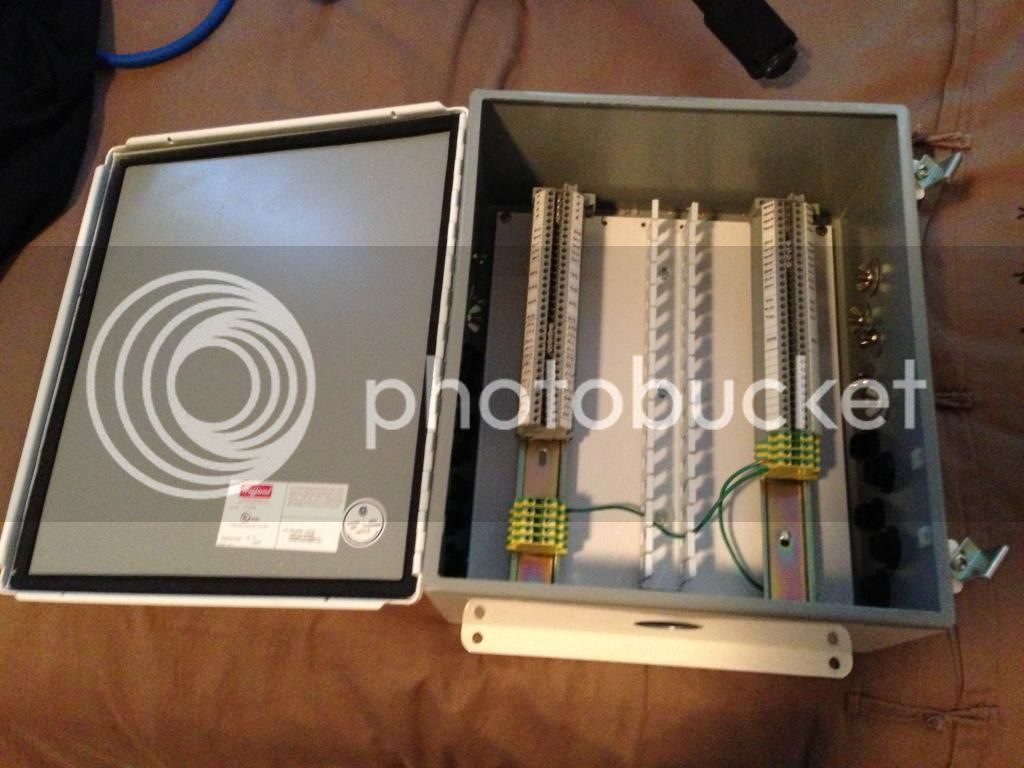
It has 4 set of "connectors" combining 6 or so connectors into one block as well as all of the grounds being wired together. The caps on the sides are pre punch conduit holes which will make mounting plugs and running wire in and out a breeze. I am currently using Google Draw to map my layout as well as wiring schematic.
pub


(Image updates as I update the doc, don't hate if something is currently wrong as I am still designing!)

Have everything layed out. Ordered 50ft each of red and black 12 AWG wire to get everything wired up. Gonna raid my wire bucket to get what bits I need for ground wire and if I come up short, Ill grab some from HD. Still gotta add in the alarm tonight.

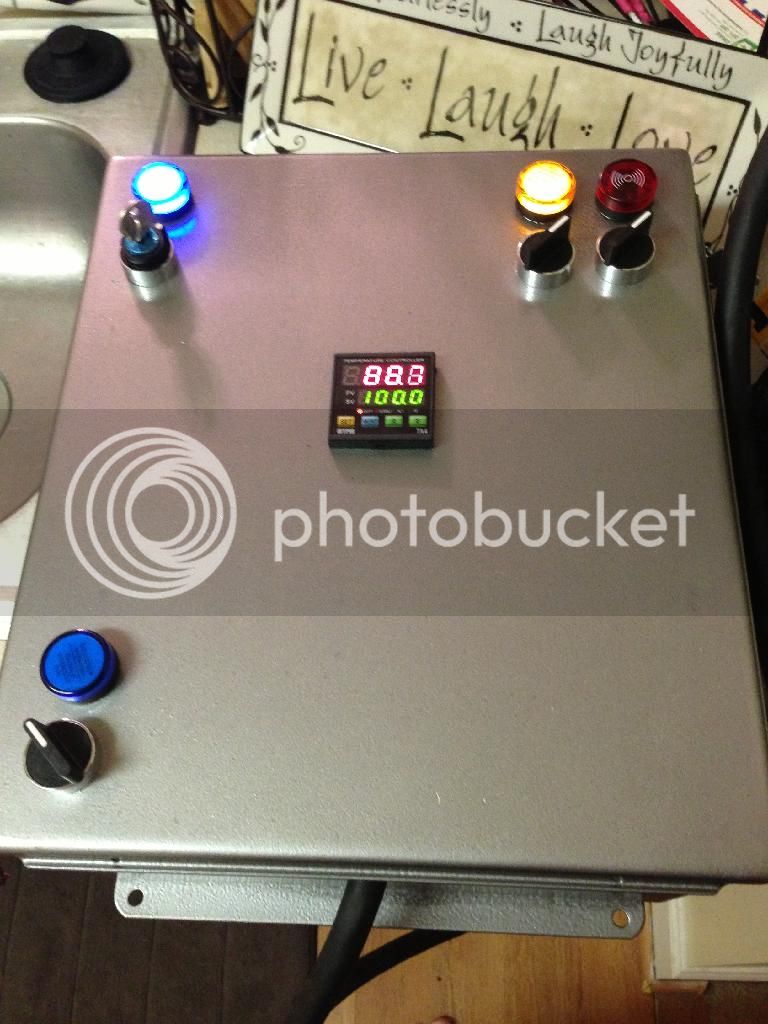
For now, the 2nd element will no go through the panel. It would require another SSR, wiring, plugs, etc. For now, I will just attach a normal 120v plug on it and plug it in to hurry up to mash temps and when I boil.

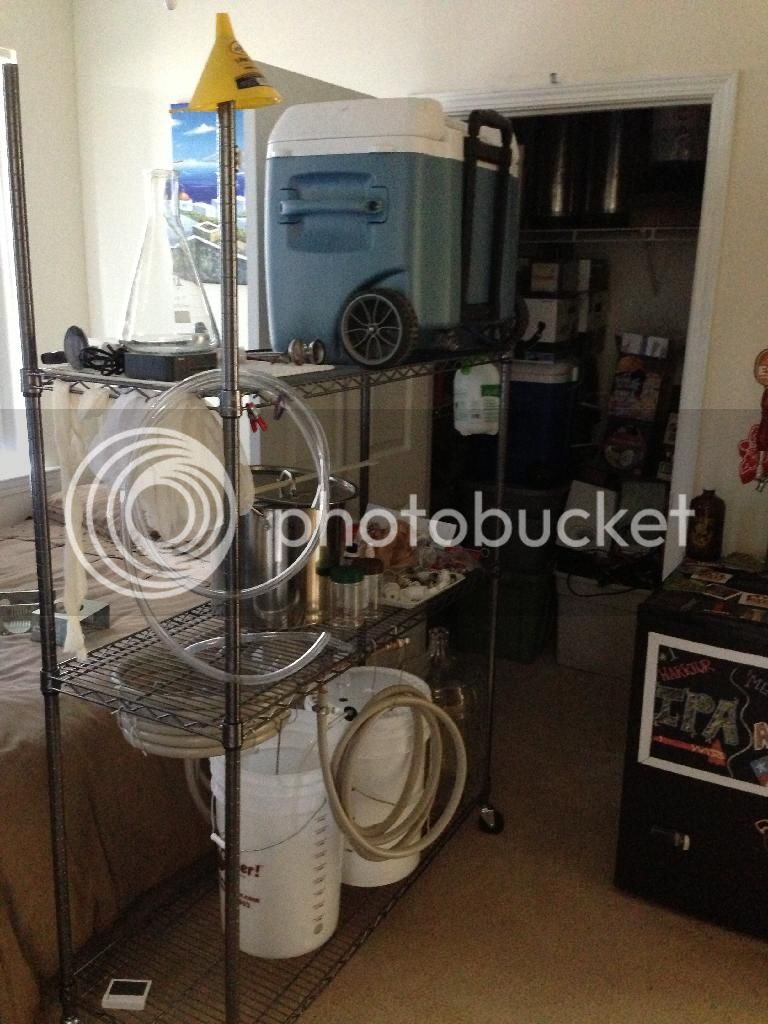
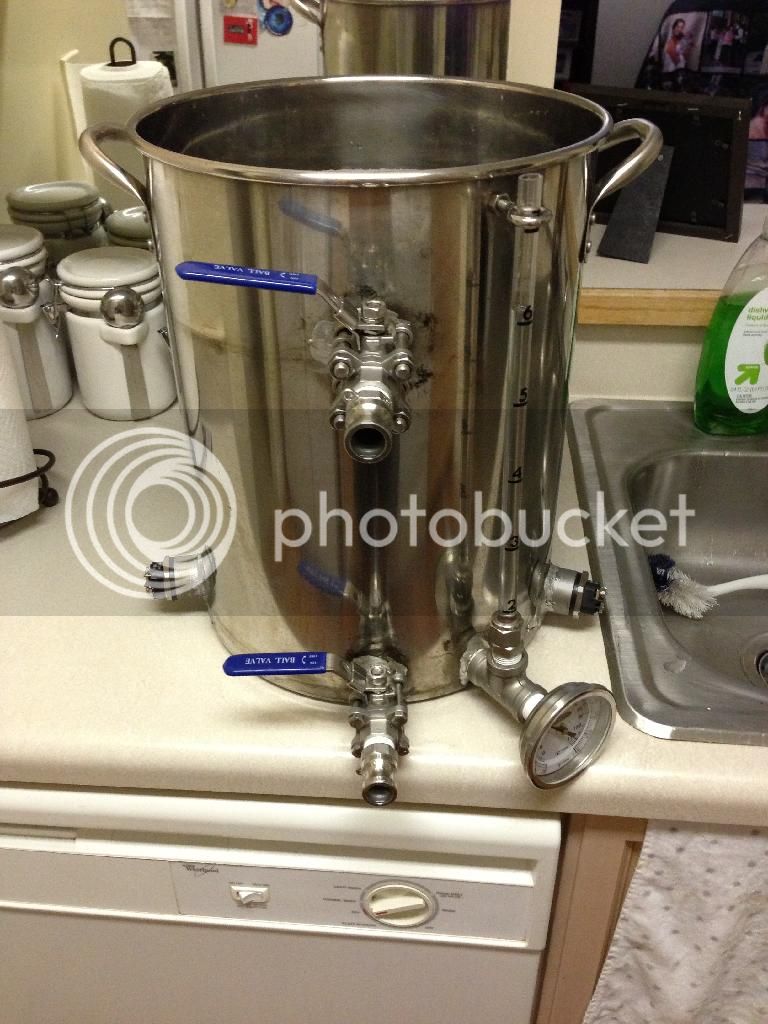
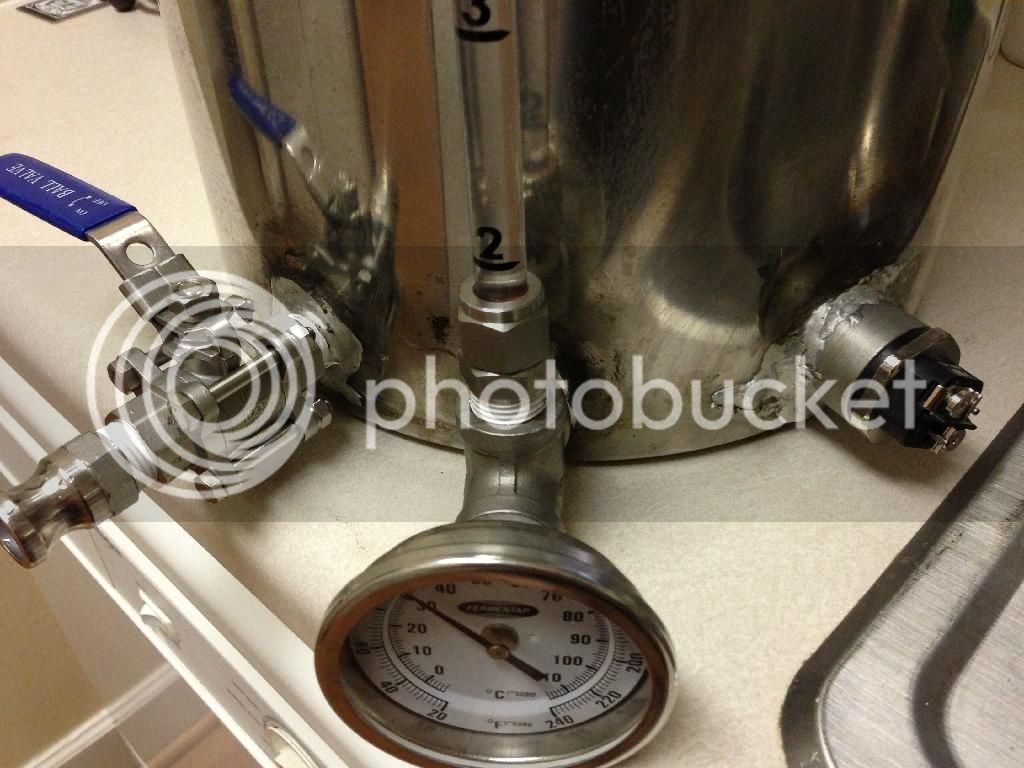
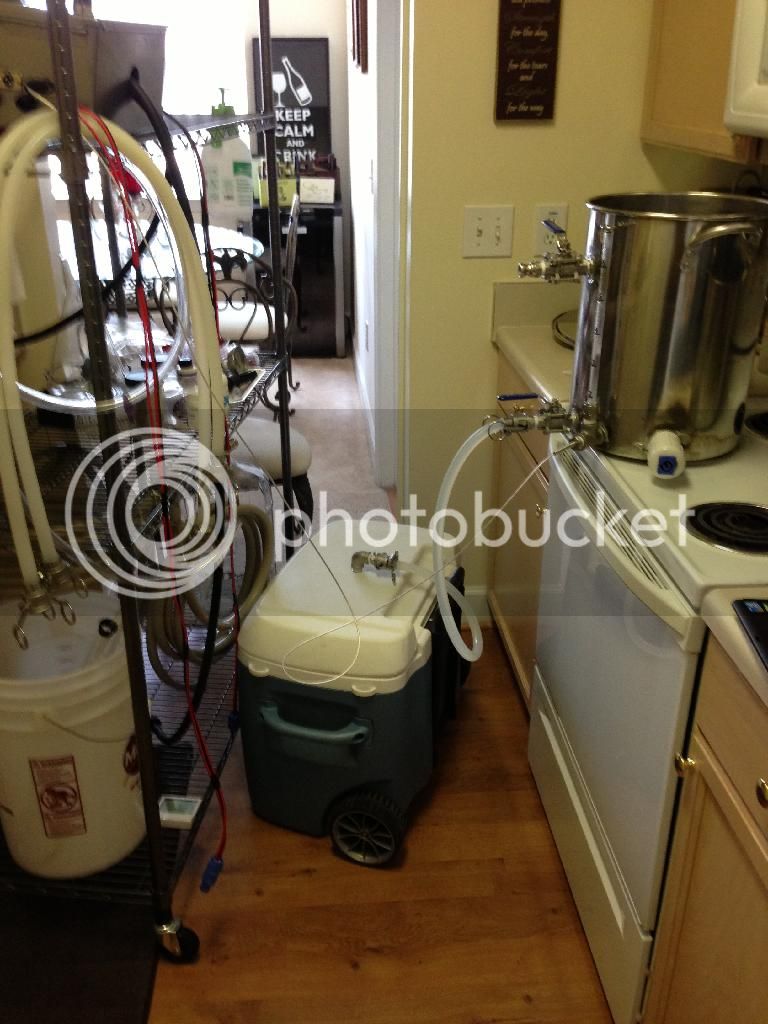
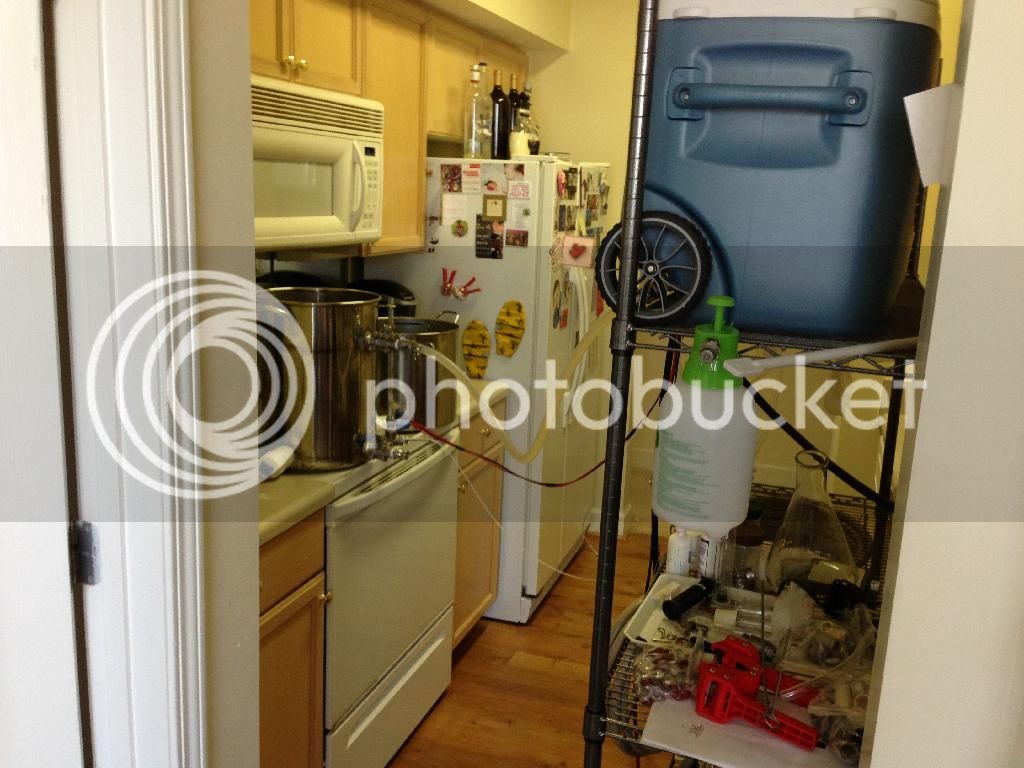
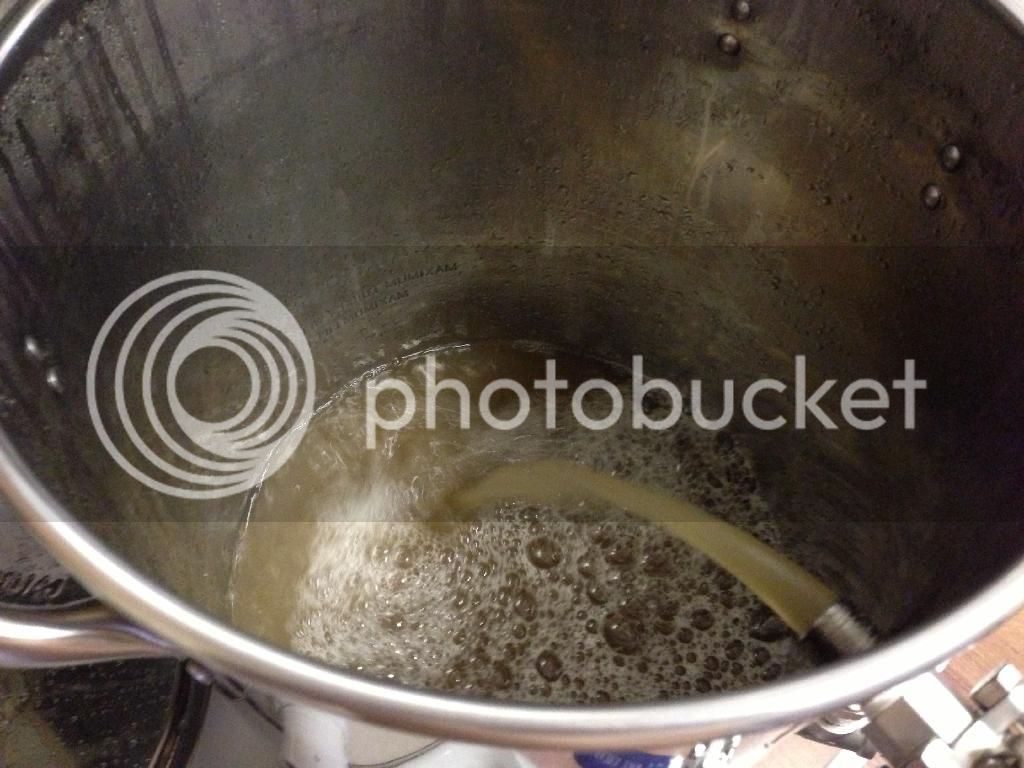
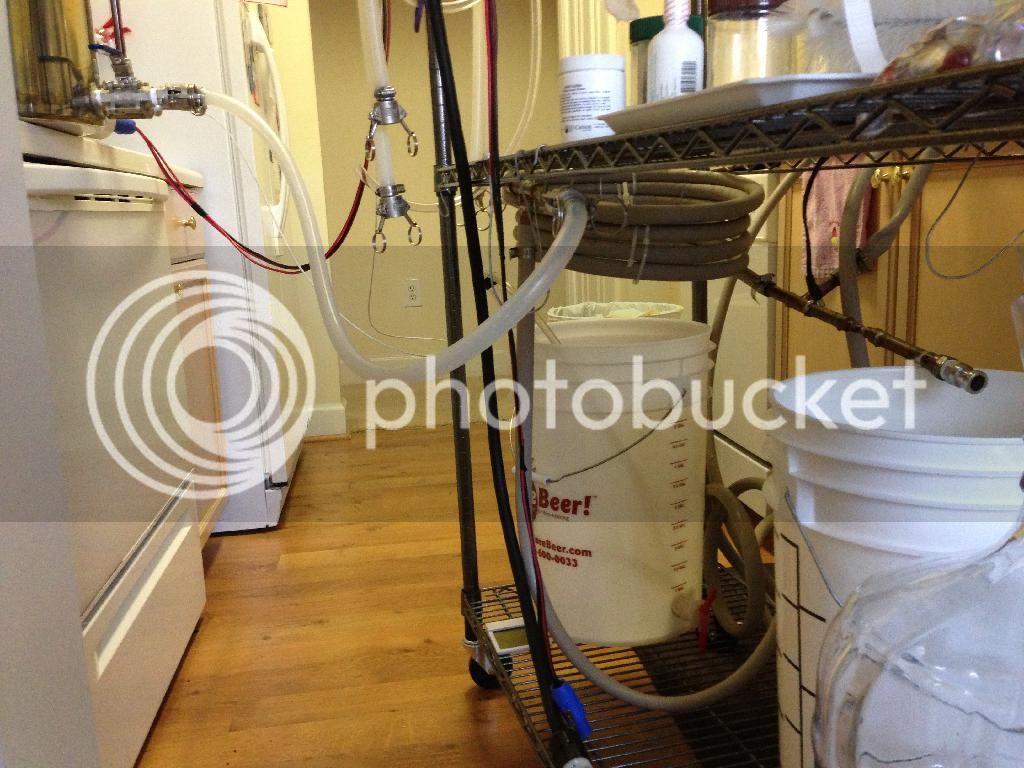
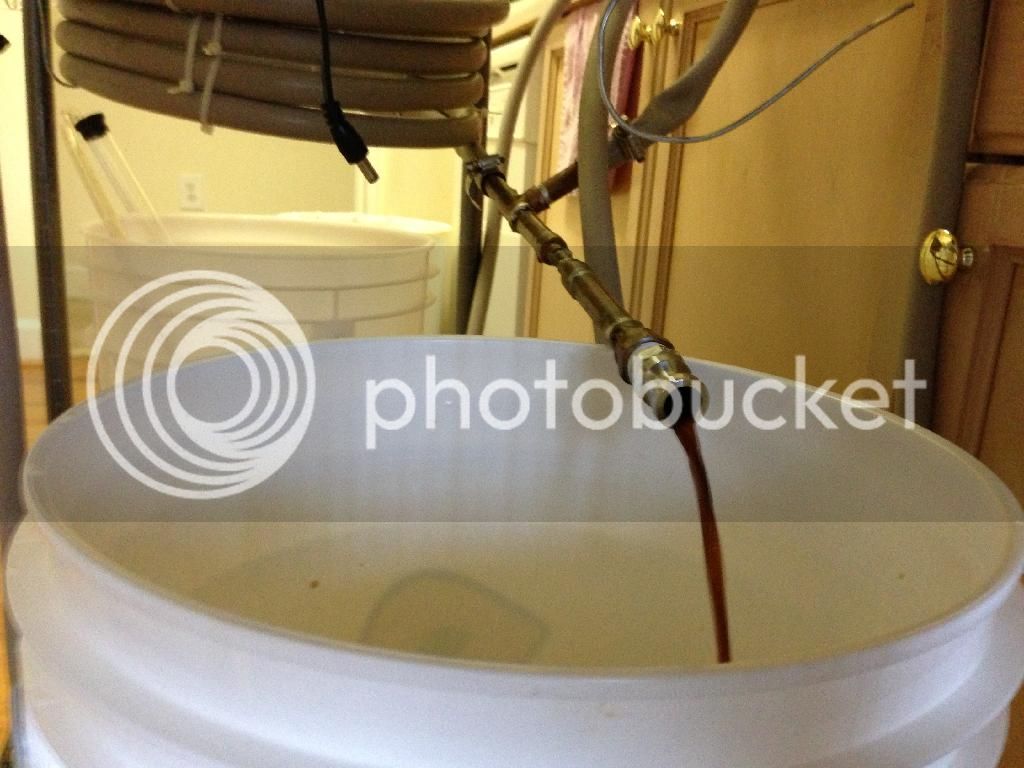
The actual brew process still needs a little work but will be based off of my "BrewRack". I live in a small apartment in atlanta and have to make use of what little room we have. Still need to do some more arranging but it will use one pump and gravity from the mash tun up top, and from the BK down to the counterflow chiller.

E8EC9275-11F8-42DF-8EE8-8D09B1AD6FAE_zpskrytveav.jpg
 
Probably hard to follow but the wiring diagram is finished for now. I am sure once I actually get in there and start wiring that I will change some things but I am pretty confident. I have all of the switches wired beyond where the PID will switch them so that the LED truly represent if they are getting power. IE the element LED will only light if it is actually on. Not sure if I like that or not... Anyone see any issues with this layout (aside from the SSR having to be mounted on top)?
 
Update: After a hiatus do to shipping, bad weather, and a trip to vegas, I finally got the boil kettle done and almost every part I need in. I learned a LOT of lessons through trying to build this thing. And yes, my solder/welds are terrible but they hold well.

1. Just get a damn punch. The step bit it tough to deal with and can burn up quickly if you don't do it right. We bought 2 after killing the first.

2. Get Harris Stay Clean ACID BASED flux. Soldering Stainless does NOT WORK WITH NORMAL FLUX.

Here are some picks of the kettle. The water has the bubbles because I dropped some Oxyclean in to help clean up any left over flux, bits, etc.

9B9569D4-0471-4CBB-8907-AC56F9B83F3E_zpsxboo3gqt.jpg


45F831D3-03A5-4D78-9059-394C06D9F1F7_zpsrrvubgnn.jpg


12F5AFDB-3FDF-429A-B3FD-03D32B889D6E_zps9kypa13h.jpg
 
Let us know how it goes. I used 1500w elements that size and scorched my wort.

Sent from my SCH-R970 using Home Brew mobile app
 
Let us know how it goes. I used 1500w elements that size and scorched my wort.

Sent from my SCH-R970 using Home Brew mobile app

I have heard mixed stories on it. How do you know aside from a burnt taste?

Luckily the elements are like $8 each and I am building the system to be able to support 20A so I can change to lower if I want.
 
The elements come out crusted with black scorched stuff 1/4" + thick. I recently saw in another thread a camco 120v ULD. $20 on Amazon. A 240v element works fine on 120 volt and can give you even lower density. Just remember that the output is 1/4 of the output@ 240v (6000w@240=1500w@120). And you have the option to use it@240v in the future if you so choose.

Sent from my SCH-R970 using Home Brew mobile app
 
Yeah, might end up going with a pair of 5500 or 6000's. Thats a really good idea. Gonna see how these ride out because there is no need in changing them before even using them once.
 
Makes sense. Hope they work for you!

Sent from my SCH-R970 using Home Brew mobile app
 
Nice. Yah I was to do to the same thing to an extra brew kettle I have, but I don't know how to wield is the problem.


Sent from my iPhone using Home Brew
 
These are silver soldered. Check out the DIY forum because there is a LOT of discussion on it. After quite a few failed attempts, getting the correct materials turned out to big the biggest thing. Also, the step bit I had did not go all of the way up to the size that I needed for the element bungs so I took a pair of pliers and gently flared out the opening and then tapped the bung into the hole from the inside. VERY tight fit and made the soldering very easy.
 
Lol, people staying over is half the reason I have to make this all fit in that tiny closet. We are buying a place soon but it will most likely be a condo with not too much more room so I am making all of the work on the principle of the rolling brewery.
 
Got the box cut, painted, wired and got a test run going now. Still need some clean up. Had quite a few problems with the contactors not firing because LED's were inline and tripping the gfi because of the element wiring had something wrong. Ill come back and document it all later but for now:

717BF8C2-DF0C-4E0F-9B89-D8F82BE29E68_zpsebpq65sd.jpg


A5910561-043F-420D-B436-5DA762B75FCE_zps0zd9zdhe.jpg


C4374AED-6160-42DB-B71E-B24B1AC8D2BD_zpskyvfyzbm.jpg
 
First brew done complete. I ran into a few issues, the biggest being I did not even decide how I was going to mash until about 5 minutes before I hit strike temp. This is mostly due to the fact that this is a new system, this is my first all grain batch, and I was still missing the damn pump. I do not have a pump yet and as you will see, there is a bit of a height issue. Brewed deception cream stout. Here is how it all went down:

1. Fire both elements. Get water to 160.
2. Drain water into cooler on ground and lift up onto top shelf of the rack.
3. Dough in.
4. Start heating sparge water because mash temps are low and I need to add some hot water.
5. Drain half of sparge water into seperate kettle and pour in mash tun to batch sparge.
6. Drain remaing sparge water into seperate kettle.
7. Vorlauf twice, and then drain from tun to boil kettle.
8. Add steeping grains to boil kettle while 2nd batch sparge is happening (When doing all grain, do you still steep specialty grains like this?)
9. Pull steeping grains.
10. Vorlauf twice, drain mash tun into kettle up until preboil volume. (I overestimated boiloff and my effeciency suffered. Gotta hit that number and stop!)
11. Fire both elements up until 200F and then pull the main element and let the boil happen.


I did notice a bit of crusting on my elements after completion but it came off very easily. Might still move to large, 240v elements.

And, the pics:

16AC700F-44B0-4F09-A832-1E1CE3DA86EB_zpsdgvsaiw9.jpg

D9BD9BE4-EF9A-4563-A1E9-9472F1476689_zpslnpx1rco.jpg

121F27BD-3E59-48D5-8C8F-27CF3B21AA9B_zpspf8wd0vb.jpg

Is this a good clarity for wort coming into the bk?
E73B7C39-50A5-4F3A-83D5-0CD23FAA39B5_zpsrikqvukv.jpg

There is a clear seperation of the little water left from what the kettle could not drain out and the new wort.
E06BE750-6291-4DE9-8DEF-32076D049643_zpslyqnsp51.jpg

E2E40414-34F2-4955-B91A-1D58D3B65DC2_zpsinrcq9yn.jpg

Took about 10-15 minutes for the kettle to fully drain but with about 25% pressure from the sink, wort came out at a perfect 70F.
 
Looks good. Why would you want to move to larger elements? Do you mean you'd move to larger and still run 120V on them for the lower watt density, or that you were unsatisfied with the heating times?

Also, if you brew again before the pump just preheat your mash tun and you should be solid.
 
Bigger elements as recommended above. like 6000W 240's run on 120 so they are lower watt density. This beer won't mind at all but lighter beers might suffer. Pump should have been here. Need to check up on it. It was a cheap thing ordered from china.

Edit: As I posted, it was delivered. http://www.amazon.com/gp/product/B00H3V4NY8/?tag=skimlinks_replacement-20
Ill report on how it works later.
 
Last edited by a moderator:
Roger. I'm about to start building my 120v rig soon and I'm tempted to run the 6000s as well, but they're monsters. I really wish there was a more consensus on scorching. Some people never get it running HWD, some people do even on LWD. Don't understand. I'll probably just run these regular 1500 foldbacks and move to a wavy if I have issues.
 
Yeah I am not even sure this was scorching, but the elements were like $8 each lol. I am actually more worried about rust but those end caps I made are sort of stuck there now as the grounding screws I used snapped when they fully set in. So taking it apart means entirely redoing them.
 
mine do the same thing, i've been running my elements for about a year now.
unless you go to stainless ones, they will turn black for then most part, just keep them clean after brew days adn you'll be set! :)

good job!
 
Good to know it worked out. I only used hwd once in a brew and it ruined it, so I threw them in the HLT and got some ulwd 240v for the BK. I'm glad you had better luck!

Sent from my SCH-R970 using Home Brew mobile app
 
I will probably get new elements soon but we are buying a house in june and I am limiting all of my discretionary spending :). Next thing is fixing all of the little problems, getting the pump wired up, and ironing out the process for a recirc mash like a Brutus 20.
 
Cool, and congrats on the new home to be. Are you a first time homebuyer?

Sent from my SCH-R970 using Home Brew mobile app
 
Yeah. Wanted to make the system work for any house so that we can get a condo and not have to worry. Will be interesting...
 
Yeah. Wanted to make the system work for any house so that we can get a condo and not have to worry. Will be interesting...

FWIW,
I will eventually build mine into the kitchen. In the mean time I simply plus into the stove outlet. A dryer outlet could work too. As long as you add gfci protection to it it will provide 240v.

Sent from my SCH-R970 using Home Brew mobile app
 
Right, but that depends on if you have easy access to a stove or dryer outlet. Or if your SWMBO will let you move the stove out to plug in your brewrig...

..and of course the outlet for the stove has to be on the damn floorboard.
 
Yeah our current stove would require complete moving to access the back of it. The twin 120v GFI outlets is a good solution and is versatile as I think it is a requirement to have 2 separate gfi circuits in a kitchen.
 
Quick update: Got my pump wired up but I still need to do some modifications so that it can be easily unplugged and I don't have a huge ac adapter in the control panel to switch it to 12V. For $18 this thing is amazing. 1/2" NPT fittings fit perfectly on there. Will need to get it mounted up to the rack and start doing some real testing tomorrow. For now, eye candy:

4117E498-9167-454F-91F4-5525828D1D94_zps50k5mtvu.jpg


61D6DEEB-3CFE-48E5-BBD7-42FD57756030_zps1fwbi24k.jpg
 
$18? Please, link me. I've been tempted to get two small pumps instead of a chugger.

Also, is it possible to just wire it to a lappytop or iPod charger and have a regular outlet on your panel? Seems the easiest. Oh, is there a mounting bracket at all? Looks rounded on the bottom as well?
 
Absolutely, and I might end up going that route I just don't want and ugly outlet on the panel. If I can find one to mount in one of those side holes, that would be perfect.

http://www.amazon.com/gp/product/B00H3V4NY8/?tag=skimlinks_replacement-20

Looks like it's out of stock right now, and it also took like 2 months to come in from china. But I was in no rush :).
 
Last edited by a moderator:
Wait! I stand corrected after seeing the second pics, that is different than mine... mine are the topsflo style with coated impeller and the tan 12v ones also FDA approved with the coated impeller.
 
Man those Topsflo ones are still like ~$70. I really want to try out some of these smaller pumps because I think bigger is overkill, but at that price I believe I'd rather just do a $100 Chugger I know will last.

I'll just keep an eye out for some deals I suppose. Hard to tell a difference between all of these small identical looking ones, makes it tough.

Have you tried these? They work great also.
http://www.ebay.com/itm/Solar-12V-2...t=LH_DefaultDomain_0&var=&hash=item43bd118cda

I have 2 24v would be stronger. I have 12v version.
 
@nab911 - Looks like the wort is creating a lot of bubbles coming back into the boiling kettle... you may want to 'soften' that a bit or you risk oxygenating it at those temperatures which could lead to off flavors.
 
Looks like the wort is creating a lot of bubbles coming back into the boiling kettle... you may want to 'soften' that a bit or you risk oxygenating it at those temperatures which could lead to off flavors.
I've read Budweiser does this on purpose something about it helping to release compounds
Maybe I'm mistaken though.
 
@nab911 - Looks like the wort is creating a lot of bubbles coming back into the boiling kettle... you may want to 'soften' that a bit or you risk oxygenating it at those temperatures which could lead to off flavors.

I have a 90 elbow and 3" extension I am putting on at an angle to start whirlpooling.
 

Latest posts

Back
Top