You are using an out of date browser. It may not display this or other websites correctly.
You should upgrade or use an alternative browser.
You should upgrade or use an alternative browser.
Unveiling my brewery & garage build
- Thread starter fall-line
- Start date

Help Support Homebrew Talk - Beer, Wine, Mead, & Cider Brewing Discussion Forum:
This site may earn a commission from merchant affiliate
links, including eBay, Amazon, and others.
MaltMonster
Well-Known Member
there should be a "like this thread" button, liking each of the OP's individual posts just won't cut it")
You can always hit the "Prost this thread" button at the top right of the thread on each page.
MaltMonster
Well-Known Member
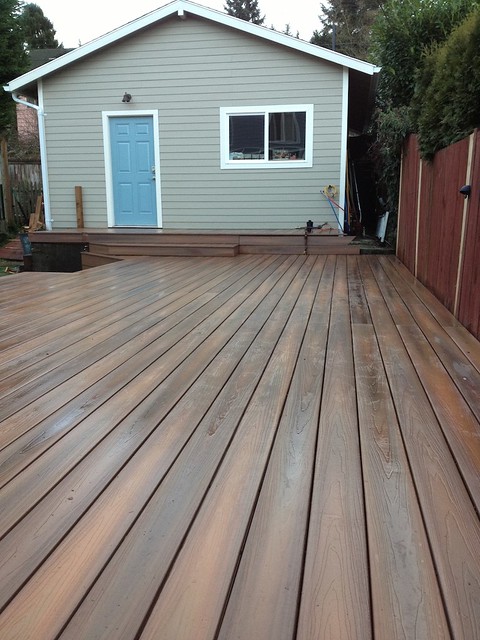
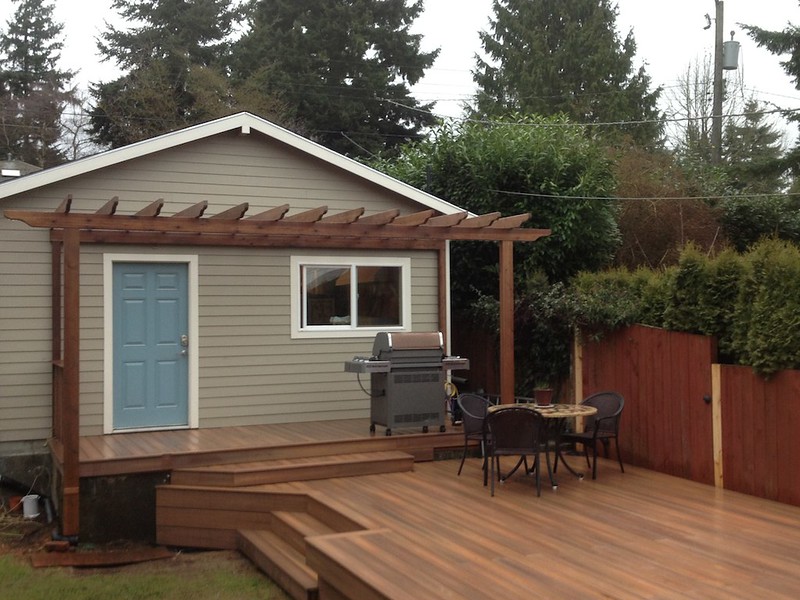
Is it summer yet? I'm almost ready! As I mentioned before I've been avoiding spamming the this thread with non beer related updates, but I'm happy to report that the decking is done. Moving along now to the railings and the arbor, painting the fence, and building the outdoor kitchen.
Meanwhile I'm happy to say that the brewing continues, with an IIPA, Maibock, Moose Drool, 'Island Lager', home grown apfelwein, and a Pale in various stages of fermenting or consuming. We're looking forward to the brewery warming party in March!
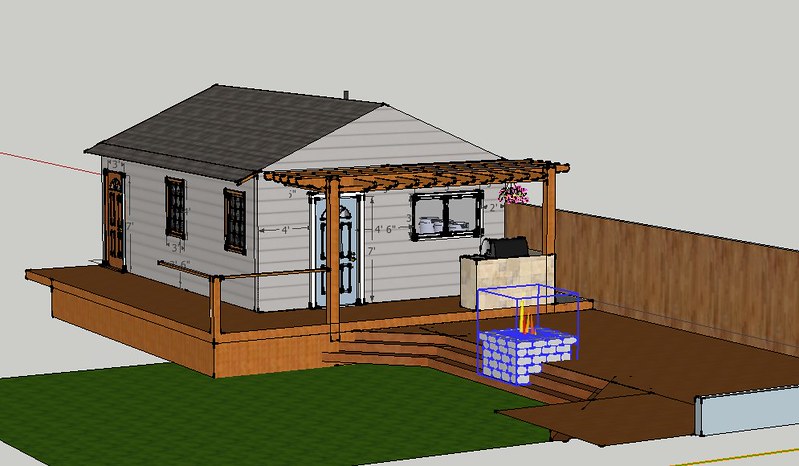
The design has changed a little from the original sketches, but it's pretty cool to once again see my drawings coming together in real life as they did with the building itself.
I love that you were able to connect the deck between the house and the brewery. Look forward to seeing some hops growing on the arbor this Spring.
OP
OP
Thanks, all.
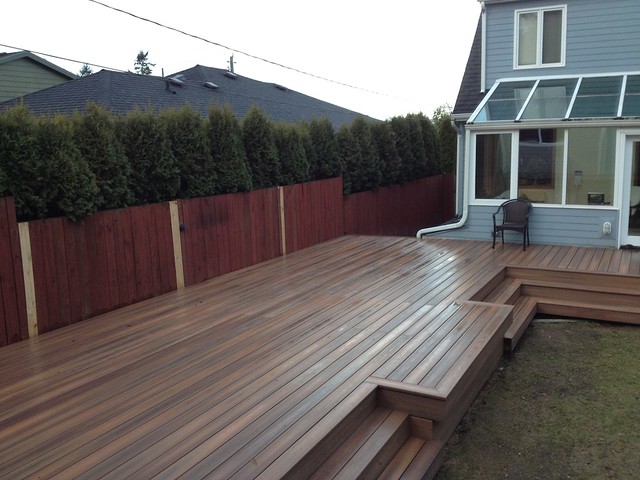
Yeah, tying the two spaces together on one level was an important goal of the project. Before any of this got started we had a small deck off the house, then a step down to a shorter deck, then a step down to a patio, then three big steps UP to the slab where the garage now sits. I'm still a little sensitive about how large we had to make the deck in order to accomplish a single level without it being super skinny like a bowling alley, but I'm really glad to be able to walk from the house to the brewery in one easy motion now.
Better yet, as long as it's not raining, I can do it in my slippers.
OP
OP
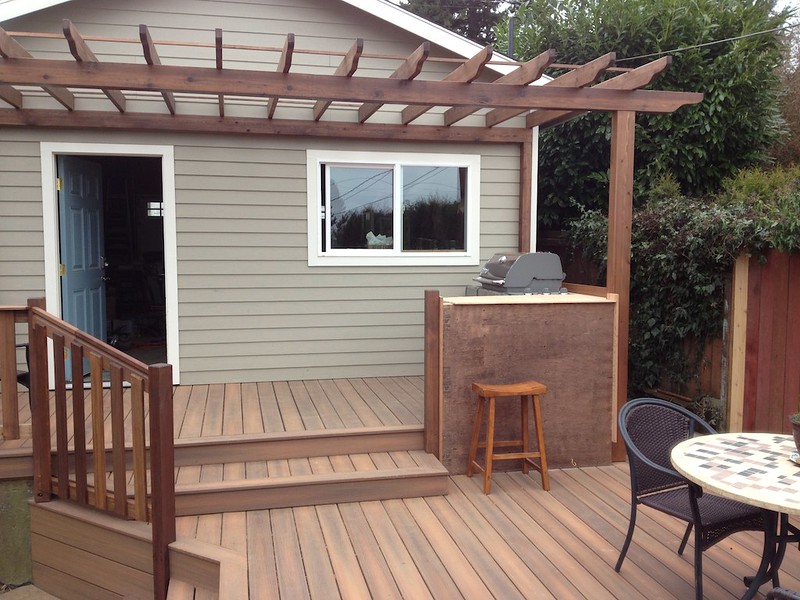
The arbor is almost done. We're going to add 4 more rafters to it so the spacing is a little narrower. These aren't nailed down just yet, as evidenced by the one on it's side over the door. I'm pretty excited about how it's turning out though!
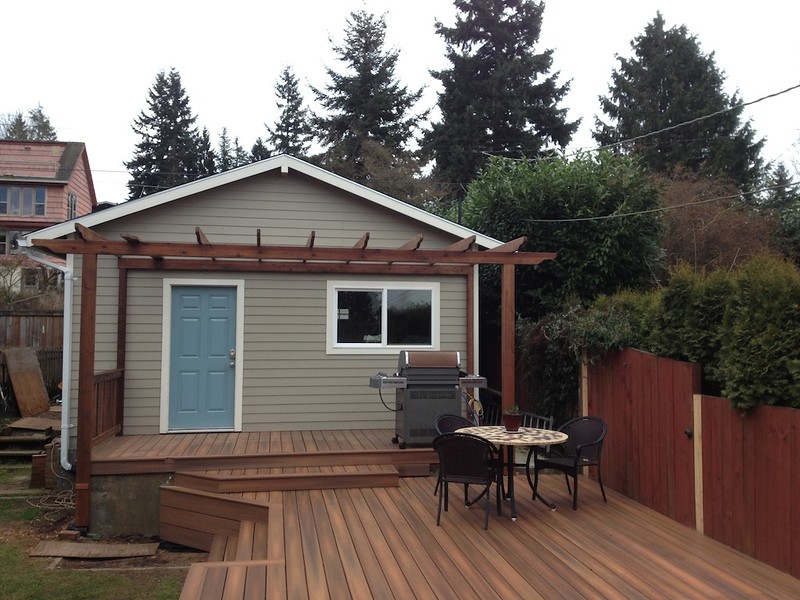
I'm pretty excited about how it's turning out though!
rockinmarty
Big Member
Dude can we switch. I'll give you snow and freezing cold in exchange to what you have. Posting pictures in February that looks like spring is evil for us on the east coast.:rockin: Great build.
OP
OP
Thanks!
It's true, we did have a couple of nice days here, for February anyway. I'm glad we were able to take advantage of them. It's back to cold and wet today though.
It's true, we did have a couple of nice days here, for February anyway. I'm glad we were able to take advantage of them. It's back to cold and wet today though.
OP
OP
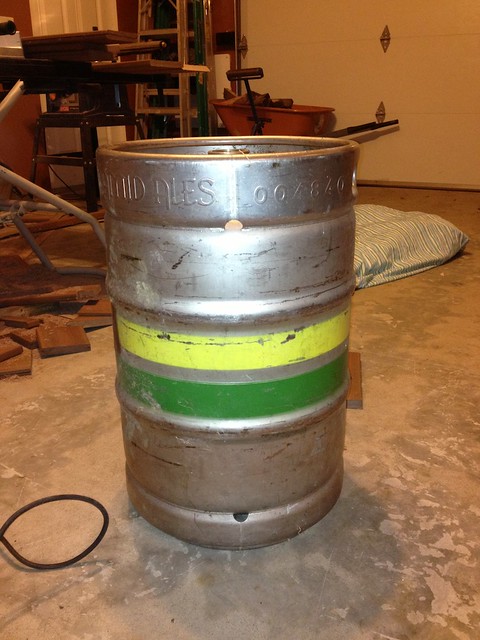
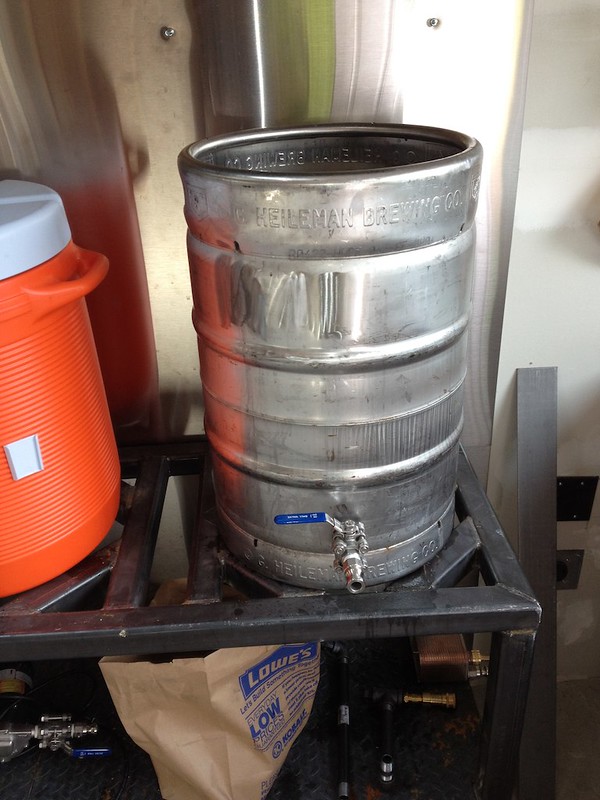
I also put some work into the brewery this weekend in advance of a 10 gallon batch I brewed last night. I finally found the motivation to clean/polish/cut/drill my final keggle. I'm not sure why I waited so long with this keg sitting in storage for several months. It's so much nicer than using my old pot as the HLT.
Pardon the mess, as you can see we are still in full 'construction zone' mode in the shop in support of the outdoor projects.
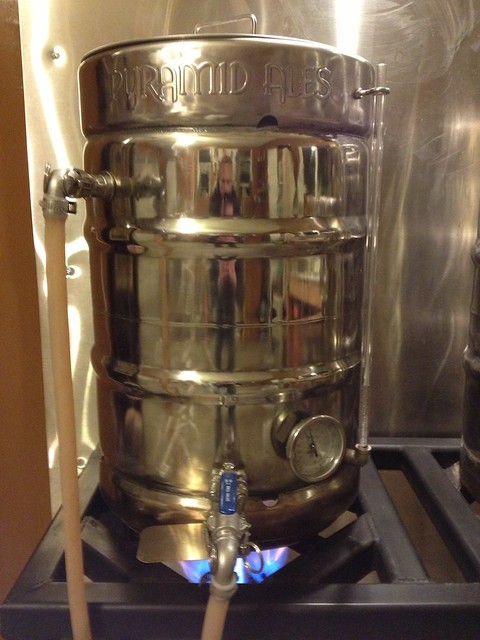
Detailed conversion pics of the other kegs are earlier in this thread, so I'll skip the details and just show the before & after.
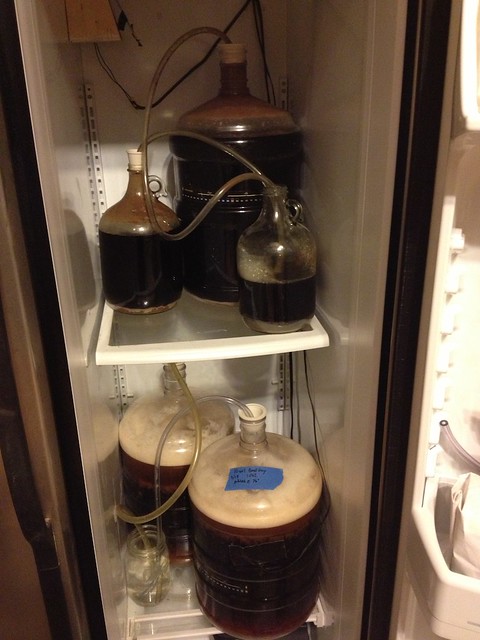
And the aforementioned 10 gallons (bottom shelf) nice and snug for fermenting
Pardon the mess, as you can see we are still in full 'construction zone' mode in the shop in support of the outdoor projects.
Detailed conversion pics of the other kegs are earlier in this thread, so I'll skip the details and just show the before & after.
And the aforementioned 10 gallons (bottom shelf) nice and snug for fermenting
rockinmarty
Big Member
lucky you here it's cold with blowing snow.
Great polishing job on your keggles.
What did you brew it looks tasty
Great polishing job on your keggles.
What did you brew it looks tasty
OP
OP
That would be my slightly altered version of Yooper's AG Dead Guy clone. It's one of our house standards, and always seems to disappear before I can replenish it when doing 5 gallon batches. Our friends (and us too) just cant get enough of the stuff.
Big props to Yooper, once again. She has been either the direct source of, or the inspiration for several of my favorite recipes. Of course, that's no surprise to many HBT readers.
Big props to Yooper, once again. She has been either the direct source of, or the inspiration for several of my favorite recipes. Of course, that's no surprise to many HBT readers.
BeardedIdiot
Well-Known Member
Damn good job polishing that keg! I just picked up two more kegs, and I want to polish them and my original keg up like that. What grinder pads are you using to get that kind of result?
OP
OP
I followed Bobby M's polishing steps on this last one to the letter. Here is his exellent writeup on the subject .
I really took my time on this one, after ending up with less than ideal results on the other two by taking shortcuts. I don't really need polished kegs, but what the hell.
I really took my time on this one, after ending up with less than ideal results on the other two by taking shortcuts. I don't really need polished kegs, but what the hell.
OP
OP
Very minor update, I didn't like how far apart the rafters were on the arbor, so we put up some more. I also set a hard deadline of the end of February (one week from today) for all of this work to be D.O.N.E, and to start cleaning up my garage/brewery for full production mode. It's an easily attainable deadline, but a cheap one considering that the original plan was to have this done by the end of 2012.
It's an easily attainable deadline, but a cheap one considering that the original plan was to have this done by the end of 2012.
MaltMonster
Well-Known Member
I just realized that your grill is next to the brewery instead of the house. Love it!
OP
OP
Definitely. The grill is in the area being built out today with an L shaped counter/cabinet, which will become our "outdoor kitchen". Pretty basic, but there will be a grill, sink with H+C, and electrical. I thought about putting in a fridge, but there will be plenty in the building itself. Plus we are still planning to one day put a tap through the wall between the door and the window for outdoor 'lawnmower beer' in the summer time.
We really wanted to create an outdoor living and entertaining space with this project. It's making me really wish it was spring!
We really wanted to create an outdoor living and entertaining space with this project. It's making me really wish it was spring!
ScotBrew
Well-Known Member
You putting some sort of roof on the arbor or you keeping it open and more natural looking?
Oldskooler
Supporting member
Really nice work.
OP
OP
You putting some sort of roof on the arbor or you keeping it open and more natural looking?
Sort of. I'm not totally sure how well it will work out, but the plan is to put a sheet of plexiglass down on top of the rafters, but just over the kitchen area. It was built with a very gentle slope away from the garage to encourage rain roll off of it. The rest of it will be open to better facilitate the growing of hops.
This plan may evolve over time, but the idea is just to keep the grill/counter/etc out of the direct rain.
OP
OP
Thanks, Oldskooler.
BadNewsBrewery
Well-Known Member
I built a similar arbor for my parents and we put clear plastic corrugated roofing up. Looks OK. We set it up to be easily removable if they want it down for the dry season or need to scrub it. Just an option.
OP
OP
I built a similar arbor for my parents and we put clear plastic corrugated roofing up. Looks OK. We set it up to be easily removable if they want it down for the dry season or need to scrub it. Just an option.
Thanks for the info. I've got the clear corrugated stuff in mind as a backup plan. We get very little snow here so I think that flat plexi will do the trick, but I'm totally aware of the possibility that it might not hold up and would need to be replaced with corrugated at some point. I imagine that once it's all in use and has hops going on it, I won't really mind either way.
OP
OP
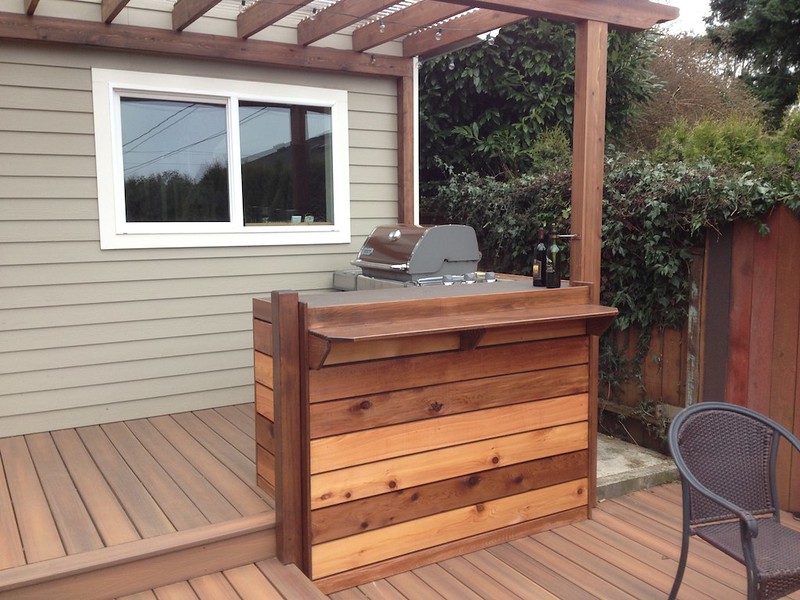
Last minute minor change here as the build wraps up. We decided to relocate the grill to the other side of the "L" in the kitchen area, allowing us to build a combo countertop (on top) & eating bar (a few inches below) on the portion that faces the deck. This is getting built out today, but here is the mockup I threw together with some plywood. A can't wait to be sitting there on an 80º day eating something delicious hot off the grill and drinking a lager.
Nice build all around. A word of warning on growing Hops on a trellis though, I did that last year for my first year Cascades and other than the daily baby sitting to train the bines it made harvesting those little flavor nuggets a real PITA! Look really cool when their in full bloom though!
OP
OP
Thanks lstrowge, I had pondered that a bit myself. Harvesting certainly won't be as easy and cutting the string and bundling up the vines like I do now (I run a couple of strings up the south wall of my house.) I think I'll give it a try for a year or two though and see how it goes. It is after all an arbor on a brewery - it really deserves to grow hops! If it doesn't work out, I may plant some grapes on this one and relocate my hop production to a trellis in my garden, where they would get more sun anyway.
If it doesn't work out, I may plant some grapes on this one and relocate my hop production to a trellis in my garden, where they would get more sun anyway.dubprocess
Well-Known Member
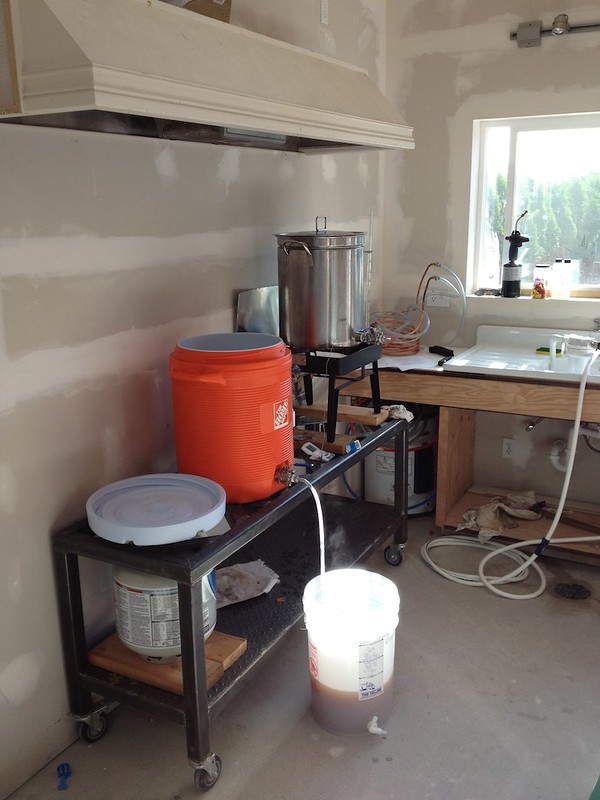
Fast forward a few weeks, and the insulation and drywall are 1/2 done. Plumbing is in and operational, and the funcional spaces of the brewery are starting to take shape.
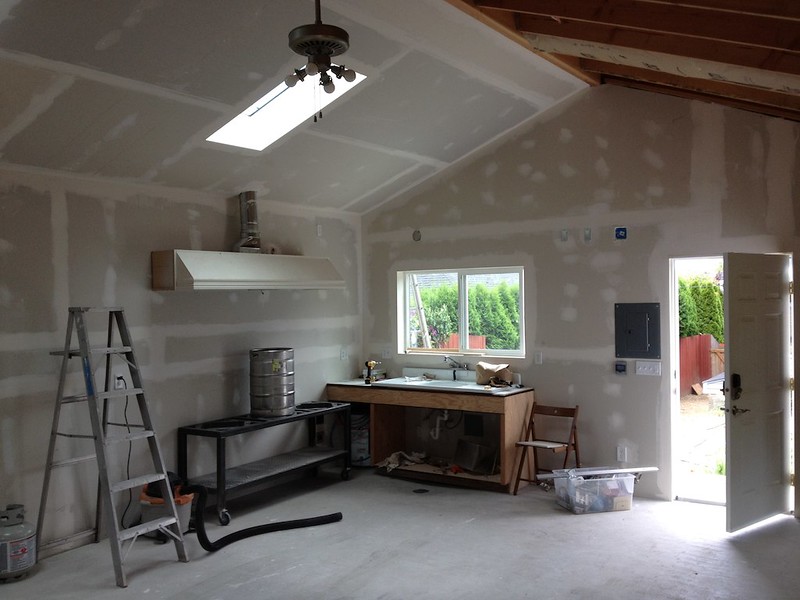
The 5' wide enamled cast iron sink was scored for $40 at the same 2nd hand building supply store as the hood (and hot water heater, and R.O. water filter). I had hoped to find a good deal on a commercial 3 vessel sink, but I'm very happy with this.
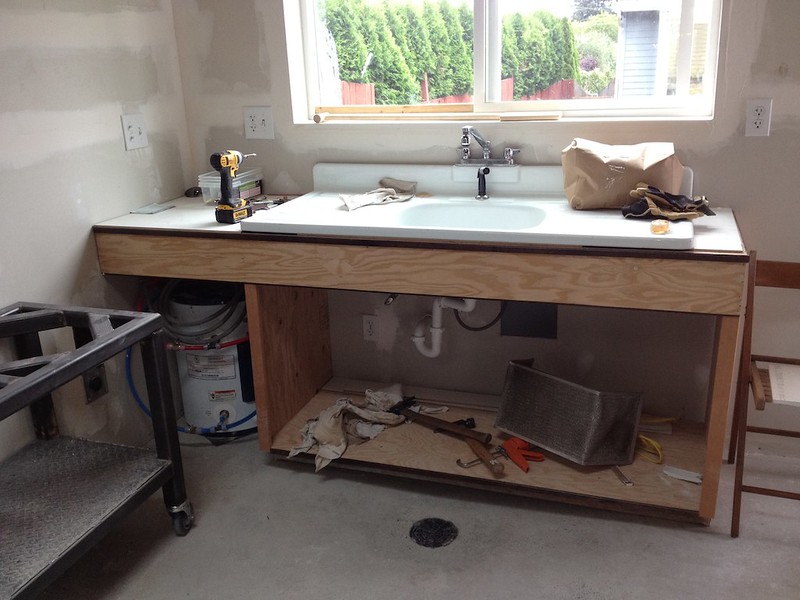
Nowhere NEAR done with the building, or the brew setup, but you know it's all about the beer. I had to take a break from the real work on a Saturday afternoon and brew the ceremonial first batch. I wanted something easy that I had brewed many times before, so it's EdWorts's (Garage) Haus Pale Ale
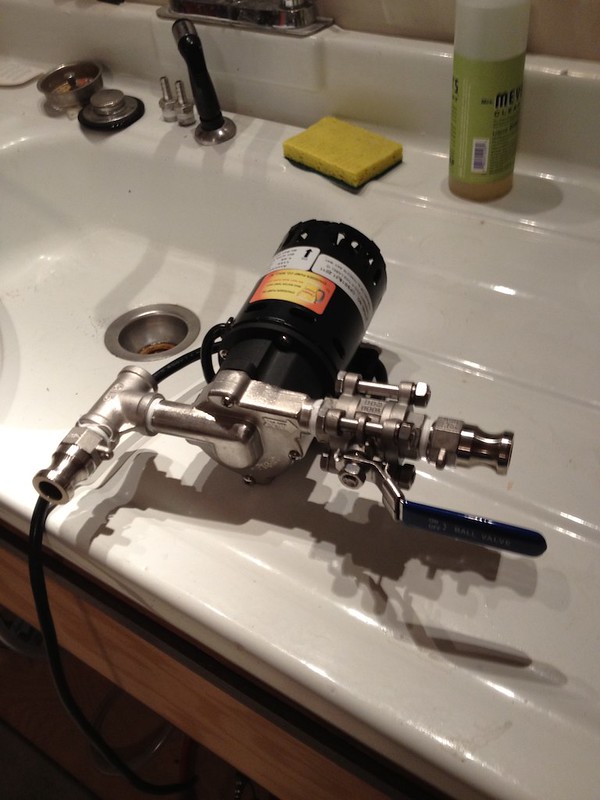
Order #1 (of 4 total) from bargainfittings and brewhardware.com

Pump #1 taking shape.
Brew space really starting to look usable. Stainless steel backing. I had planned to use cheap whiteboard material, but heat was definitely going to be an issue. Stainless sheets were $250 (as opposed to $100 for the white board), and protect the wall from heat, as well as looking infinitely cooler.
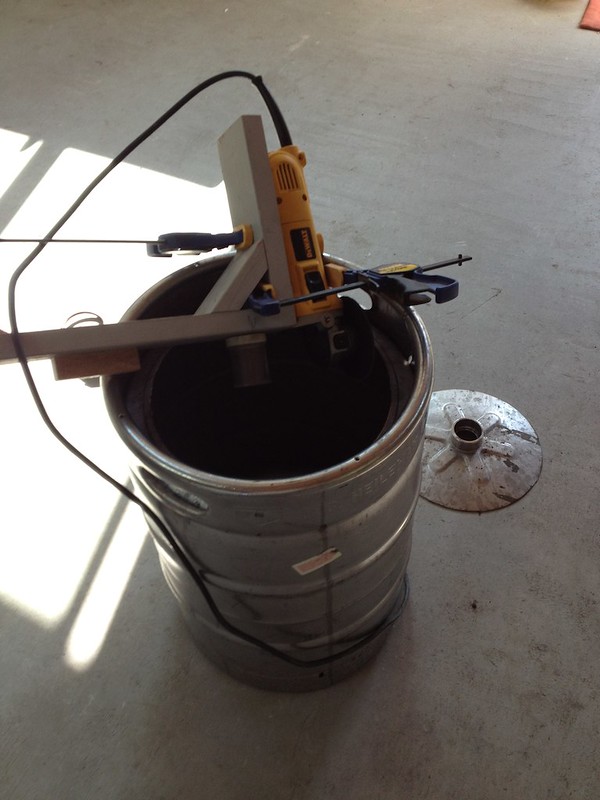
Cutting the first keg. This jig was a joy to use.
Boil kettle taking shape. I owe you an update picture. It's since been cleaned up a bit and has a sight glass, return port and thermometer.
Meanwhile, real work continues on the building. It's painting day.
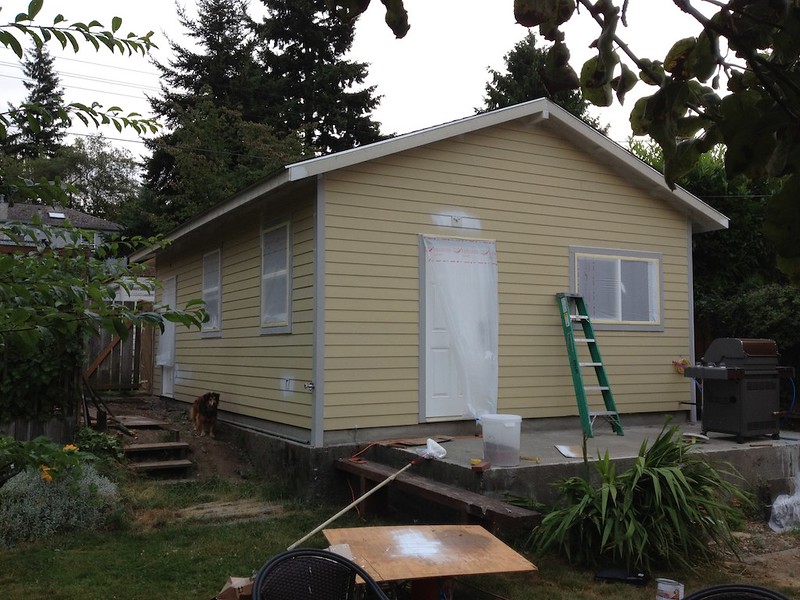
And via the magic of television.. after. We couldn't decide on the color, but had to get it painted. We don't like the blue color of our house very much, but didn't want the garage too clash to badly. In the end we went neutral and boring, but it looks nice enough. The blue door ties in the house color.
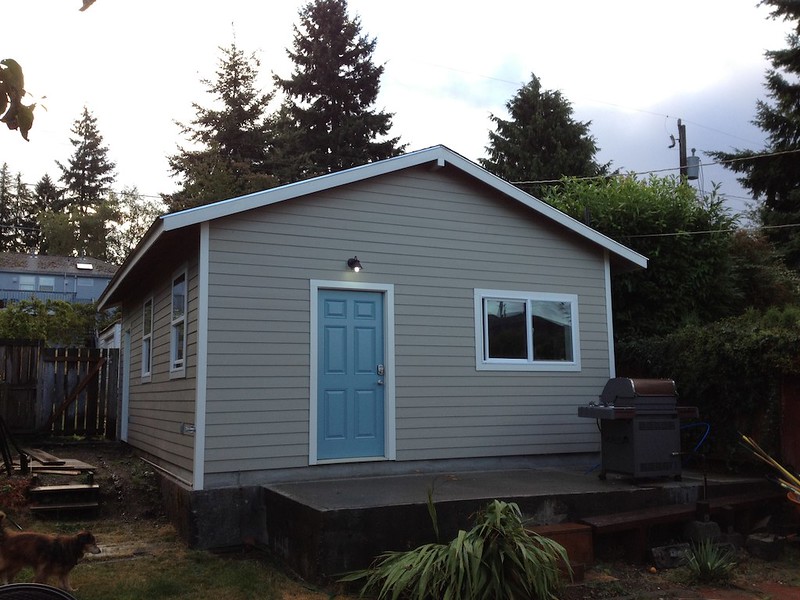
Ok that was no fun, back to the good part.

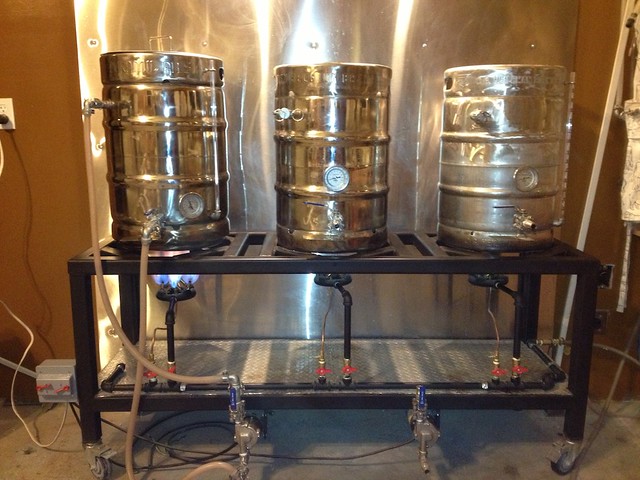
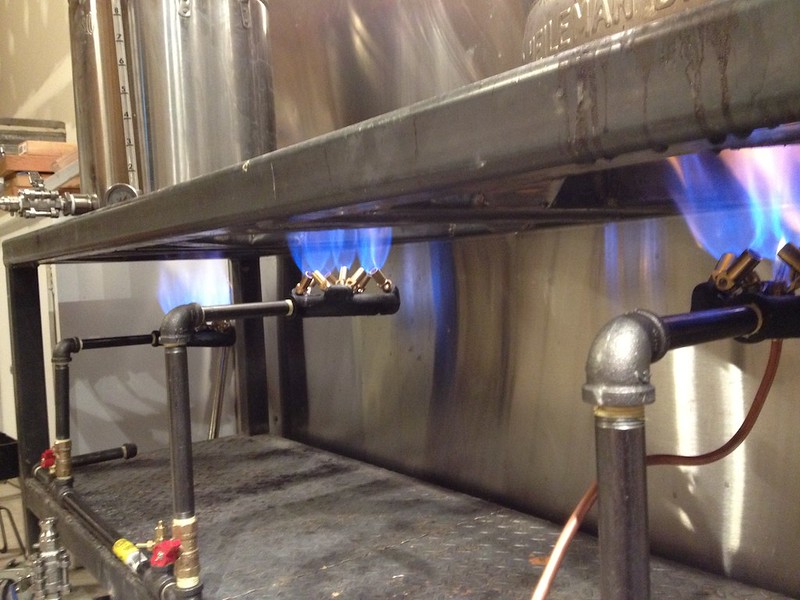
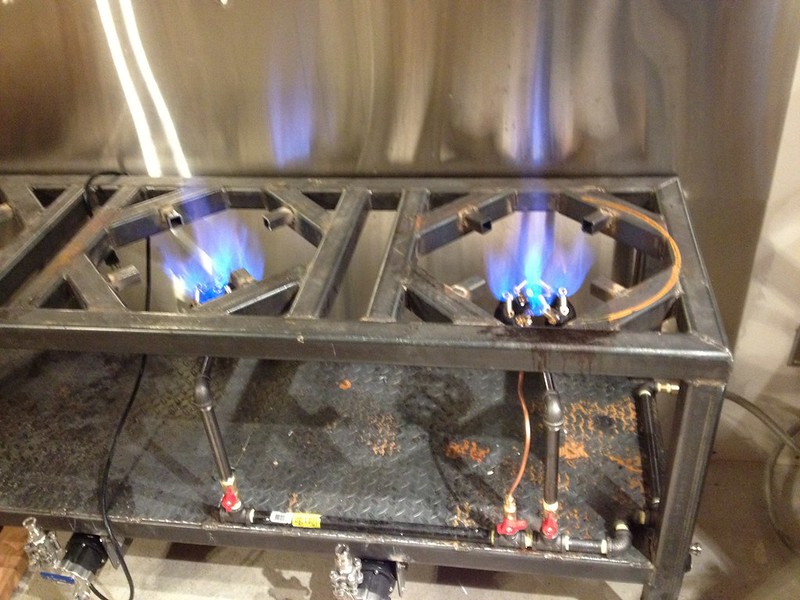
Building the gas manifold. Here we can see the first real signs of influence by JonW's outstanding build. Big props to him, there will be more.
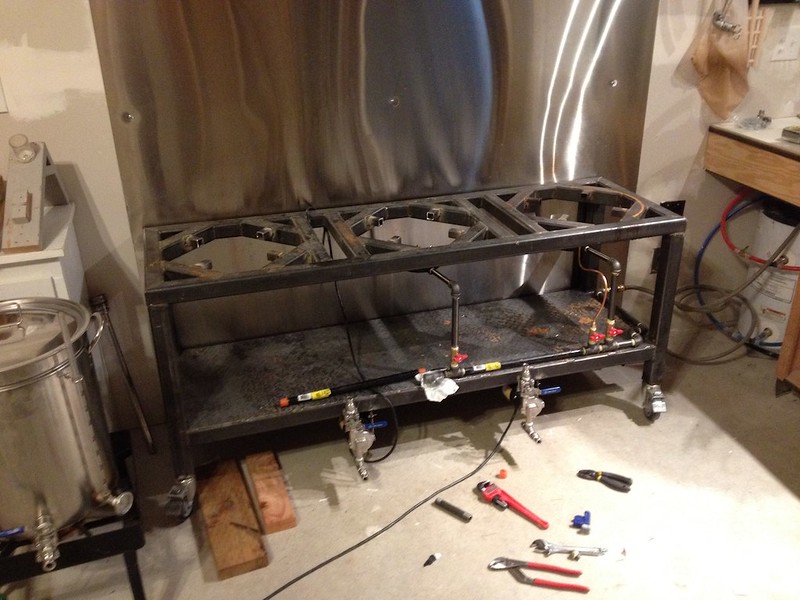
Fire! Natural gas is really easy to work with, and I have been plesantly surprised by these 10-tip jet burners. They can be unruly at full blast, but are easier to control than I expected in the mid range.
I'v been putting this off for a while now, telling myself I don't really need to paint my stand yet. Well, I do. Mild steel is really easy to work with and much cheaper than stainless, but don't skimp or slack on the paint. I enjoyed learning to weld on this stand, though the majority of welds were done by a good friend (who was teaching me at the time) with his cheap wire feed welder. A MIG welder is in my future.
EDIT: January 2012 - After several months of use, I have confirmed my suspicion that pained mild steel diamond plate is not a good idea. I've been unable to keep it from rusting through the paint due to continued exposure to liquid. Go with aluminum, even it it means you have to bolt it on rather than weld it. I will be cutting off the steel plate and replacing it with aluminum soon.
Using an 80 and then 120 grit flapper wheel I sanded down the surface (and removed all the rust that had developed after a couple of 'test brews'. The diamond plate below is also mild steel (I'd suggest aluminum if your welder can handle it - EDIT: See above), and had to be sanded by hand with a sanding block for painting. For the frame I used this paint, thanks to BobbyM and others for the info. Available for $8.99 a can at the local auto parts store, very nice paint to work with.
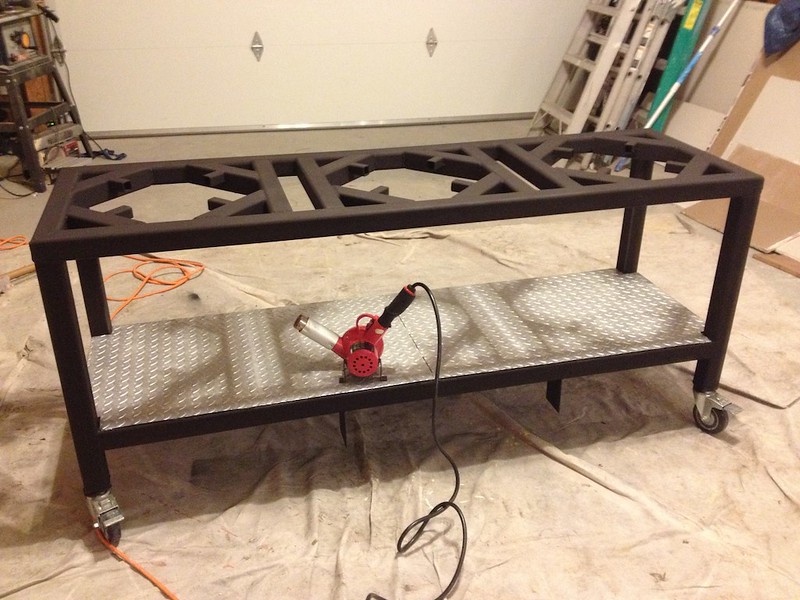
Painting is complete. 4 coats of the high temp stuff on the frame, and 3 coats of a 'steel base layer' paint for the diamond plate. It looks really nice in person, as it does (I think) in the picture. I borrowed a friends heat gun (basically an industrial strength hair dryer) to help cure the high temp paint. It says to cure in steps at 250ºF, 400ºF, and 600ºF. This heat gun might have gotten me to the 250ºF step, but won't get anywhere close to the higher temps. The next step is to put some pots on the stand and fire up the burners to 'cure' the rest.
Where did you get those stainless sheets? Did you go to a local supplier for that?
OP
OP
Yep, the stainless panels came from a local supplier. If you just search around a bit in your area for a metal shop, it should be pretty easy to find.
dubprocess
Well-Known Member
Yep, the stainless panels came from a local supplier. If you just search around a bit in your area for a metal shop, it should be pretty easy to find.
i found one..but not sure what gauge, finish, etc to get..so confusing just picking a a product!!

OP
OP
Oh yeah, I went through that too. I went with the brushed finnish, which I am happy with. The mirror polish option would have shown smudges and stuff even more than this. I went with the thinest gauge they had in stainless.. I think it was 24 gauge?
Thicker would have been nice, but the prices go up quite quickly when you start looking at the thicker (lower number) gauges.
Once you get the stuff in place, you'll love it. It's definitely overkill for this kind of an application, but I'm pleased with my choice.
Thicker would have been nice, but the prices go up quite quickly when you start looking at the thicker (lower number) gauges.
Once you get the stuff in place, you'll love it. It's definitely overkill for this kind of an application, but I'm pleased with my choice.
MetallHed
Well-Known Member
Wow this was an awesome build! One day I hope to have something half as nice as what you built.
OP
OP
Thanks, MetallHed.
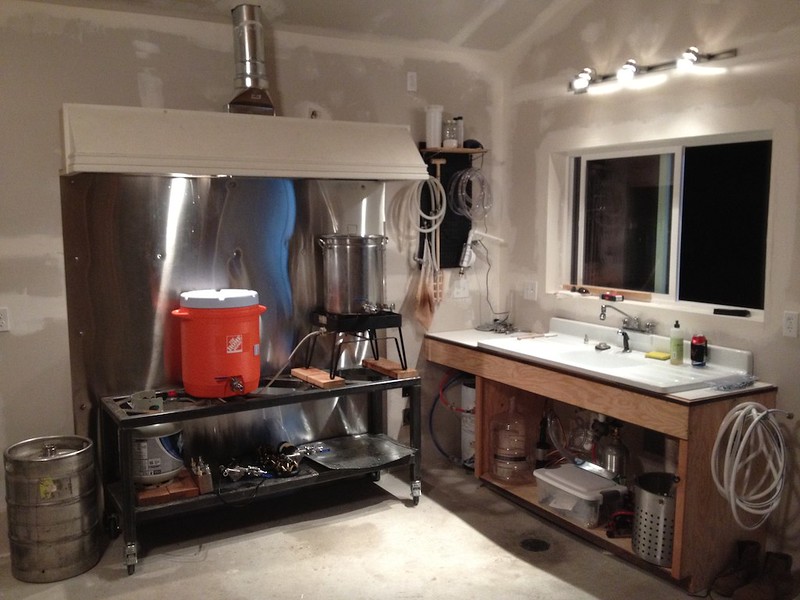
Here are a few more pictures to wrap up the build.
A few more items of trim to be added, and some site cleanup to go.. but it's pretty much complete. I drank a beer and grilled some food the other night in my new kitchen area. Despite being 34º, I loved every minute of it. It's going to stay like this for a few monts, and then we'll be adding concrete counter tops and a bar sink this summer.
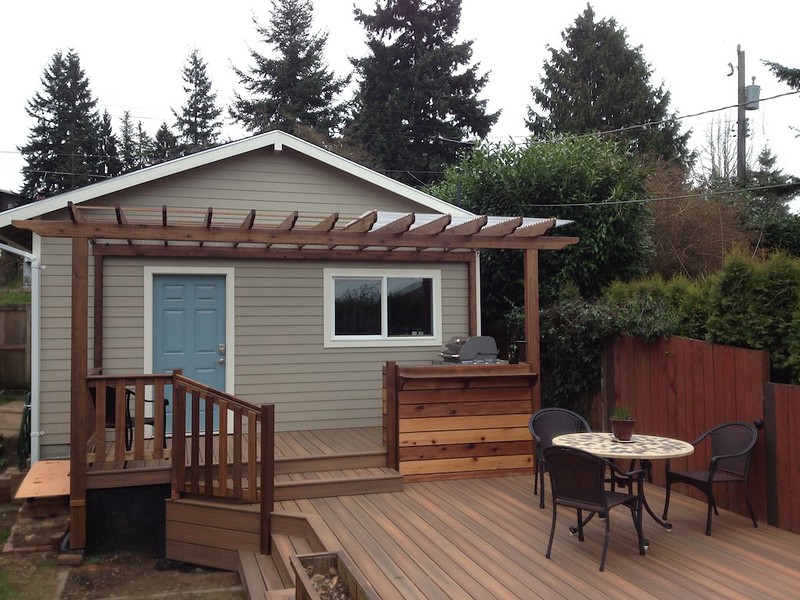
The wine bottles are actually homemade tiki torches (example photo, not mine) that we made a few years back. I'll be mounting them on the posts.
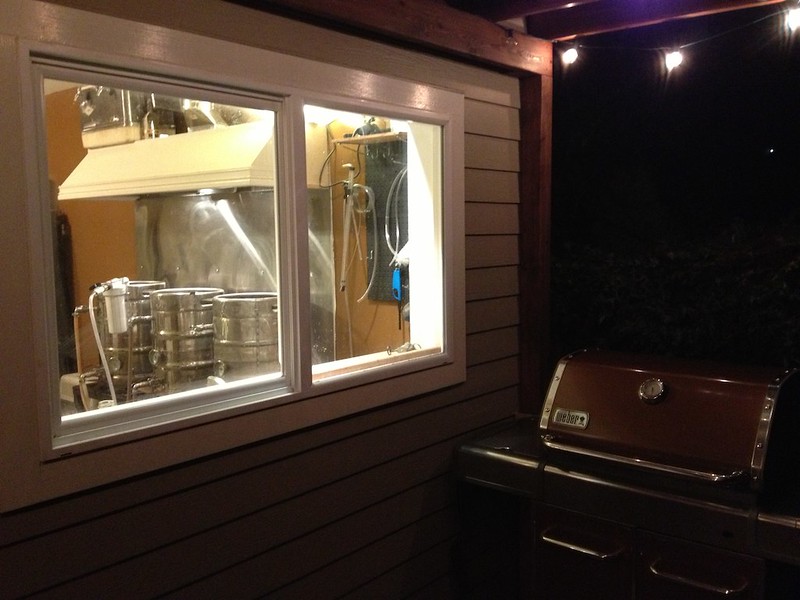
Brewing last night, from outdoors looking in
It's been a lot of fun sharing these photos and experiences with you over the past several months. Thank you for all your encouraging comments and feedback. I'll post a few more photos and updates as they come, but I'm happy to be finally/maybe/tentatively/hopefully declaring this project.. DONE.
It's time for a beer!
Here are a few more pictures to wrap up the build.
A few more items of trim to be added, and some site cleanup to go.. but it's pretty much complete. I drank a beer and grilled some food the other night in my new kitchen area. Despite being 34º, I loved every minute of it. It's going to stay like this for a few monts, and then we'll be adding concrete counter tops and a bar sink this summer.
The wine bottles are actually homemade tiki torches (example photo, not mine) that we made a few years back. I'll be mounting them on the posts.
Brewing last night, from outdoors looking in
It's been a lot of fun sharing these photos and experiences with you over the past several months. Thank you for all your encouraging comments and feedback. I'll post a few more photos and updates as they come, but I'm happy to be finally/maybe/tentatively/hopefully declaring this project.. DONE.
It's time for a beer!
Looks like you have a great man-cave space that will provide many years of enjoyment. Great job!
MuddyCreek
Well-Known Member
Duuude... It's never "done". ; )
That's a great build and I'm really happy for you.
That's a great build and I'm really happy for you.
Congrats on your awesome build!
You even finished off the deck with a great grill. Looks like you have the same model that I have. Can't beat grilling on a Weber while drinking a homebrew!
You even finished off the deck with a great grill. Looks like you have the same model that I have. Can't beat grilling on a Weber while drinking a homebrew!
BIGREDIOWAN
Well-Known Member
Very nice build, I enjoyed following this thread!
BeardedIdiot
Well-Known Member
So have you actually been using it as a garage, or is it turned into more of a brewhaus/workshop building?
Similar threads
- Replies
- 18
- Views
- 1K
- Replies
- 4
- Views
- 449
