True TDD-2 Kegerator remodel/touchup

Homebrew Talk - Beer, Wine, Mead, & Cider Brewing Discussion Forum

Help Support Homebrew Talk - Beer, Wine, Mead, & Cider Brewing Discussion Forum:

This site may earn a commission from merchant affiliate links, including eBay, Amazon, and others.
Is the beer getting too cold?

The TRUE commercial coolers function on a constant cool/defrost cycle. The compressor cycles on and runs until a thermostat adjustable (cut out) temperature is reached IN the evaporator,...

raouliii:

Thanks so much for this post. It seems after reading this that the thing may be doing exactly what It's supposed to be doing. I'll monitor some liquid temps and see where I am, but the beer is a bit too cold for my preference. I would like to see it at about 38F, but it's my impression that it's closer to 32F.

As for the evap tray and drain tube, I'm going to be testing that whole area today. I've had the unit turned off for 24 hours so I can really go at it.

Anyway, I'm really relieved after reading this thread because it seems that you guys have all had the same issues and most have resolved them. Once I get these issues handled, I know it's going to be a monster unit.

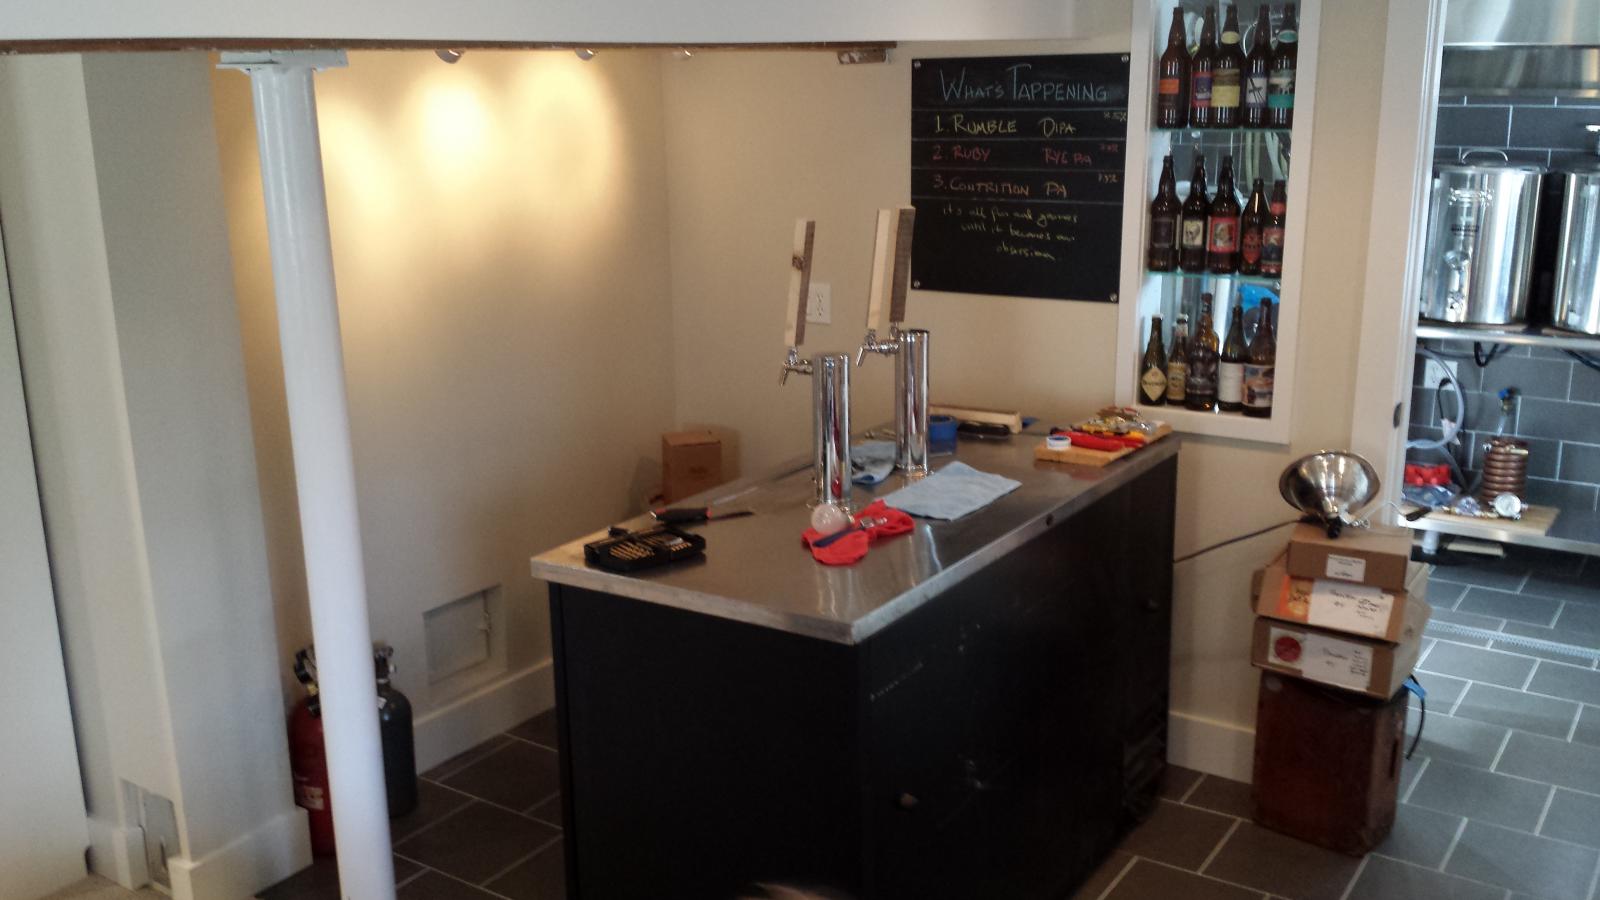
I planning to build a bar around it, so that it's an under-bar unit. Here's a shot of it in position in the tap room area outside the brew-studio.

tdd2Cleaning.jpg
 
raouliii:


Thanks so much for this post. It seems after reading this that the thing may be doing exactly what It's supposed to be doing. I'll monitor some liquid temps and see where I am, but the beer is a bit too cold for my preference. I would like to see it at about 38F, but it's my impression that it's closer to 32F.


As for the evap tray and drain tube, I'm going to be testing that whole area today. I've had the unit turned off for 24 hours so I can really go at it.


Anyway, I'm really relieved after reading this thread because it seems that you guys have all had the same issues and most have resolved them. Once I get these issues handled, I know it's going to be a monster unit.


I planning to build a bar around it, so that it's an under-bar unit. Here's a shot of it in position in the tap room area outside the brew-studio.


Sent from my iPhone using Home Brew
 
raouliii:


Thanks so much for this post. It seems after reading this that the thing may be doing exactly what It's supposed to be doing. I'll monitor some liquid temps and see where I am, but the beer is a bit too cold for my preference. I would like to see it at about 38F, but it's my impression that it's closer to 32F.


As for the evap tray and drain tube, I'm going to be testing that whole area today. I've had the unit turned off for 24 hours so I can really go at it.


Anyway, I'm really relieved after reading this thread because it seems that you guys have all had the same issues and most have resolved them. Once I get these issues handled, I know it's going to be a monster unit.


I planning to build a bar around it, so that it's an under-bar unit. Here's a shot of it in position in the tap room area outside the brew-studio.
Nice bar build and I can also sort of see your brewery build. You have any thread showing off the builds ? Would like to see more of how you have it set up


Sent from my iPhone using Home Brew
 
kchomebrew:

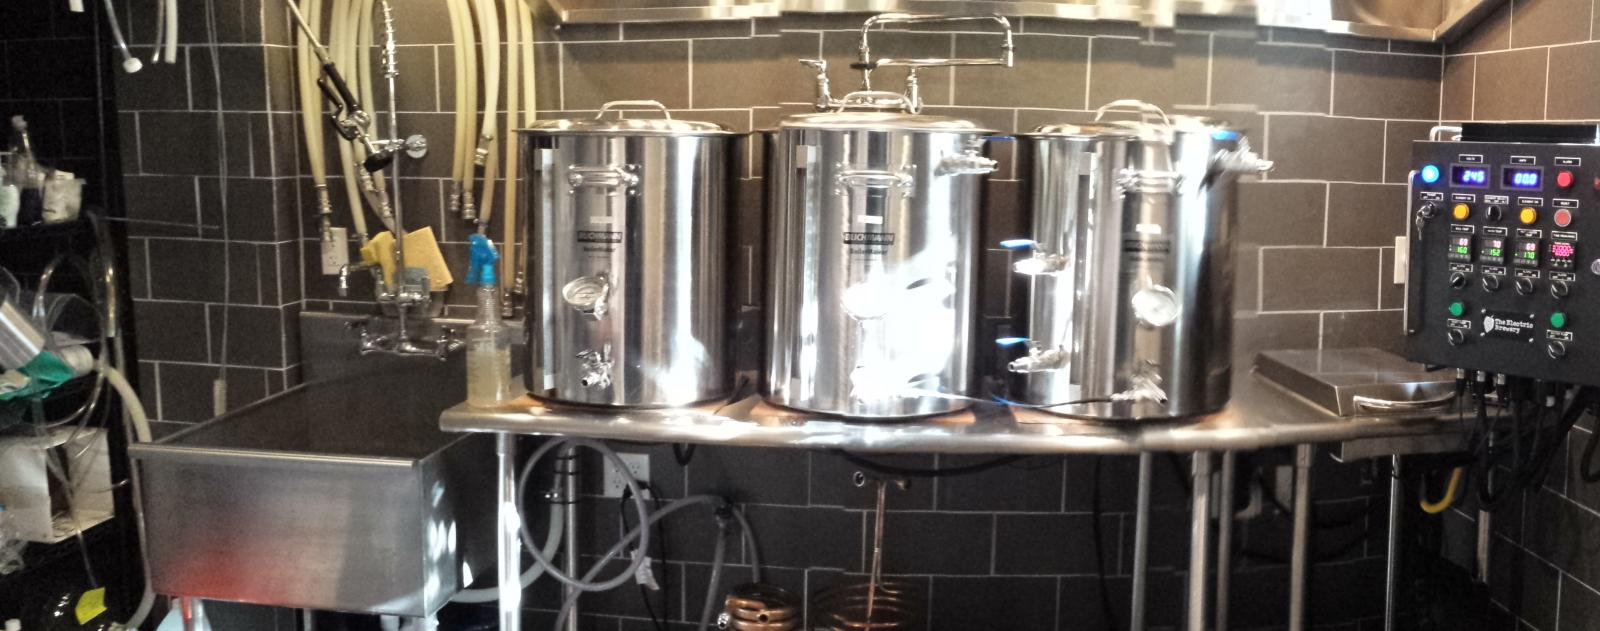
I do have pictures but I haven't set up a thread yet. The brew-studio is a classic Kal style electric brewery. I was dealing with a truly tiny amount of space, but I was able to get just about everything I needed into it. The brew studio area is 8'x12' and is constrained on one side by our furnace.

Here's a shot I did recently. The space is so small I had to pull out a stand-up freezer fermentation chamber conversion just to take the photo - and I had to use freakin panorama mode to get even that.

brewstudio.jpg
 
Meanwhile, back to the TDD-2 remodel/touch-up thread...

So against my better judgement, I pulled the evaporator drip-pan. I've been taking things apart with mixed success since I was a little kid - sometimes it works out okay and I can put them back together :)

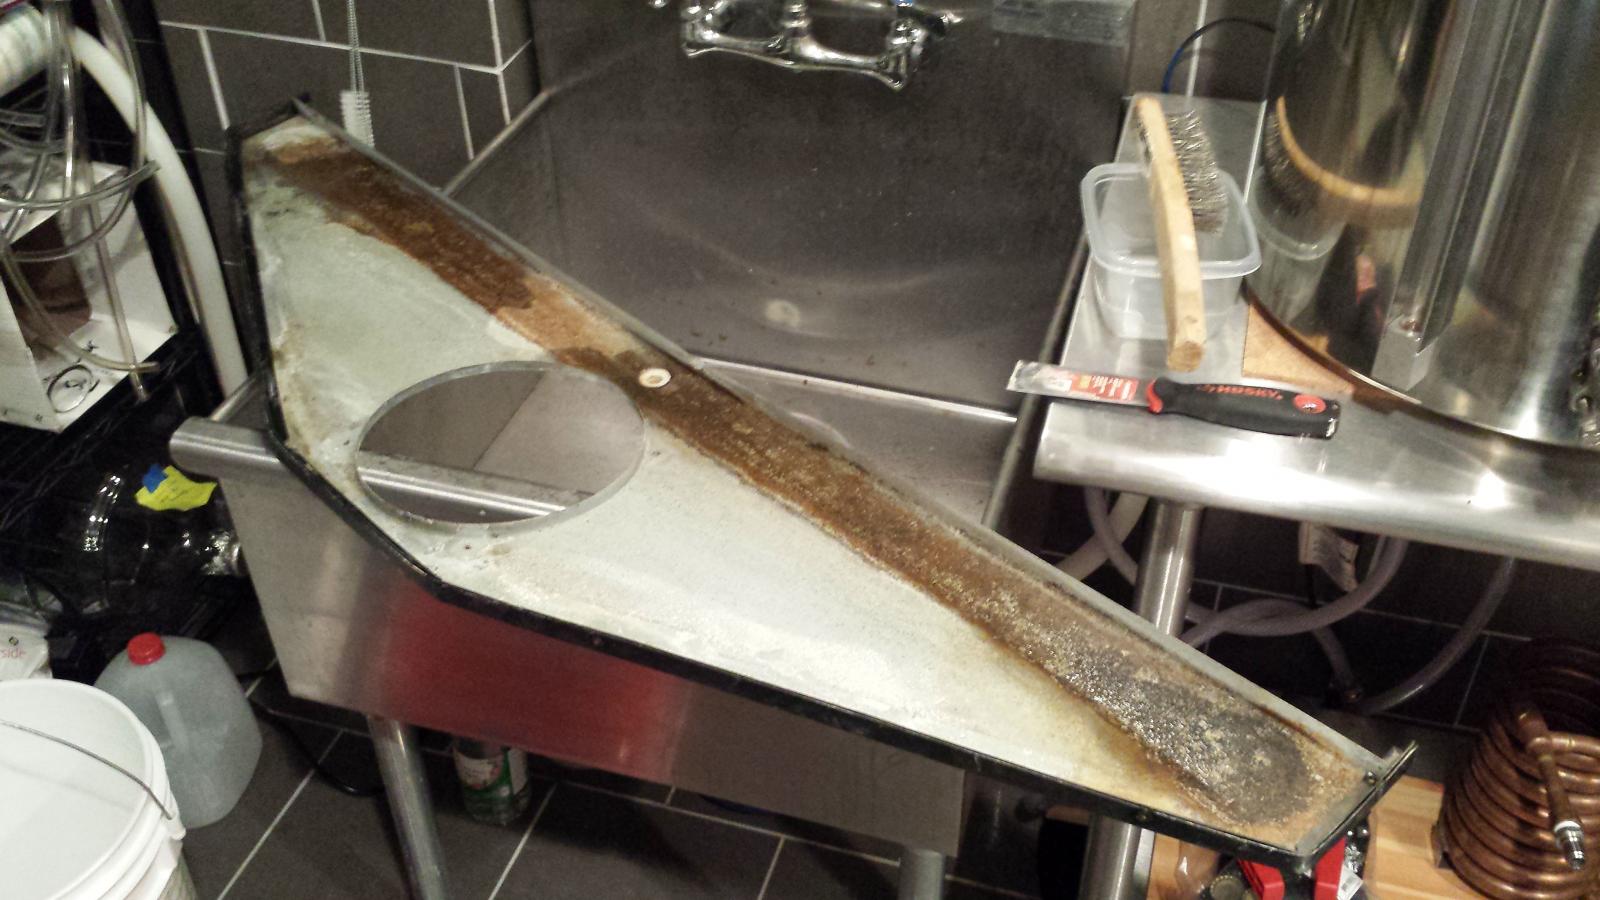
Anyway, this turned out to be a good idea, because, after cleaning it up, I discovered it had many, many pinholes throughout the pan, usually located along obvious rust lines. No amount of spotty efforts to patch it up would have done any good. I now plan to give it a coat of epoxy paint on the inside and the outside and re-install it.

Now that the pan is out I can also clean everything in that area. There was all manner of balled up unidentifiable black guck (technical term). I have also been able to fill and soak the evap pan drain tube with PBW, and then run some rinse water through it. This gave me assurance that the tube is clear.

I hope at the end of this process, I'll have a drip-free and ice free interior. Stay tuned...

evapPan.jpg
 
One thing to add from my post last night - I found a site where a guy used 3M scour pads and used a wooden block to run the scour pad across the stainless top. It's EXTREMELY important you move the scour pad length-wise and with the grain (and also do it in one long trips - don't go back and forth. Just sweeps across the entire length of the fridge in single waves). But if you have scratches etc. on your stainless this is the way to get them out. I'll try and find the video it had a lot of other maintenance tips for these types of refridgerators. I rehabbed mine using all his tips.
 
This photo of the evaporator pan shows a rust area right below where the evaporator is (which makes sense because that's what's going to drip).

It's in that area where the galvanized steel is literally perforated with dozens of tiny pin holes. I still think to seal the pinholes I should paint it with epoxy. Because it's galvanized steel, I was planning to clean, paint with an etching primer, and the topcoat it with epoxy paint.

Any thoughts about this? I haven't looked into buying a replacement part but I was kinda thinking because the thing is 10 years old I probably wouldn't be able to get one...

evapPan2.jpg
 
call these people -

http://restaurant-equipment-parts.com/part/true/870920#.VHN_3ovF-1U

They have the parts probably, but man are they expensive. I've figured out that if you're replacing anything other than the motor you're going to pay a lot. These things are like BMWs or Sports Cars - awesome until they break. But they SHOULD have everything for the TDD-2s

I did find some parts for mine on amazon but you had to do a lot of digging with manufacturer part #'s etc.

Holy crap - that's cool. Thanks for the link. I'll probably do the paint job to try to seal it and see what happens, but these cold air hoses gotta go, so maybe I'll buy replacements for those.
 
Just advice too - they say to call them with your part number. I'd get them on the phone. I bought two pieces from them and only needed one and most of their stuff is not returnable. So I would make crystal clear what you're ordering. I took a huge loss in ordering unnecessary additional parts.


Sent from my iPhone using Home Brew
 
Update to the evaporator drip pan perforation repair....

First of all, for anyone who has water collecting inside your TDD-2, and it's more than 6-8 years old, you almost certainly have a perforated evaporator drip pan. The telltale sign, without disassembling everything, are small dots of rust on the bottom of the pan.

Your evaporator is located along the top of the back wall, and has a galvanized steel drip pan below it, which also houses the evaporator fan. You can see photos of mine, disassembled, earlier in this thread.

After cleaning that thing up, hitting it with some Loctite Rust Neutralizer, and some self etching primer, it became obvious to me that paint was in no way going to seal all those pinholes.

So I mixed up some five minute JB Weld and applied it. It sets pretty fast, which is good, because it took a number of passes to actually hit all the holes (they're hard to see without a light source behind them).

I sanded, and hit it with one more light coat of primer, and now I will topcoat with white epoxy paint. At this point, the thing is sealed, I'm just coating with epoxy just to insure longevity of the repair.

All the above sounds like a lot of work, but it only took sporadic effort over a weekend in between drying and cleaning out the evaporator - that's a story for another post...
 
I had this happen as well. I re-routed the drain tube to where it flows into an existing sink line next to the kegetator. This happened once and I have wood floors. So I needed to make sure it never happened again.
 
Some updates on my TDD-2 refurb. kc - don't mean to hijack your thread - just though it made sense to post here since it's the same tlpic.

I took some time off to get a whole lotta brewing done. I did that and have been using a converted freezer to keep the kegs and serving using picnic taps. Now I'm running out of room in there so I am forging ahead with this refurb and tower makeover.

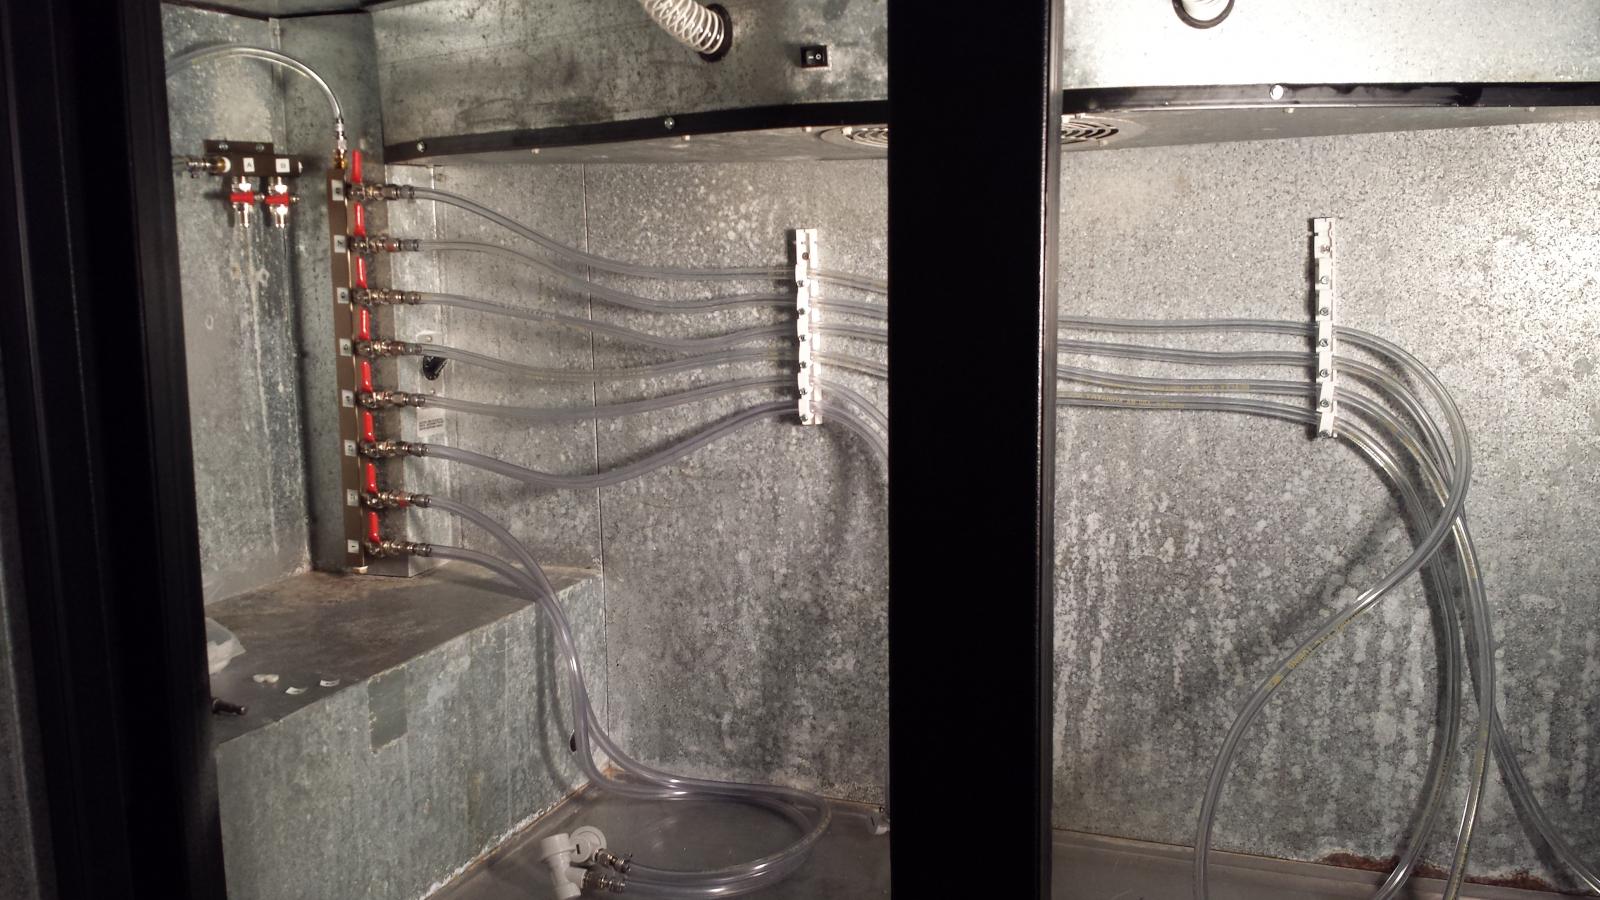
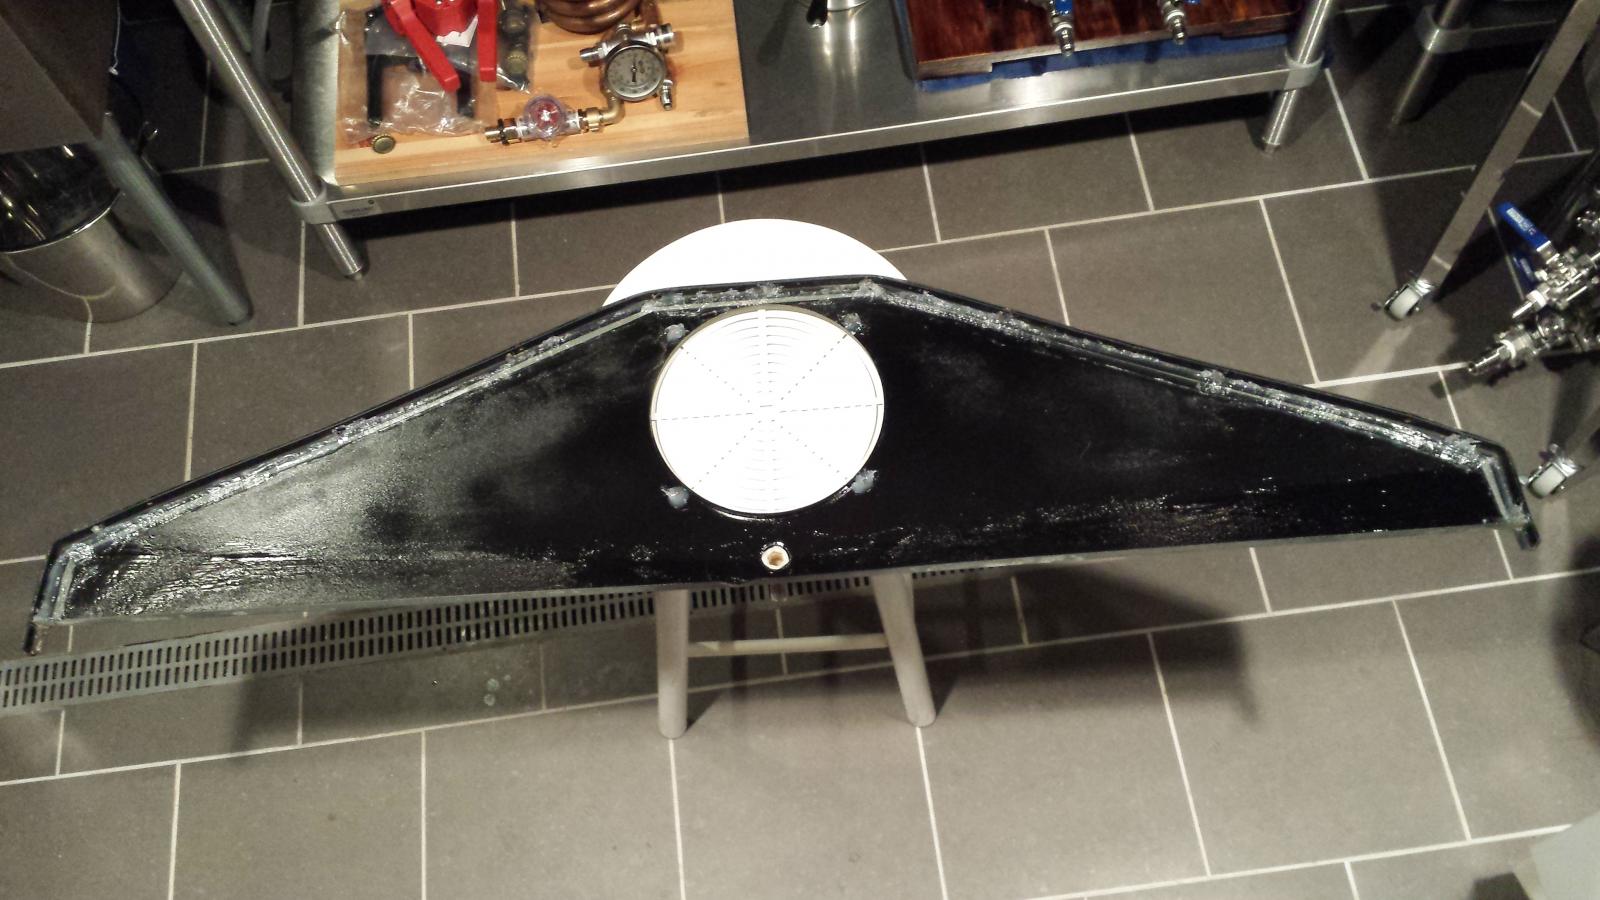
Here are some shots of the evaporator pan patched and painted. I also replaced door gaskets (manufacturer made - expensive but I didn't want to screw around with almost-fit) and cooling air hoses (the old ones were skank).

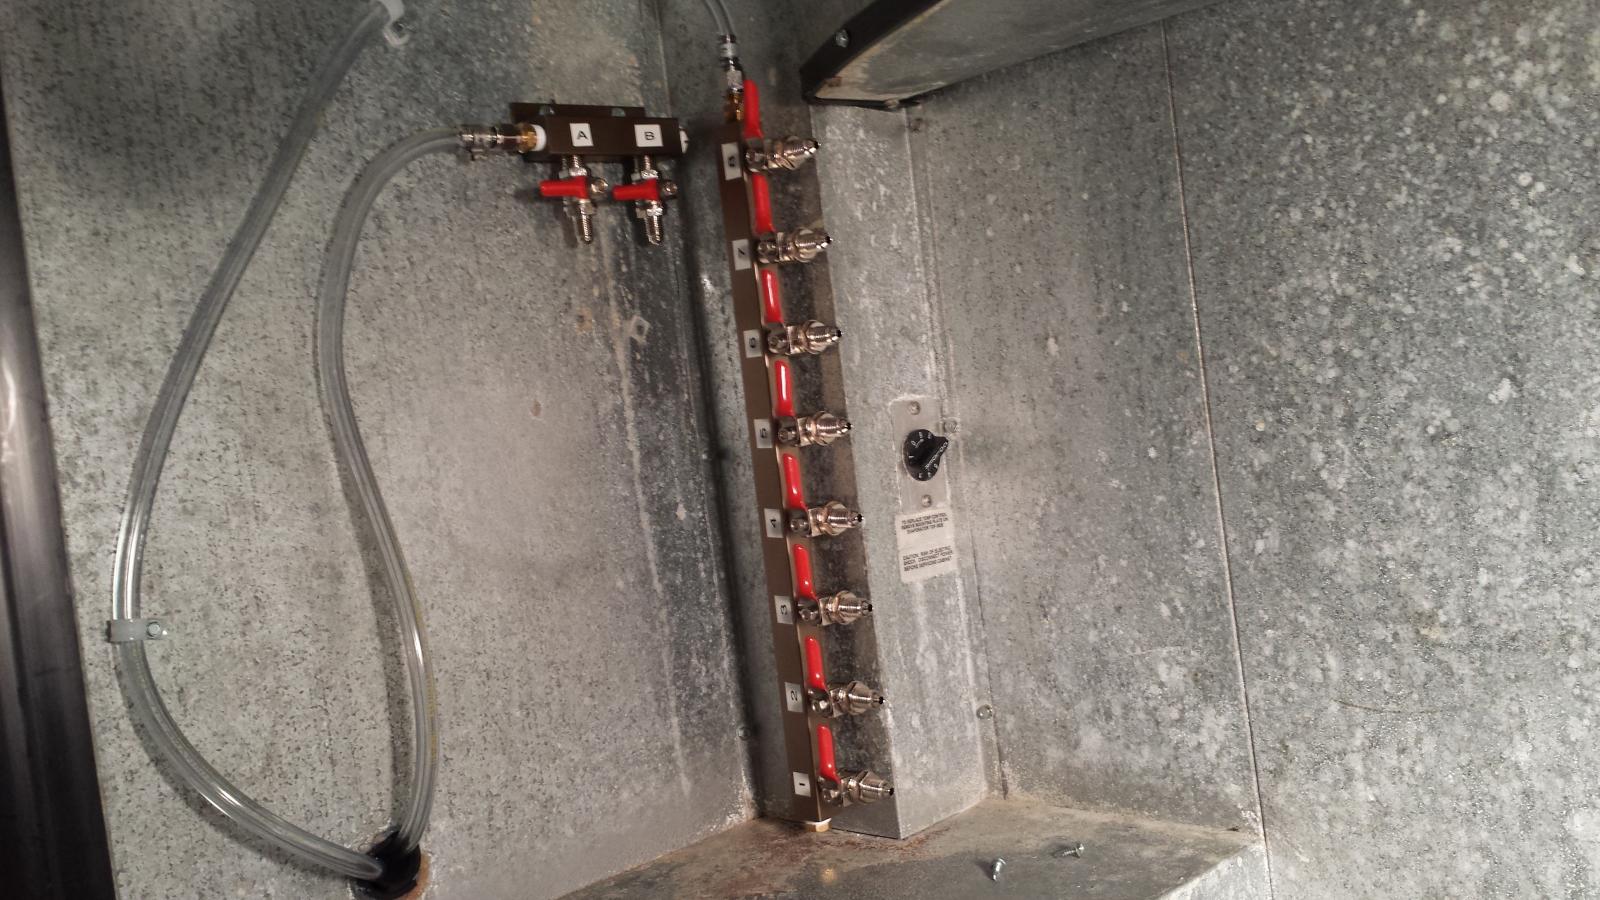
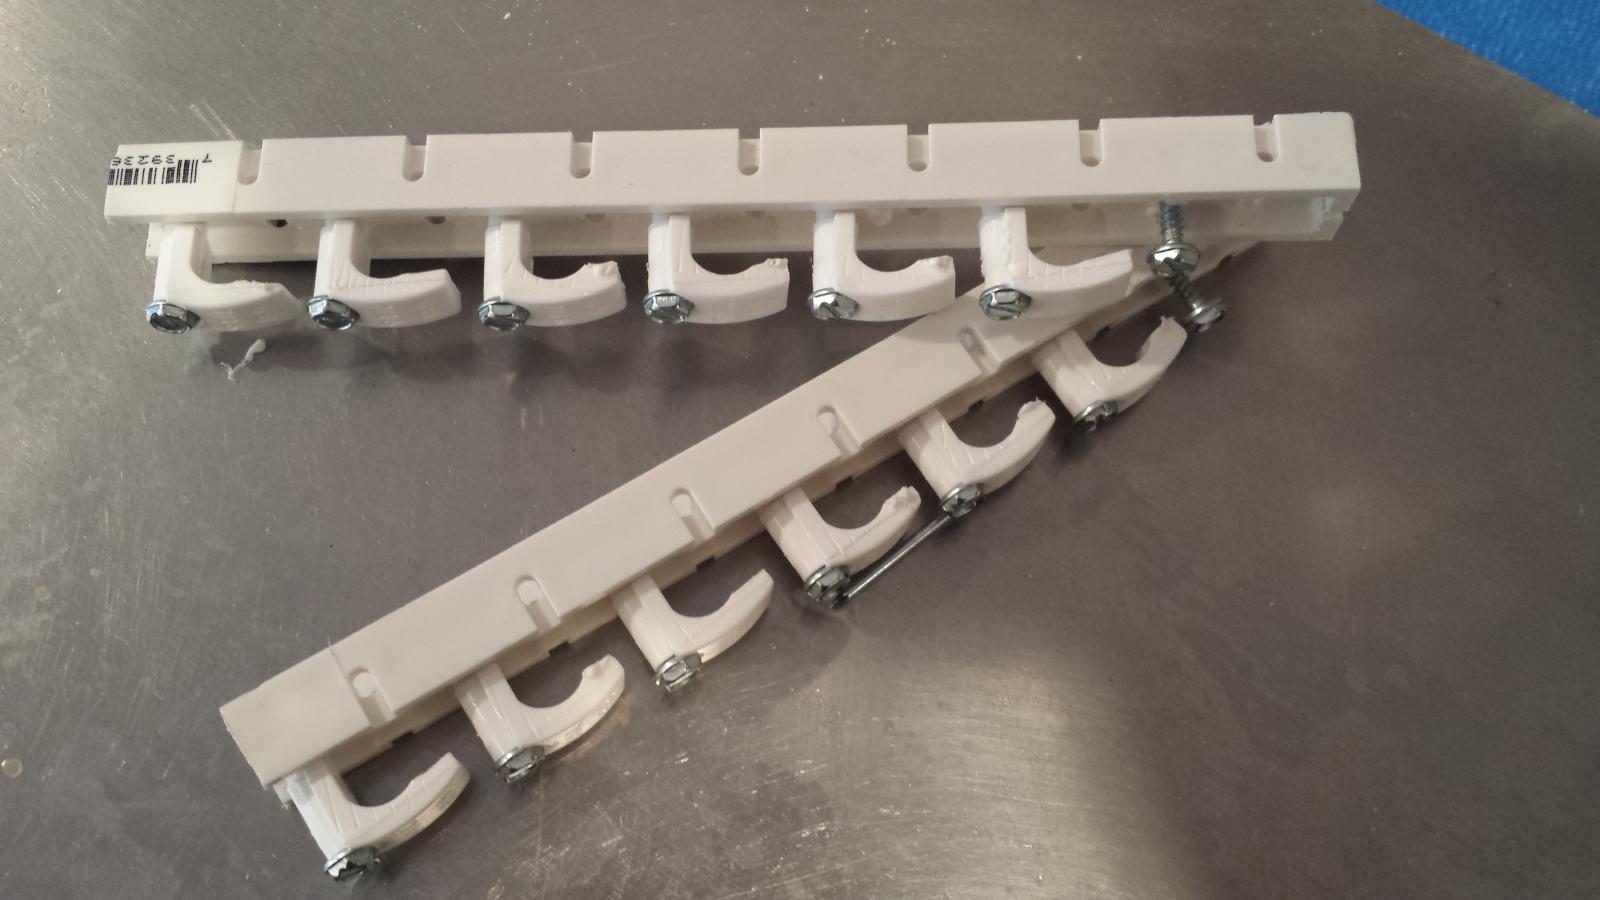
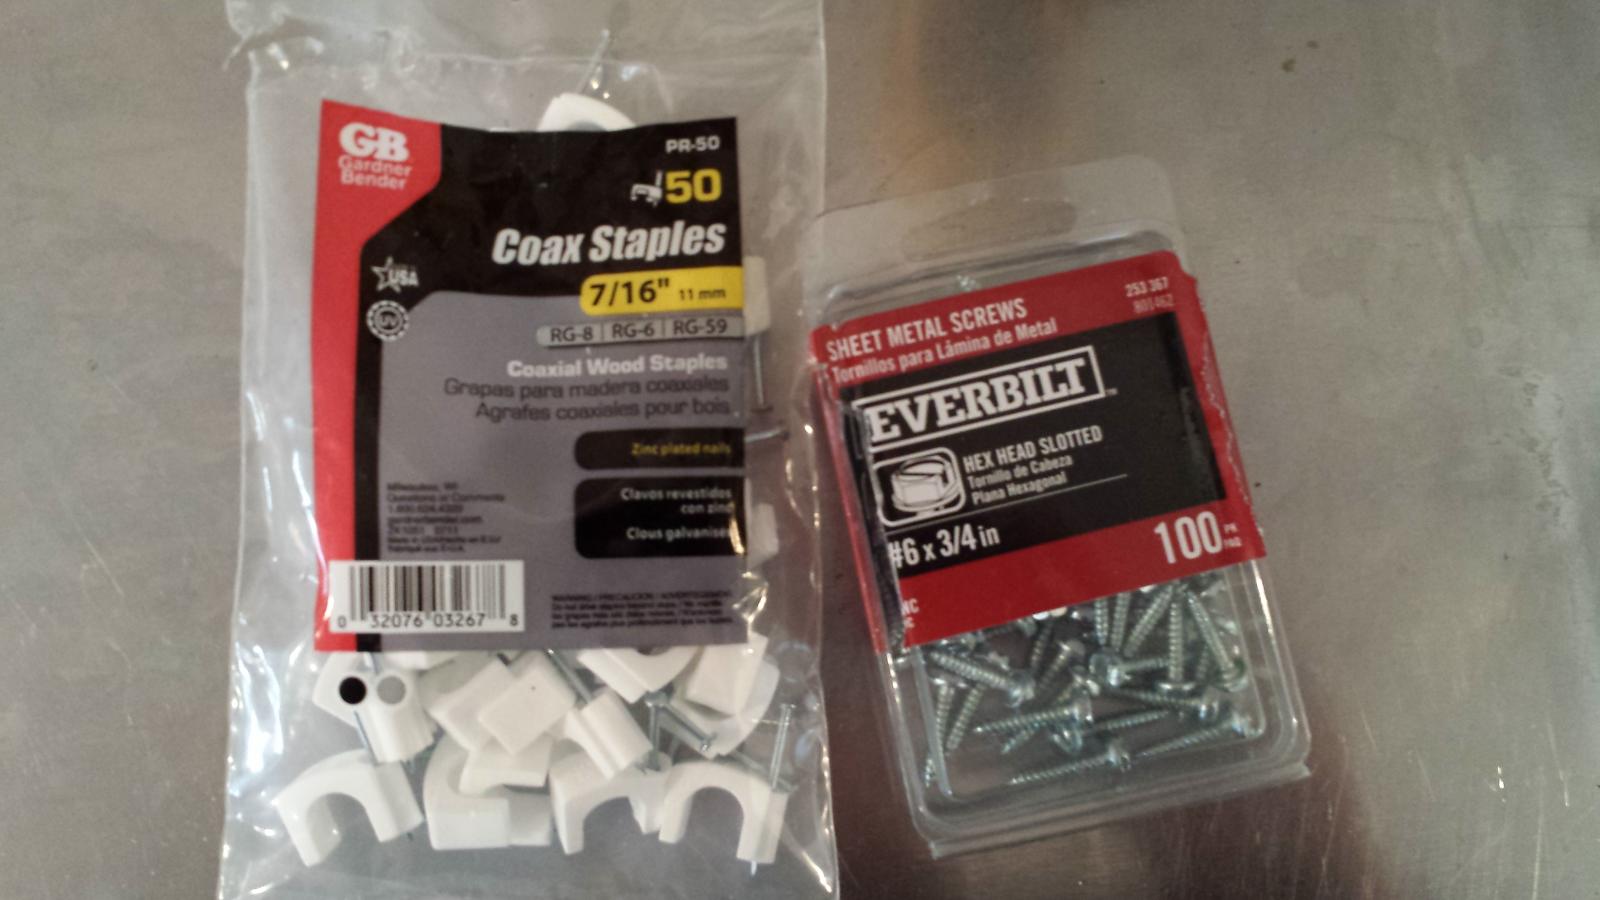
There are also some inside shots of the gas manifolds and gas hose hangers I made, along with some parts shots for the hose-hangers.

I completed the 7-faucet tap tower and will install that shortly. I'll update with more pictures then.

evapPanAfter.jpg


20150405_111703_Flicker Ln.jpg


20150405_123325.jpg


20150405_110834_Flicker Ln.jpg


20150405_110938_Flicker Ln.jpg


20150405_110324_Flicker Ln.jpg


20150405_110216_Flicker Ln.jpg
 
Nice. I've got a 5 tap setup in mine. I've got my regulator on the opposite side.

Noticed my fridge runs constantly but doesn't seem to suck a lot of power which in nice.

I like your hose setup. One thing I've noticed is that hose control is paramount with the number of kegs you can fit in these things.
 
Thanks.

I'll have to watch it to see how it runs. It is a little noisy - and I have a TV and audio setup in that area, so not great as far as that goes.

While I was figuring out the hose runs, I mapped out room for nine cornies. So that's seven on tap and two conditioning or carbonating. I put in the second double outlet gas manifold specifically so I could burst carb new kegs. I'm happy to have all those hose runs off the deck.

BTW - leveled and loaded it up tonight with the six kegs I have ready to go. I've got three of those on picnic taps for now. The primary gas manifold seems to be working just fine.

Next week I'll figure out how to mount the tap tower and finish this puppy off.
 
I put a new set of wheels on mine that are locking - found some cheap ones off amazon but you have to be careful and make sure they can handle the weight.

Does your TDD2 already have holes feeding the top? I actually bought an underbar fridge and drilled holes into the top myself. I found a cheap underwear fridge at an auction site but I noticed it's EXACTLY the same setup and everything as a TDD4.

I just positioned mine and leveled it. I didn't want it on wheels because I'm going to be building a bar around it.

Yes, mine came with two towers and three faucets, so it had two thru holes in it for the towers. At first, I cleaned up the towers, changed out the tower insulation, upgraded the faucets to Perlick 630SS and put in new bev lines. It was pretty cool and worked like a dream.

But I wanted more faucets, so I made a 3" black pipe 7 faucet T tower. The existing holes line up with the inside of the holes. I'll have photos of the new tower installation shortly but here's what the top looked like before and after I removed the old towers (before I cleaned it up!).

tdd2TopTowersRemoved.jpg


tdd2Cleaning.jpg
 
I just positioned mine and leveled it. I didn't want it on wheels because I'm going to be building a bar around it.

Yes, mine came with two towers and three faucets, so it had two thru holes in it for the towers. At first, I cleaned up the towers, changed out the tower insulation, upgraded the faucets to Perlick 630SS and put in new bev lines. It was pretty cool and worked like a dream.

But I wanted more faucets, so I made a 3" black pipe 7 faucet T tower. The existing holes line up with the inside of the holes. I'll have photos of the new tower installation shortly but here's what the top looked like before and after I removed the old towers (before I cleaned it up!).

I noticed that you said you were going to build a bar around it. I had the same thing done and I kepy having freeze up problems inside, so I had to adjust the cut-out and (knock on wood) gent had any problems since. Just a bit of advice in case u run into a similar problem after u build the bar around it.
 
I noticed that you said you were going to build a bar around it. I had the same thing done and I kepy having freeze up problems inside, so I had to adjust the cut-out and (knock on wood) gent had any problems since. Just a bit of advice in case u run into a similar problem after u build the bar around it.

Thanks for the heads-up t_d_harvey. I was planning to keep open the two vent areas on the lower front and rear corners by putting in a cover vent in the front and doing nothing in the back (that will be open). Do you think I'm okay there?
 
Hey Philip do you have any troubles with your beer coming off your taps and NOT going into the spill tray? I have the exact same spill tray you have but when my beer comes down from the taps it splashes everywhere rather than going down the tray. I'm considering changing out my spill tray but haven't researched any replacements yet.

It's definitely something you're probably going to have to consider as you move away from the factory perlick taps. If you come up with something let me know and I will do the same.
 
This is a bit different than the coolers you guys are working with. But i have a bev air freezer that I'm turning into a ferm chamber.

Holds 12 cornies. (Not sure if the top would support that weight tHough)

Can i just feed my temp probe wire through the door and tape it to my FV for temp control?

IMG_20150203_152008.jpg
 
in the pic my JC a419 probe is 0laced in a growler of water inside the freezer. The temps would swimg pretty widely.

I was thinking id have better results with an stc probe stuck to the FV
 
This is a bit different than the coolers you guys are working with. But i have a bev air freezer that I'm turning into a ferm chamber.

Holds 12 cornies. (Not sure if the top would support that weight tHough)

Can i just feed my temp probe wire through the door and tape it to my FV for temp control?

Yes - there's all kinds of methods for which you can set the temp probe inside. You could tape it to a keg, let it just stay out there in the air, or you could take a cold can of beer and tape it to the outside of the beer can.

My only suggestion is that you want to tape it to something that has some sort of mass. It will reduce the # of temp swings and the time between your freezer cycles.
 
Frost, when I get home I will post some photos of my fermentation vessel. I use a water bath that is my carboy (5 gallons) + bath (about 3 gallons around the carboy). It holds temp extremely well.
 
Cool. Thanks bondra.

Side note. Think it will work up against a plastic speidel FV? I'm thinking i will need to do your water bath method because the plastic is pretty insulating.

Or build a thermowell. : (

On second thought, the probes are pretty flexible.. maybe i could just sanitize that probe and slip it through that giant air lock those come with.
 
Hey Philip do you have any troubles with your beer coming off your taps and NOT going into the spill tray? I have the exact same spill tray you have but when my beer comes down from the taps it splashes everywhere rather than going down the tray. I'm considering changing out my spill tray but haven't researched any replacements yet.

It's definitely something you're probably going to have to consider as you move away from the factory perlick taps. If you come up with something let me know and I will do the same.

Are you talking about spilling beer??? Sacrilege!

I will have to see about that. When I add the new 7-tap, double-T configuration tower I've been working on, that's definitely going to be an issue because the side faucets won't even be over the drip tray.

But honestly, I've been keeping a bar rag folded up under the faucets, and if I pour carefully and the beer is pouring well, I've found the Perlick 630SS's drip a few times after shutoff and that's about it. So I'm not seeing a real flow of beer onto the drip tray.

...which is a good thing because the drain for the drip tray runs to a 1/2" PVC fitting at the base of the kegerator and I haven't plumbed that to anything.
 
Thanks for the heads-up t_d_harvey. I was planning to keep open the two vent areas on the lower front and rear corners by putting in a cover vent in the front and doing nothing in the back (that will be open). Do you think I'm okay there?
I believe if u do have have vents built in to allow circulation you will be fine. unfortunately I did not account for that in the rear of mine, but the cut-out was not hard to change so no big deal.
 
This photo of the evaporator pan shows a rust area right below where the evaporator is (which makes sense because that's what's going to drip).

It's in that area where the galvanized steel is literally perforated with dozens of tiny pin holes. I still think to seal the pinholes I should paint it with epoxy. Because it's galvanized steel, I was planning to clean, paint with an etching primer, and the topcoat it with epoxy paint.

Any thoughts about this? I haven't looked into buying a replacement part but I was kinda thinking because the thing is 10 years old I probably wouldn't be able to get one...
I doubt anybody is still checking his thread, but I've recently noticed my tdd2 (built in 1993!) has an ice skating rink in the bottom. While investigating I've noticed that the entire bottom of what I think is the evapoator cv we assembly is rusted through and I found the elbow drain on the bucket where I've been catching the water. Is this a fix that can be done by a pretty non-mechanical guy??
 
Mikey,

It's hard to tell, but do you have a drain hose coming from that pan? See my picture below. I have actually bypassed mine and connected a T and hoses to re-route to a bucket. How these are supposed to work is that any water that collects in that pan runs into a hose that is under the compressor I believe (bottom left of mine). The water is suppose to evaporate from the pan from the heat of the compressor. I re-routed for a few reasons, which I can explain if u would like.
Back to your water pan, easy fix? Only thing I could suggest is trying to replace it. I am not positive, but think it is held together with screws and can be removed and replaced if you can find the part. I have the same issue with the ice in the bottom of the cooler and you will continue having this problem if you don't fix it, because you basically have a "leak" and eventually it will get worse. The pan is there for the defrost problem. I have noticed multiple times I've build up on the coils behind the pan and when the unit defrosts the water holds in that pan and goes through a drain hose, at least that is how mine is suppose to operate.

IMG_5370.jpg
 
Thanks for the response, Harvey. There was an elbow drain that attached to a drain that disappears into the back wall of the kegerator. I assume this routes to the drain pan by the compressor. When I bought the unit that drain was cut and the water was dripping into a bucket that was placed on the floor of the unit. That worked until now. I'm assuming that the water eventually ate through the evaporator and if I replace that piece I can at least funnel that water into a bucket. I found a replacement for the evaporator cover assembly for 163 on a restaurant equipment website.
 
Okay, so that's clear now.

What I can tell you from experience with my setup, which is identical. I removed that drain-pan and did a lot of work to patch the drain holes. It is now leaking again, so I'm just going to replace it - so I think you've got the right idea.

Note: The drainpan itself is that odd shaped piece on the bottom. You can replace it by removing the sheet metal screws along the edges - no need to remove the entire framed-out box that extends to the roof of the kegerator (can you tell I made that mistake???)

Also, as cocked up as the drain-thru-backwall-to-an-evaporator-pan-under-the-compressor arrangement sounds, it actually works. When you get your new drain-pan, it will have a new elbow fitting on it. Make sure to ream out that drain tube to insure it's clear, and then just hook it back up and you should be good to go.

Have fun lying on your back, with your neck aching, half way in and half way out of that damned box, trying to get enough light in there to see what the hell you're doing!!! I know I did (and I am going to have to do it again soon to replace the thermostat - the fun never stops! Next time, as cheap as I am, I'm paying up and buying new).

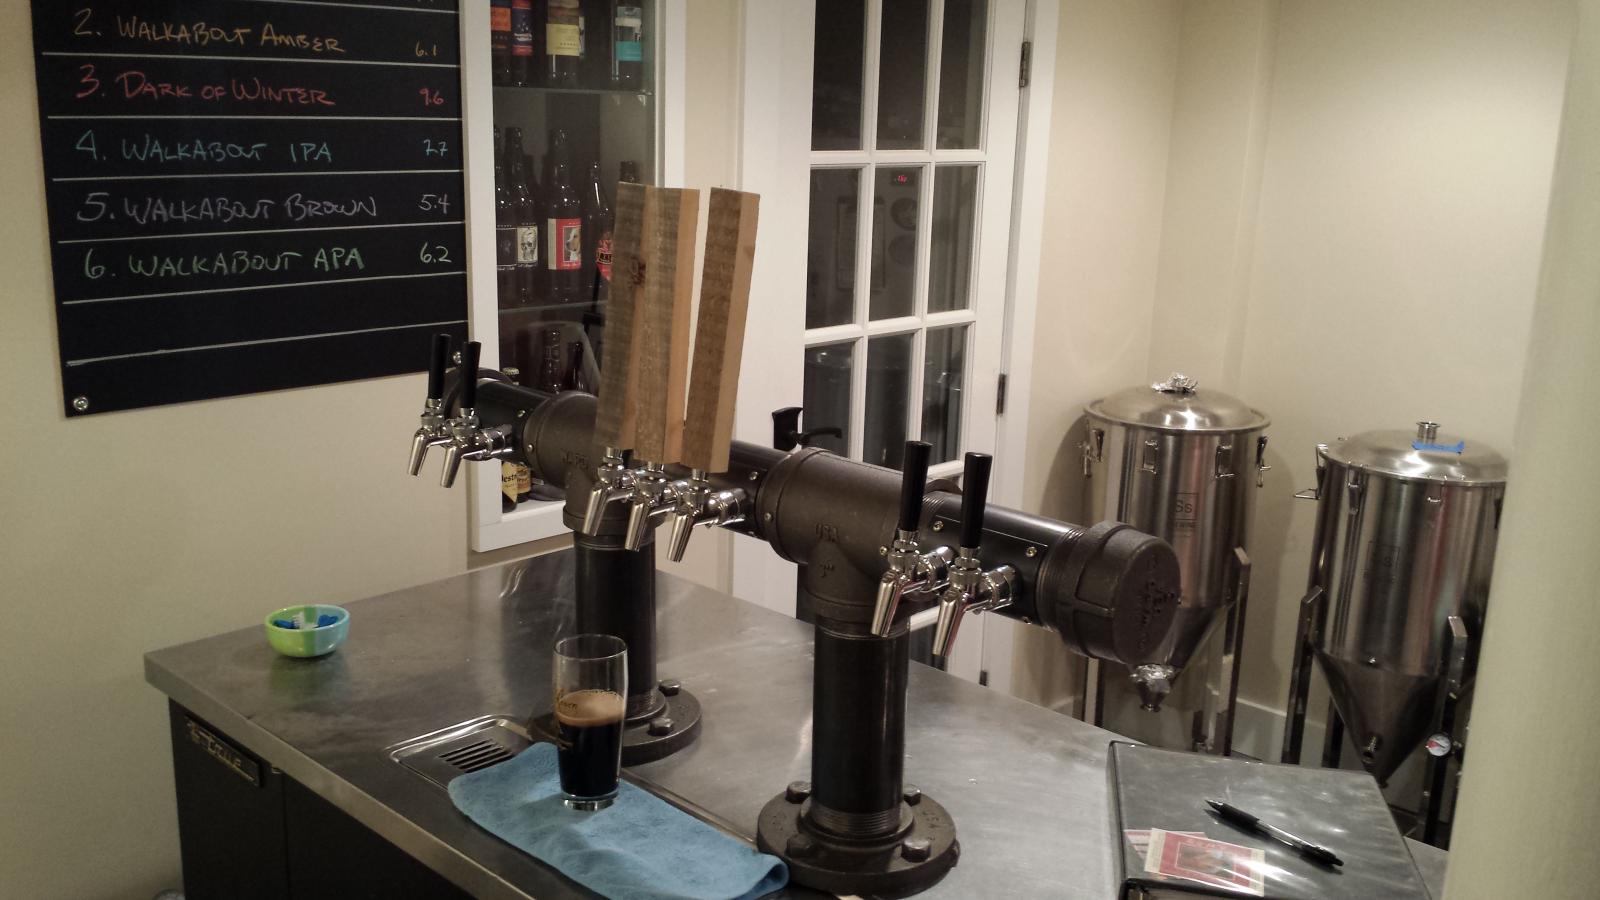
As inspiration - here's a shot of this unit now fully restored with upgraded tap gang...

20150419_213552_Flicker Ln.jpg
 
Ha! Thanks so much for the response. I believe I'll be ordering the part today. It looks like it'll take about 1-1.5 weeks to get here, but I'll update when it's complete. Thanks again for the info.
 
Thanks - and BTW could you share that web site and maybe the part number where you saw that $163 evap pan replacement? The only thing I've found is for $300!!!
 
Back
Top