That would work. You will find the recovery isn't as fast as a dedicated glycol chiller, but it will work. FWIW, no need to dedicate a keg to this---any reservoir will work.
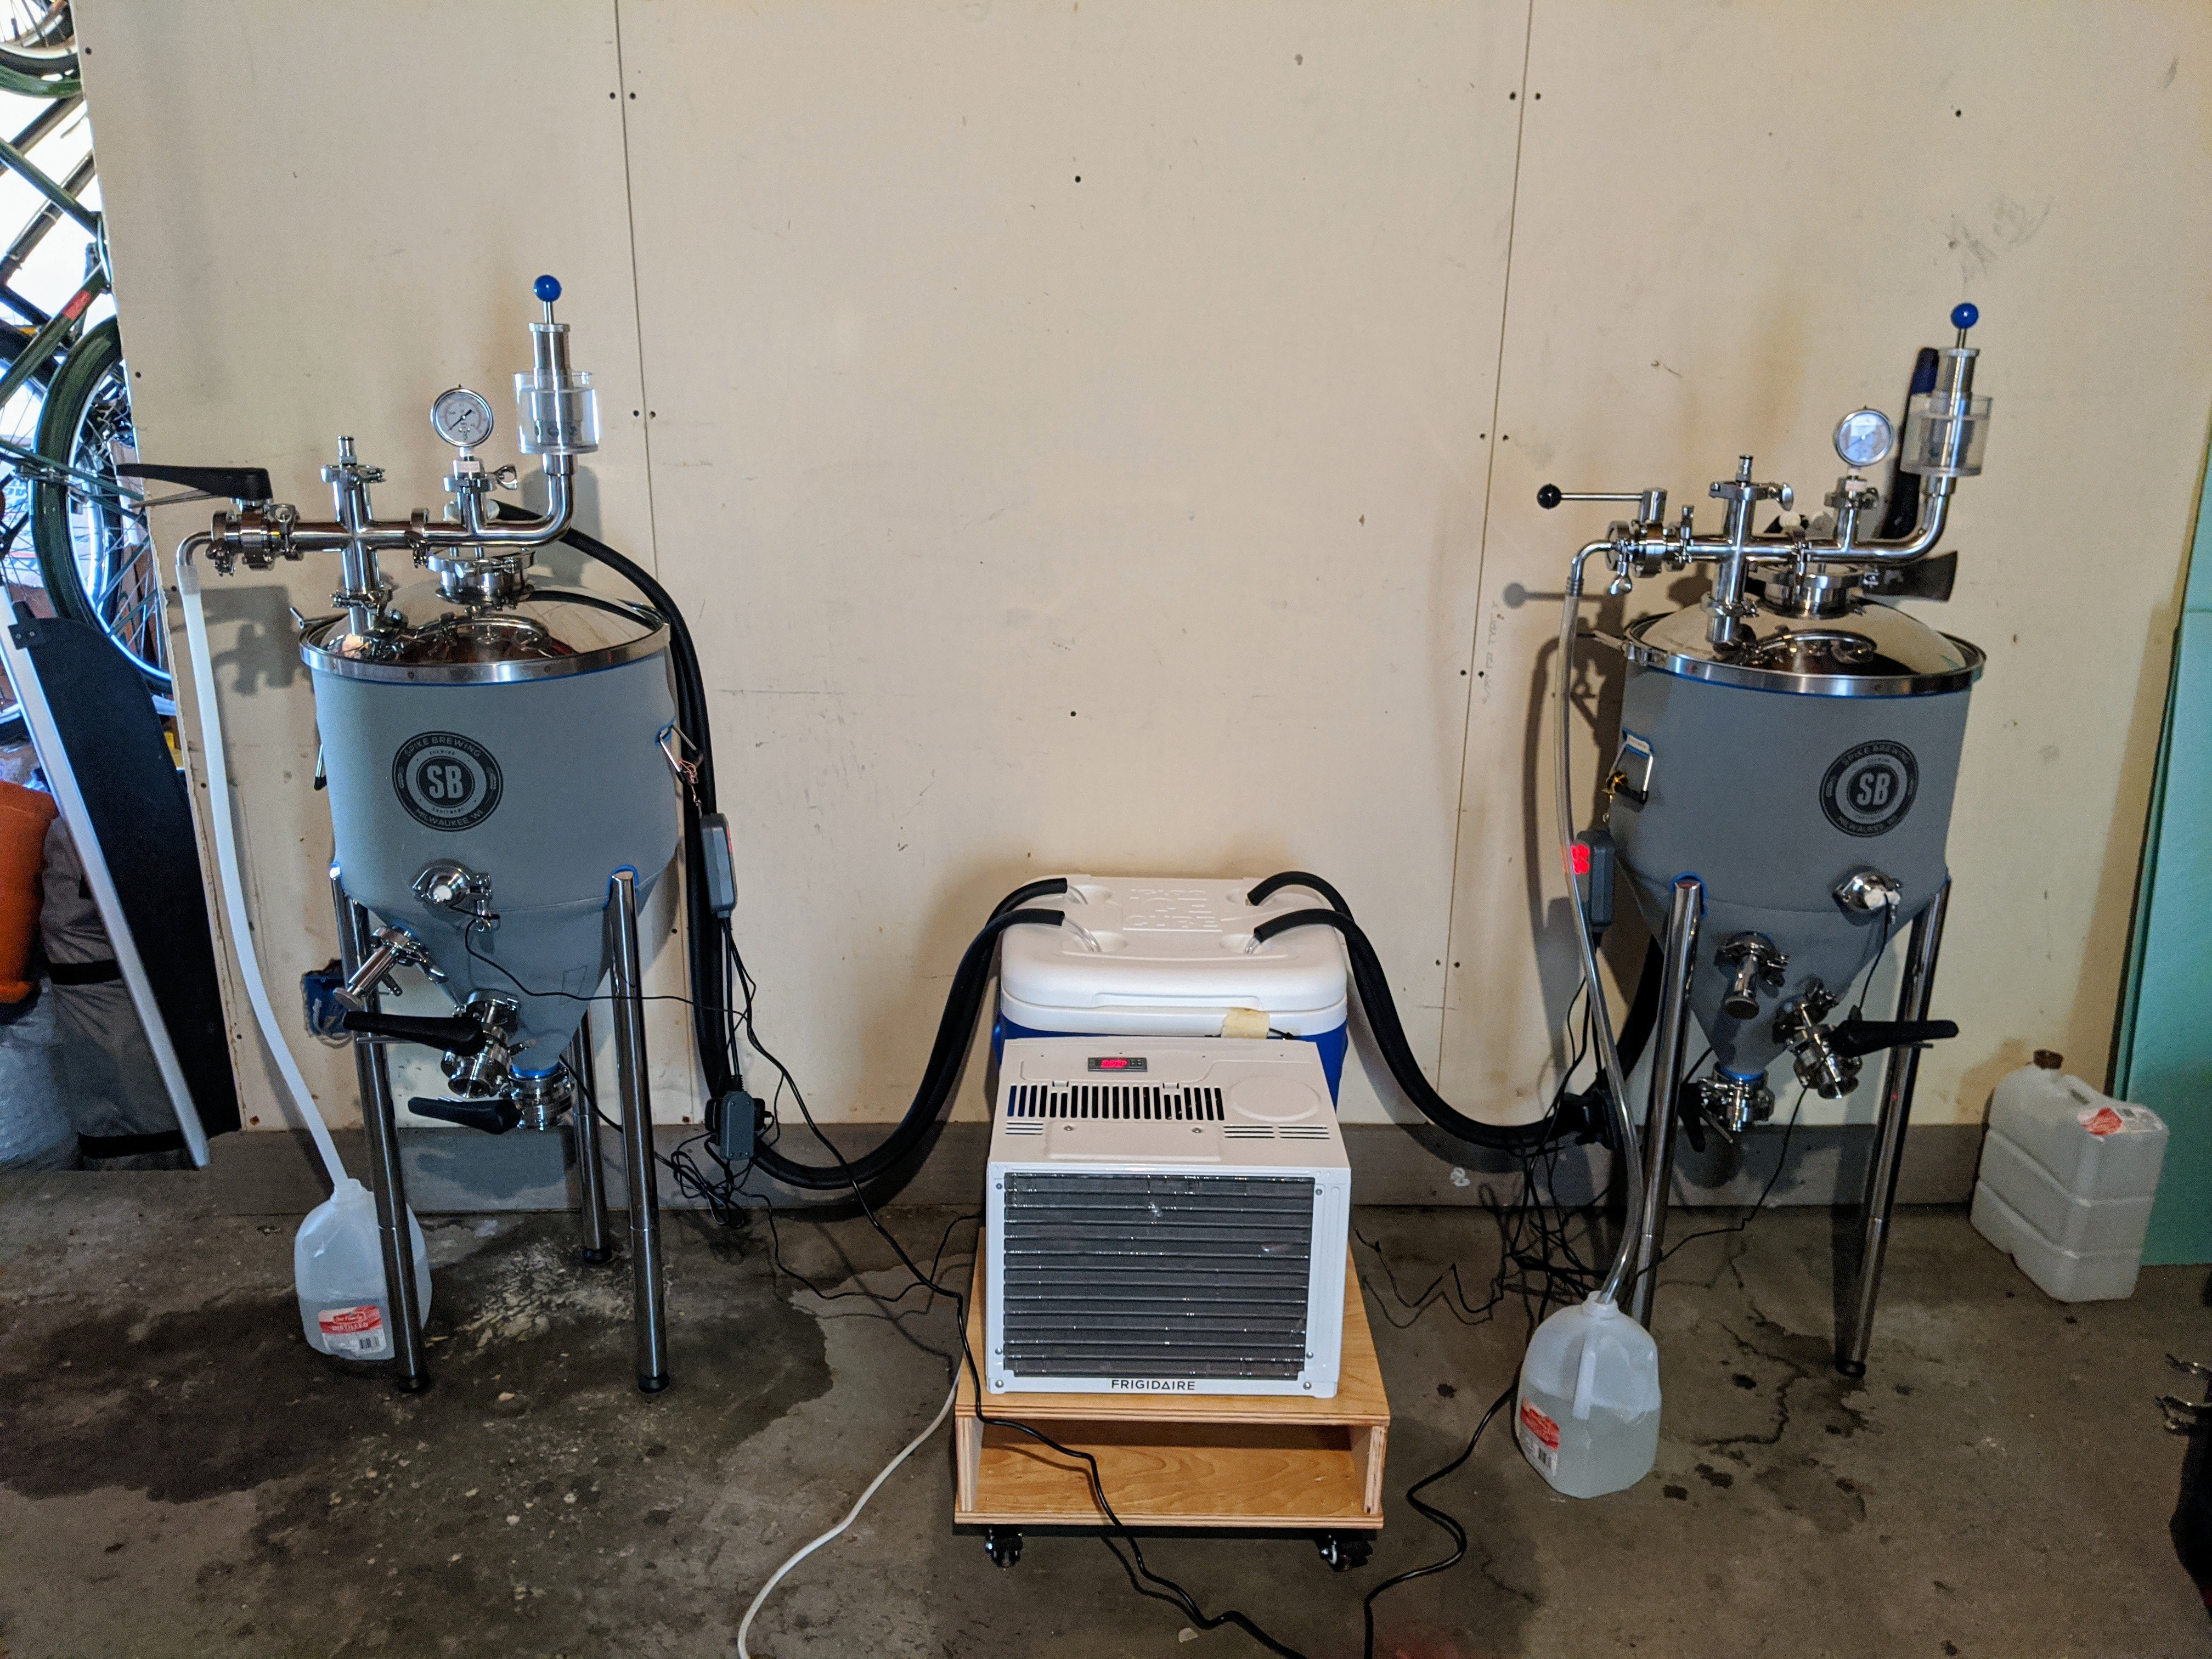
I did something like this along the way to buying my glycol chiller. I set up a reservoir in the freezer compartment of my larger ferm chamber, drilled a couple holes in the top of the unit and ran the hoses in that way. I had two Inkbirds controlling this, one to control the glycol chilling the fermenter, one controlling the refrigerator/freezer.
And it worked. The cost was minimal--maybe $50 or so.
Now, having said that, response was a little slow. It worked well enough to hold temps as low as 50 without any problems. But one thing was clear: I couldn't get the fermenter below about 38 degrees on a good day, and I wanted to crash it down to 30 or so.
Where a dedicated freezer would excel on this is with defrost; my fridge has a defrost cycle which, of course, tended to warm up my glycol solution. A dedicated freezer w/o defrost cycle would be better.
If I can find the thread where I detail all this, including pics, I'll edit it in.
*********
So why did I buy my Penguin? I thought that A) I would be able to get that fermenter down to 30 or 32, and B) I thought there was a good chance I'd expand, and I'd need a dedicated chiller for that.
*********
EDITED TO ADD:
Running tubing through freezer for wort chilling
This shows what I did. I made a heat sink out of some scrap aluminum I had (riveted it together), then spliced some copper tubing into the "circuit," and even had a fan in there blowing over the heat sink and copper tubing to try to improve performance.
It helped somewhat, but in the end, I opted for the Penguin. Part of me wishes I had not--the setup I had DID work to manage ferm temps, and it did that quite well. It was just the crashing I couldn't do, and in the end, it wouldn't have been the end of the world if the best I could do was 38 degrees.
Know why? Because I can't get it below that temp with the penguin, unless the garage where I have all this is pretty cold (sub 50 degrees). I was on an odyssey to figure out how to insulate the fermenter to allow that crash temp, but nothing was particularly effective. I tried wrapping the fermenter with a moving blanket, tried using reflectix on everything (see pic below, my wife called it the "Tin Man"), even built a "closet" out of pegboard into which I directed the cold air from a window air conditioner. None of it worked to improve the low temperature I could achieve.
I have one more thing to try, and that's to use 2" foamboard to make a "ferm chamber" inside which the fermenter will....well, chill. If I can isolate the fermenter from ambient, I think that would work.
But all that is tangential to the issue of whether you can do this in a freezer. Answer: Yes. I've done it.
View attachment 680772

")