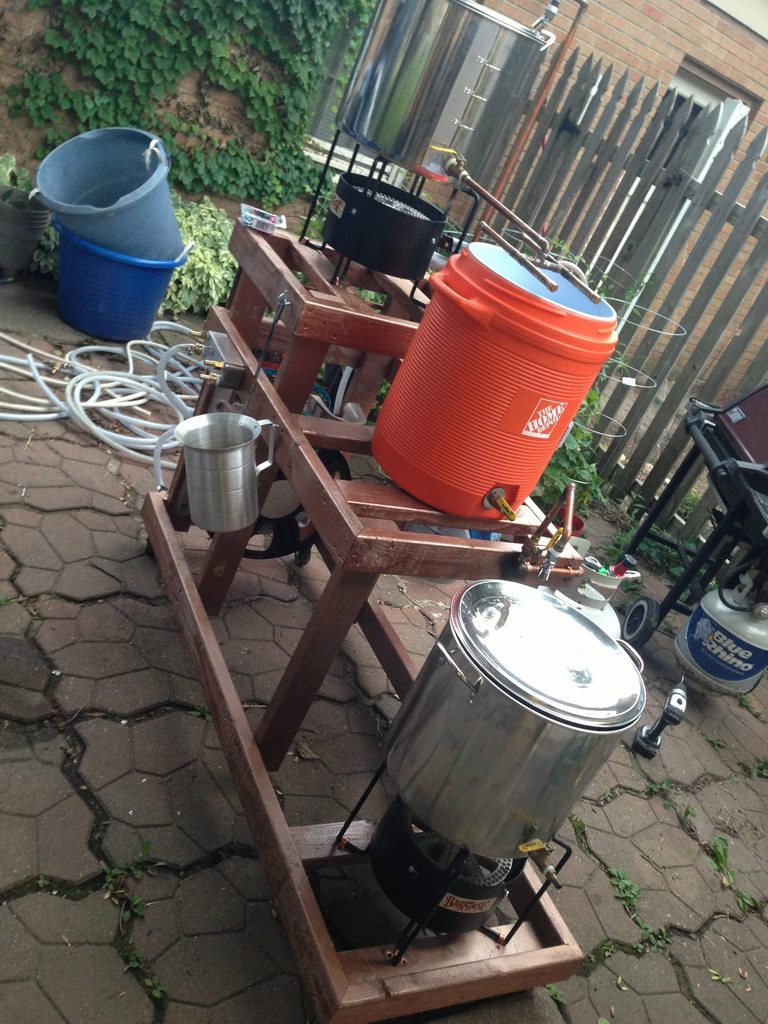
Show Me Your Wood Brew Sculpture/Rig

Homebrew Talk - Beer, Wine, Mead, & Cider Brewing Discussion Forum

Help Support Homebrew Talk - Beer, Wine, Mead, & Cider Brewing Discussion Forum:

This site may earn a commission from merchant affiliate links, including eBay, Amazon, and others.
I emailed Thompson's to see what the official response would be. For whatever it's worth, here's the email conversation:

Me:
I'm planning to build a wooden workbench. There will be a propane burner with 24" stainless steel legs sitting on top of the bench. The flame is directed up. There could be some wooden structure beside the burner also. The wood should not have direct contact with the flame, but be exposed to heat that radiates on the sides and bottom. I would like to seal the bench with Thompson's Water Seal, but I wanted to check about the flammability of the product once it's dry and whether the heat would cause any fumes. Thanks.

Thompson's:
Our products can only withstand up to 120 degrees F. It sounds as though you surface may get hotter than 120 degrees F. If this is the case do not use our products. Once our products have fully cured (20-30 days after application) they are no longer toxic nor are they a flame risk.

Me:
Thank you. That's very helpful. One clarification. If it is non-toxic and not a flame risk after 20-30 days, what would the result be of exposure to 120+ degree temperatures?

Thompson's:
The product will turn black, peel, crack, and basically fail when exposed to temps higher than 120 degrees F.

Very interesting. I wonder how a polyurethane spray would hold up under the heat. My rig has had no issues with the spray so far.
 
Very interesting. I wonder how a polyurethane spray would hold up under the heat. My rig has had no issues with the spray so far.

just look up the MSDS sheet for any of your products used. i just looked up rustoleum polyurethane spray since its mosty what you would find in any store. this might just be before application but one thing that looks like a general consensus amoung a polyurethane coating is...

CONDITIONS TO AVOID: Avoid temperatures above 120 ° F. Avoid all possible sources of ignition.

HAZARDOUS DECOMPOSITION: By open flame, carbon monoxide and carbon dioxide. When heated to decomposition, it emits
acrid smoke and irritating fumes.
 
Temperature cautions usually mean while applying so you don't have blowtorch in your hand. As far as durability under high temps I would use exhaust manifold paint, rated to withstand temps much higher than BBQ paint. They will all produce odors at high temps, at least for awhile.
 
There is lots of great information in this thread! Thanks all for the ideas.

Here is my new gravity stand based on what others have done on this forum. Thanks for the helpful tips.

image-1859117843.jpg
 
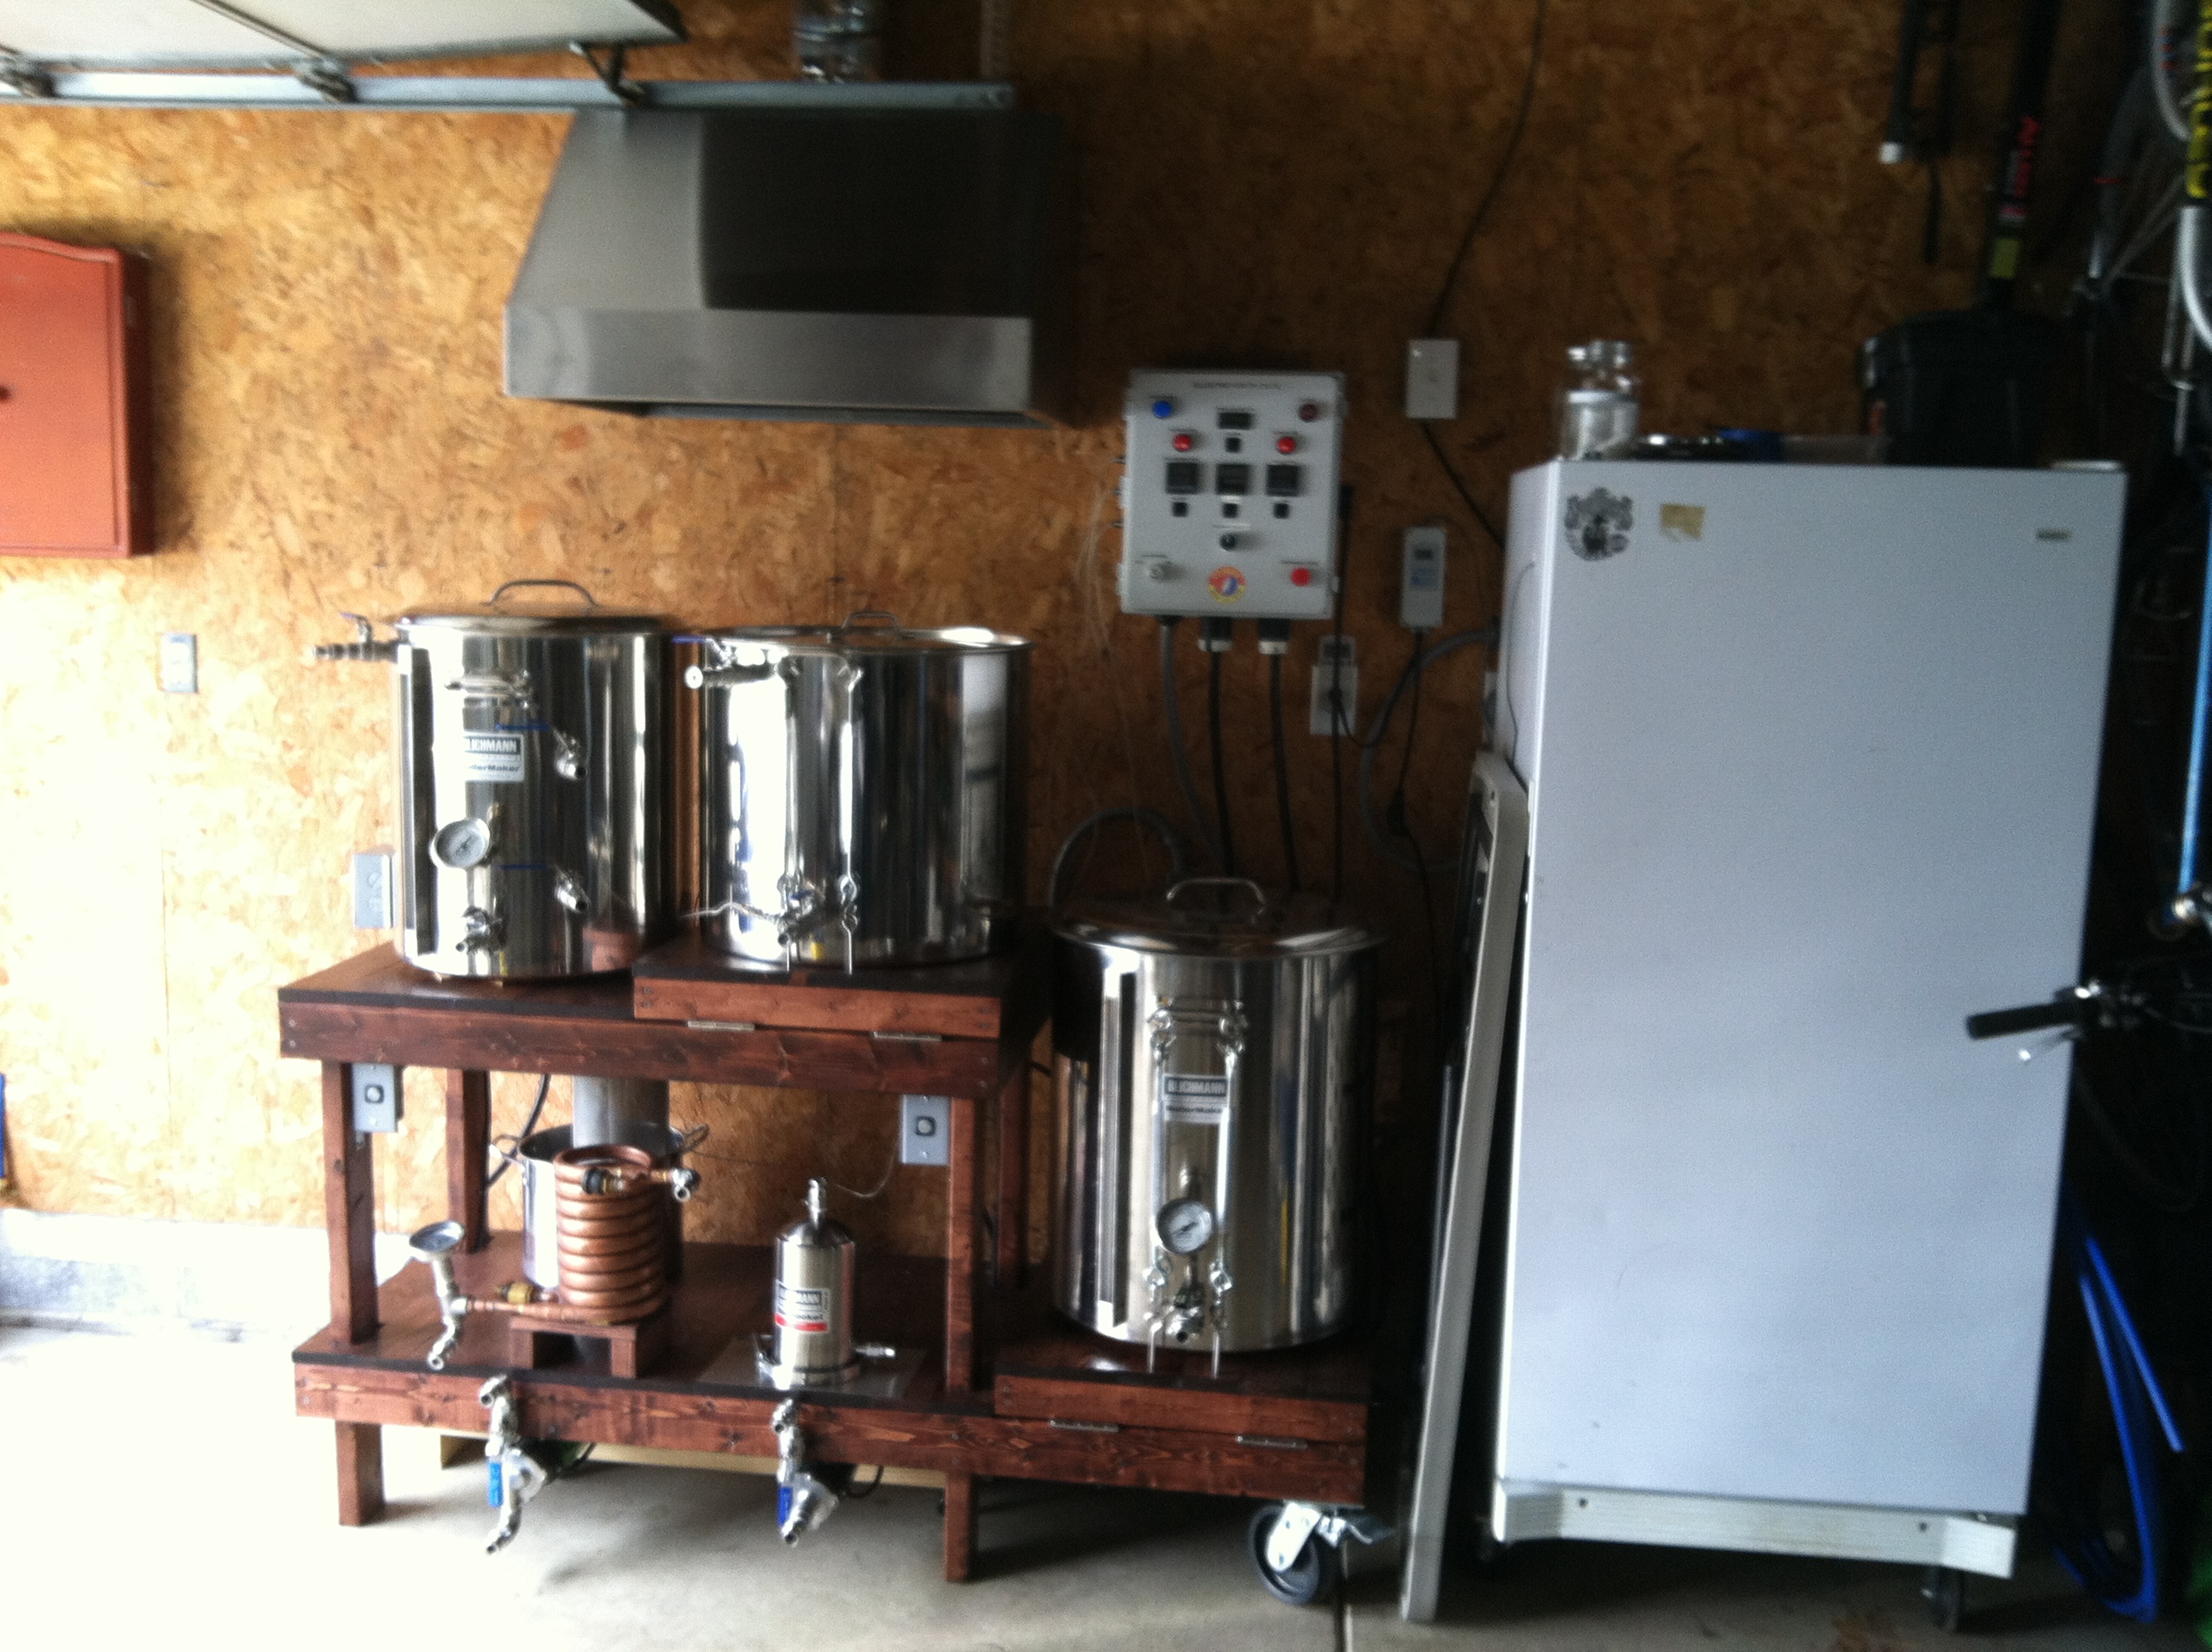
BFD Brewhaus v2.0 - Single level platform for three Blichmann floor LP burners and two March 815 pumps (HLT kettle and third burner future)...gas manifold, NG conversion and HLT/MLT temperature control automation are future upgrades...

Updated BFD Brewhaus v2.1 - Added third burner and 15g HLT and automated burner control for the mash tun and HLT. Takes the adrenalin infused rage out of holding a mash temp and mashing out...
BFD Brewhaus was designed to keep any flammable material outside and below the burner shield perimeter. I used 1" angle iron back to back to make a "T" platform to mount the burners. The wooden frame was given a light spray of polyurethane clear coat to inhibit water infiltration. After I built it and fired up the burners, I found that the burner shields do get pretty hot, but the wooden frame surfaces and the steel angle below the burners were barely warm to the touch. I think I could have gotten by with wood to support the burners.

DSC_6781cls.jpg


DSC_6753.jpg


DSC_6763.jpg


DSC_6796rcl.jpg
 
Updated BFD Brewhaus v2.1 - Added third burner and 15g HLT and automated burner control for the mash tun and HLT. Takes the adrenalin infused rage out of holding a mash temp and mashing out...
BFD Brewhaus was designed to keep any flammable material outside and below the burner shield perimeter. I used 1" angle iron back to back to make a "T" platform to mount the burners. The wooden frame was given a light spray of polyurethane clear coat to inhibit water infiltration. After I built it and fired up the burners, I found that the burner shields do get pretty hot, but the wooden frame surfaces and the steel angle below the burners were barely warm to the touch. I think I could have gotten by with wood to support the burners.

Very nice........DROOOOOOLLLL!
 
Still need to add some sort of drip pan under burners to catch stuff that falls down and possible boil over. Also need to figure out how to attach the chiller?
 
Update on progress of my brew stand. Pomp tool box is reconfigured and ready to go. Added se heat shielding to protect the wood around the burners. Added a clear plastic covering to the tops to protect the wood and give a smooth work surface.

woo that is sexy! :mug:
 
Oh, and since I added the new BoilerMaker HLT, figured I'd post a couple pics...


tell me, what is the metal skin around your burners made of? I have some heat bleed that I intend to contain but my old man and I couldn't decide what material might be best for this.
 
tell me, what is the metal skin around your burners made of? I have some heat bleed that I intend to contain but my old man and I couldn't decide what material might be best for this.


Zoom in on it about 3 times.........Looks thin and easily trimmed and formed to me......


I would guess roof flashing.:mug:
 
Zoom in on it about 3 times.........Looks thin and easily trimmed and formed to me......


I would guess roof flashing.:mug:

Exactly. Galvanized roof flashing. It was a 24 inch x 10 foot roll. I cut 2 2'x2' squares for under the burners. I then trimmed up some sections to make wind screens for the KAB6s.
 
ccostel said:
Update on progress of my brew stand. Pomp tool box is reconfigured and ready to go. Added se heat shielding to protect the wood around the burners. Added a clear plastic covering to the tops to protect the wood and give a smooth work surface.

Wow... That's a gorgeous rig man.
 
image-1343092375.jpg

This is what I just finished. Brewed a 10 gallon batch last Wednsday. Worked pretty well. Needs a little tweaking. Much better than my old method. I like pumps
 
I see a lot of people using kegs for there rigs... how...if there is a way... to obtain such items??
 
You can find them the right way (buy from somewhere that obtained the kegs legally) or the wrong way which is usually how people get them (Craigslist, etc. ). If people just put a deposit down and never return the keg it's still property of the brewery. The breweries will decommission the kegs eventually though and sometimes will sell to places that will then resell them.
 
You can find them the right way (buy from somewhere that obtained the kegs legally) or the wrong way which is usually how people get them (Craigslist, etc. ). If people just put a deposit down and never return the keg it's still property of the brewery. The breweries will decommission the kegs eventually though and sometimes will sell to places that will then resell them.

True, but when that happens someone got charged $300 by the brewery or whatever the fee is for not returning a keg. So its not like the breweries or bars are losing money right?
 
I've never seen anyone put that amount down as a deposit on a keg. It's usually like $60-$80 which would not pay for that keg.
 
FuzzeWuzze said:
True, but when that happens someone got charged $300 by the brewery or whatever the fee is for not returning a keg. So its not like the breweries or bars are losing money right?

Well, perhaps someone does pay, but who? Not the person who ends up with the keg.

I got my officially decommissioned kegs from a beer distributor for around $60 each. You just have to ask around.
 
I've been working on a three tier with an adjacent dolly. I would make a few major changes if I built another one. Should be finished and will brew on Sunday.

ForumRunner_20130801_220025.jpg


ForumRunner_20130801_220047.jpg


ForumRunner_20130801_220103.png
 
Ajgeo said:
Here is my rig, the Electro-brew 2000. Wood two tier with a tippy dump mash tun and tippy dump boil kettle. 20 gallon HLT, 23 gallon MLT, and 30 gallon boil kettle. Electric system based on Kal's design.

That is simply beautiful!!!
 
Thefirebuilds said:
I await your feedback, HBT.

I present, Brewpocalypso:


CLICK THE IMAGE FOR THE FULL ALBUM OF PICTURES.


Looks good. I would be concerned about the instability of 50 lbs of propane hanging off the back, though. You might consider mounting just one tank underneath and splitting the supply with a Mr. Heater F271735 Y Female Adapter.


image-1470388210.jpg
 
Looks good. I would be concerned about the instability of 50 lbs of propane hanging off the back, though. You might consider mounting just one tank underneath and splitting the supply with a Mr. Heater F271735 Y Female Adapter.


View attachment 139786

Just guessing the weight of Brewpocalypso, I would think it would be fairly stable without any brewing vessels, and very stable with filled brewing vessels.

The stand has a fairly wide footprint front to back, perhaps 30", and looks rather heavy...the center of the propane bottles only looks to 6-8" off the back of the stand.

An easy test of stability would be to try and lift the front of the stand with full propane tanks, and unloaded stand to see how potentially tippy it is toward the rear..
 
I've been trolling this thread for quite a while, getting ideas and making plans for my own stand. Its a work in progress and hope to have it done in the next week or so. I was going to wait to post pics until it was done but I'm getting excited about how it is coming out and wanted to reach out for any ideas.

I wanted a BIAB setup that I could wheel outside or at least to the edge of the garage depending on the weather. I wanted some storage space built in as well a a counter top to work from. Lastly, I wanted to have my grain mill built in.

Last night we finished up the structure with the help of my 5 year old. A good friend donated some really neat tile I will be installing tonight. Have to mount the mill and pump, do a little touch up with the stain, add some hooks for hanging things like hoses, mash spoons, ect...

Any comments or ideas?

IMG_5213.jpg


IMG_5214.jpg
 
Finally sat down over the last 2 days and made this. I will take it for an inaugural brew session tomorrow with an Oktoberfest. I will probably take more pictures of it "in action" tomorrow. I was looking for something simple, yet something that didn't take up a larger footprint than the brew stand I had been using.

image-3800324303.jpg
 
Here's a little better picture of it in action this morning. Definitely enjoying the use of the pump for fluid transfer. Found my grain might have been milled a touch too fine for my false bottom, it's being a bit finicky but should still work. Definitely looking forward to the addition of the RIMS system to maintain mash temps.

image-2457299800.jpg
 

Latest posts

Back
Top