Sanke Fermentation: Yeast/Trub Harvester build

Homebrew Talk - Beer, Wine, Mead, & Cider Brewing Discussion Forum

Help Support Homebrew Talk - Beer, Wine, Mead, & Cider Brewing Discussion Forum:

This site may earn a commission from merchant affiliate links, including eBay, Amazon, and others.

maierhof

Supporting Member
HBT Supporter
Joined
Apr 14, 2013
Messages
497
Reaction score
55
Location
San Mateo
Ok - so I saw the post by PlinyTheMiddleAged and that was all I needed to get my latest project off the ground.

For over a year now I have been envisioning a way to do this with ball jar and the proper lid - he found them and away I go now.

Holy Shiznit - getting all the parts for this thing was expensive!

I just spent around $130 for:

3 Wide-Mouth Jar Bands (Rings)) Item Price: $11.95

6 x Tank Post & Dip Tube Nipple - Weld-in-Place - Stainless Steel (TankNipple-WIP 15C07103ih) $26.58
3 x Cornelius & AEB - Spartan - Super Champion. Gas IN (TankPlug-CorneliusGAS-15C07115IH) $29.55
3 x Cornelius & AEB - Spartan - Super Champion. Liquid OUT (TankPlug-CorneliusLIQ-15C07116IH) $29.55
3 x Diptube - Liq out - Firestone/Spartan Straight (DiptubeStrght-5gal - 15C07129IH) $33.75

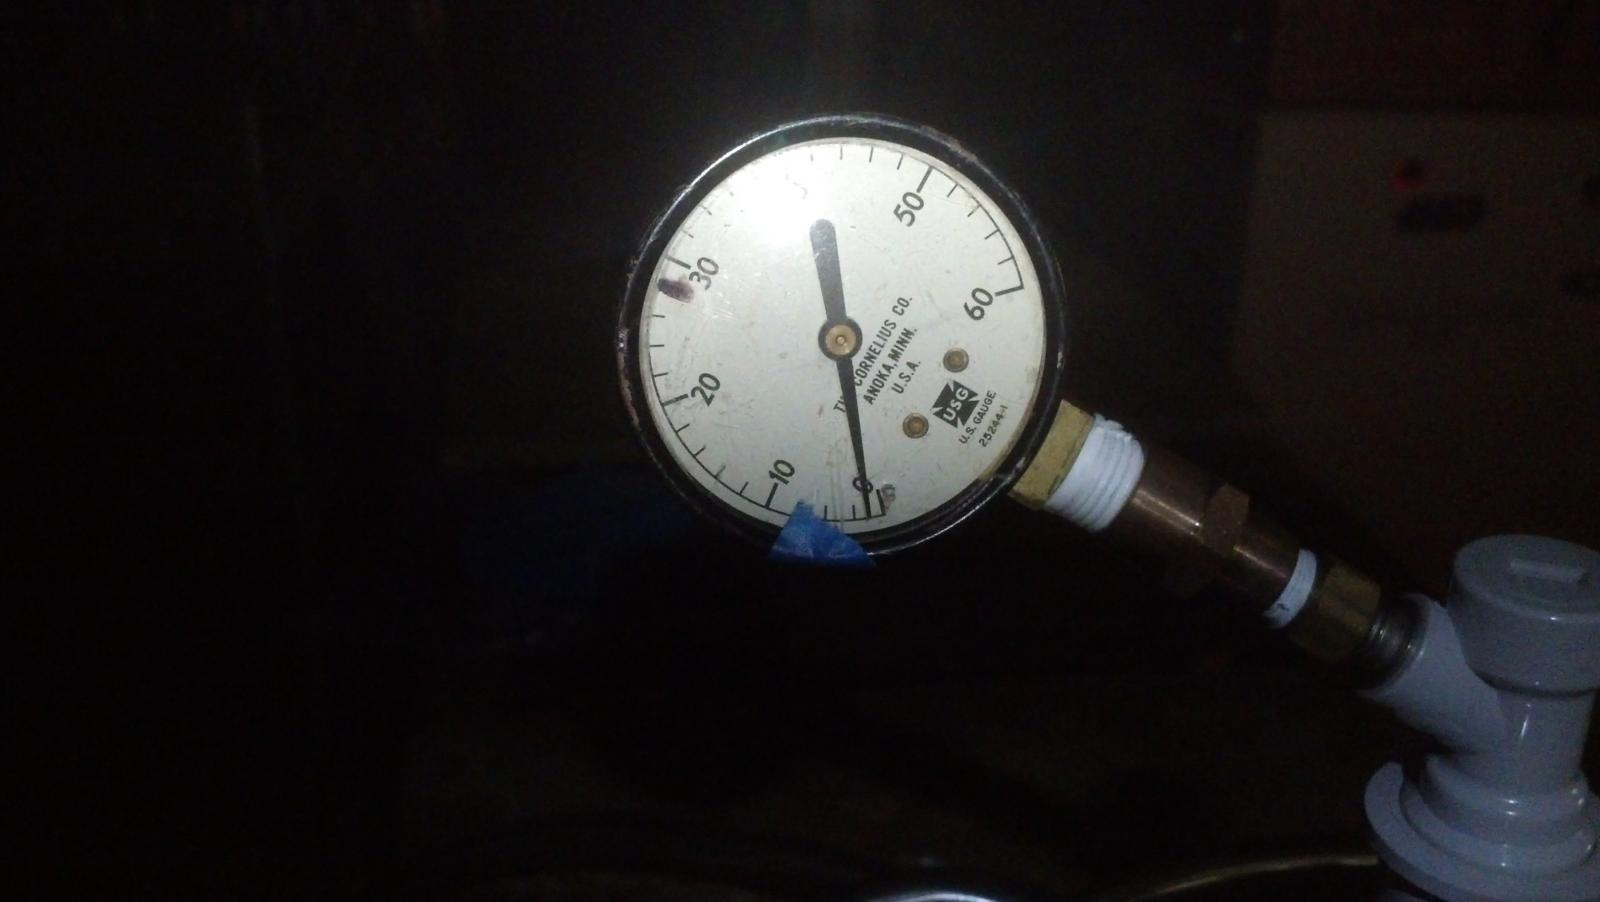
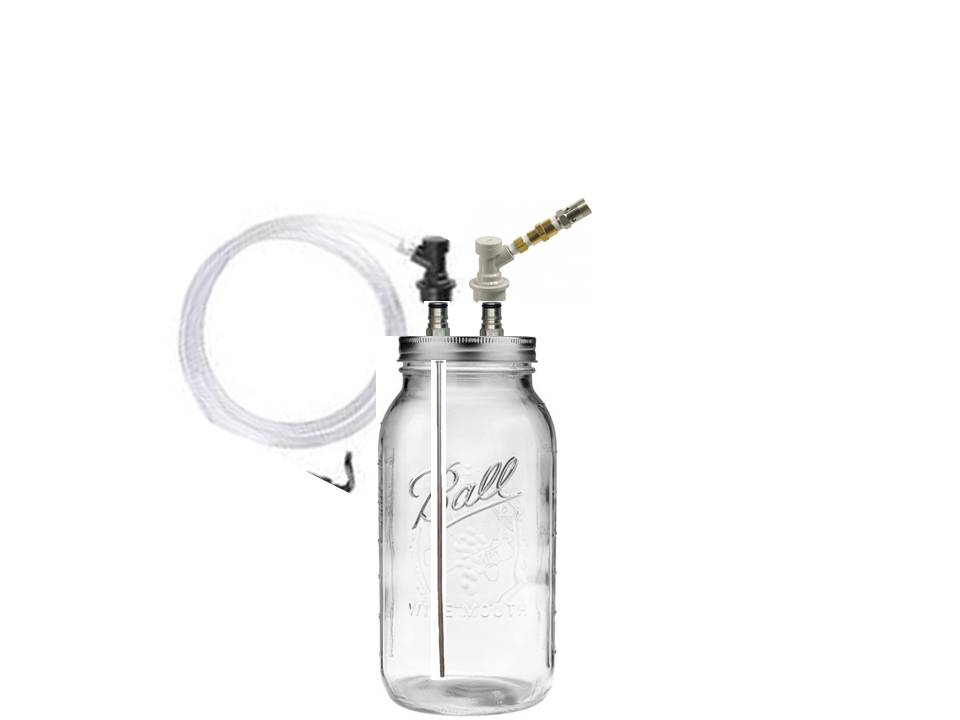
My idea is to have a corny disconnect post attached twice on each lid one gas one line w/ diptube - then attach my line tube from the fermenter into the liquid side of this lid into a half gallon ball jar and use a pressure release gauge from morebeer that I use during transfers on the gas side to take the o2 out of the jar and prevent the exploding jar trick.

I will use this method after one day of waiting for the temps to be just right before I pitch and then I will take out as much trub as I can (and of course a little wort too =:<) and I then pitch the yeast in my 13.2g sanke (10g batch).

After the cold crash I will take out the yeast via the same method before I transfer the beer to the serving keg . This method should be great! Thank you for finding these lids PlinyTheMiddleAged!! Yeast transfer w/ no o2 and no mess now!!!
YeastHarvester2015JHM.jpg
 
Meirhof,

When are you going to take that rig for a test drive? Looking forward to seeing that in action. It's given me some ideas as well. If your system works out, I may make changes to mine.

Cheers!
 
Heck - I just ordered all this stuff! lol
Give me a few weeks for sure - walking into a busy time for my work. That and I am working on putting up a hops farm in my buddy's Aquaponics farm so that is this weekend. Brewing? Nah - too much else to do! Although I am getting itchy to do another batch here soon. =;>

More as it comes...
 
Well - I thought ChiCompany was slow on their shipping - wow EcoJarz is REALLY slow... I have seen the slow boat from China taking about the same time. I ordered these things on the 21st of Feb. No wonder shipping was free!

I have the posts and diptube holders - just waiting on the darn lids now... soon...
 
That's odd. I don't remember it taking that long to get lids. I'm having an issue with another vendor though that is related to the longshoreman strike on the west coast. Maybe there's a shipping container full of stainless steel canning jar lids sitting outside of Los Angeles harbor. My tri clover fittings are probably in the container next door. (I'm not dinging the vendor here - he's stuck too!)

Good luck!
 
Hooray! They finally arrived!! Holy s#!t that took forever...
Ok - now I just need to make some time to solder these puppies in - hopefully this weekend.

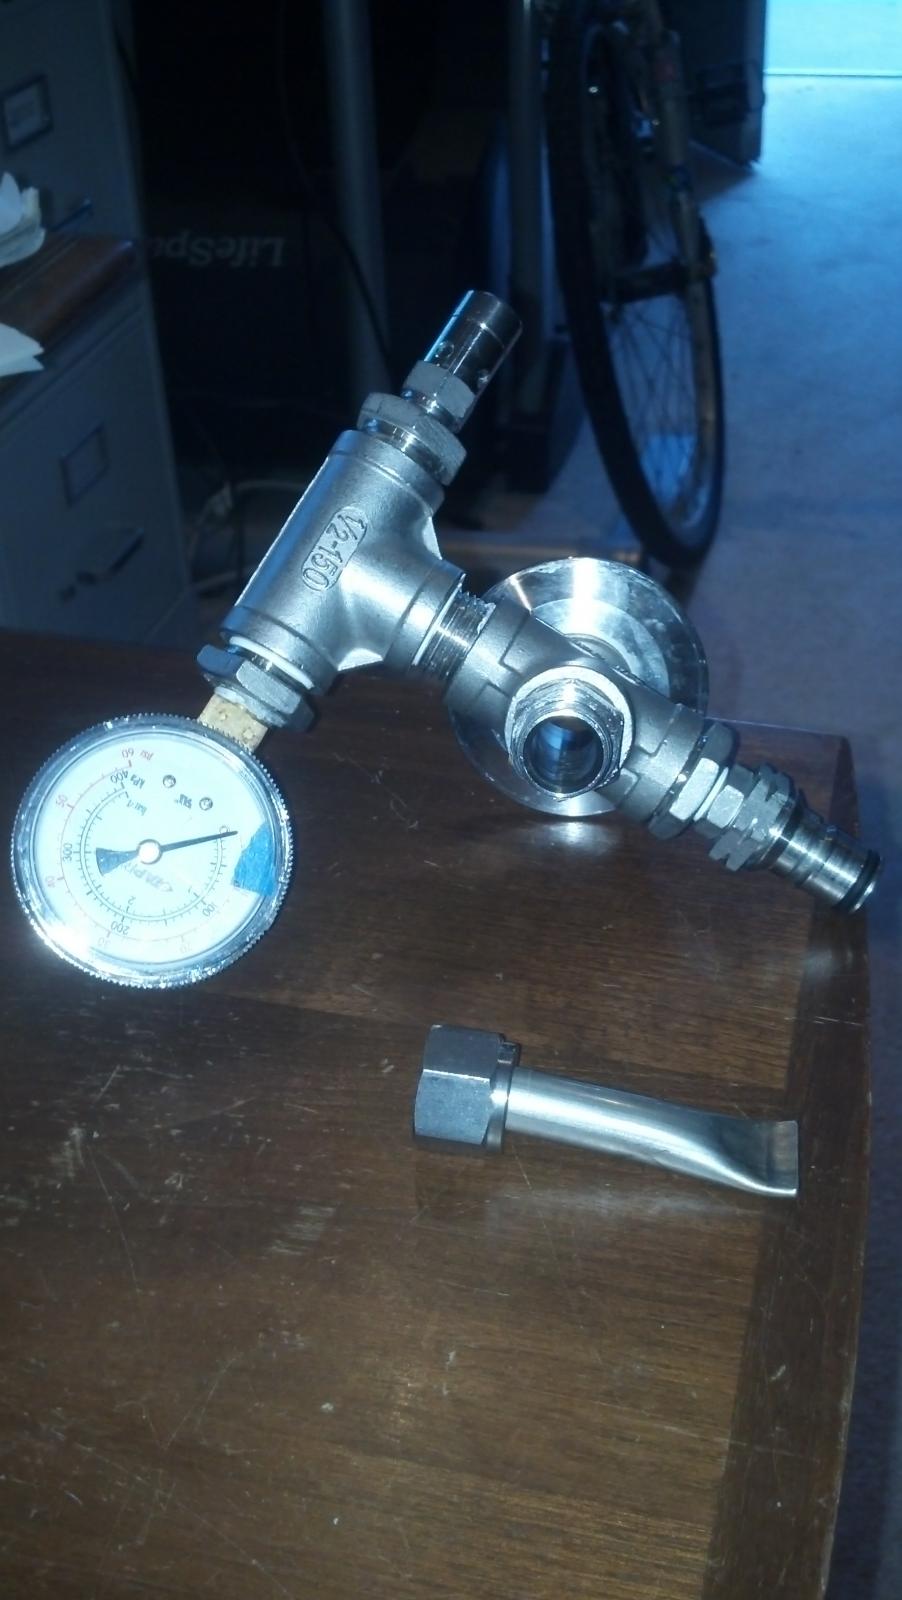
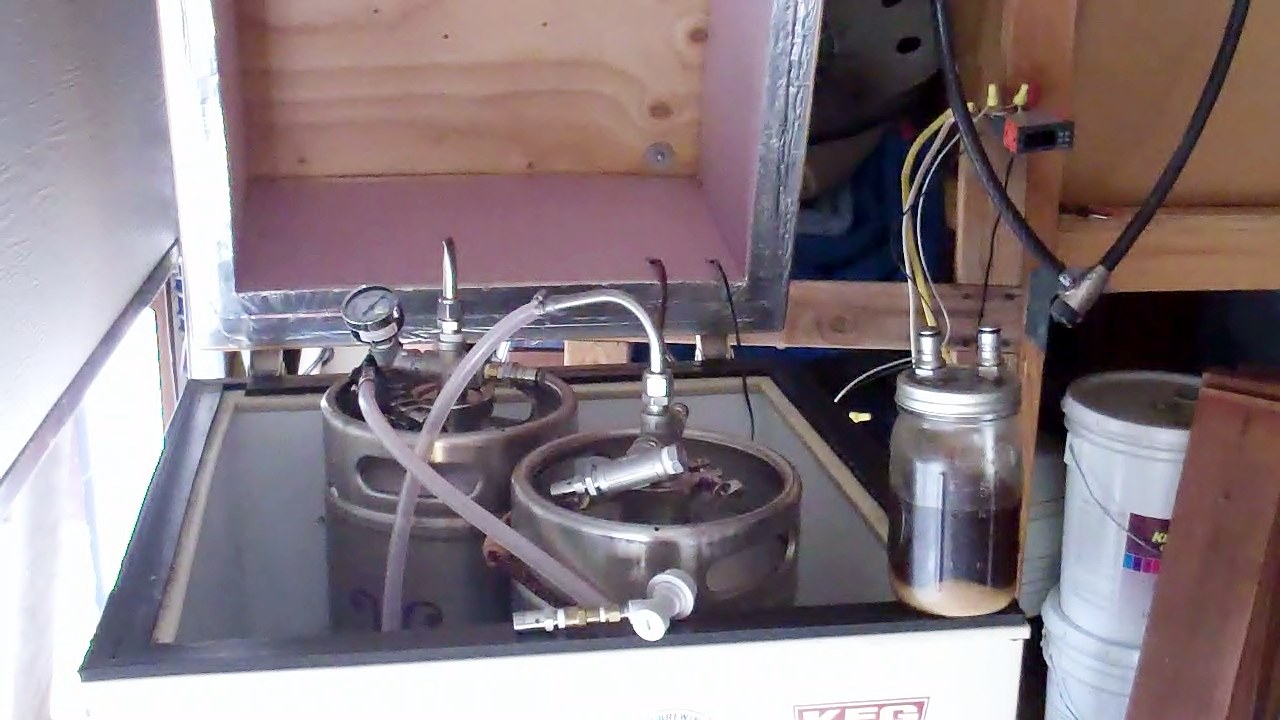
So for those of you that don't know what the heck I am talking about - I am building a yeast/trub harvester for my setup. I ferment in sanke kegs and have a custom top that I had built over a year ago. I love this thing. I can put it on any of the sankes I have...

So what I do is ferment with the custom top on it and a blow off tube attached to the full bore compression lock. Then after primary fermentation is almost over I cap the compression lock with a sealed lid. When I am done with my 3 weeks in the primary fermenter, I push the beer from the fermenter, via a 1/2" dip tube stuck into the full bore compression lock at my desired height, into a serving keg by adding co2 pressure to the keg so there is no o2 exposure at all.

The first three pics are my custom top to the fermenter. Pardon the ball lock valve on the first pic as I did away with that a while back and just use plain line tubing to flare fittings to ball lock disconnects then onto the filling sanke coupler.

The last is what the "yeast/trub harvester" will basically look like without the diptube.

more as it comes...

IMG_20140122_113922_790.jpg


IMG_20150311_183317_187.jpg


IMG_20150311_183347_459.jpg


IMG_20150311_181016_607.jpg
 
Took a little time today and did my first lid.
Wow - these are thin lids for sure.

Making the holes and torching the solder really took their toll on these.
Yeah Yeah Yeah - I put a little too much solder on one of them - meh... it actually increased the strength of the whole lid. =;>

All I need to do now is just BKF this one, cut the dip tube and do the rest...

IMG_20150312_102936_130.jpg
 
maierhof,

I agree - soldering fittings on that lid is a little tricky. Since the lids are thin, it's a delicate balance between getting the fitting hot enough to get the solder to flow without overheating the lid. But, it looks like you got the hard part of your project done!

I pulled a dimple on a lid to get a really secure solder attachment to a triclover fitting. That was tricky! I had to be really careful to not turn the disk of the lid into a cylinder while I was pulling the fitting into the hole.

Inspired by your gadget, I'm planning to make some modifications to mine. The changes will allow me to purge the canning jars with CO2 and to rouse dry hops without introducing oxygen. I got my package from chicompany yesterday!

Cheers!

Yeah I was going to pull a dimple into the lid with the part and then I thought it might be better to just drill it to 9/16 with my hole cutter instead. I took off all the oils with Acetone, dabbed the bottom of the part and top part of the lid hole with flux and then wrapped the bottom with the solder. I put the heat on em and they fell into the holes when they were ready. Then I went back and added a little (too much) solder to finish and to make sure it was totally air tight.

I can't tell which method is easier with these lids. Wow these are thin!

Nice - I can't wait to see what you have done.
 
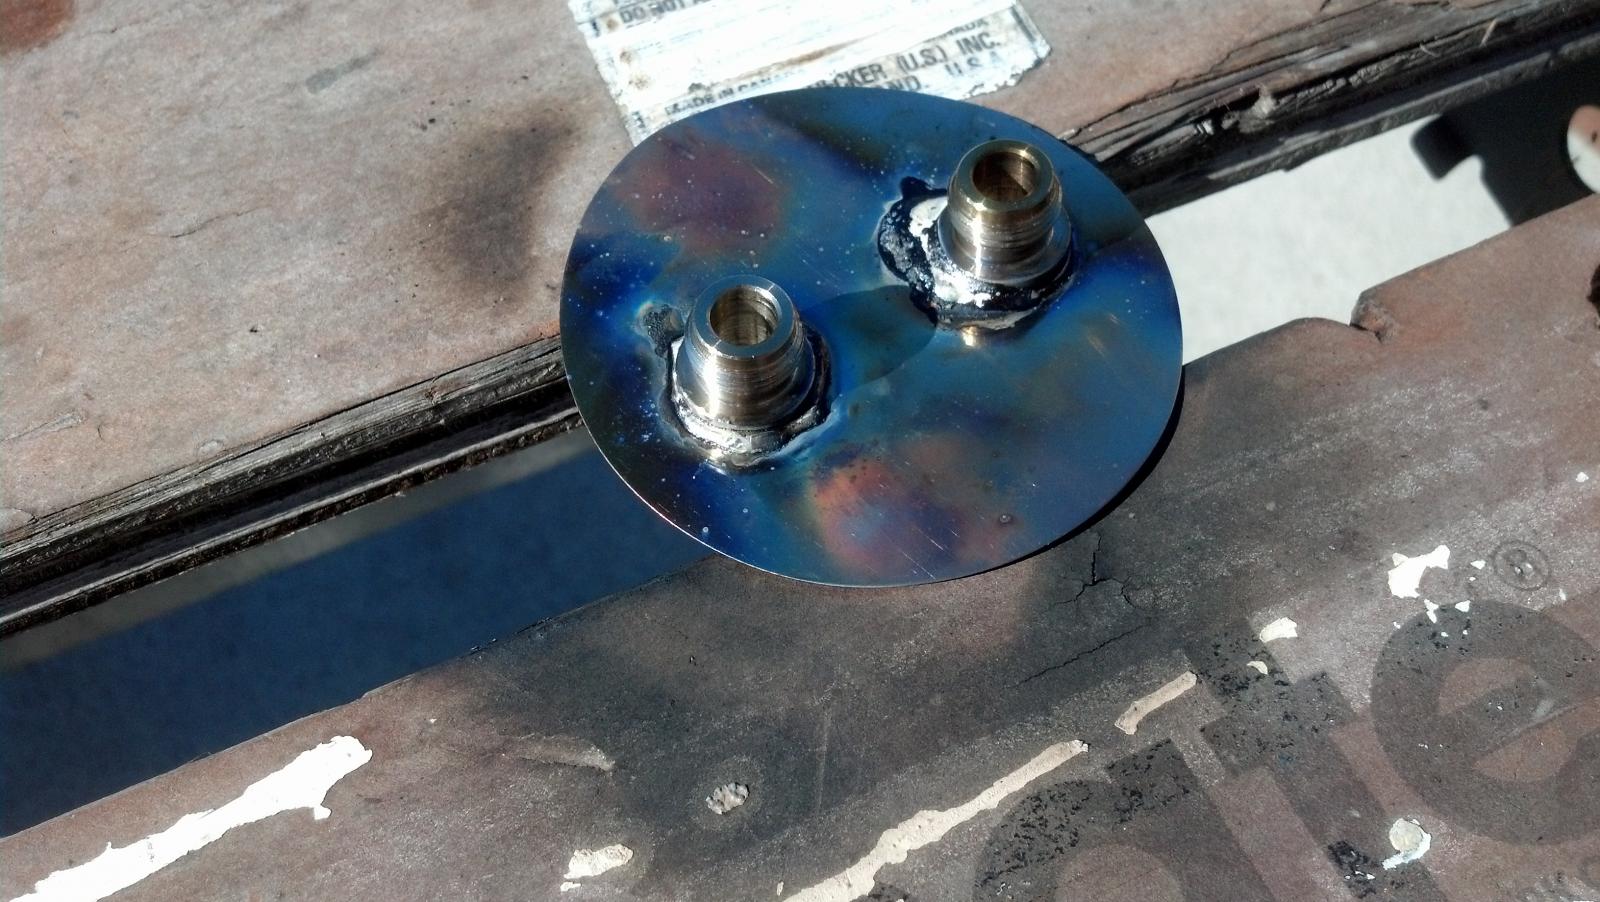
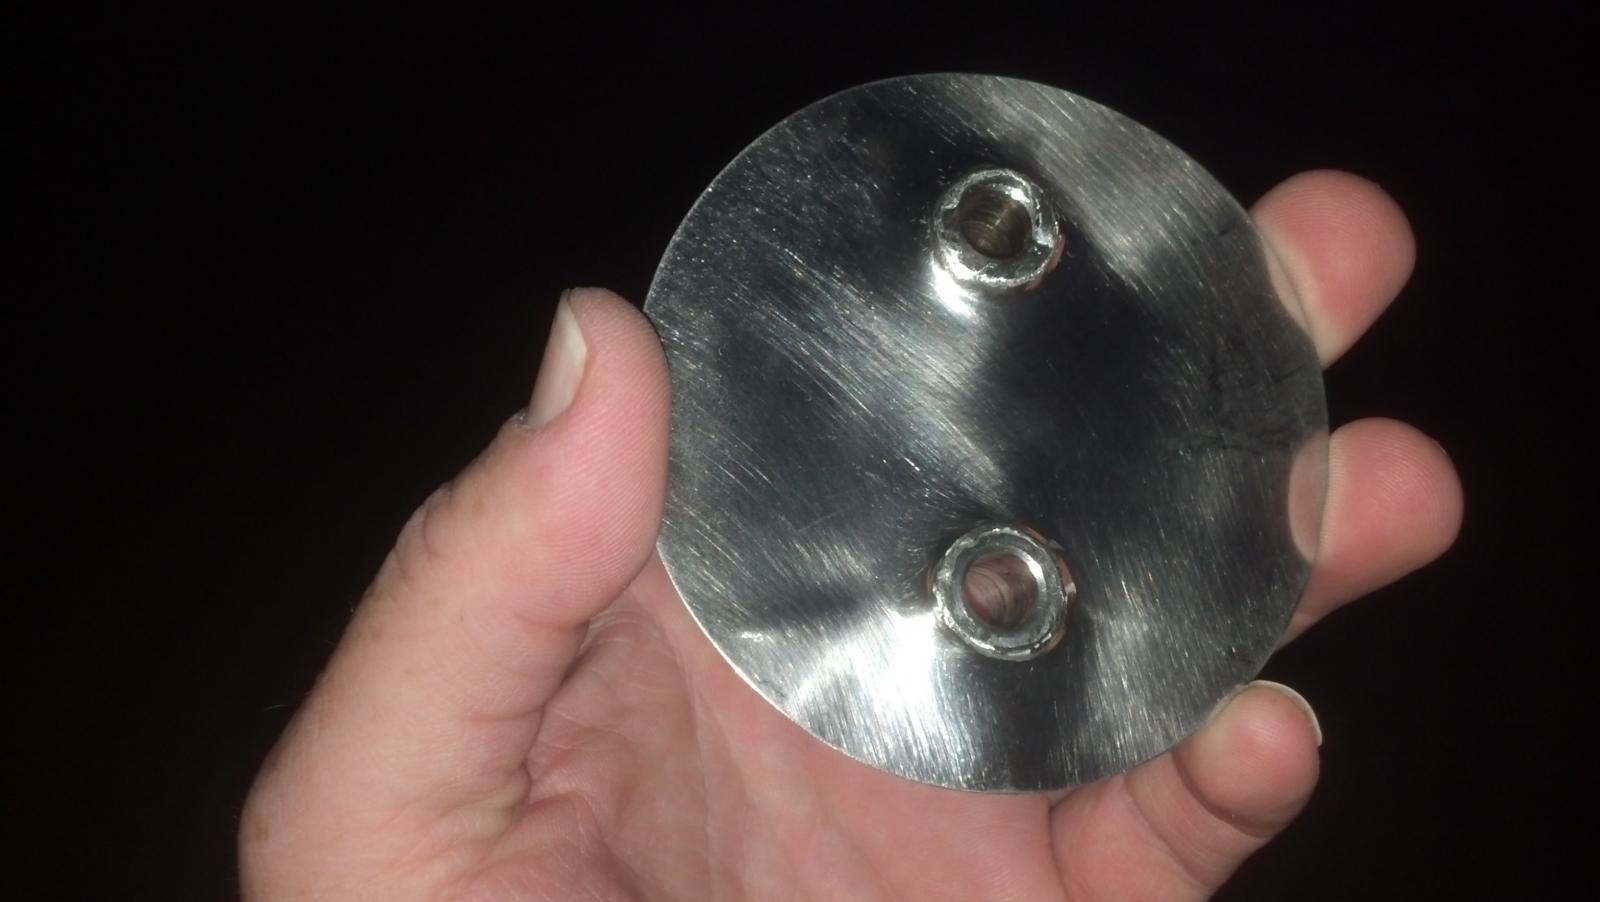
Ok - finally found time to BKF this thing thing to get them ready.
Wow - again these things are really thin so doing the BKF was tough had to use the center hole in my main sink as a way to firm it up without bending it and scrub the living s#!t out of it for like 30min. Eventually - they looked like the first two pics.

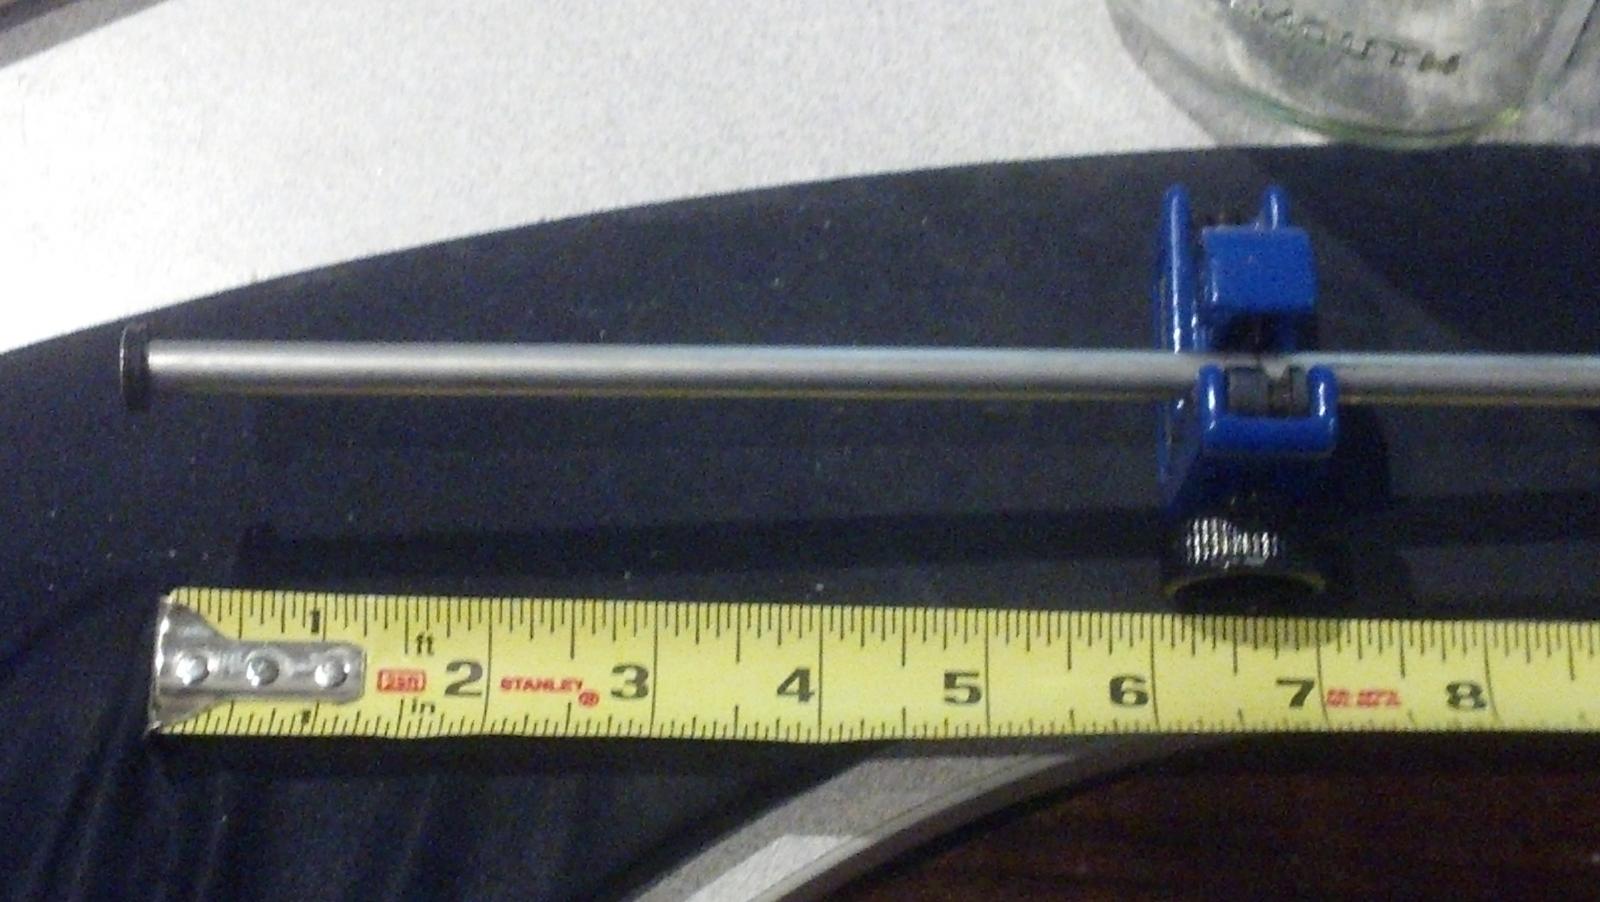
Then after they were clean I cut the dip tube of the first rod with my copper tube cutter. Thin SS works well with this kind of cutter but I don't think I would want to use it when I am doing a 1/2" or 3/4" tube btw. After I cut it to 6.625" (see third pic), which gives me enough room at the bottom for proper flow (I hope) then I ground off the burs at the point in which I cut it using a cone shaped aluminum oxide tip on my dremel tool. I cleaned it after that again with more soap and it finally smelled clean and free of oils.

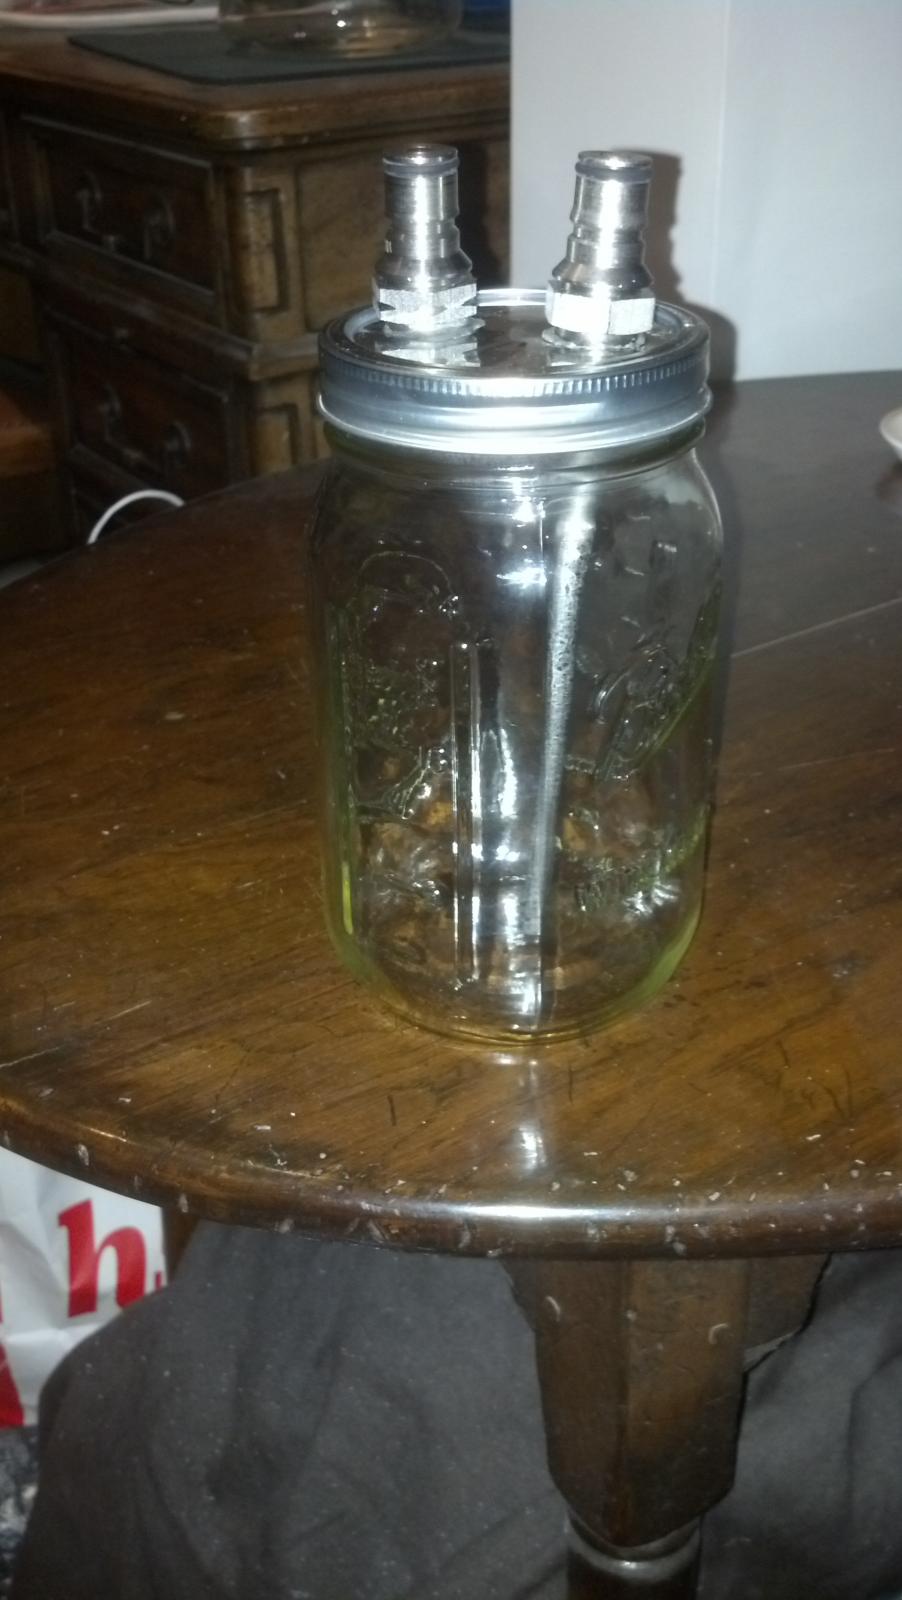
I put the seal back on, then put it into a ball jar and sealed it with a lid. I took my co2 bottle and turned it down to 2.5psi and put some into the jar. This is the point where I noticed air coming out of the air side through the post threads. I put on a seal that post side and tightened it up again, still bubbled but this time from the seal on the lid. Then I unscrewed it - repositioned the seals so that they were all equal from the edge of the lid and then pushed the co2 back into it. This time I was able to hold the 1 psi for about 4min. Meh - good enough for tonight!! See the fourth pic.

And here is the final product. See fifth pic...

IMG_20150315_193744_413.jpg


IMG_20150315_193818_836.jpg


IMG_20150315_203615_461.jpg


IMG_20150315_212914_509.jpg


IMG_20150316_241139_850.jpg
 
Ok - I finally managed to get a day to brew this weekend - it was almost 2 months since my last one.

I decided not to test this thing out on the trub pull as I was just flat out lazy and wiped out. I don't think that using a sanke keg is going to pile the trub up directly in the middle so it kinda seems that this original view is not going to work as well as I had hoped. Meh - not the primary use for this thing anyway...

The good news is that in 3 short weeks I will have a brand new batch of WLP001 to test this new contraption out on. I will try to video the process and take pictures as much as I can.
 
Finally received my "SureScreen"s in the mail today - hoping to do a test on my old corneys - one with Centennial - one with Cascade. Hoping they both turn out well as this is my first dry-hop test... Just can't wait any more to do my testing of this thing!:mug:
 
Well - I finally used it!
And it did exactly what I wanted it to do: harvest yeast easy

I will post some vids and pics when the kiddos go to bed shortly.
 
Ok - here are the final results.
This thing is incredible - it works great!

Here are the pics:
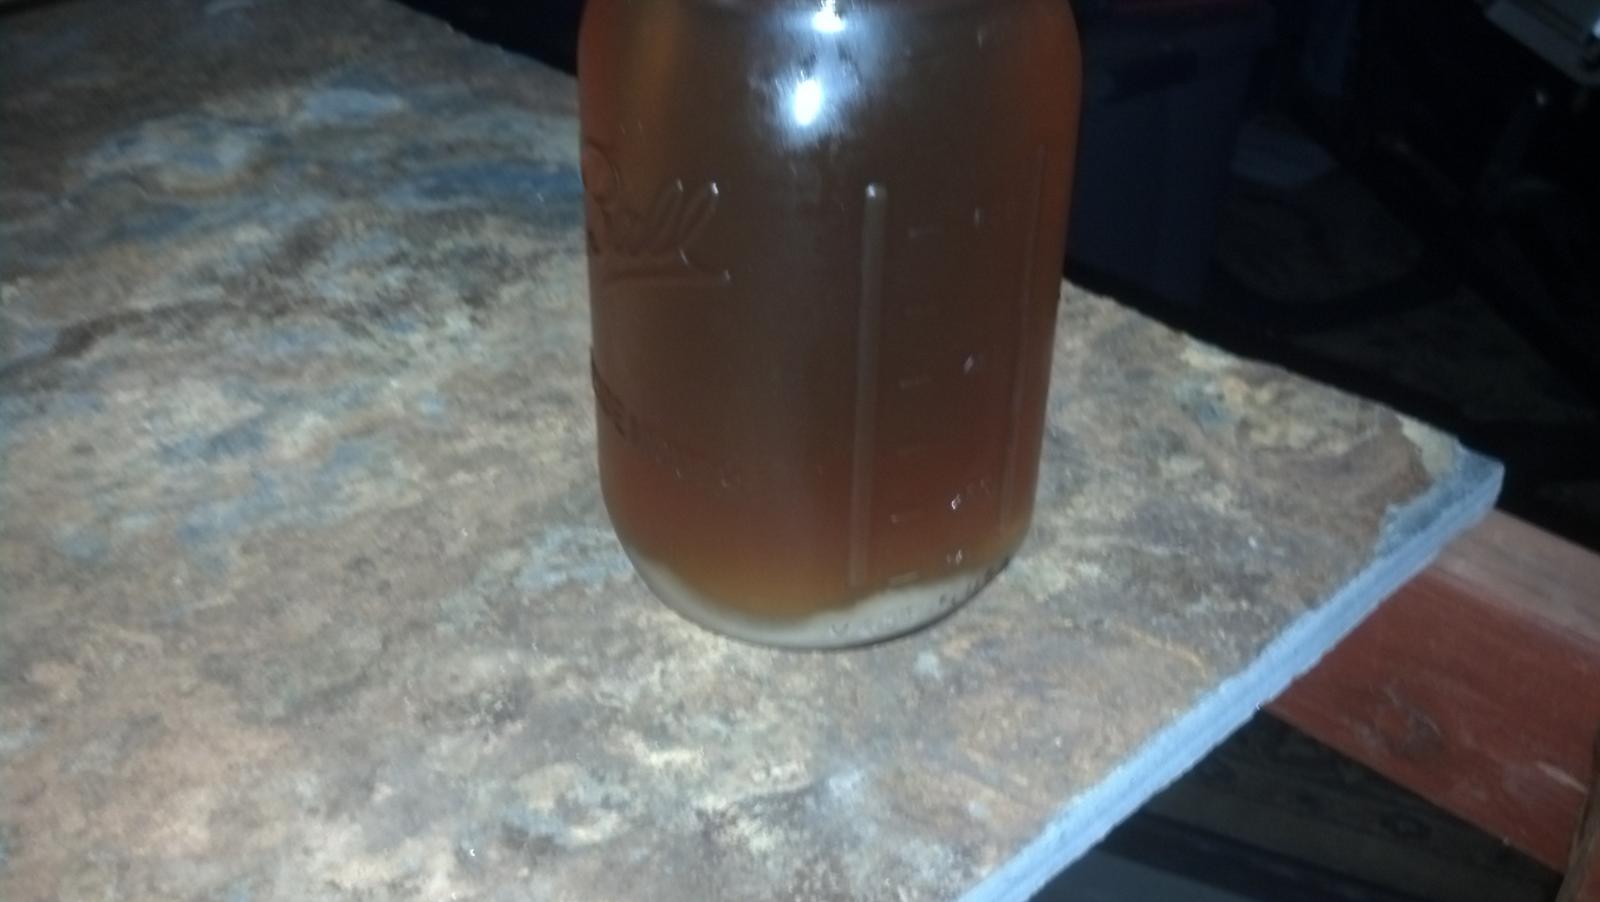
Final Product: 2 batches of yeast.
One from before the transfer to keg to clean the surface of the keg.

Another to just take whatever is left in the keg and put it into a clean jar.

Here are the vids:
https://www.dropbox.com/s/mff6uishq0cbd3s/Easy Yeast Harvester Setup.mp4?dl=0

https://www.dropbox.com/s/n5hj5h8eq32wb70/Easy Yeast Harvester.mp4?dl=0

https://www.dropbox.com/s/oj4rtkkstm124mq/2nd Batch Today Easy Yeast Harvester.mp4?dl=0

IMG_20150423_221312_927.jpg


IMG_20150423_230247_034.jpg
 
maierhof,

Nicely done! Looks like that worked out pretty good for you - a nice clean jar of yeast for your next brew session without a lot of hassle.

Cheers!
 
maierhof,

Nicely done! Looks like that worked out pretty good for you - a nice clean jar of yeast for your next brew session without a lot of hassle.

Yes it did! Thank you for finding those lids, it became a reality as soon as I saw those on your thread.

This method is soo much better than the old way it is not even funny.
 
Well, you know what I think - great solution to a messy chore! Plus you gave me the idea to turn my yeast harvester into a container that I could purge with CO2. So, thanks!!!
 
Well, you know what I think - great solution to a messy chore! Plus you gave me the idea to turn my yeast harvester into a container that I could purge with CO2. So, thanks!!!

Nice! Glad to hear it! I love your harvester too - can't wait to get a real conical now... (dreaming)

This is scary to me (even with a pressure release valve).

Wouldn't have said anything, but you asked. :cross:

I know - it scared the hell out of me too. Which you should notice in the last second video. I had the pressure release wide open when I started it and then clamped it down just a bit. The best part is that the these lids are so thin that the extra pressure just bleeds out the sides of this thing. In actuality though it is no more scary than pressurizing a bottle of beer IMO...

So long as I don't go over 5 lbs of pressure I think I am good. Anyone have any experience on this subject?
 
2800+ views and only a few comments? Really??!!??

Come on people - chime in and tell me what you think!


Your title is misleading. This isn't easy, it requires advanced skills in building stuff.
 
Perhaps the lack of comments is because not as many folks ferment in a sanke???

I don't think drilling two holes and soldering counts as advanced building skills. The soldering does take a little practice but if you use the stickie as a guide, you should be good. And the good thing about soldering is that if you mess up, you just apply heat to undo your mistake, clean up, and start over.

Cheers!
 
Your title is misleading. This isn't easy, it requires advanced skills in building stuff.

Lol - never thought about that. Sorry I took for granted that if you are brewing beer you have learned how to silver solder. You are right - not everyone knows how to do that.

My title is actually talking about the "how you harvest the yeast" not the making of the lid so...

Perhaps the lack of comments is because not as many folks ferment in a sanke???

That is what I think - although this should be a call for more people to do it! This method just makes the transfer of beer even cleaner that it did before. I am looking at my beer here and am amazed by it's clarity.

I don't think drilling two holes and soldering counts as advanced building skills. The soldering does take a little practice but if you use the stickie as a guide, you should be good. And the good thing about soldering is that if you mess up, you just apply heat to undo your mistake, clean up, and start over.

Cheers!

Agreed. I didn't know how to silver solder before I brewed - I picked this up from BobbyM. Thank you Bobby!
 
I will say that soldering stainless steel is a lot trickier than soldering copper. Copper seems to be more forgiving. Keep the metal clean, use some flux, and heat the copper until solder flows. I can't recall ever overheating copper and burning the flux off. But I sure did that when I tried it on stainless. That's the only tough thing about this - but a little practice solves that issue.
 
Finally received my "SureScreen"s in the mail today - hoping to do a test on my old corneys - one with Centennial - one with Cascade. Hoping they both turn out well as this is my first dry-hop test... Just can't wait any more to do my testing of this thing!:mug:

Can you explain how this is used for dry hopping? My mind is failing to connect the dots between harvesting yeast and dry hopping.
 
Can you explain how this is used for dry hopping? My mind is failing to connect the dots between harvesting yeast and dry hopping.

You will have to excuse the late night post after a few too many on that one =;> sorry for the non sequiter...
I essentially removed all the flocc'd yeast on the co2 push at the beggining and at the end of my rack to my dry hop kegs. Nothing but crystal clear wort into the dry hop... yes i give up jusr a little more beer than before but wow it is really clear now.
 
Yes because I wouldn't have clicked on it. It's way beyond my comprehension :)
 
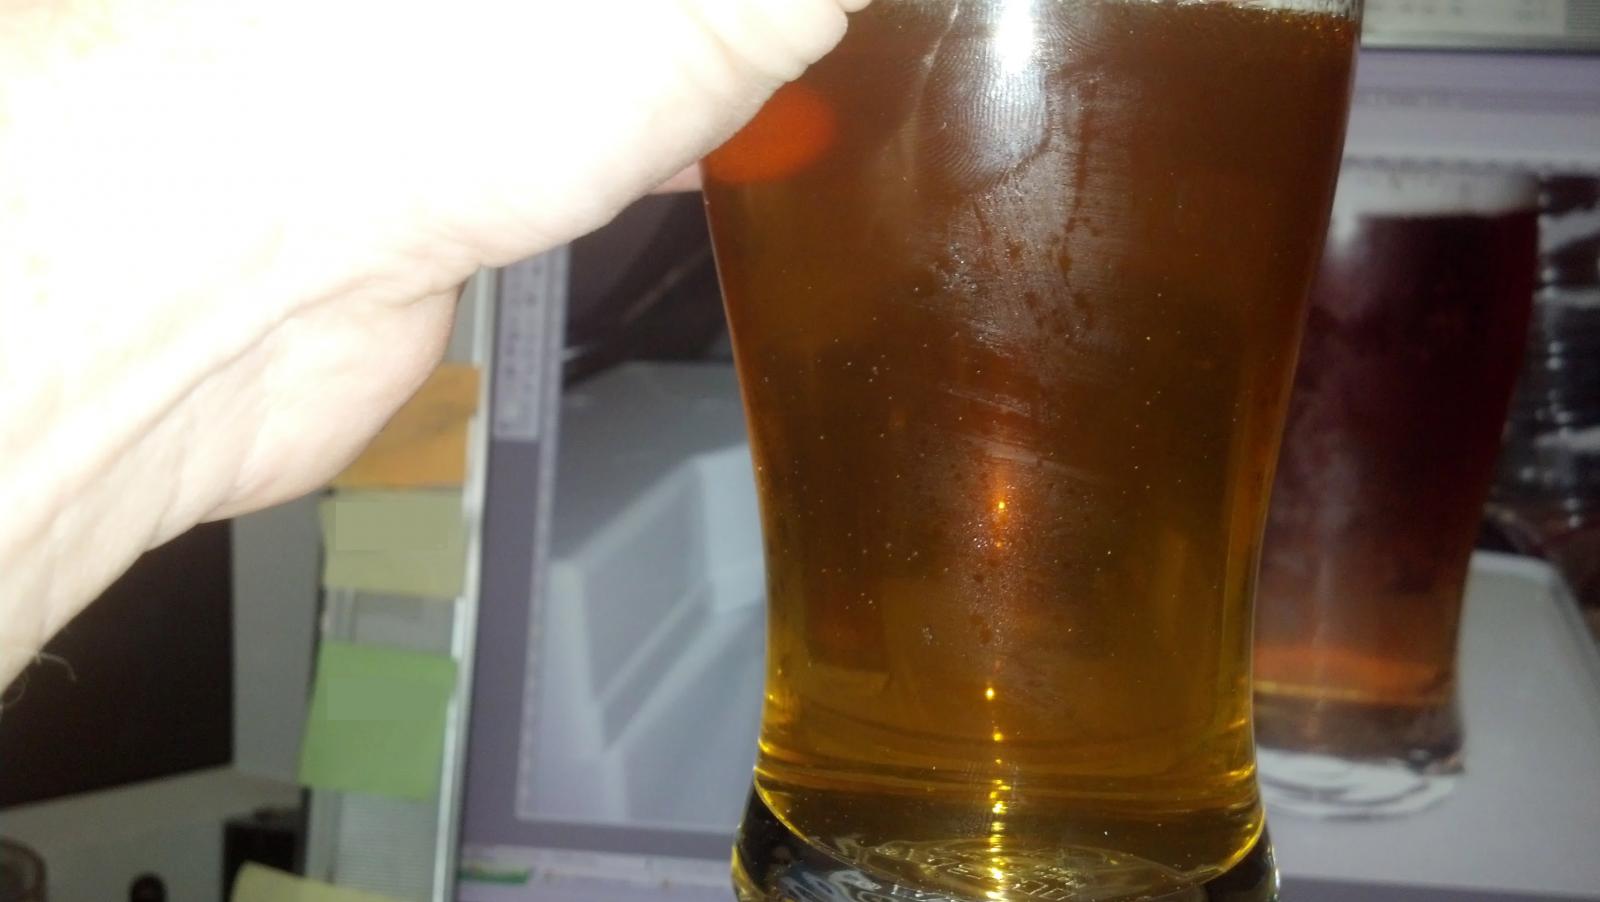
Ok - I have finally taken my beer out of the conditioning phase and it is THE most clear beer that I have made yet. Wahoo!!!

The first pic I took in the garage and it just didn't show the clarity well - so I pulled it into my office. The old pic is in the background.

Loving this thing!!

Blonde IPA  2014 Fav.jpg
 
Did another batch again this week... again it worked flawlessly both times.

All I did was attach my racking cane into the hole on top of the fermenter, add pressure to fermenting keg, attach disconnect to harvester and wait until no more schtuff comes through the tube, then disconnect from harvester and attach to serving keg and fill... easy.

See attached:

Harvester 070115.jpg
 
This looks cool--very elegant. Well done! :mug:

What is the advantage of collecting the yeast without oxygen, though? You are just going to spin the heck out of it for a starter, right?
 
This looks cool--very elegant. Well done! :mug:

What is the advantage of collecting the yeast without oxygen, though? You are just going to spin the heck out of it for a starter, right?

I would think a sealed sanitary transfer is a pretty good advantage. Always good to limit infection/contamination exposure.
 
This looks cool--very elegant. Well done! :mug:

What is the advantage of collecting the yeast without oxygen, though? You are just going to spin the heck out of it for a starter, right?

Helterscelter nailed it - less contamination, less mess, less hassle. It is just easy to do this with the yeast then I just stick the whole thing in the fridge for a few weeks until I need to brew again.
 
Helterscelter nailed it - less contamination, less mess, less hassle. It is just easy to do this with the yeast then I just stick the whole thing in the fridge for a few weeks until I need to brew again.

OK. I also ferment in a sanke, but I use a sanke tap with a picnic tap attached to the liquid port for sampling. (I replace it with a hose when I pressure transfer to another keg). When I do a pressure transfer, only the section of trub\yeast that is right around the spear is transferred. Do you do anything to collect more of the yeast, or do you just take the stuff around the spear?
 
You ferment in sankes too - nice to hear.
Taking hydrometer readings during a lager are much easier for you that is for sure....

That is a good point. I actually collect three jars in total.

First - the trub/yeast draw in the initial transfer from around the spear to serving keg - just right for another 10g batch in my opinion.
Second/Third - the final yeast and trub washing process

I wash down my remaining trub and yeast by pouring in about 2-3 jars full of boiled/cooled water into the sanke. Then swirl it around a few min and then push what I can into the jar. Then I take off the pressure top and replace with a normal jar cap and I can be done. Or I can pour, swirl, wait, pour swirl wait too... depending on how much effort I need to put into it that day. =;>

Thanks for the info. I don't harvest yeast right now (I just build a bigger starter), but I'll keep this build in the back of my mind.
 
Back
Top