You are using an out of date browser. It may not display this or other websites correctly.
You should upgrade or use an alternative browser.
You should upgrade or use an alternative browser.
How To: BrewPi LCD Add-On
- Thread starter day_trippr
- Start date

Help Support Homebrew Talk - Beer, Wine, Mead, & Cider Brewing Discussion Forum:
This site may earn a commission from merchant affiliate
links, including eBay, Amazon, and others.

Going to give this a shot, but need a bit of help ordering the boards from DirtyPCB... the order form is a more than a bit Greek to me... anyone care to give me a hand filling it in!

Bigdaddyale
Well-Known Member
These are the setting I used to order my boards. Below is the link.
FR4 proto: 2 layers / 10x10cm (5.4x6.0cm) / 1.6mm / HASL / 1oz / Blue / Protopack ±10
http://dirtypcbs.com/store/user/edit/1124
FR4 proto: 2 layers / 10x10cm (5.4x6.0cm) / 1.6mm / HASL / 1oz / Blue / Protopack ±10
http://dirtypcbs.com/store/user/edit/1124
OP
OP
fwiw, white silkscreen on red soldermask really shows up well.
And definitely don't skip the HASL process!
Cheers!
And definitely don't skip the HASL process!
Cheers!
PapaFoxtrot
Well-Known Member
The standard shipping doesn't include tracking. I've been waiting for 7 weeks since I received the shipping notice email. I'd definitely go for upgraded shipping.
Bigdaddyale
Well-Known Member
7 weeks seems like a long time to wait for the boards. I have ordered five sets of boards from them and they all arrived with in a month. Have you tried to contact them ?The standard shipping doesn't include tracking. I've been waiting for 7 weeks since I received the shipping notice email. I'd definitely go for upgraded shipping.
user 40839
Well-Known Member
- Joined
- Jul 13, 2009
- Messages
- 1,176
- Reaction score
- 86
As an aside (just now getting around to starting mine that the mighty @Bigdaddyale sorted) I would just like to say, likely on behalf of many others:
*clears throat*
SOLDERING PFETS CAN KISS MY HAIRY IRISH @#$#@!!!!
*clears throat*
SOLDERING PFETS CAN KISS MY HAIRY IRISH @#$#@!!!!
OP
OP
heh heh...at least you have an actual footprint to work with ")
Tin the three pads on the board, tin the three legs on the pfet, use tweezers to position it and reflow one leg.
And one of these helps a ton for the far-sighted...
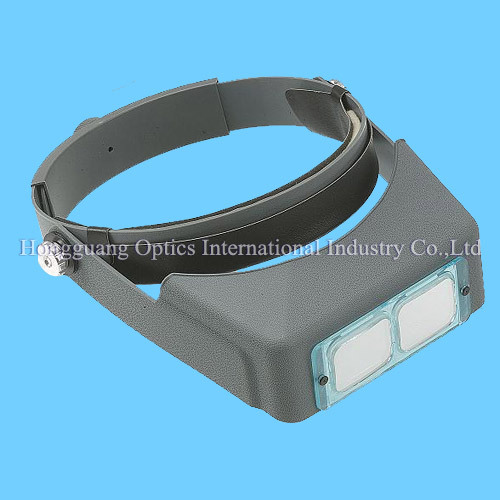
Cheers!
Tin the three pads on the board, tin the three legs on the pfet, use tweezers to position it and reflow one leg.
And one of these helps a ton for the far-sighted...
Cheers!
As an aside (just now getting around to starting mine that the mighty @Bigdaddyale sorted) I would just like to say, likely on behalf of many others:
*clears throat*
SOLDERING PFETS CAN KISS MY HAIRY IRISH @#$#@!!!!
heh heh...at least you have an actual footprint to work with
Tin the three pads on the board, tin the three legs on the pfet, use tweezers to position it and reflow one leg.
Cheers!
I just pre-tinned one pad. Usually the one by itself. Then held the p-fet down with the tweezers while I reflowed that leg. Then I soldered the legs on the opposite side. I think liquid solder flux helps a lot too. It did take some effort to hold the p-fet down in the correct position while soldering.
user 40839
Well-Known Member
- Joined
- Jul 13, 2009
- Messages
- 1,176
- Reaction score
- 86
Yeah, I got the three of 'em in (I hope!) but yikes, that was a fiddly job. The tweezers I had weren't the greatest, and the little bugger would squirm around on there at the lightest touch. Got there in the end, though.
Then I ran out of flux, so back on hold for a little bit... yeesh.
Then I ran out of flux, so back on hold for a little bit... yeesh.
Bigdaddyale
Well-Known Member
I used XG-Z40 solder paste. I had to mod the tip of my soldering iron by grinding it to a fine point.worked out well using my 4X magnifying glasses and one of the tools from my solder assist kit
PapaFoxtrot
Well-Known Member
7 weeks seems like a long time to wait for the boards. I have ordered five sets of boards from them and they all arrived with in a month. Have you tried to contact them ?
I opened a support ticket with them. I recently had a relay module go to Istanbul from China before eventually showing up at my door, so I'm pretty patient with China Post...
user 40839
Well-Known Member
- Joined
- Jul 13, 2009
- Messages
- 1,176
- Reaction score
- 86
Welp, poop.
So got two of the three boards @Cadibrewer boards soldered and one of them is working away, the other is giving me nada. Tried swapping the LCD screens (with the one from the working board) but no dice. Thankfully I ASSUMED I'd screw one up, and have a backup (just need to snag some more capacitors and a pair of diodes) but before I delve into the autopsy, have there been any instances of bad boards, per chance?
Also, another question now that I have the one soldered up, since I'm used to the DIY one from @day_trippr (sans PFET, haha!) - I assume the rotary encoder just goes into the relevant pins go to digital 7,8,9, and ground on the stackable headers, using the relevant resistors? (Also have some of the ready-made ones @ame mentioned that I might try)
PapaFoxtrot
Well-Known Member
The standard shipping doesn't include tracking. I've been waiting for 7 weeks since I received the shipping notice email. I'd definitely go for upgraded shipping.
I received a response from DirtyPCBs and their advice is the same as mine:
Thank you for ordering and we are very sorry for the inconvenience. HK Post takes 1-8 weeks as delivery time. Kindly monitor your delivery until next week and let me know if you have not received it still by then. HK Post does not have a tracking number so I also suggest that next time,you use DHL as courier so there would be a tracking number assigned. I will try to investigate further and see if we got any notification involving your delivery.
CadiBrewer
Well-Known Member
Welp, poop.
So got two of the three boards @Cadibrewer boards soldered and one of them is working away, the other is giving me nada. Tried swapping the LCD screens (with the one from the working board) but no dice. Thankfully I ASSUMED I'd screw one up, and have a backup (just need to snag some more capacitors and a pair of diodes) but before I delve into the autopsy, have there been any instances of bad boards, per chance?
Also, another question now that I have the one soldered up, since I'm used to the DIY one from @day_trippr (sans PFET, haha!) - I assume the rotary encoder just goes into the relevant pins go to digital 7,8,9, and ground on the stackable headers, using the relevant resistors? (Also have some of the ready-made ones @ame mentioned that I might try)
I have not heard of any bad boards this far. Check one of day_trippr's posts about a week ago for places to start troubleshooting your soldering. Basically you want to look at the power and data pins on the IC, and then look at your LCD header pins.
Yes, the rotary encoder just goes to the stackable header pins and ground as you've described.
user 40839
Well-Known Member
- Joined
- Jul 13, 2009
- Messages
- 1,176
- Reaction score
- 86
Went through my solder joints, and did notice that some of them around the IC socket weren't 100%, so redid them. Lo and behold, I have LCD activity now - just no backlight (yes, I immediately adjusted the trim pot!). Can't find any other issues, so my thoughts turned to the PFET. That said, the PFET should only be an issue after 10 minutes of inactivity, so even if it were in there wrong (it does look ok) then it would just mean the backlight would remain on?
CadiBrewer
Well-Known Member
Went through my solder joints, and did notice that some of them around the IC socket weren't 100%, so redid them. Lo and behold, I have LCD activity now - just no backlight (yes, I immediately adjusted the trim pot!). Can't find any other issues, so my thoughts turned to the PFET. That said, the PFET should only be an issue after 10 minutes of inactivity, so even if it were in there wrong (it does look ok) then it would just mean the backlight would remain on?
Pins 15 and 16 on the LCD deal with the backlight. Pin 16 is ground for the cathode. Assuming that your solder on the header is good, you shouldn't have any problems there. Pin 15 is for the anode. The path flows from pin 2 on the shift register IC, through the p-fet, through the two diodes, through the larger 1/2W resistor, to pin 15 on the LCD. Check that entire path to make sure the solders are all solid. If that all looks good, you may have a bad LCD screen. Though I'm sure you checked into that first by hooking up your known good LCD screen.
Hope this helps.
user 40839
Well-Known Member
- Joined
- Jul 13, 2009
- Messages
- 1,176
- Reaction score
- 86
Ohh, baby. 'twas the sneaky Pete P-FET.
I SAID THEY COULD KISS MY HAIRY IRISH @#$#!!!!
I SAID THEY COULD KISS MY HAIRY IRISH @#$#!!!!
CadiBrewer
Well-Known Member
Glad you got it working!
OP
OP
Hahahahah! Very entertaining
How about the other board?
How about the other board?
user 40839
Well-Known Member
- Joined
- Jul 13, 2009
- Messages
- 1,176
- Reaction score
- 86
Hahahahah! Very entertaining
How about the other board?
Two seem to be working fine, and the third is the backup in case I screwed it up (which I did my utmost to do!). Now the joys of wrasslin' with the dual chamber install on the RPi3B which I've already nuked and started from scratch on again...
On the flip side, while I suck at this, I do make REALLY good beer!
OP
OP
[...]On the flip side, while I suck at this, I do make REALLY good beer!
Well, that's something, anyway
Probably want to debug that third build now while your inner technician is all warmed up...
Cheers!
user 40839
Well-Known Member
- Joined
- Jul 13, 2009
- Messages
- 1,176
- Reaction score
- 86
Well, that's something, anyway
Probably want to debug that third build now while your inner technician is all warmed up...
Cheers!
If your plan is to distract me and keep me out of the main brewpi thread with server-side inane questions, it won't work. I'll be there soon enough, and I'm laser focused - nothing will cause me to... OOH SOMETHING SHINY!
wbarber69
Well-Known Member
- Joined
- Oct 13, 2013
- Messages
- 2,191
- Reaction score
- 263
If your plan is to distract me and keep me out of the main brewpi thread with server-side inane questions, it won't work. I'll be there soon enough, and I'm laser focused - nothing will cause me to... OOH SOMETHING SHINY!
I started building my multichamber system a couple years back then I needed one 3d printed part, so I bought a small 3d printer so I could build a larger 3d printer so I could print the parts I need
I'll get back to you when I finally start brewing again

user 40839
Well-Known Member
- Joined
- Jul 13, 2009
- Messages
- 1,176
- Reaction score
- 86
I started building my multichamber system a couple years back then I needed one 3d printed part, so I bought a small 3d printer so I could build a larger 3d printer so I could print the parts I need
I'll get back to you when I finally start brewing again
I know the feeling. I'm doing my absolute best to not realize that for the money I've spent on various Arduinos and components, I could have likely bought 3-4 BrewPi Sparks at this point.
Mikmonken
Well-Known Member
- Joined
- Mar 28, 2013
- Messages
- 423
- Reaction score
- 101
I know the feeling. I'm doing my absolute best to not realize that for the money I've spent on various Arduinos and components, I could have likely bought 3-4 BrewPi Sparks at this point.
Haha yeah I'm the same could have bought a full fat Brewpi with the amount of spent!!
Bigdaddyale
Well-Known Member
You guys got me thinking how much I have invested per minion. I bet it's less than $40 bucks.
I buy the cheap Uno R3 for 3 bucks, I bought a couple of RPI0 for .99 cents when they went on sale, I think the biggest expense was the sensors and enclosure.
I buy the cheap Uno R3 for 3 bucks, I bought a couple of RPI0 for .99 cents when they went on sale, I think the biggest expense was the sensors and enclosure.
OP
OP
[...]I'm doing my absolute best to not realize that for the money I've spent on various Arduinos and components, I could have likely bought 3-4 BrewPi Sparks at this point.
Otoh, if you've noticed the three threads in the Software forum regarding BrewPi Spark, you'd likely be joining at least two folks on a very exclusive - and sad - island.
Seriously, that version looks FUBAR at this point...
Cheers!
Bigdaddyale
Well-Known Member
I think the most bang for buck when it come to fermentation control is this DIY BrewPi,Thorrak ESP8266 and the STC1000+
OP
OP
I haven't been following its thread - is the STC1000+ web enabled now?
If not, it's the outlier, and between you and me, I would never go back to control devices I can't wiggle from afar
Cheers!
If not, it's the outlier, and between you and me, I would never go back to control devices I can't wiggle from afar
Cheers!
Bigdaddyale
Well-Known Member
I know they were playing around with hooking it up to an esp8266 but not sure if they got it working. Once BrewPi gained momentum I think progress slowed down. I still have a few kicking around and they work great for Sous Vide.I built a few units for the guys in my brew club and they still use them for fermentation control. The game changer to the BrewPi was the $ 5.00 RPI0 and the $3.00 UNOR3I haven't been following its thread - is the STC1000+ web enabled now?
If not, it's the outlier, and between you and me, I would never go back to control devices I can't wiggle from afar
Cheers!
user 40839
Well-Known Member
- Joined
- Jul 13, 2009
- Messages
- 1,176
- Reaction score
- 86
Yeah - the thing about the BrewPi is that it's as cheap as you want it to be, really. Easily built from Chinese clone boards, and at this point most people even have a spare PC lying around to act as the web server if they don't want to plop the money on an RPi. The LCD and rotary stuff is really more for show, although I personally like being able to physically look in on it, and drives the cost up accordingly.
Oddly, the one area in the build where you CAN'T skimp seems to be the USB cable. I've got a total of five different ones here, and only ONE (a new one with double ferrite chokes) works. With both Arduinos hooked up to my RPi, the web interface only recognizes the one with that cable. (Even then it's shaky... methinks I need a hub, or at least provide power to the Arduinos externally rather than through the USB, even though I have a 10A power supply on the RPi)
Oddly, the one area in the build where you CAN'T skimp seems to be the USB cable. I've got a total of five different ones here, and only ONE (a new one with double ferrite chokes) works. With both Arduinos hooked up to my RPi, the web interface only recognizes the one with that cable. (Even then it's shaky... methinks I need a hub, or at least provide power to the Arduinos externally rather than through the USB, even though I have a 10A power supply on the RPi)
Oddly, the one area in the build where you CAN'T skimp seems to be the USB cable. I've got a total of five different ones here, and only ONE (a new one with double ferrite chokes) works. With both Arduinos hooked up to my RPi, the web interface only recognizes the one with that cable. (Even then it's shaky... methinks I need a hub, or at least provide power to the Arduinos externally rather than through the USB, even though I have a 10A power supply on the RPi)
I was running a similar configuration with 3 Arduinos and kept losing communication with one of them. Unacceptable. SO i added a powered USB hub as many here have and no more problems. It's definitely the way to go if you have more than 1 Arduino. Only 1 cable has ferrite chokes.

Received the boards from OSH Park today - Very nice quality
Made in USA too.
13 Days from order to receive - but the postal service took four days from Portland to my house 135 miles way...
hi where i can find this pcb?? could you please provide me link?
Bigdaddyale
Well-Known Member
You can order ten boards here for $25 bucks but you will have to wait a month to see them-( The wait is longer as the factory has gone on spring break)or maybe somebody has a spare board they can sell.hi where i can find this pcb?? could you please provide me link?
http://dirtypcbs.com/store/pcbs/buy/101121/c1e28b42b2bbfcb601f61f14415aeb76-brd
Here is the link to the OSH PARK site
https://oshpark.com/shared_projects/rcOadziH
hi where i can find this pcb?? could you please provide me link?
Bigdaddy has the correct link
Here is my complete parts list.
You may want to change C5 - C7 to a different smaller capacitor that fits the board better - see the picture - they don't fit on the board the best.
Similar threads
- Replies
- 9
- Views
- 2K
- Replies
- 11
- Views
- 1K

Latest posts
-

-

-

-

-

-

-

-
 Yeast question for a Quad - Don't understand BeerSmith....
- Latest: Northern_Brewer