You are using an out of date browser. It may not display this or other websites correctly.
You should upgrade or use an alternative browser.
You should upgrade or use an alternative browser.
DIY Walk In Cooler Build
- Thread starter Irrenarzt
- Start date

Help Support Homebrew Talk - Beer, Wine, Mead, & Cider Brewing Discussion Forum:
This site may earn a commission from merchant affiliate
links, including eBay, Amazon, and others.
OP
OP
Actually I was thinking of something like that sort of. We have a hot wire setup at work for cutting foam that is kind of like a table saw. It's not very portable though. I asked my boss if I could borrow it but he was reluctant. Based on your Amazon link, I just ordered one, should be here tomorrow. I never saw a portable hot wire but turns out they have them on Amazon, with prime shipping. Thanks Whsoj!
Actually I was thinking of something like that sort of. We have a hot wire setup at work for cutting foam that is kind of like a table saw. It's not very portable though. I asked my boss if I could borrow it but he was reluctant. Based on your Amazon link, I just ordered one, should be here tomorrow. I never saw a portable hot wire but turns out they have them on Amazon, with prime shipping. Thanks Whsoj!
Wow, I didn't think you would bye it man! I hope that's a good one!
We used to get coolers that Omaha meats would ship stuff in around Christmas kinda like the cheap ones in the gas stations but harder and 3x thicker held ice forever. I made a couple wooden coolers out of that stuff and those knives help out
OP
OP
I have a lot more foam to cut so I figure 30 bucks is worth a try. Thanks for the heads up.
Monster Mash
Well-Known Member
The problem with some hot wire cutters is they aren't deep enough to cut large sheets. I made my own with steel fishing leader and a variac. I put steel rods on a table at the height I wanted and slide the sheets across. Just like melted butter!!
OP
OP
Yeah I was a little worried about that, but for 30 bucks shipped overnight, it's worth a try, especially if it kicks ass. If it doesn't work, oh well. I'll have a foam cutting tool suitable for little figurines/christmas tree ornaments and what not.
Some good news today, Ghettogyle Greg got a hall pass from the SWMBO to work on the cooler tomorrow and on Sunday. My boy Scottish is coming over Saturday, so I will have a helper all weekend. We should see some good progress.
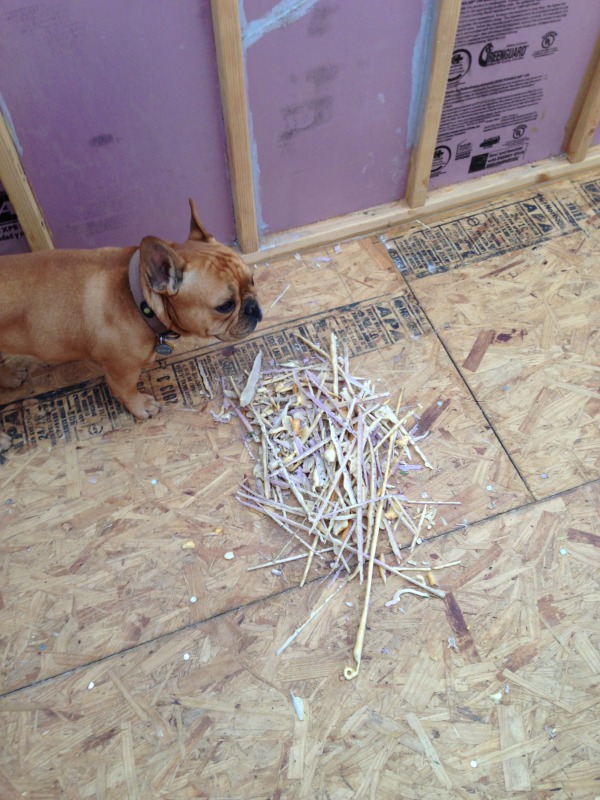
Got the rest of the foam cut out today after work:
I was a little worried as the only tarp I have is covering the scratch and brown coat/Portland cement bags. Yesterday's hail/rain/floor soaker storm has started to cup the exposed OSB layer at the seams a bit. I think we can screw it down but I'll need to get the right screws so we don't penetrate the vapor barrier underneath all that much or at all.
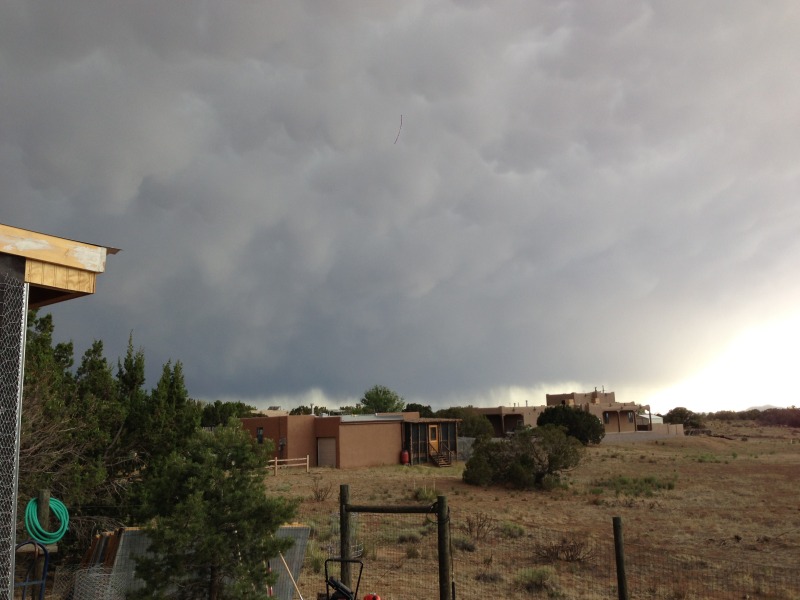
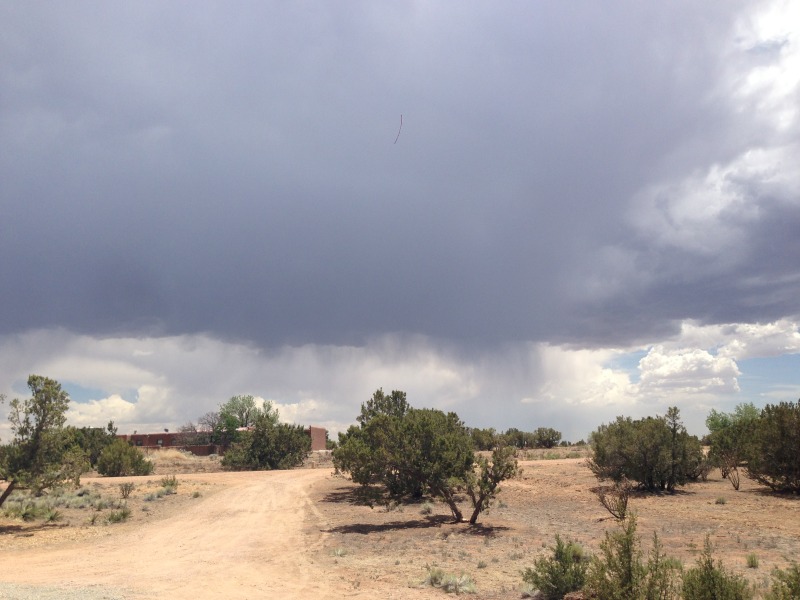
It's supposed to clear up tomorrow for the weekend but we had a close call just now:
Some good news today, Ghettogyle Greg got a hall pass from the SWMBO to work on the cooler tomorrow and on Sunday. My boy Scottish is coming over Saturday, so I will have a helper all weekend. We should see some good progress.
Got the rest of the foam cut out today after work:
I was a little worried as the only tarp I have is covering the scratch and brown coat/Portland cement bags. Yesterday's hail/rain/floor soaker storm has started to cup the exposed OSB layer at the seams a bit. I think we can screw it down but I'll need to get the right screws so we don't penetrate the vapor barrier underneath all that much or at all.
It's supposed to clear up tomorrow for the weekend but we had a close call just now:
Carlscan26
Well-Known Member
What kind of dog is that? Looks like a pug mix?
tucsonmike
Active Member
Where do you live? I didn't see clouds all day...
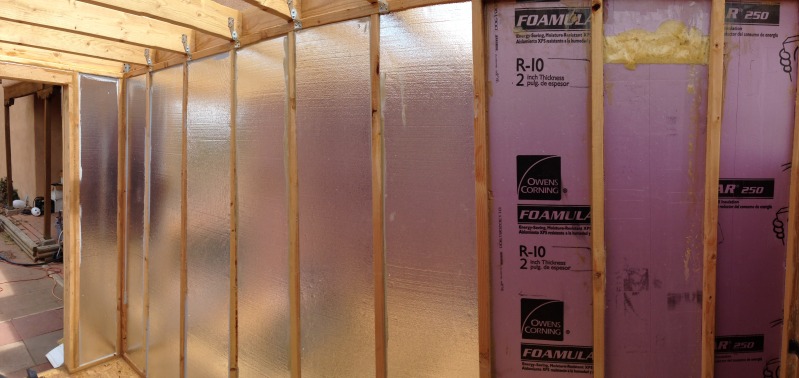
Why all the work to infill the stud cavities with XPS ? It's a lot of work and money espeically if your shopping at the HD.
I would have infilled with roxul or HD fiberglass and done an interior foam wrap. It's cheaper easier and elimiates thermal breaks.
I am not trying to critique what you have done so much as make suggestions for others.
I would have infilled with roxul or HD fiberglass and done an interior foam wrap. It's cheaper easier and elimiates thermal breaks.
I am not trying to critique what you have done so much as make suggestions for others.
What kind of dog is that? Looks like a pug mix?
I'm gonna go with French Bulldog. And excellent work on this project BTW.
OP
OP
Why all the work to infill the stud cavities with XPS ? It's a lot of work and money espeically if your shopping at the HD.
I would have infilled with roxul or HD fiberglass and done an interior foam wrap. It's cheaper easier and elimiates thermal breaks.
I am not trying to critique what you have done so much as make suggestions for others.
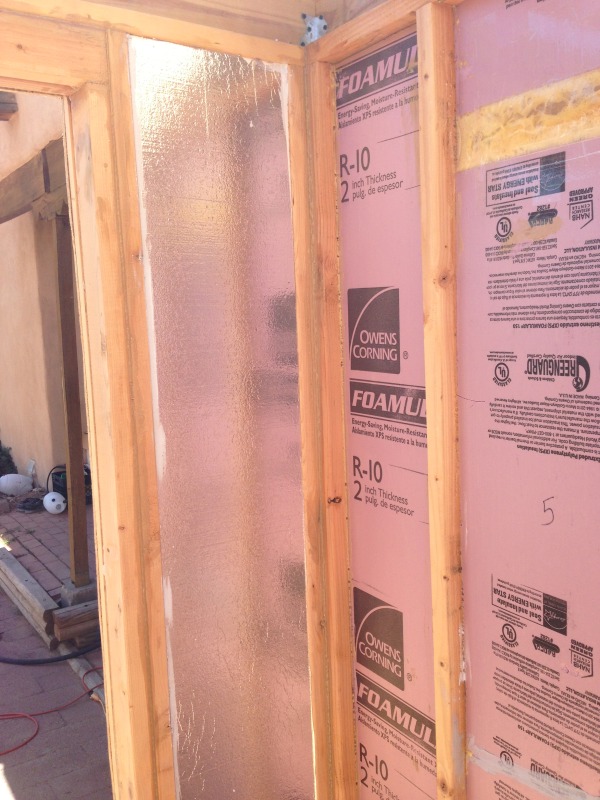
XPS holds up well to moisture. In retrospect, I think the roxul would have been easier, but I couldn't find any in stock at any store here. I wanted to use it for the floor and wall fills based on the document on the storeitcold site where they show their cooler build in the basement. I would have had to order it in. I wasn't going to use the pink fiberglass fill as that can get moldy easily. I have to say the XPS is tough as nails. You can see it was pelted hard with hail and it held up pretty well. If I had used roxul and left it exposed, it wouldn't be in as good of condition as the XPS is.
I'm not a contractor, nor do I have a lot of experience in these kinds of matters. Therefore I'm sure I could have done things better/differently. I'm just trying to do the best I can with the knowledge and resources I have on hand. Would I do things differently? Probably in some ways. But for the most part I think we are doing a pretty good job with limited resources. If I had the cash, I would have a pad poured and a 12' x 6' Masterbilt outdoor spec walk in cooler right on the pad right now. Obviously that wasn't in the cards or that's how I would have gone.
The point of this thread is exactly to make suggestions so others can learn from my experience (or lack thereof). So please continue to make suggestions. It is valuable and allows others to learn from this.
One bonus of the XPS is it is pretty firm and it is cut tight so I imagine it does firm up the walls quite a bit. As it is windy here, a firm building is better than a soft one.
OP
OP
What kind of dog is that? Looks like a pug mix?
French bulldog
OP
OP
I was just up the street for breakfast with Greg and we saw the most ghetto walk in cooler. I'm excited to be on the right track more or less with this one. I'll take pics the next time I'm over there as I forgot my phone.
Somewhat slow start today as Greg took off at 8:30 (it's 10:30 now) but he should be back in a bit. I've just been straightening up a bit as it's a freaking mess here.
Fixing the OSB cupping a bit:
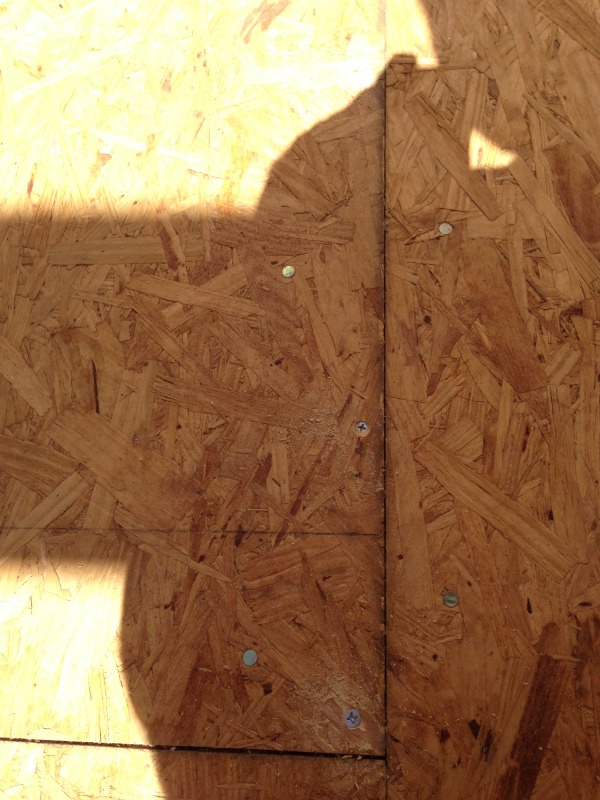
You can't really tell from the picture, but it is looking much flatter than it did before. I need to get the roof on before monsoon season kicks in.
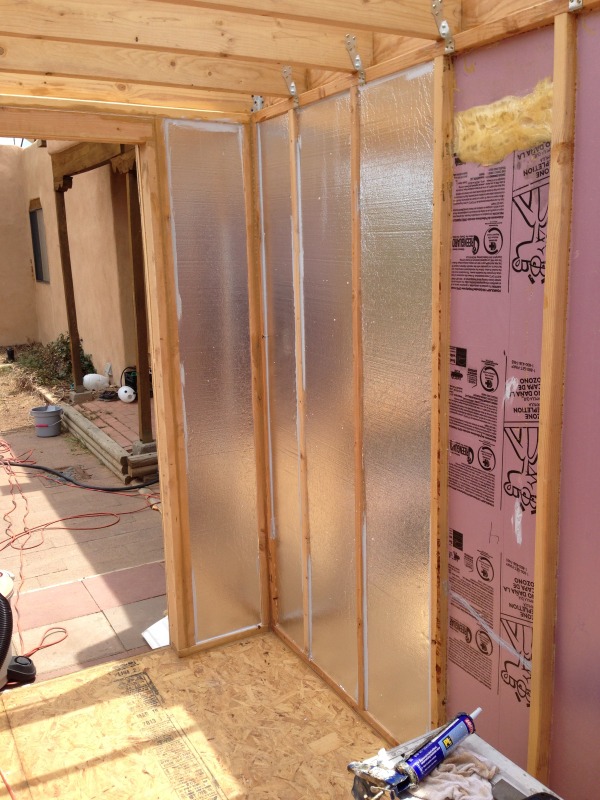
Starting the 1" EPS population:
A few more:
Takes awhile to do this...
Somewhat slow start today as Greg took off at 8:30 (it's 10:30 now) but he should be back in a bit. I've just been straightening up a bit as it's a freaking mess here.
Fixing the OSB cupping a bit:
You can't really tell from the picture, but it is looking much flatter than it did before. I need to get the roof on before monsoon season kicks in.
Starting the 1" EPS population:
A few more:
Takes awhile to do this...
Carlscan26
Well-Known Member
Irrenarzt said:I was just up the street for breakfast with Greg and we saw the most ghetto walk in cooler. I'm excited to be on the right track more or less with this one. I'll take pics the next time I'm over there as I forgot my phone.
Somewhat slow start today as Greg took off at 8:30 (it's 10:30 now) but he should be back in a bit. I've just been straightening up a bit as it's a freaking mess here.
Fixing the OSB cupping a bit:
http://s49.photobucket.com/user/Smoooth69/media/null_zps7a680ba1.jpg.html
You can't really tell from the picture, but it is looking much flatter than it did before. I need to get the roof on before monsoon season kicks in.
Starting the 1" EPS population:
http://s49.photobucket.com/user/Smoooth69/media/null_zpsebe2590e.jpg.html
So after all this in fill then the cooler walls go in that you showed us earlier? If you didn't have those additional walls would you be doubling up these current walls?
OP
OP
So after all this in fill then the cooler walls go in that you showed us earlier? If you didn't have those additional walls would you be doubling up these current walls?
Yes the panels will cap these current layers on the inside. Why not? I want an efficient cooler. A bit excessive perhaps but if you are gonna do it, why be ghetto? The better I seal it up now/insulate it, the cheaper it'll be to run in the long term.
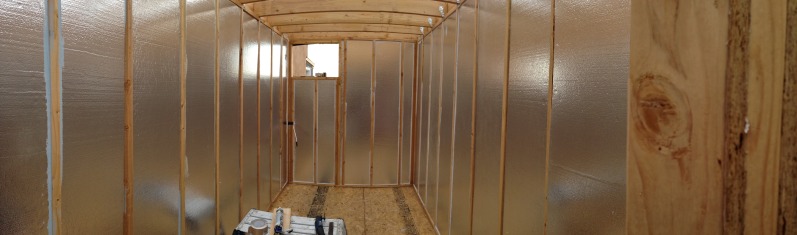
Still populating:
Took a break to work a bit more on the lath:

Ran out of caulk but got most of the EPS in:
Made a quick Home Depot run and I'm good to go for caulk and lath for the weekend.
Got a few more EPS panels sealed before I ran out of light.
Great build! I do have a recommendation for anyone that wants to duplicate it. If you are not building in an extremely dry place, like this one, you need to get the floor joists up on pear pads 6 to 8 inches off grade. If you decide to leave it on grade, I also would not suggest filing cavities with concrete mix. It will wick all available moisture from the ground to the wood.
Carlscan26
Well-Known Member
Impressive. Most impressive.
OP
OP
Great build! I do have a recommendation for anyone that wants to duplicate it. If you are not building in an extremely dry place, like this one, you need to get the floor joists up on pear pads 6 to 8 inches off grade. If you decide to leave it on grade, I also would not suggest filing cavities with concrete mix. It will wick all available moisture from the ground to the wood.
Yeah this is a good point and will be a big problem in wet climates. If you are anywhere other than the southwest, do yourself a favor and have a pad poured and be sure to insulate under and around the pad with XPS 250 as this is what 250 is designed for. It is able to handle the compressive loads associated with being under a concrete structure.
In other words, don't be a cheapass m'er f'er like me.
A big problem here is mice getting into walls. The solid insulation like EPS/XPS do a great job of keep mice from burrowing into them. The loose types do not. I have found more mice nests in my house walls than I care to recall over the years. Mice also do not like base course or concrete. Keep it firm to keep mice out.
OP
OP
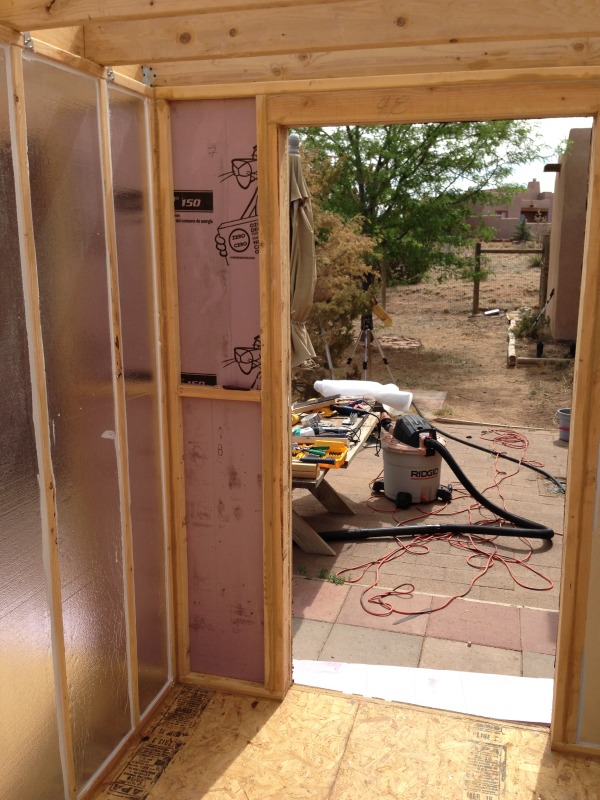
Retake of the power coming in shot from last night:
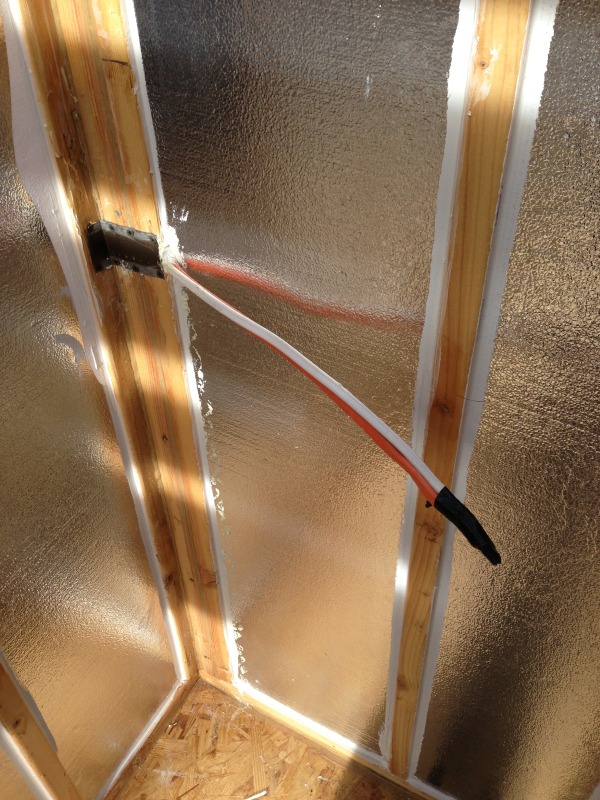
I removed the blurry pic from the original post.
I removed the blurry pic from the original post.
OP
OP
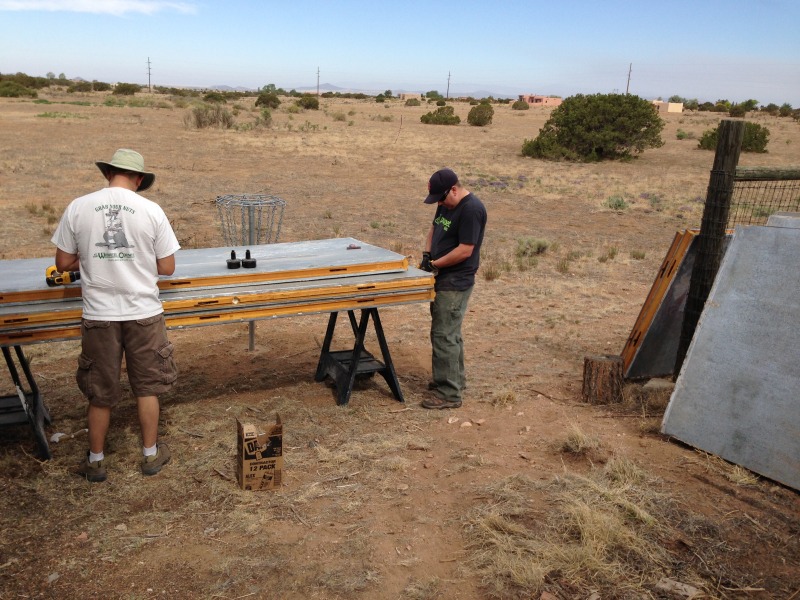
Lucked out today as I've got Scottish, Paulie and it sounds like Ghettogyle Greg might be getting a hall pass today as well.
Scottish and Paulie descaling the cooler panels:
Meanwhile I'm caulking it up in the cooler...
Two more to go:
Got all the wall EPS installed, but forgot to take a pic. No biggie. It's getting covered up anyway.
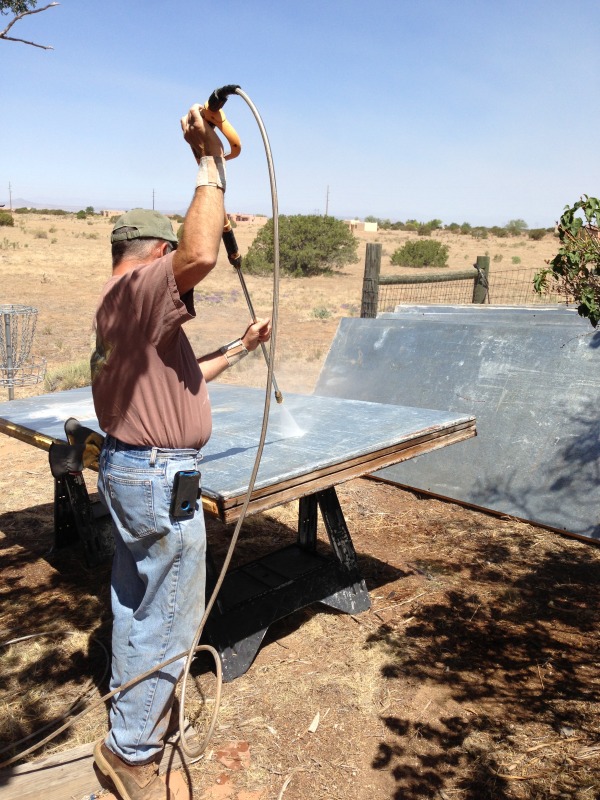
Onto pressure washing the cooler panels:
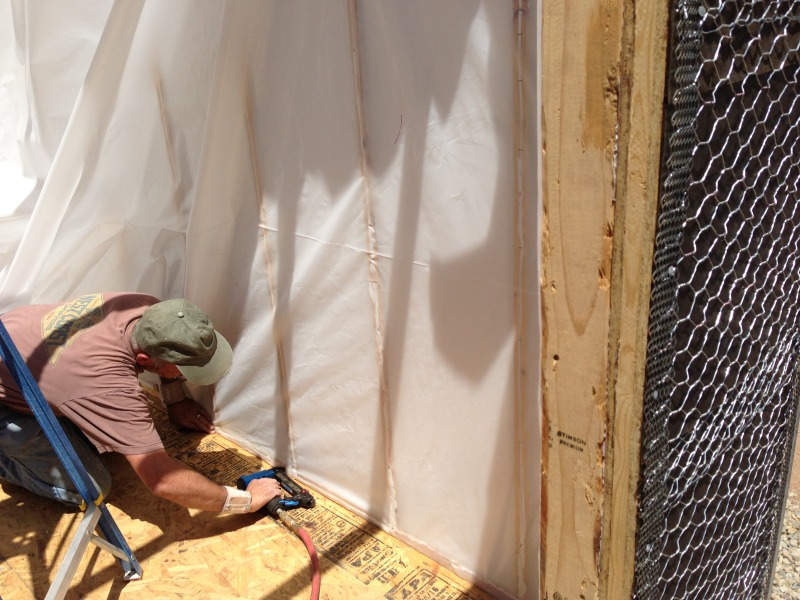
Ghettogyle Greg got me started, I finished that up while he is getting started on the inner vapor barrier. He's caulking and stapling, as there is no such thing as enough overkill.
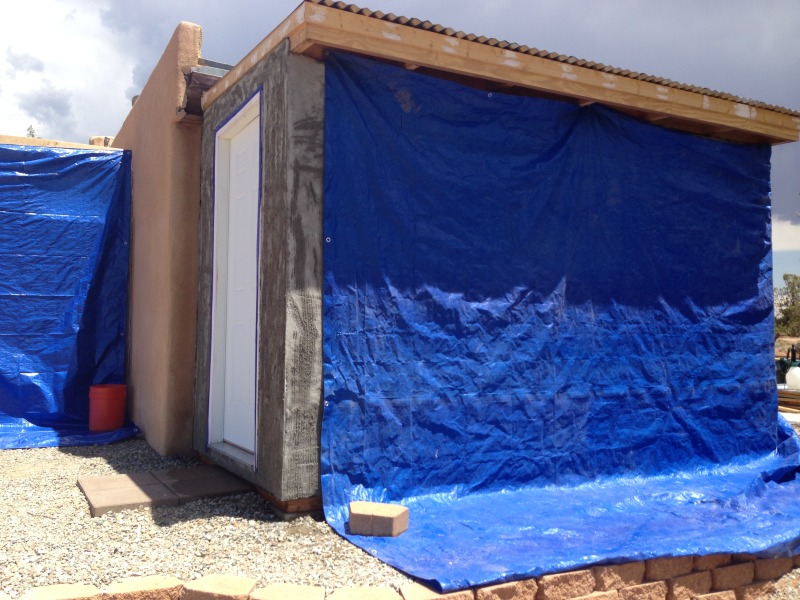
Scottish and Paulie had to go but scratch coat is going up on the shed:
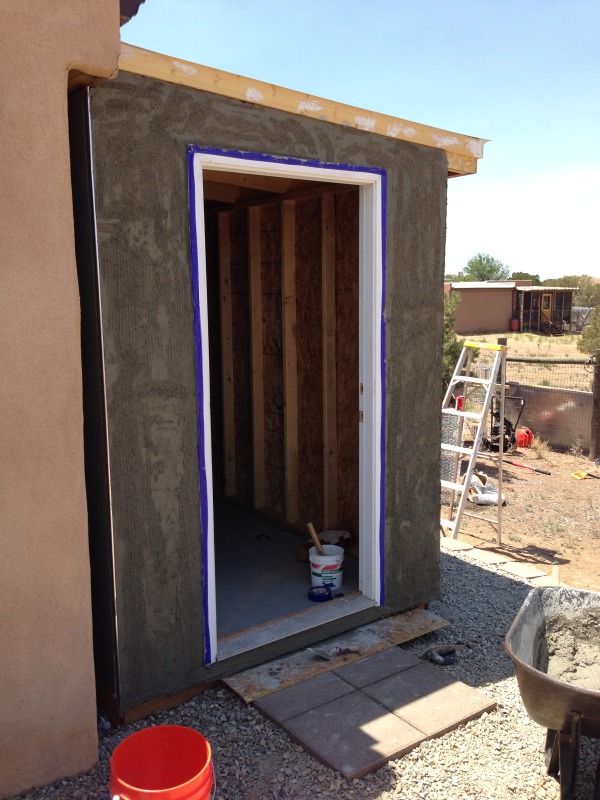
It's hot as hell today and Greg had to go home and take a nap. He was about to pass out from the heat. I however am powering through it. In his defense, it's insanely hot inside the walk in cooler...
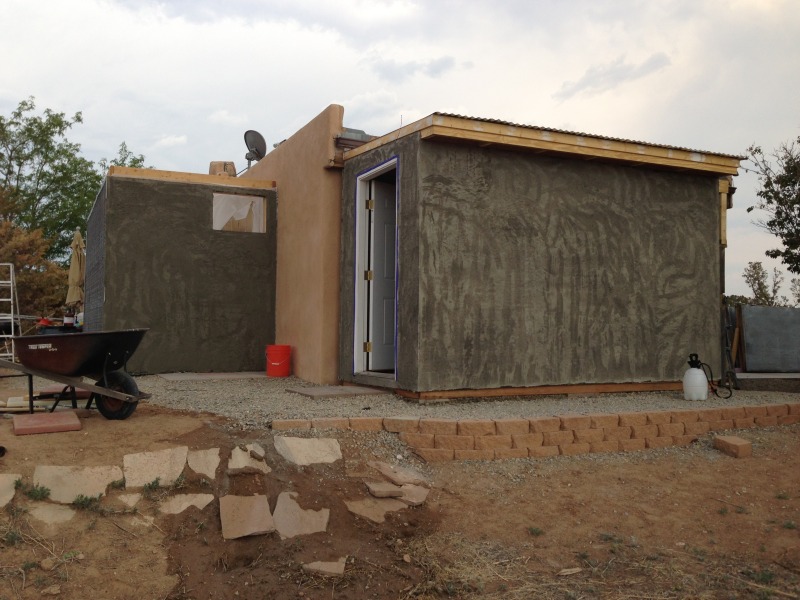
Scratch coat is done on the shed and the AC unit side of the cooler:
Vapor barrier going up on the inside wall of the cooler:
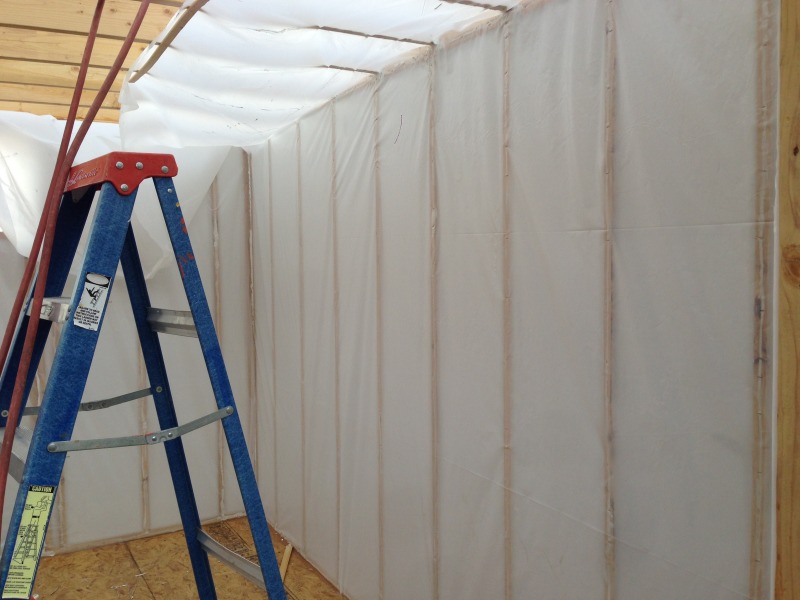
Caulked and stapled:
Scottish and Paulie descaling the cooler panels:
Meanwhile I'm caulking it up in the cooler...
Two more to go:
Got all the wall EPS installed, but forgot to take a pic. No biggie. It's getting covered up anyway.
Onto pressure washing the cooler panels:
Ghettogyle Greg got me started, I finished that up while he is getting started on the inner vapor barrier. He's caulking and stapling, as there is no such thing as enough overkill.
Scottish and Paulie had to go but scratch coat is going up on the shed:
It's hot as hell today and Greg had to go home and take a nap. He was about to pass out from the heat. I however am powering through it. In his defense, it's insanely hot inside the walk in cooler...
Scratch coat is done on the shed and the AC unit side of the cooler:
Vapor barrier going up on the inside wall of the cooler:
Caulked and stapled:
OP
OP
At this point, I'm just keeping the scratch moist until the sun goes down. Don't want it to get too dry too fast or it'll crack.
OP
OP
Yesterday I was measuring 125 degrees F in the walk in so working in there was not an option. I was struggling just to keep the scratch coat wet. I was watering every 30 minutes and around 4 PM when the sun was on it the most, I would wet it and it was just drying within minutes. I'll be taking the day off just to do the same today. It is supposed to be even hotter today.
Yesterday I was measuring 125 degrees F in the walk in so working in there was not an option. I was struggling just to keep the scratch coat wet. I was watering every 30 minutes and around 4 PM when the sun was on it the most, I would wet it and it was just drying within minutes. I'll be taking the day off just to do the same today. It is supposed to be even hotter today.
But at least it's a dry heat right?

OP
OP
125 is Saudi Arabia kind of hot, no matter how you cut it. The ambient temperature wasn't terrible, but it was hot enough to dry out the scratch faster than you'd like.
125 is Saudi Arabia kind of hot, no matter how you cut it. The ambient temperature wasn't terrible, but it was hot enough to dry out the scratch faster than you'd like.
Don't envy you there! It's rainy and foggy in Murryland

OP
OP
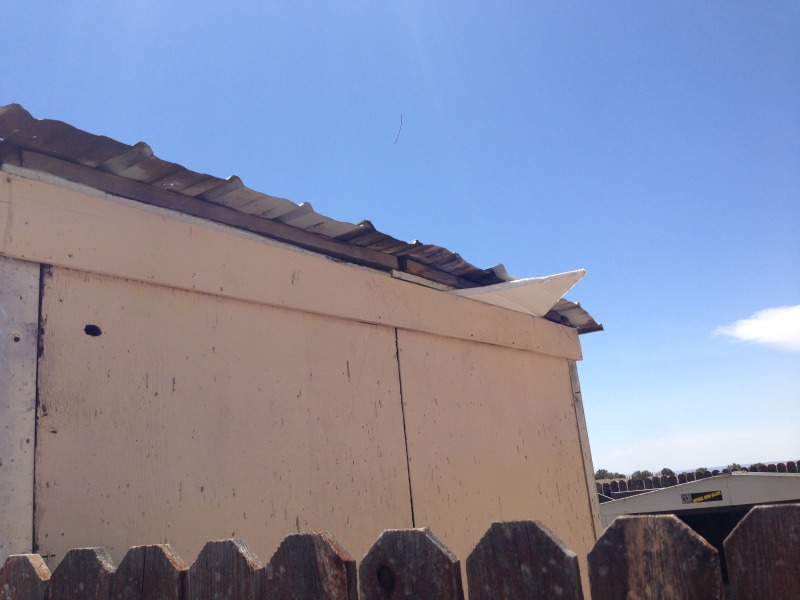
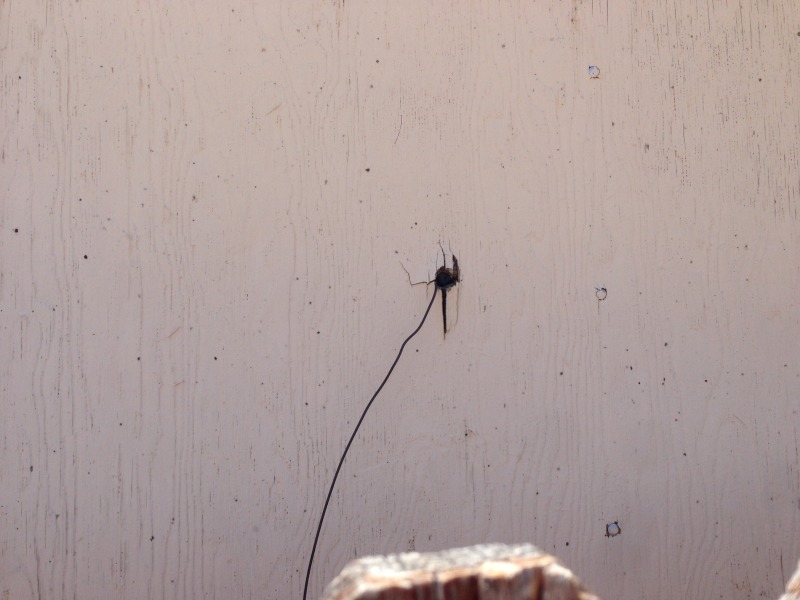
So I headed out to lunch and so I stopped by the place with the ghetto-ass walk in cooler and took some pics. I love how you can see the EPS foam just hanging right out the side of the roof. This gives me faith in what we are doing is on the right track for the most part.
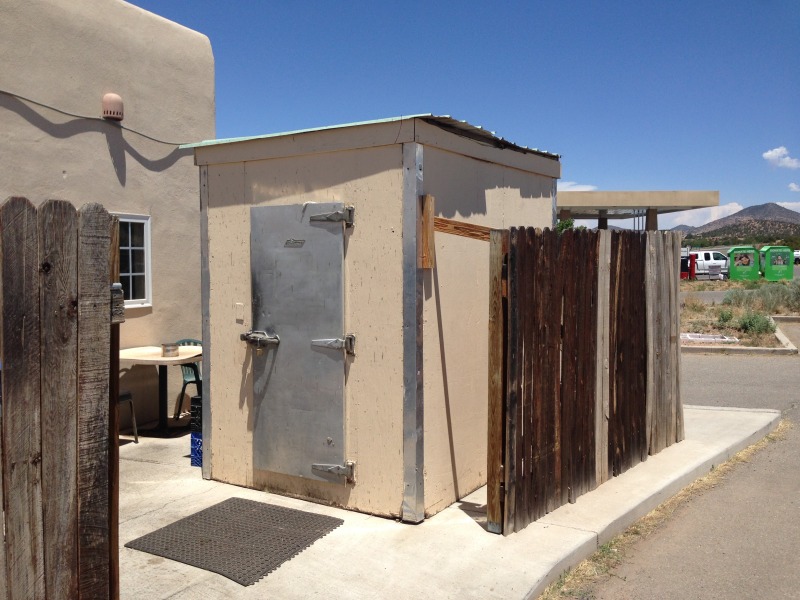
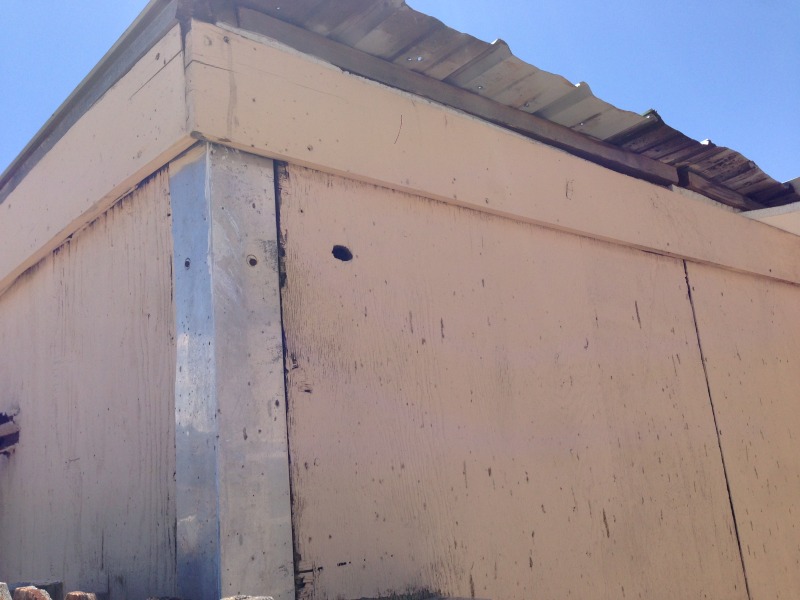
Yes that is a hole in the siding.
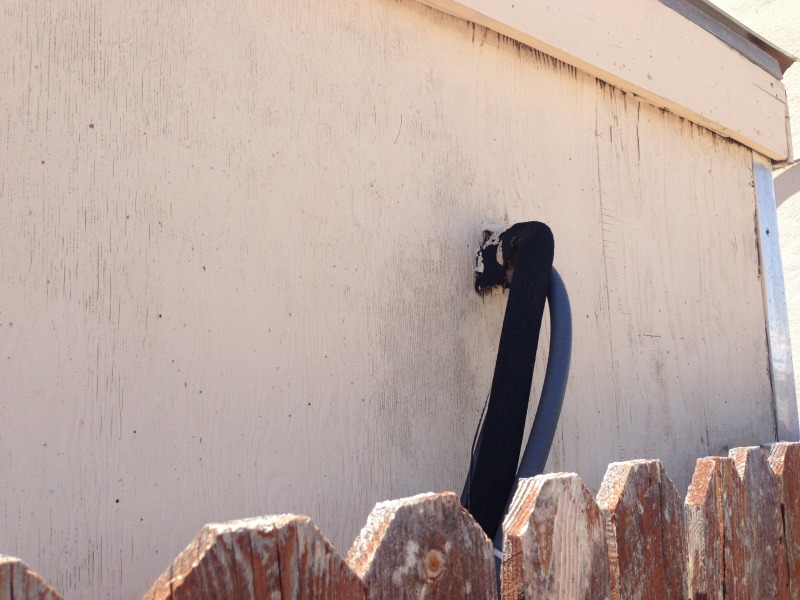
At least there is a wire sticking out of this hole.
Yes that is a hole in the siding.
At least there is a wire sticking out of this hole.
So I headed out to lunch and so I stopped by the place with the ghetto-ass walk in. Some pics. I love how you can see the EPS foam just hanging right out the side of the roof. This gives me a little faith in what we are doing is on the right track for the most part.
Who needs proper building standards when you can pay the electricity bill, right??? Glad you're doing it the right way!

Travestian
Well-Known Member
It always costs more to do it right the first time. It's always worth it when you get to laugh at the other guys in the end. More $ up front means less money in the end. Good on you for doing it right the first time.
OP
OP
Thanks fellas for the good words.
G. Greg brought over a second tarp to try to keep the scratch coat damp:
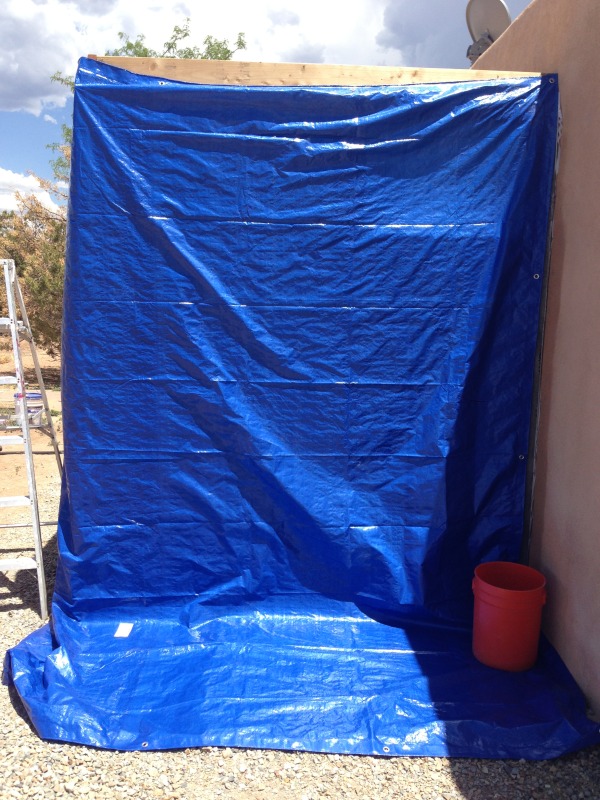
I already had one up:
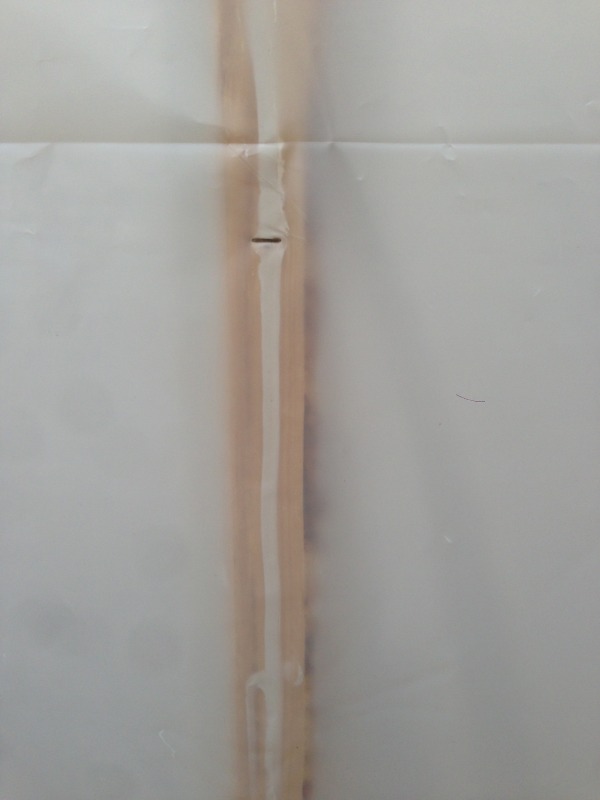
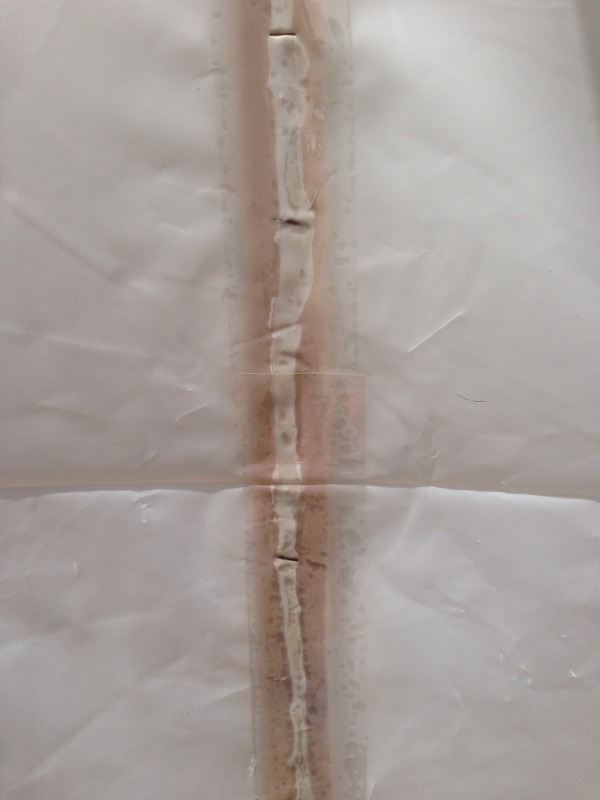
In the interim, I'm taping the stapled areas on the inner vapor barrier to further seal them. Nothing kills better than overkill:
Monsoon season looks to be starting up here. Some relief from this wicked heat is welcome. I really need to get a roof on the cooler.
G. Greg brought over a second tarp to try to keep the scratch coat damp:
I already had one up:
In the interim, I'm taping the stapled areas on the inner vapor barrier to further seal them. Nothing kills better than overkill:
Monsoon season looks to be starting up here. Some relief from this wicked heat is welcome. I really need to get a roof on the cooler.
OP
OP
Another data point. The tarps don't matter all that much during the peak heat of the day. The scratch coat is drying with or without a tarp. That stuff is thirsty!
Tarping seemed to help earlier and I will try them tonight for overnight but for now, I'm watering the walls every 15 minutes.
Tarping seemed to help earlier and I will try them tonight for overnight but for now, I'm watering the walls every 15 minutes.
OP
OP
Yeah I was thinking of ways to automate the process. I'm using a pressure washer now as I can ****** the hell out of it in no time. In fact I'm going out there to ****** it right now.
Travestian
Well-Known Member
Forgive my ignorance but why do you have to keep the scratch coat wet? What is it for in the first place? And what is the next step beyond the scratch coat?
The OP can correct if I am wrong. It needs to stay wet so that it will not dry too fast and crack. The scratch coat is the base coat for stuccoing walls. The finish coat has the color and desired texture to make it pretty.
OP
OP
Exactly. Bookworm nailed it but there is also a brown coat that goes on top of the scratch coat, which is the same sanded fastwall stucco mix as the scratch coat but is smoothed out. Color coat is the third coat and goes on last and is just skimmed on really light. I have 16 bags for both the scratch and brown coats for both the cooler and shed. It should only take 5 bags total for the color. Overall, all three coats should be no more than 3/4" thick total. There are newer types of engineered stucco coatings with less coats (Dryvit is one that comes to mind, Sto is a popular system as well) but since my house is old school El Rey stucco, I wanted to try to match it as closely as possible. Plus the old school schit is cheaper overall I imagine.
I kind of skimped a bit and went with oversized chicken wire for the bulk of the lath work. Ideally you want lath all around as it does a better job holding the scratch to the wall but I'm bleeding cash hard and that step saved me 100 bucks. I stapled the hell out of the chicken wire with long staples and an air stapler as well as nailing it with longer than spec galvanized roofing nails (should use 3/4", I went with 1-1/4" for more bite). I think it'll be ok as I can see the scratch starting to crystallize, which is a good sign. You want it to cure nice and firm around the underwiring without it cracking too much. In fact, I think I better go water it.
I was going to just paint the outside sheathing the same color as the house but then it occurred to me that I would have to repaint both the shed and the cooler maybe once a year as UV is hard on paint here. May as well just stucco them both and not worry about the painting (i.e. more time to brew in the future). Plus if the HOA comes a knocking, they are much more likely to cut me some slack if I have a matched to the house stucco coat. ALL the houses here must have stucco as per the covenants. I think I'll be in good shape as I've learned a bit more on the requirements for not needing a permit since I started this project.
Under 120 ft^2
No additional water use/leaching into the septic (their main concern is adding additional living space, which we are not doing whatsoever, it's all for storage).
Stucco to match house
Must abut the house, not supposed to be free standing out in the open. They don't want me blocking others views and what not.
I should be OK as I will be in compliance on all those points. I took a drive around and found a high number of non-compliant sheds so I'll be glad to take them around for a nice little ride around the neighborhood should they pitch a fit.
I am still thinking about the flooring in the cooler. I was thinking perhaps there is something like cork flooring that would add some additional r-value. I was going to go with commerical vinyl tiles but if anyone has some interesting ideas, I'd love to hear them. Cost is an issue as I don't want to be kicking down another kilobuck for some crazy travertine tiles or anything like that.
Travestian
Well-Known Member
Cool. Thanks for the info. Interesting why the HOA's require stucco. Seems like there would be better building materials available with current technology.
OP
OP
Oh definitely. Stucco is a flawed material as it cracks in time no matter what you do. I think the HOA would allow other stucco types of building materials, but they don't allow vinyl siding, or other things like that. I suppose they want to keep property values up, which is commendable. They don't allow non-earth tone colors either. They want the houses to blend into the surrounding nature as much as possible. You definitely can't paint your house purple here. There was some crazy artist who painted her house baby blue at one point and they took her to court and made her paint it tan or some other neutral earth tone color. Some other dude was flying a red old school commie Russian flag with the yellow scythe on it from way back in the day and they made him take it down.
They really don't like things that stand out. But if it keeps the property values up, then I can't complain. I have no desire to fly a red flag of Russia anyway.
They really don't like things that stand out. But if it keeps the property values up, then I can't complain. I have no desire to fly a red flag of Russia anyway.
starman
Well-Known Member
I'd skip the cork due to the likelihood of moisture / condensation / spills. The additional r value will be minimal.
Cheap ceramic or a Terra cotta tile - either with some texture would be my first choice with a vinyl sheet product as 2nd.
Cheap ceramic or a Terra cotta tile - either with some texture would be my first choice with a vinyl sheet product as 2nd.
Similar threads
- Replies
- 4
- Views
- 937
- Replies
- 6
- Views
- 691
