Wooden Rocking Horse

Homebrew Talk - Beer, Wine, Mead, & Cider Brewing Discussion Forum

Help Support Homebrew Talk - Beer, Wine, Mead, & Cider Brewing Discussion Forum:

This site may earn a commission from merchant affiliate links, including eBay, Amazon, and others.

wobrien

Well-Known Member
Joined
Jun 10, 2011
Messages
5,214
Reaction score
1,862
Location
Plymouth Meeting
In addition to brewing I love to use my little free time to make sawdust. About 4 years ago, before my first son was born, I made a nice wooden rocking horse based off one I saw online. Now my second son's 2nd birthday is approaching and my brother's wife is pregnant, so two more horses have been ordered up.

Figured I'd document the build here because I really enjoy these types of threads. So, here goes.
 
Ran the boards through the planer and the jointer.

I had made up patterns out of 1/4" hardboard last time I made a horse, so it was easy to lay out the components and cut them out on the band saw.
View attachment ImageUploadedByHome Brew1445987897.101592.jpg

Next step was to clean up the edges with the spindle sander the run them through the router with a 3/8" round-over
View attachment ImageUploadedByHome Brew1445987981.813671.jpg
View attachment ImageUploadedByHome Brew1445987999.930905.jpg
Also drilled the holes for the handle (3/4" no round-over), the eye (1 1/4"), and the nose/mouth (3/4")
 
Next step was to temporarily clamp the legs to the body to measure the distance between the feet so I could lay out the cross pieces and the rockers.
View attachment ImageUploadedByHome Brew1446121059.882182.jpg
Then I cut several 3/8" oak dowels into 2 1/2" pieces to use as pegs for the joinery.
View attachment ImageUploadedByHome Brew1446121123.486040.jpg
Then I glued up the rockers and cross pieces and let them dry for about an hour or so. As you may be able to see in the picture, I let the cross pieces rest on 1/2" strips of wood so they'd be offset from the top of the rockers.
View attachment ImageUploadedByHome Brew1446121289.259174.jpg
View attachment ImageUploadedByHome Brew1446121179.179325.jpg
 
I wasn't concerned with splitting the seat, so I continued with the pegs here
View attachment ImageUploadedByHome Brew1446380704.099647.jpg
I glued the legs to the cross pieces using a scrap piece of lumber as a spacer. Adding the pegs to the legs is the toughest part of this job, and with the tight pegs, it's nearly impossible, so I ordered a slightly larger drill bit to make it easier. Remember to test fit those pegs on scrap before damaging your rocking horse!
 
I haven't finished these cherry horses yet, but here are a few pics of one I did in black walnut.
View attachment ImageUploadedByHome Brew1446386841.288089.jpg
View attachment ImageUploadedByHome Brew1446386853.234422.jpg
View attachment ImageUploadedByHome Brew1446386864.752706.jpg
I finished it with walnut oil that I bought at the grocery store, then once that dried I sprayed it with shellac.

As for the measurements, I'll have to measure the templates I made. Next time I'm in the shop I'll try to remember to post those.
 
Spacht in skippack. The only place I've been, and I've had good experiences there.

How's the pricing? I use Rittenhouse Lumber. They aren't exactly the cheapest, but they are literally in the back of my neighborhood. Usually have a really nice selection of Cherry, hard Maple, and Walnut, which is what I tend to work with. Also a ton of poplar as they make a ton of moldings for Chestnut Hill homes.
 
How's the pricing? I use Rittenhouse Lumber. They aren't exactly the cheapest, but they are literally in the back of my neighborhood. Usually have a really nice selection of Cherry, hard Maple, and Walnut, which is what I tend to work with. Also a ton of poplar as they make a ton of moldings for Chestnut Hill homes.


Don't really have a point of reference to compare prices (except it was cheaper than Woodcraft, haha) but to give you an idea it $90 for 16+ bd-ft of clean 4/4 cherry.

They have a great selection of cherry, walnut, maple, poplar and the flitches they have are awesome. I need an excuse to buy a couple of them.
 
I did a test with the 10mm bit and the fit is much better so we shall proceed
View attachment ImageUploadedByHome Brew1446917020.530317.jpg

Next step was to finish connecting the legs to the cross pieces
View attachment ImageUploadedByHome Brew1446917085.319951.jpg
The inside pegs go straight down and the outside ones go in on an angle

Now I am waiting for the glue to set between the legs and the body. Once that is set up I will drill through the legs into the body for more dowels.
View attachment ImageUploadedByHome Brew1446917162.414439.jpg
Coming together now!
 
I had always been apprehensive about using a block plane to flush trim dowels and tenons. A slip could gouge the work piece or chip off the opposite side below the level of the work. I bought a Japanese flush cut saw. Wide flexible blade to stay flat on the work surface, with the teeth set on only one side to prevent scoring the work surface. Cuts on the pull stroke for better control. One of my great purchases.
 
Beautiful work.
Love to see plans on those as well.
I have plans for a boat cradle I planned to make for my little guy before he came along, but... things happened and he's now 5 1/2 months old. I'm planning on nixing the cradle idea and turning it into a rocking "horse" (boat) for him. The plans have instructions to turn it from a hanging cradle to a side-to-side rocker, I'll play with those a bit to make it a front-to-back rocker. I'll need to make a seat for it, and I'll make a little ship's wheel as a "handle."
I should get on that project... among way too many others.
 
I had always been apprehensive about using a block plane to flush trim dowels and tenons. A slip could gouge the work piece or chip off the opposite side below the level of the work. I bought a Japanese flush cut saw. Wide flexible blade to stay flat on the work surface, with the teeth set on only one side to prevent scoring the work surface. Cuts on the pull stroke for better control. One of my great purchases.


Those are really nice, wish I bought one of them, it's the perfect tool for these kind of projects. I'll probably get one before the next horse I make.
 
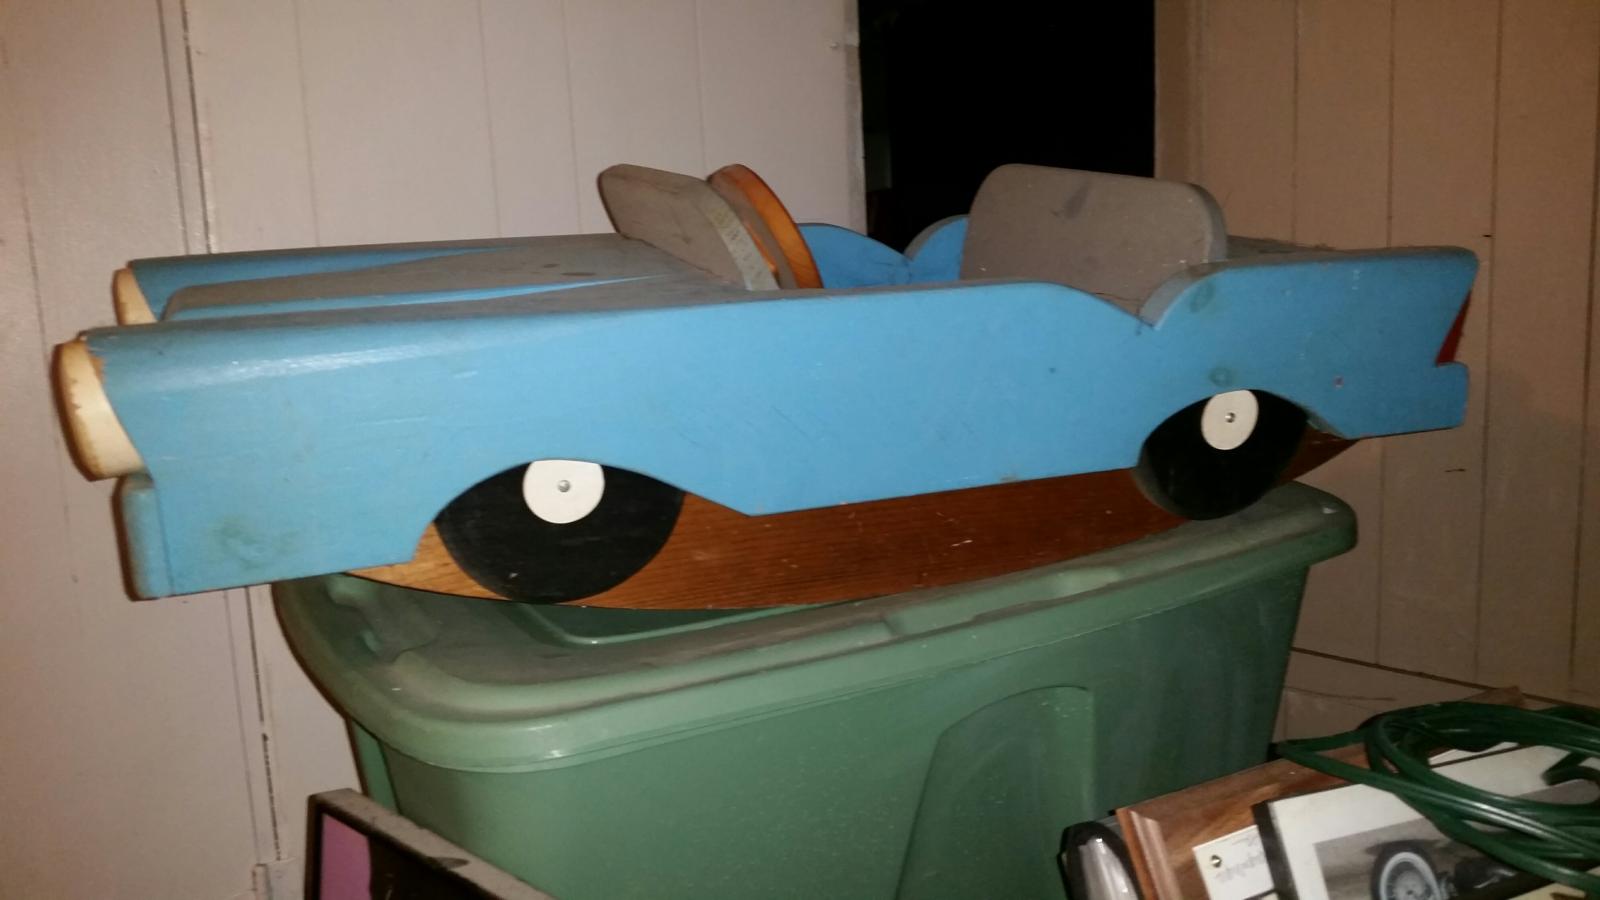
Very nice work on the horses. My farther loved to do things like that for the grand kids. He made for my son a rocking 55 Chevy. I had one at the time. I have to get a photo of it to post.
The kids are going to love them.
 
Very nice work. Those will likely be enjoyed by multiple generations of kids!


Very nice work on the horses. My farther loved to do things like that for the grand kids. He made for my son a rocking 55 Chevy. I had one at the time. I have to get a photo of it to post.
The kids are going to love them.


Thanks! I hope they get passed down, that would be nice to see
 
Thanks! I hope they get passed down, that would be nice to see

As promised. My son is now 23, so the car is around 20 years old I am saving for his kids (if ever) It has been in my basement uncovered for 18 years.

55chevy.jpg


55chevy2.jpg
 
Back
Top