Show us your sculpture or brew rig

Homebrew Talk - Beer, Wine, Mead, & Cider Brewing Discussion Forum

Help Support Homebrew Talk - Beer, Wine, Mead, & Cider Brewing Discussion Forum:

This site may earn a commission from merchant affiliate links, including eBay, Amazon, and others.
This is about 90% complete. Adding a shelf to it, mounting a 2' x 4' back board to mount some hangers for potable hoses and a 2-stage camper filter, putting a couple coats of Thompson honey gold tinted water sealer, and finally putting some flashing down on the decks.
 
That HLT looks like a midget compared to that monster boil kettle!

lol Yeah, I was originally going to get a 20 (to go with my former 10 gallon BK becoming my HLT), but the LHBS had a 'factory blemished' 30 that with a discount I had scored on a Facebook trivia post cost me less than the 20 would have (especially since he doesn't stock the 20s and would have had to order it). Both the LHBS owner and I looked but couldn't find the blemish, so score for me. I'm going to wind up getting a 20 sometime this year probably, but I need more storage space before stepping up to 15 gallon batches.
 
85% complete... Only a few hundred more dollars!

ForumRunner_20130429_211425.jpg
 
Looking good Mike!

Thanks Doug, I'll bring an extra 6 pack for you if I see you at the pick-up. I have a PA that's 30-15-5 Simcoe or a Wee Heavy (amber Ale) that's 30-15-5-0 Zythos; both bittered with Magnum. I'm bringing extra 6packs to get some feedback from fellow brewers.
 
Smithy said:
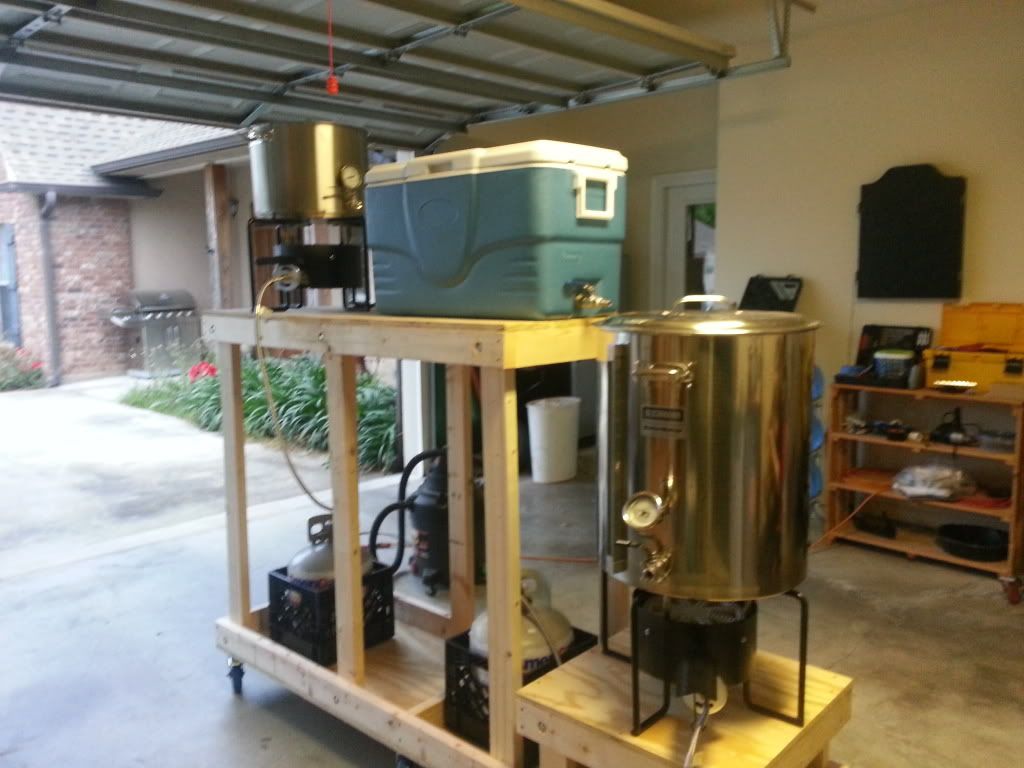
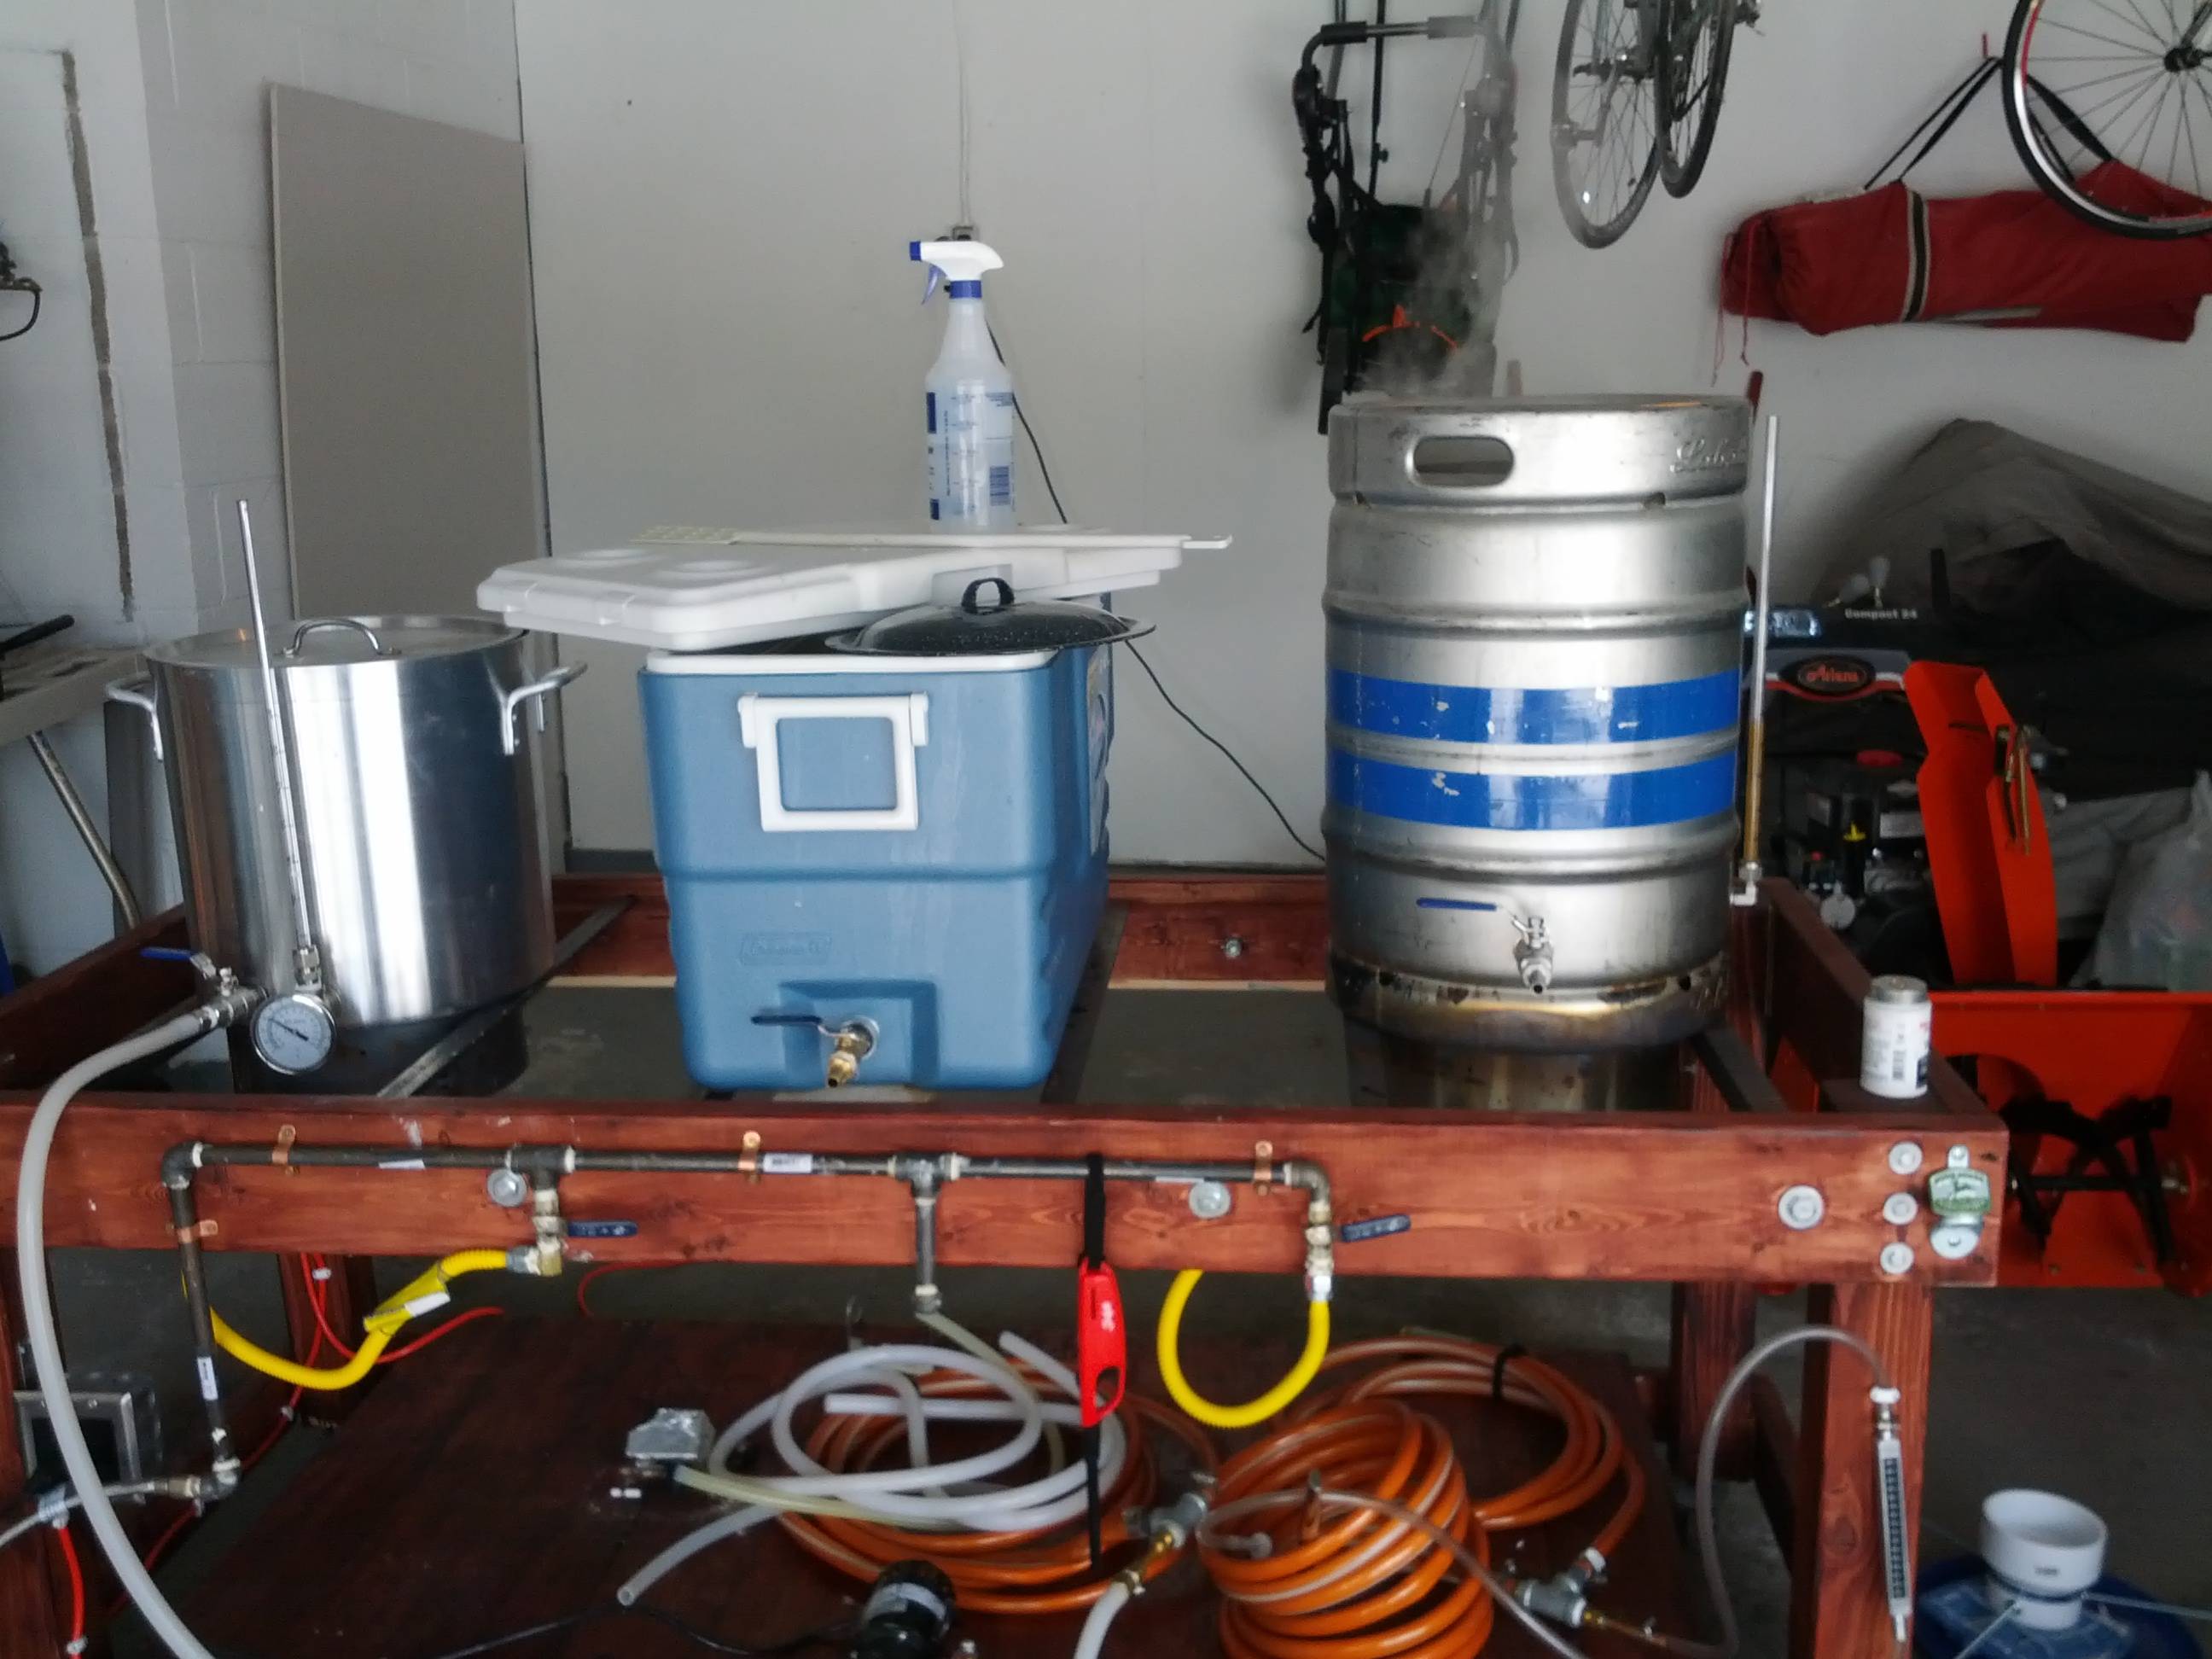
So this is my Brew Bench that my boys and I came up with. It's a common design but I like it as it is designed with the garage brewer in mind!

We added provisions so that the kettles are tight to the bench but can un-clamp fast for easy cleaning.

We only have a few more details to finish as overall we want everything that has to do with this bench and brewing to fit within the footprint of the bench. That means everything stores on the bench so that it isn't scattered all over the place. Then put the cover on and push it into the corner of that garage.

Next is process control design. Our intentions are that you can run this with your iPhone, Android, or tablet. We intend to sell these in the future.

Dang that's clean. Nice work. I want one.
 
Almost done with the newest brewery. Still have to mount the burners and put legs on the false bottom. Finally got to test out my three way valve idea and it works great. 9" probes on the thermometers and I got triclover thermowells to with them. All the ports at pulled and polished.

image-2223719566.jpg


image-1557847834.jpg


image-2200372050.jpg


image-1303484372.jpg
 
Almost done with the newest brewery. Still have to mount the burners and put legs on the false bottom. Finally got to test out my three way valve idea and it works great. 9" probes on the thermometers and I got triclover thermowells to with them. All the ports at pulled and polished.

Can you tell us what is going on with that 3way valve? i don't understand really, looks like flush water but it is plumped into the main line with no valves and looks like it would full with wort when pumping? Need more info pleeeease :D
 
mattd2 said:
Can you tell us what is going on with that 3way valve? i don't understand really, looks like flush water but it is plumped into the main line with no valves and looks like it would full with wort when pumping? Need more info pleeeease :D

Ok. The line coming in from the left is the water supply line. In don't have any water filters or anything on it because I just finished and was so excited to try it out. The galvanized pipe going down and to the right is to supply the jacket of my tube and shell heat exchanger. The ss butterfly valve is what sends the water into the system either to flush or to start filling your pots to brew. You can send water to the chiller or the brewery with just the turn of the handle you you never have to unplug the water. I put a sanitary butterfly valve after it so when you run product it never hits anything with threads. It's all purge welded tri clover fittings. If you notice the bottom most stainless line jumps from 1" to 1-1/2" tubing. Inside the 1-1/2" tubing is four 1/4" lines that's what the hot wort goes though while you are sending cold water Into the jacket around the 1/4" tubes. Does that make any sense? I'm trying to explain it the best I can. If you have any more questions let me know. I hope I answered more then I just raised right now.
 
Ok. The line coming in from the left is the water supply line. In don't have any water filters or anything on it because I just finished and was so excited to try it out. The galvanized pipe going down and to the right is to supply the jacket of my tube and shell heat exchanger. The ss butterfly valve is what sends the water into the system either to flush or to start filling your pots to brew. You can send water to the chiller or the brewery with just the turn of the handle you you never have to unplug the water. I put a sanitary butterfly valve after it so when you run product it never hits anything with threads. It's all purge welded tri clover fittings. If you notice the bottom most stainless line jumps from 1" to 1-1/2" tubing. Inside the 1-1/2" tubing is four 1/4" lines that's what the hot wort goes though while you are sending cold water Into the jacket around the 1/4" tubes. Does that make any sense? I'm trying to explain it the best I can. If you have any more questions let me know. I hope I answered more then I just raised right now.

Makes perfect sense now (and just noticed the S&T cooling water "return" is the centre tube draining to ground. That is pretty awesome, was it difficult to build? Test run yet?
 
mattd2 said:
Makes perfect sense now (and just noticed the S&T cooling water "return" is the centre tube draining to ground. That is pretty awesome, was it difficult to build? Test run yet?

No. Not difficult just time consuming. It took a lot of thought on how I was going to do it and still make it look good.
 
iamperplexed said:
Your gear looks a lot like what I've got and what I'm aiming for. Are you using a single burner for strike water and then for the boil?

Only using one burner. Heat 10g kettle to strike temp, mash for hour, heat 5gallon to sparge temp while mashing, collect {yummy goodness} then reboil in 10g kettle with hop schedule...

Although I just scored on a keg and now making keggle....let the fun keep expanding! I just hope my masher can handle larger grain bills now!

Thanks for the reply. I just picked up a cooler and keggle yesterday along with a new pot and several other goodies (thanks to craigslist!) so I'm suddenly "almost" ready to move forward.

Looks like you're doing everything by hand and using gravity? I plan on doing the same, no pumps. I hope.
 
iamperplexed said:
Thanks for the reply. I just picked up a cooler and keggle yesterday along with a new pot and several other goodies (thanks to craigslist!) so I'm suddenly "almost" ready to move forward.

Looks like you're doing everything by hand and using gravity? I plan on doing the same, no pumps. I hope.

No pumps, all gravity, running out of garage space...
 
I built this during the winter in my garage in upstate New York. I am not a smart man, but I did enjoy building this. There are two BG-14 burners, one under each kettle. I just recently added camlock fittings to everything after getting burned one too many times on my last brew day.

4aV7w38.jpg
 
Just finished hard piping my system last week. Now have RIMS fully operational. Brewed first 10 gal batch and this system works great!

image-3342695570.jpg


image-901831705.jpg
 
Back
Top