Soldering Question for Immersion Chi

Homebrew Talk - Beer, Wine, Mead, & Cider Brewing Discussion Forum

Help Support Homebrew Talk - Beer, Wine, Mead, & Cider Brewing Discussion Forum:

This site may earn a commission from merchant affiliate links, including eBay, Amazon, and others.

SouthPhillyBr3w3r

Well-Known Member
Joined
Dec 2, 2017
Messages
151
Reaction score
42
Location
Philadelphia, PA
I have a homemade immersion chiller, but it is kind of dinky (25' x 3/8") and takes about 25 minutes of constant stirring to bring 5.5 gallons of wort from 212'F to 68'F. As such, I am looking to build a dual-coil immersion chiller where the water inlet is split, flow is directed through both coils in parallel, then the coils merge just before the outlet hose.

Anyway, on to the point.... Most of the designs for a double-coil chiller require soldered pipe fittings, rather than tubing that is slipped on and secured with clamps. I am familiar with soldering, but am unsure as to how large of a torch flame I need. I currently have two kitchen torches (stock photos below), which are butane powered. One is a mini-torch with a 3" flame on full blast. The other is an Iwatani-style torch that attaches to the top of a butane can; it puts off a much larger, but somewhat less directed flame. I am unsure if either of these torches has enough power to solder pipe fittings but I would prefer not to have to buy a larger torch, which would take up space and raise the cost of this project considerably.

Please take a look at the attached photos and let me know if you think that either of these torches is capable of getting the job done. THANK YOU!
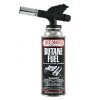
chefmaster.jpg minitorch.jpg
 
Last edited:
The little guy is out.
That bigger one with the less directed flame might stand a chance, but it will take forever to heat up (if at all) and you burn through a lot of butane ($$).
I you run down to the hardware store and buy a bottle of propane with nozzle you’re in for $20. It’ll be done quick and easy, and you will have a lot left over for future projects or plumbing repairs.

I hear ya, but with two torches and no use for the big one other than this one project, I should probably just try to borrow or rent one... Unless you can think of some more uses for brewing beyond this?? I rent my house, and our plumbing is PVC, so home repairs aren't part of the equation. I am not trying to disregard your advice, and will look into borrowing a propane torch, but the butane can for my torch costs about $1.75 USD so if all else fails, I'll be breaking rocks with a ball peen hammer. Space is a major consideration for me, as I already have too much S**t laying around, and SWMBO is about to make me sleep outside if I clutter up the house any more.
 
Last edited:
I agree with FunkedOut. A propane torch is a small investment to get the job done. I use mine all the time to flame the top of carboys and flasks to sterilize them before dry hop, transfers, etc. I would highly recommend one with a built in striker. It's 1000x more convenient.

Thought you might like my dual coil immersion chiller build. You can see it on my web page here. It's been working really well for me. I know I've posted about it somewhere on the forums before. I can't seem to find that right now. One suggestion someone made was to raise the level of the y's so that they were not in the wort. That would be an improvement, but since the only point was to get the joints up out of the wort it would be a minor one.

If you have not soldered copper before, there are a few tricks that make it go a lot more smoothly. (I'm not a plumber and no expert, but these are some tips that help me.)

  • Proper preparation of the joint is CRITICAL to having it go smoothly. You want to de-grease and sand the inside and outside of every joint. Any coatings, oil, or contaminants can reject the solder. When this happens its very frustrating. The solder doesn't flow into the joint and I often end up taking it apart and trying again.
  • Make sure the tubing does not have any water in it. This is less of a concern when you are doing an immersion chiller, but can be a big deal when doing pipes in an existing house. Small amounts of water will boil off, but larger amounts will keep you from being able to get the joint hot.
  • Use a liberal amount of paste flux. The flux in the solder is not enough. Coat both sides of the joint in paste flux and then put the joint together. When you heat it up this flux etches the copper and helps remove any last contaminants.
  • Heat the female side of the joint, then the male side as needed to get the solder to flow. Having the female side hot helps draw the solder up into the joint.
  • When the joint is hot enough and you touch the solder to it it will melt like butter and flow into the joint.
  • Don't get the joint to hot.
  • When the joint is filled with copper, step back and let it cool for a minute to solidify. You might see the pros wiping the joint down with a wet rag to get the excess solder off and clean up the joint. In my experience I just end up moving things and/or messing up the joint.
I hope my unsolicited help is useful. :oops:
 
I hope my unsolicited help is useful. :oops:

It is! That is the procedure I was planning on, but it is good to see I am on the right track. Even though the manufacturer claims my larger torch will reach 2012'F, I just posted both of my torches on craigslist so I don't end up with 3 torches laying around when I buy a proper propane torch. The propane will do everything I needed my butane torches to do and more, so I think it will be a good call as long as I can ditch my other 2.

I actually saw your webpage earlier in my research (google search) without realizing it was yours! I pretty much ripped off your design, so thanks! I will plan on putting the Y-splits higher, about the same level as the rim of my kettle, to ensure there is proper separation between the parallel channels. I really appreciate your input. Thanks for posting such a thorough design to the interweb!

My biggest question: How did you manage to keep your coils so uniform when wrapping around the kettle? When I was creating my current chiller, I tried to coil it around a corny keg, and I had a problem keeping the wraps tight around the keg; every time I tried to make another wrap, the previous one would spring back a little from the surface of the keg. My first try ended up with the coils all being slightly different sizes, which looked sloppy. When I straightened it and re-wrapped it, i ended up kinking the tubing slightly in a few places. It's not bad enough to restrict flow, but it's pretty amateur hour.
 
It is! That is the procedure I was planning on, but it is good to see I am on the right track. Even though the manufacturer claims my larger torch will reach 2012'F, I just posted both of my torches on craigslist so I don't end up with 3 torches laying around when I buy a proper propane torch. The propane will do everything I needed my butane torches to do and more, so I think it will be a good call as long as I can ditch my other 2.

I totally understand your situation with keeping too many things around.
Still, don’t get rid of the small one.
The propane is too much for small things like lighting a cigar or heating shrink wrap on a cable/connector.
Also, you’ll taste propane in food, you won’t taste the butane if you buy the good stuff. Look at the cigar fuel. I like the Xikar brand.
 
I actually saw your webpage earlier in my research (google search) without realizing it was yours! I pretty much ripped off your design, so thanks! I will plan on putting the Y-splits higher, about the same level as the rim of my kettle, to ensure there is proper separation between the parallel channels. I really appreciate your input. Thanks for posting such a thorough design to the interweb!

My biggest question: How did you manage to keep your coils so uniform when wrapping around the kettle? When I was creating my current chiller, I tried to coil it around a corny keg, and I had a problem keeping the wraps tight around the keg; every time I tried to make another wrap, the previous one would spring back a little from the surface of the keg. My first try ended up with the coils all being slightly different sizes, which looked sloppy. When I straightened it and re-wrapped it, i ended up kinking the tubing slightly in a few places. It's not bad enough to restrict flow, but it's pretty amateur hour.

Glad someone is looking at my web page and using the info! I should really get some more stuff up on there.

Copper work hardens very easily. It's best to only bend it as much as you need it. It tends to harden the more you work it. For this chiller I took the store bought coil out of the packaging, set the pot in the middle of it, then started to wind the tube around the pot. Since the pot is a smaller diameter than the coil, I actually spun the pot as I wound the tubing onto it. I'm not quite sure what I did to get it neat looking. As I wound the coil up the pot. I may have been using a spring coil around the tubing to help keep it straight. Regardless, lots of pressure and wind it around and hold the whole thing together as you spin it up the pot. It probably took me 15-20 minutes to get it all formed.
 
I totally understand your situation with keeping too many things around.
Still, don’t get rid of the small one.
The propane is too much for small things like lighting a cigar or heating shrink wrap on a cable/connector.
Also, you’ll taste propane in food, you won’t taste the butane if you buy the good stuff. Look at the cigar fuel. I like the Xikar brand.

I've got a little Xikar torch for lighting cigars, and a heat gun for other tasks that don't need an open flame. I can see what you mean about the little guy having other uses, but honestly I haven't used it since I quit smoking pot after college. FWIW, you can usually get Vector butane cheaper on Amazon than the Xikar stuff, and it's just as good.
 
Glad someone is looking at my web page and using the info! I should really get some more stuff up on there.

Copper work hardens very easily. It's best to only bend it as much as you need it. It tends to harden the more you work it. For this chiller I took the store bought coil out of the packaging, set the pot in the middle of it, then started to wind the tube around the pot. Since the pot is a smaller diameter than the coil, I actually spun the pot as I wound the tubing onto it. I'm not quite sure what I did to get it neat looking. As I wound the coil up the pot. I may have been using a spring coil around the tubing to help keep it straight. Regardless, lots of pressure and wind it around and hold the whole thing together as you spin it up the pot. It probably took me 15-20 minutes to get it all formed.

Yeah... that soft metal stressed out quickly. My big problem is keeping the end of the tubing stationary. Do you think duct tape would secure the end? I can always use flux to get the glue off the pipe and WD-40 to get it off the keg/pot.

*as a side note to those who still bottle, WD-40 is excellent for getting label glue off bottles
 
Isnt he just looking to sweat pipes?

Home depot. Buy this. Always good to have in the garage anyway...its what you want for inground sprinkler repair too...Don't forget LEAD FREE solder

https://www.google.com/url?sa=t&rct=j&q=&esrc=s&source=web&cd=1&cad=rja&uact=8&ved=0ahUKEwjFmJaUt57ZAhUCTt8KHYcDDtcQFggpMAA&url=https://www.homedepot.com/p/Bernzomatic-TS8000KC-Premium-Torch-Kit-336638/205683985&usg=AOvVaw13hgZDjMY8Dbs42s62QNh4

Honestly youd be better off just getting 1/2" copper tube and starting over with 25 ft or so...just my opinion
 
Honestly youd be better off just getting 1/2" copper tube and starting over with 25 ft or so...just my opinion

Yes, just sweating copper pipe. You would prefer a single coil 25' x 1/2" IC versus one with dual 25' x 3/8" coils? I already have a 25' x 3/8" single coil, and it takes quite a while and uses about 12 gallons of water to chill a 5.5 gallon batch. Is there really that much difference in surface area between 3/8" and 1/2" tubing of the same length? I haven't done the maths, so I couldn't say.
 
Yes, just sweating copper pipe. You would prefer a single coil 25' x 1/2" IC versus one with dual 25' x 3/8" coils? I already have a 25' x 3/8" single coil, and it takes quite a while and uses about 12 gallons of water to chill a 5.5 gallon batch. Is there really that much difference in surface area between 3/8" and 1/2" tubing of the same length? I haven't done the maths, so I couldn't say.
I've never used a 3/8" chiller I started out with 2 separate 25 ft 1/2" lines for my 12 gallon batches. It was kind of a pain running 2 pond pumps. I only use one now and 25 ft of 1/2" chills 12 gallons fine. In the summer when the tap water is warmer I just chill to around 100 deg and pitch the next day when the temp naturally drops.
I never check how much water. Not an issue around here. I wouldn't think in PA water is an issue like in CA.


To put it in perspective a 3/8" auto siphon takes about 15 minutes to siphon 5 gallons. A 1/2" auto siphon takes about exactly one minute... That's a SH*T LOAD more liquid moving through and its only 5 ft of line. So I'm thinking a 1/2" line would transfer WAY more heat for a chiller

I've never run any fancy thermal tests I just know it works...25 ft of 1/2" would be more than enough foe 5 gallons
 
Last edited:
@JohnnyRotten:

Do you turn the water flow all the way up? For mine, I have found that there is an optimal flow rate around 1/3 of the way between full blast and off. As for water usage, there isn't a drought, but I hate to waste precious resources. I usually use 1/3 of my discharge water to clean my gear and the rest is used to do my laundry. I can't stand the idea of dumping 6-12 gallons of clean, drinkable water, when there are people who walk 5 miles or more for clean water.

I know... I'm a bleeding heart liberal. I've even started looking into making bread, cookies, and dog treats with my spent mash. ROUGHAGE!
 
Ya...were on different levels...its water...theres more comin...I could care less about mine running down the drain....aint so precious in these parts..And I run a pond pump so whatever it pumps it pumps, no throttling it down
 
Yes, just sweating copper pipe. You would prefer a single coil 25' x 1/2" IC versus one with dual 25' x 3/8" coils? I already have a 25' x 3/8" single coil, and it takes quite a while and uses about 12 gallons of water to chill a 5.5 gallon batch. Is there really that much difference in surface area between 3/8" and 1/2" tubing of the same length? I haven't done the maths, so I couldn't say.

The theory behind my design was that two 3/8" lines in parallel could chill faster than a single 1/2" line. I've got 50' of tubing in the wort, but it only has to travel 25' in each line. This should, in theory, be more efficient. By the time water gets down a conventional 50' line it is likely already at the surrounding temp, and therefore not pulling away any more heat.

I've never done a side by side to tell the difference. I am basing my theories on the JaDed Brewing designs. Mine is undoubtedly faster than the 3/8" 25' chiller I used to use. And of course, I love it because it's mine. :mug:
 
Is there really that much difference in surface area between 3/8" and 1/2" tubing of the same length? I haven't done the maths, so I couldn't say.
33% more.
25’ of 3/8” tubing has a surface area of 2.45 sq.ft.
25’ of 1/2” tubing has a surface area of 3.27 sq.ft.

50’ of 3/8” tubing will have more surface area than 25’ of 1/2” tubing.
25’ of 3/8” tubing plus 25’ of 1/2” tubing will have more still.
50’ of 1/2” tubing wins the pissing contest.
 
Back
Top