Keezer Collar: General Questions

Homebrew Talk - Beer, Wine, Mead, & Cider Brewing Discussion Forum

Help Support Homebrew Talk - Beer, Wine, Mead, & Cider Brewing Discussion Forum:

This site may earn a commission from merchant affiliate links, including eBay, Amazon, and others.

inchrisin

Well-Known Member
Joined
Oct 19, 2009
Messages
58
Reaction score
2
Location
bloomington
I'm about to embark on building my first (and hopefully final) keezer collar. I'm just running off picnic taps right now and I'd like to go ahead and drill the holes for the taps. I'll probably upgrade to taps one by one or a few at a time until I get all of my kegs on tap. I'm working with a 9cu foot freezer and I could probably get 6 or 7 kegs on tap.

1. Should I drill all the holes now and plug them somehow, or should I wait until I have the tap in hand? I plan on staining the collar.

2. Should I insulate the inside? I've seen a lot of people do this, but it seems like with the right glue and right seal, I shouldn't lose too much chill on the freezer. I'll either be working with 2X4s or 2X6s.

3. Is weather stripping on the inside of the collar necessary?

Cheers for the feedback!
 
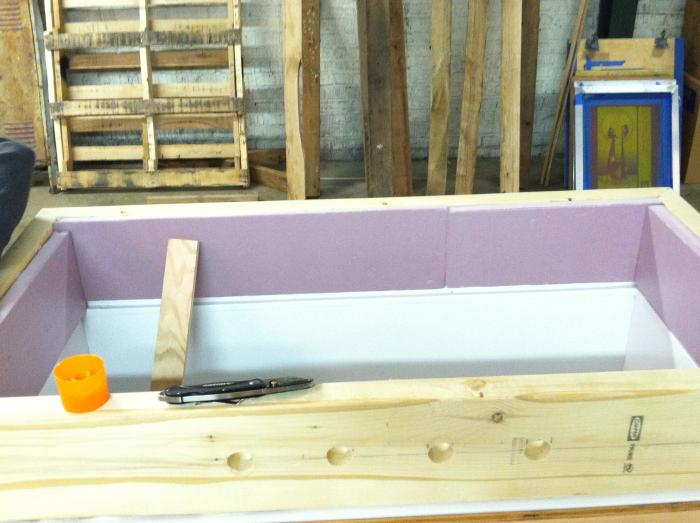
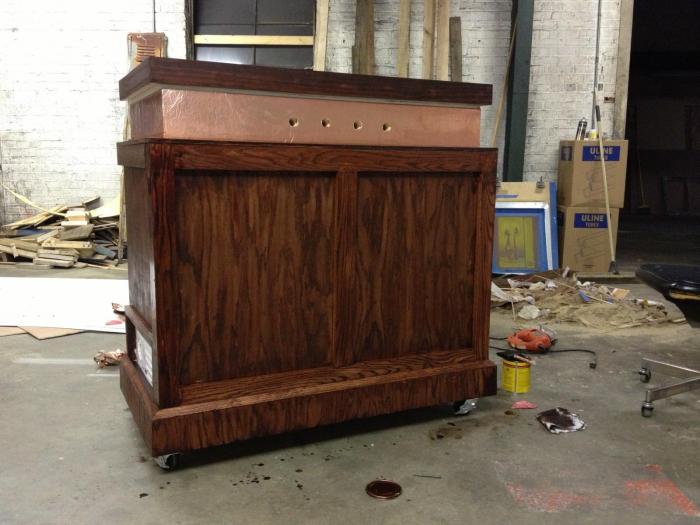
I pre-drilled my holes, did not use weather stripping and insulated the collar.

Used loctite power grab construction adhesive to "stick" collar to freezer.

Here are a couple of pics

IMG_0590.jpg


IMG_0597.jpg
 
1. If it were me, I'd probably drill taps as you need them. Your shanks should cover up any small blemishes around the hole from drilling the new holes.
2. I would probably say it depends on the size of your collar. If it's a short collar, I don't think insulation is necessary, but if you are making a taller collar to accomodate kegs on the compressor hump, I think it may be worth the extra effort.
3. I didn't find weather stripping to be necessary on my keezer build, as the existing seal on the freezer lid makes a good seal with my collar.
 
1. As said above, your shank will come with a collar that will cover up any small imperfections you get in your stain when you drill your holes, so you don't need to pre-drill them now. Although it may be easier to measure them out and drill them now before you get it all put together so everything is evenly spaced out.

2. My Keezer stays within + or - 1.5 degrees of my set temp without any insulation. I used 2x4's for the inner collar and 1x6's for the outer portion that slides over the freezer (Pic's available here) *Something that isn't shown on the pics is that I have since installed a computer fan to circulate the air better.

3. Seal on the freezer lid has worked just fine w/o any weather stripping.
 
i have a pencil dot marking where the 4th tap will someday be installed on my collar.. i believe i used 10inch boards so i opted to use insulation.. maybe overkill but it works
 
Someone on here had found chrome plated caps that are used to cover holes in sinks in the plumbing hardware section of HD or lowes.
 
I drilled four holes off the bat and only installed 3 taps. I just used a chrome plug found in the hardware store (hardware section) to seal it up until in had another tap. This way all my cutting was done before I painted and such. Worked great and looked good too.
 
Pre-drill the holes. I messed up a collar drilling them after staining.

After building three I finally ended up with one that I liked and it works great even though I glued it upside down. I didn't use insulation or weather stripping and haven't had any issues at all.
 
1 - I would drill the holes now. Drilling after the collar is on makes a mess of wood shaving inside the keezer.
2 - I used plain ol' styro-foam and glued it to the inside of my collar/lid. I removed my lid comletely. Used 1x8 for the collar, 7/16 waferboard for the top. The top is screwed to the freezer hinges and is still light enough to stay open on its own. This allows me to be at the freezer height to lift kegs in, instead of freezer height plus collar.
3 - I caulked all the joints in the lid. I have 3/4" weather stripping on the bottom of the lid where it contacts the freezer.

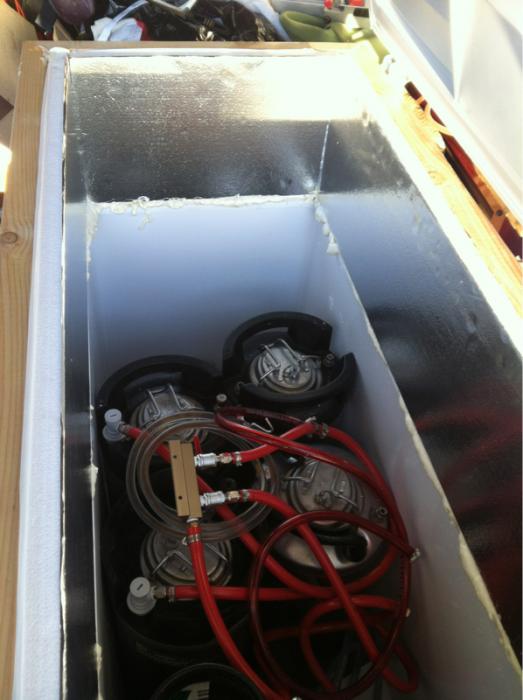
Here is a picture
 
Here's mine. Evidently wood is not a good insulator so I used the caulk gun type construction adhesive to glue the insulation into place. Easy and cheap.

image-3568567559.jpg
 
I found corks the appropriate taper and size to fit the 3 holes I did not use for taps. I had to scratch a little more money together before the setup was complete. It worked great in a pinch and only cost a few bucks.
 
FWIW, I would say try to figure out the maximum number of faucets you will ever have, then decide how you want them spaced. If your maximum number of faucets is an odd number, the center of the collar should be the center faucet. If it's an even number, the center of the collar will split the difference between the two center faucets. Install the faucets you have for now from the center out, and make a note of the spacing for future faucets. When its time for a new faucet, put an "X" of painters tape over the area where the hole will be so you can mark it easily and prevent some of the tear out.

I have 3 faucets on my kegerator, and have room for 1 or 2 more. I have a piece of tape on the inside that has the measurements listed so when I install another one, I'll know right away what the exact spacing is.

All that to say, I think you should drill the holes as you go.
 
Back
Top