OP
OP
BrewingGunner
Well-Known Member
Finally got the stand ground down and painted. I'll do a test run tomorrow with pictures. Tip to all paint this as quickly as possible. These things rust quick and they are a pain to prep.


BrewingGunner said:Casters are on. Did a little touch up paint. Pumps back on tomorrow and then I'll be waiting for your thoughts!
")

 )
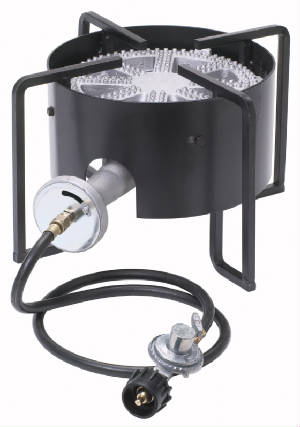
)Looking great! thats the same way i did mine (with the shields/burners)
one thing though, i would put the windscreens higher, or drill holes and mount the burners higher. you have a welder so you can do this easier. I did that on mine and increased times rather nicely = much less wasted propane
basically i had cut the legs off and welded the screens to the stand itself.
kind of like this if you dont want to cut the legs off.
hopefully that helps somewhat on the times! shouldn't take longer then an hour or two.
Keep us updated though! looking great! (PS. i have the same welder. for $100, it's kick ass
That i built.
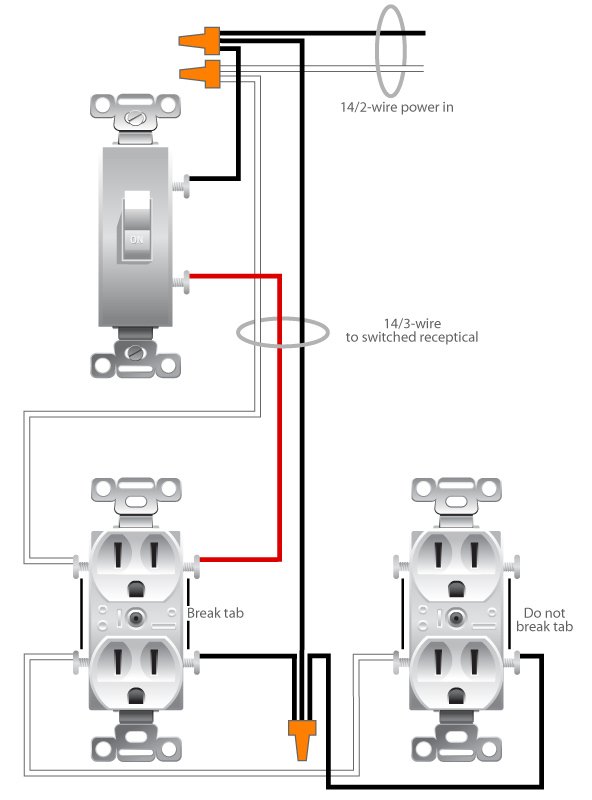
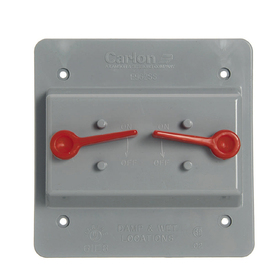
Here is the diagram, i just went to Lowes and picked up the waterproof stuff (i think all together it was about $15 or so, and the extension cord was i think $5, well worth it)
That i built.
Here is the diagram, i just went to Lowes and picked up the waterproof stuff (i think all together it was about $15 or so, and the extension cord was i think $5, well worth it)
Nice looking stand. Did you find that your burners are too far away from the kettles? I did something similar with my Bayou Classics. I cut the legs off and used the wind screen / burner mount. I mounted the rings to angle iron supported by all thread. That lets me adjust the position of the burner.
Thanks so much. I'll look for that stuff today. I'm tired of plugging and unplugging the pumps to turn them on/off. The enclosure was at lowes too?
I just finished my single tier 3 burner with 2 pumps the other day and want to wire in a waterproof box to plug in each pump without cutting the cord and each have their own switch. I see in the diagram I see you have 2 outlets, 1 for each pump but only switch, am I missing something?
it'll help get by work today (i have really nothing to do.... lol) 


Hi I'm new to brewing, only two kit brews under my belt. but was wondering where you got the welder and how much it cost. I would love to learn how to weld, and I think the practice would be fun. Your stands looks fantastic. All "Brewinggunner, Rivein, And Tanstaafb".
Got power rigged. Top outlets are switched and the bottom outlets are constantly live.
Looking good man can't wait to brew on my sculpture
It was fun to build but more fun to brew on. Let me know if you want plans.
If you're willing to share your plans, I'd love to get them. I'm planning to have a buddy do the welding for the cost of some homebrews. Fair trade. If you're willing, you can PM me- I totally understand if you'd rather keep it private.
Let me put them together. You should try the welding yourself though. Believe it or not this was my first time welding ever.
i would not hesitate to get one.Let me put them together. You should try the welding yourself though. Believe it or not this was my first time welding ever.
Turned out great!Currently planning out my current build as well. I think I may use a burner for the mash tun to do step mashes with, but I would love to see your plans for this build if possible
Mine is very similar but with a 3 burner setup if you need that information.
I'd happily take your plan as well. Every little bit helps, and I too plan to do a three burner.


I'll have to take actual measurements since the shop modified the design a bit, but here is the jist of it.
BrokenDog said:I'll have to take actual measurements since the shop modified the design a bit, but here is the jist of it.
Enter your email address to join:
