Starting my first ejectric build soon

Homebrew Talk - Beer, Wine, Mead, & Cider Brewing Discussion Forum

Help Support Homebrew Talk - Beer, Wine, Mead, & Cider Brewing Discussion Forum:

This site may earn a commission from merchant affiliate links, including eBay, Amazon, and others.

ejluttmann

Well-Known Member
Joined
May 31, 2012
Messages
105
Reaction score
28
Location
Meridian
This is my first post, but I've been lurking on the forums for a while now. I've decided to go all electric and start out simple with a single vessel system to do extract or BIAB brewing, but looking to evolve into something like a brutus 20 in the future.

When looking at building the control panel I realized I only want to build it once and want to make sure it can support future expansion, as well as have a dual function - like using with an electric smoker (which might be my next project).

I've been searching the forums, but can't seem to find a wiring diagram that supports both a 240v and 120v connected to a single PID. Ideally, what I'm looking for is:

1) Single PID controller that I can switch between 240v (brewing) and 120v (smoker).
2) Two 120v outputs with simple On/Off switches for pumps.
3) One (possibly two) additional temperature displays to monitor other temps - like mash for brewing or internal meat temperature while smoking.
4) Include a main power switch.

I'm thinking I'll only need to provide a 30a GFCI for this setup. I'd like it to be as portable as possible too.

I'll keep searching, but if someone has a link similar to what I'm looking for it would be greatly appreciated ;)

I'll also update this post when I start the build.


- Eric
 
You say you want to be able to upgrade later. Are you running a new line for the panel? If so, I would run a 50 or 60 amp line for a just in case. It is cheaper to do it once large than to do it and upgrade later.
 
Use any wiring diagram that fits your description - 1 PID, 2 switches. Simply change the plugs for your element to L14-30 4-wire 240v, and provide neutral to that receptacle. This way, you use Hot + Hot for 240 (Switched by SSR's) And Hot + Neutral for 120v (Switched by the same SSR's)

To put it another way, if you are using L14-30 30 Amp 240v 4-Wire twist locks, you hook your brewing whip up to Hot, Hot, and Ground. You make another whip wired to Hot, Neutral, and Ground for your smoker.

Inside the panel your PID will still switch both SSR's. Note: If you only use 1 SSR to control the 240 brewing element make sure that's the hot leg you use for the 120v smoker element!
 
Use any wiring diagram that fits your description - 1 PID, 2 switches. Simply change the plugs for your element to L14-30 4-wire 240v, and provide neutral to that receptacle. This way, you use Hot + Hot for 240 (Switched by SSR's) And Hot + Neutral for 120v (Switched by the same SSR's)

To put it another way, if you are using L14-30 30 Amp 240v 4-Wire twist locks, you hook your brewing whip up to Hot, Hot, and Ground. You make another whip wired to Hot, Neutral, and Ground for your smoker.

If I understand this correctly, I would have a single L14-30 outlet controlled by the pid and create a brewing whip for 240v and a separate 120v whip - both would to connect to L14-30 outlet depending on whether I'm brewing or smoking. I assume the 120v whip would be something like this: http://www.amazon.com/dp/B002MGJ2F4/?tag=skimlinks_replacement-20
 
Last edited by a moderator:
Searching through previous posts, I think I found a diagram close to what I'm looking to build ... it's one of PJ's diagrams which can be found at the following link:

http://www.pjmuth.org/beerstuff/images/Auberin-wiring1-a4-5500w-30d.jpg

I think the changes I'll make is have a L14-30 outlet (instead of L6-30) to be used with either a 240v whip or 120v whip, depending on the application.

I'll also add a red 'element' LED light and change the pump & pid switches to a blue LED lighted switch.
 
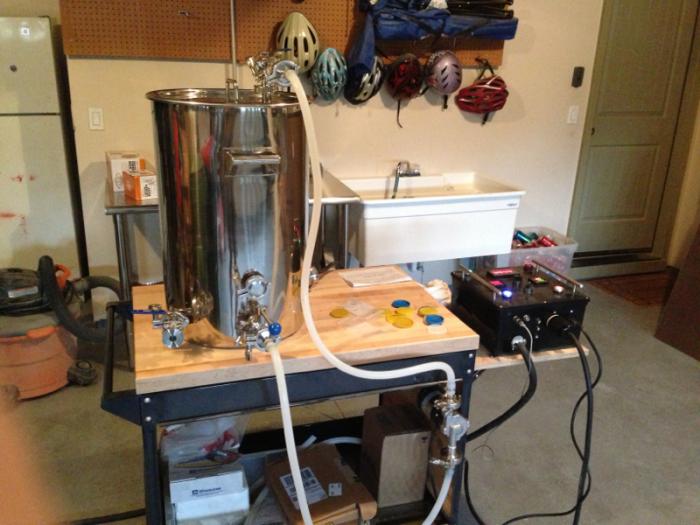
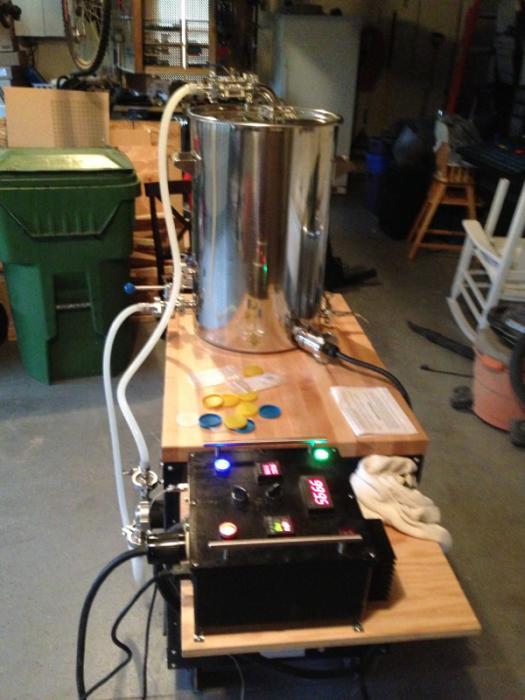
Took a while to get started, but I've made some progress ... I installed a 50 amp outlet in the garage, setup a 50 amp GFCI spa panel, and built my controller - still need to order and apply the labels. Started on the brew stand, and waiting for my BIAB kettle to arrive next week.

image (8).jpeg

image (9).jpeg

image (7).jpeg

image (6).jpeg

image.jpeg
 
Looks good!

I built a separate smoker controller for 120V but having 240V capability would have been very handy.
 
Looks good!

I built a separate smoker controller for 120V but having 240V capability would have been very handy.

I actually decided to build a second 120v controller for smoking, mainly because I decided the 50 amp cable limits where I can place the smoke house. Besides, I figure I can use the 120v controller if I ever decided to utilize a RIMS in my brewing setup - at least that is my justification ;)
 
If you have 240v near the smoker, you should be able to use your kettle output (4-wire) connector and wire the hot and neutral for a 120v fan. The fan would only use 2 signals on the 4-wire output and the PID would control the SSR based on the temp sensor. You could switch the PID to relay ON/OFF mode for the smoker and back to PID mode for brewing.

In theory you could also design a 4 wire input power connector and run the whole panel off of 120v (smoker) or 240v for brewing using different input power cables.
 
I would like to see one, but I'm not too bothered that I didn't go that route in the end. I was always going to build a dedicated brewery controller, and portability was important for the smoker controller.
 
jCOSbrew said:
If you have 240v near the smoker, you should be able to use your kettle output (4-wire) connector and wire the hot and neutral for a 120v fan. The fan would only use 2 signals on the 4-wire output and the PID would control the SSR based on the temp sensor. You could switch the PID to relay ON/OFF mode for the smoker and back to PID mode for brewing.

In theory you could also design a 4 wire input power connector and run the whole panel off of 120v (smoker) or 240v for brewing using different input power cables.

I created a 120v whip that I made to test the control panel. But in the end, where I would want to run the smoker isn't convenient location for 240v. I thought about making a 120v/240v input but decided it really wasn't that much more of a hassle/cost to make a smaller 120v version versus upgrade the 240v to support 120v as well. I had already bought a spare pid and digital temp incase of failures.
 
Got the kettle and TC parts in ... Did a quick test with some water to ensure no leaks and that the controller was working properly.

image-1459389053.jpg


image-1583546796.jpg
 
You want to control flow with a valve on the output of the pump. The typical homebrew-type silicone tubing isn't rated for very much pressure, especially when hot.
 
You want to control flow with a valve on the output of the pump. The typical homebrew-type silicone tubing isn't rated for very much pressure, especially when hot.

Yep, I read about that last night when I was searching to see if restricting the output flow would cause damage to the pump. One nice thing about the TC connections, it's easy to reconfigure next time ;)
 
Back
Top