
Supergrump
Well-Known Member
4 years ago I built a wooden jockey box:
https://www.homebrewtalk.com/showthread.php?t=428860
A friend from my homebrew club likes to point out that it's the #1 result when doing a Google image search for "wooden jockey box". Quite an achievement! I'm hoping to bump it to #2 with my new one:

The previous one served it's purpose but it's a big big and heavy. The new one was intended to be a more manageable size, and to upgrade the old one in every way. My old box will be donated to my homebrew club.
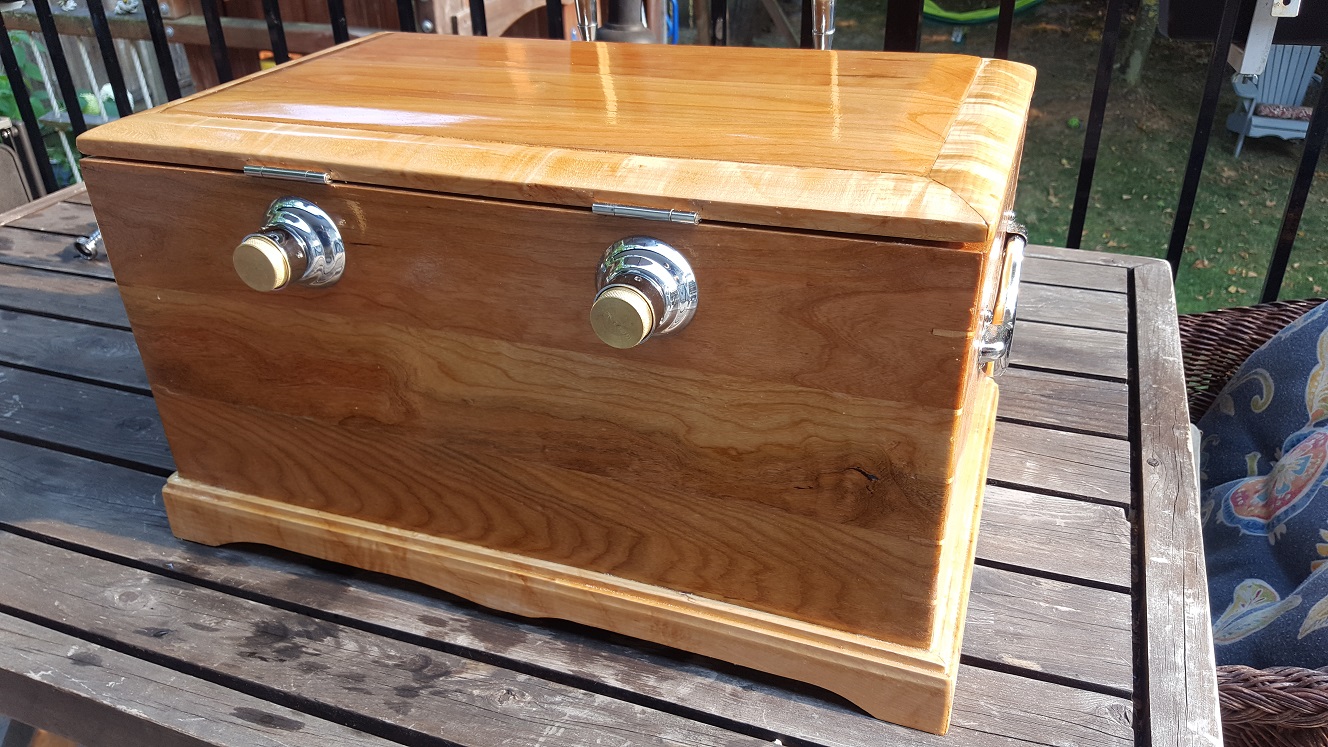
It's made of cherry hardwood with maple trim. I also put decorative maple splines along the sides hoping it would provide some contrast but it doesn't show well in certain light.
This one also has a drip tray incorporated into a drawer:


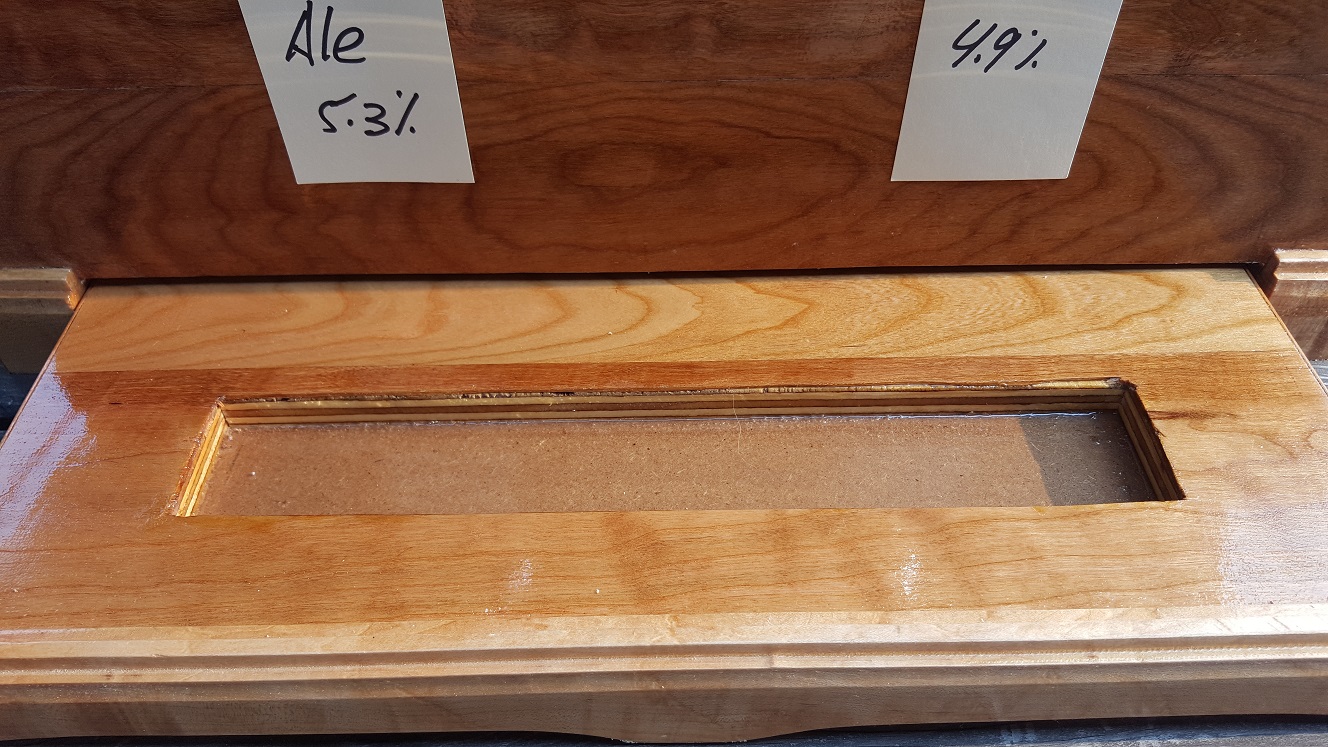
The drawer does not drain so I have to monitor it from time to time and dump it out if necessary. This only happens when people who don't know any better dump their beer into it after pouring a cup of foam. I put magnets on the side that stick to metal washers under the box. These serve as a stay to keep the drawer locked open or closed for transport.
I am not at all happy about the small gap between the drawer and the maple skirt on the right side when the drawer is closed. Oh well.
I chose chrome fittings for the entire box. I tried brass but it didn't look as nice.

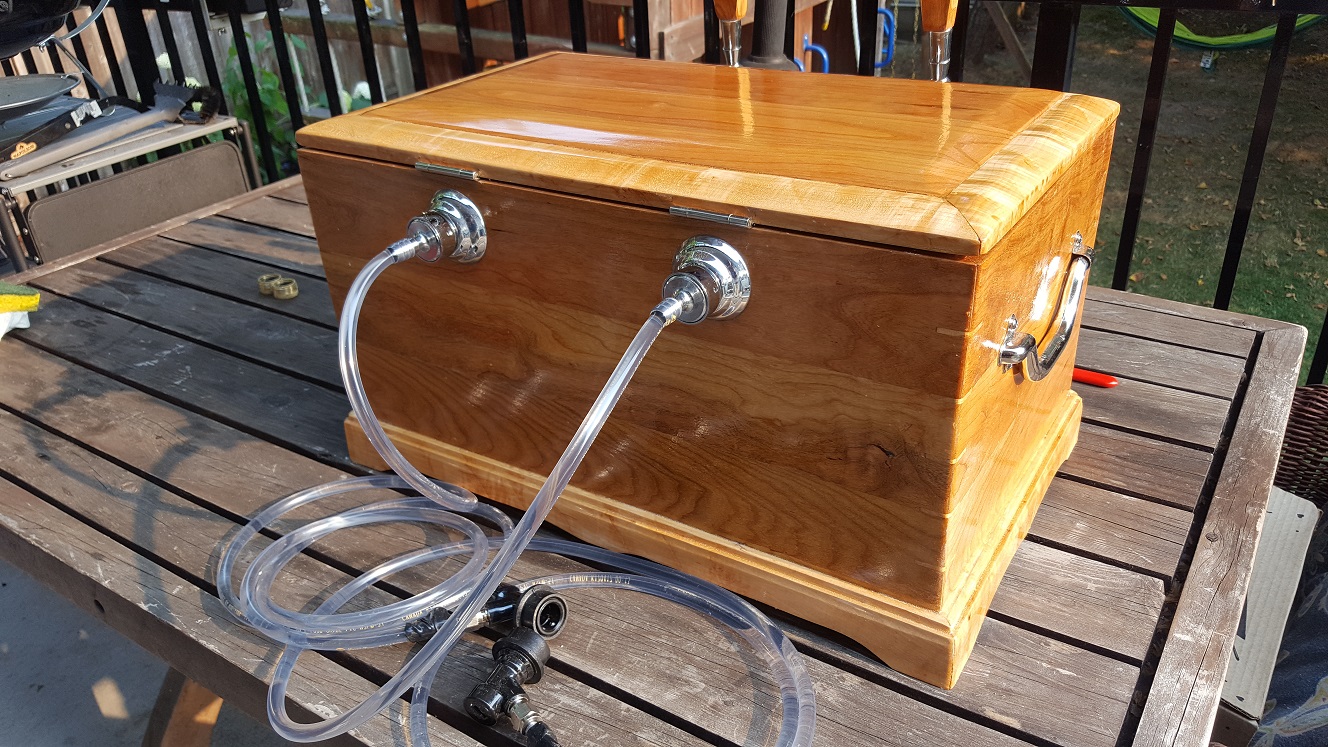
My previous box used a false back to hide the lines. I felt it really served no purpose since no one ever saw the box from the back, and it added unnecessary depth to the box. I also like how I can remove the lines from this one and insert plugs for easy transport or storage.
I got a couple of mild kinks in the lines but it doesnt seem to impede the flow. I used proper stainless coils this time (bought during a black friday sale, which was the inspiration to start this whole project). The box was built around the dimensions of the coils that I bought (10 inch diameter) in order to keep it as compact as possible.

The inside is lined with 1/2 inch pink styrofoam which is then fibreglassed for waterproofing. With 3/4 inch hardwood and 1/2 inch foam it should be well insulated.
I put some thought into how to label the beer that's being served. My previous box has a chalkboard glued to the front which isn't pictured in the linked post. It's awkward to write on, and I didnt want to obscure the wood finish on this one. The solution I came up with was to countersink magnets into the wood, just below the taps so it's somewhat discreet:
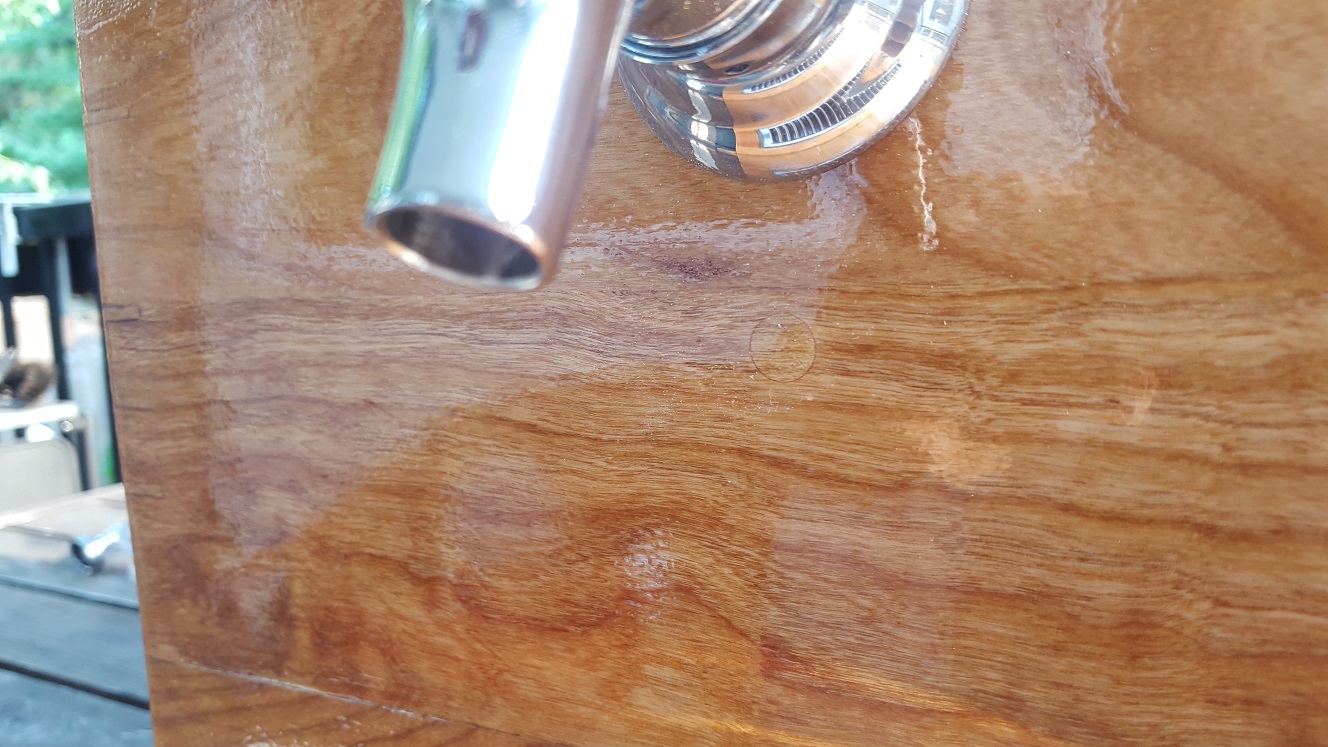

I can then attach half-round magnets to the outside to hold labels. An elegant solution if I'm allowed to pat myself on the back a bit.

Thanks for reading, and thanks for your interest. Happy brewing.
https://www.homebrewtalk.com/showthread.php?t=428860
A friend from my homebrew club likes to point out that it's the #1 result when doing a Google image search for "wooden jockey box". Quite an achievement! I'm hoping to bump it to #2 with my new one:
The previous one served it's purpose but it's a big big and heavy. The new one was intended to be a more manageable size, and to upgrade the old one in every way. My old box will be donated to my homebrew club.
It's made of cherry hardwood with maple trim. I also put decorative maple splines along the sides hoping it would provide some contrast but it doesn't show well in certain light.
This one also has a drip tray incorporated into a drawer:
The drawer does not drain so I have to monitor it from time to time and dump it out if necessary. This only happens when people who don't know any better dump their beer into it after pouring a cup of foam. I put magnets on the side that stick to metal washers under the box. These serve as a stay to keep the drawer locked open or closed for transport.
I am not at all happy about the small gap between the drawer and the maple skirt on the right side when the drawer is closed. Oh well.
I chose chrome fittings for the entire box. I tried brass but it didn't look as nice.
My previous box used a false back to hide the lines. I felt it really served no purpose since no one ever saw the box from the back, and it added unnecessary depth to the box. I also like how I can remove the lines from this one and insert plugs for easy transport or storage.
I got a couple of mild kinks in the lines but it doesnt seem to impede the flow. I used proper stainless coils this time (bought during a black friday sale, which was the inspiration to start this whole project). The box was built around the dimensions of the coils that I bought (10 inch diameter) in order to keep it as compact as possible.
The inside is lined with 1/2 inch pink styrofoam which is then fibreglassed for waterproofing. With 3/4 inch hardwood and 1/2 inch foam it should be well insulated.
I put some thought into how to label the beer that's being served. My previous box has a chalkboard glued to the front which isn't pictured in the linked post. It's awkward to write on, and I didnt want to obscure the wood finish on this one. The solution I came up with was to countersink magnets into the wood, just below the taps so it's somewhat discreet:
I can then attach half-round magnets to the outside to hold labels. An elegant solution if I'm allowed to pat myself on the back a bit.
Thanks for reading, and thanks for your interest. Happy brewing.
")
