Yet another bar build thread? I've been a lurker here for a long time with minimal posting activity. I recall wishing there were more bar build threads on HBT while I was on the hunt for ideas. There are loads and loads of threads on folks converting chest freezers into killer bar/keezers but for the more permanent installations I've always felt the content was a bit light. It seems to have picked up a little lately but I'm talking more 3-4 years ago when I started my project.
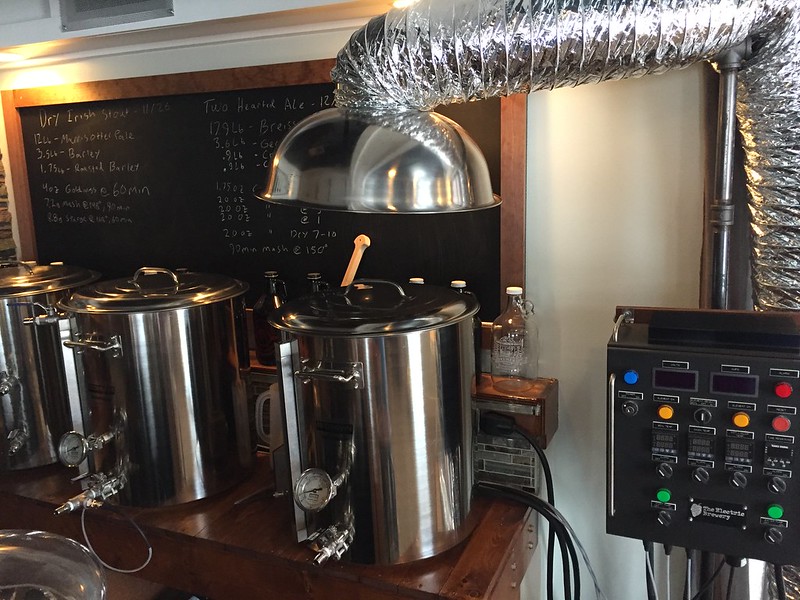
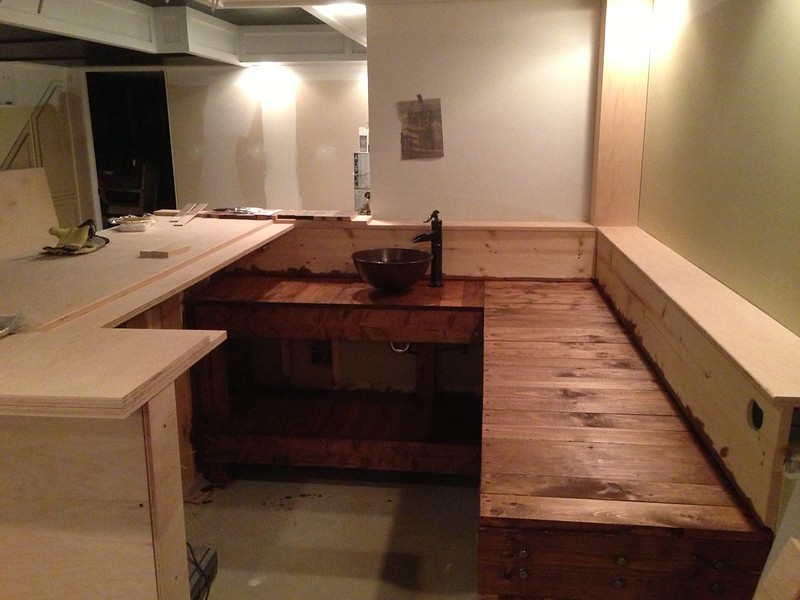
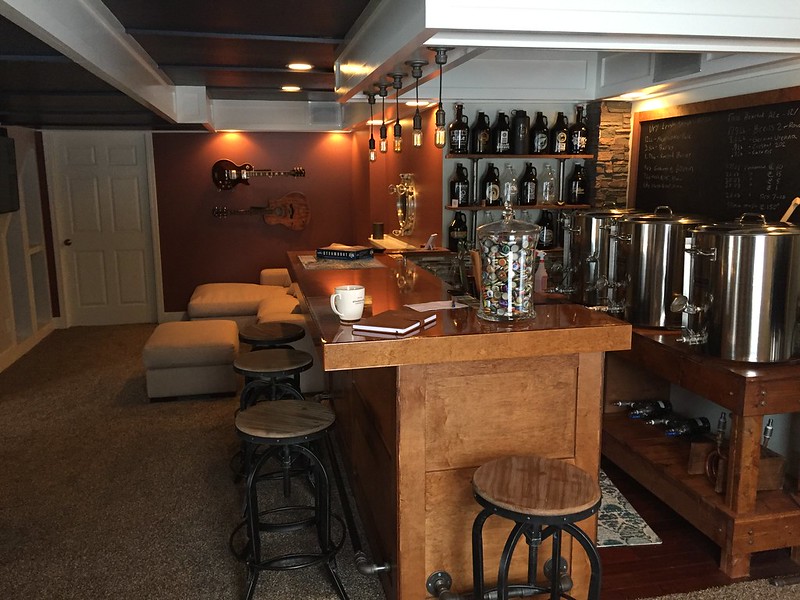
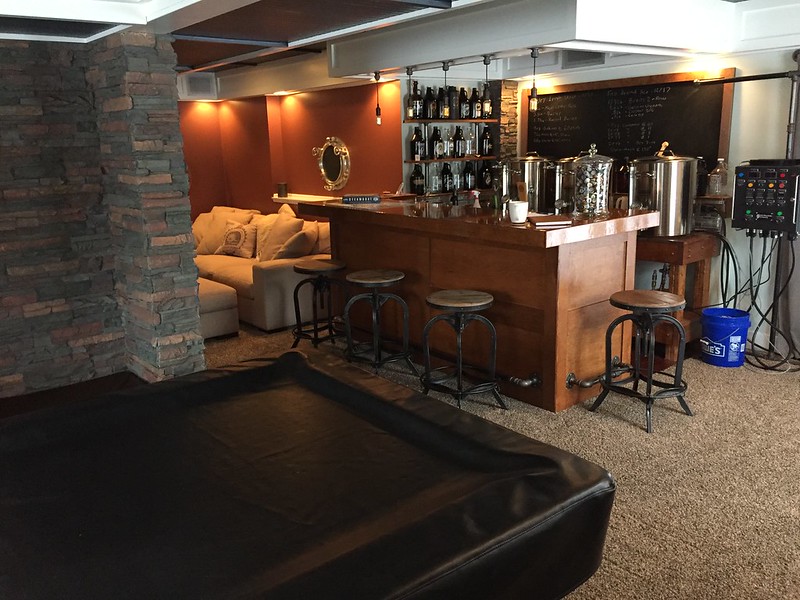
So my "bar build" was a basement remodel combined with my switch from extract to all grain brewing. Specific to the brewing my objective was to create a bar where I could go from brewing to serving with the least amount of wasted movement possible. I built the bar around Kal's brew stand design for the barback area. From there everything else was built with the intent to minimize the overall floor space I'd consume in the basement while also creating a comfortable place to enjoy the beer when not brewing. And if we're being honest here - if I was going to spend the money on the Blingman brewing gear I wanted it to be highly visible and as much a decoration as a tool for brewing.
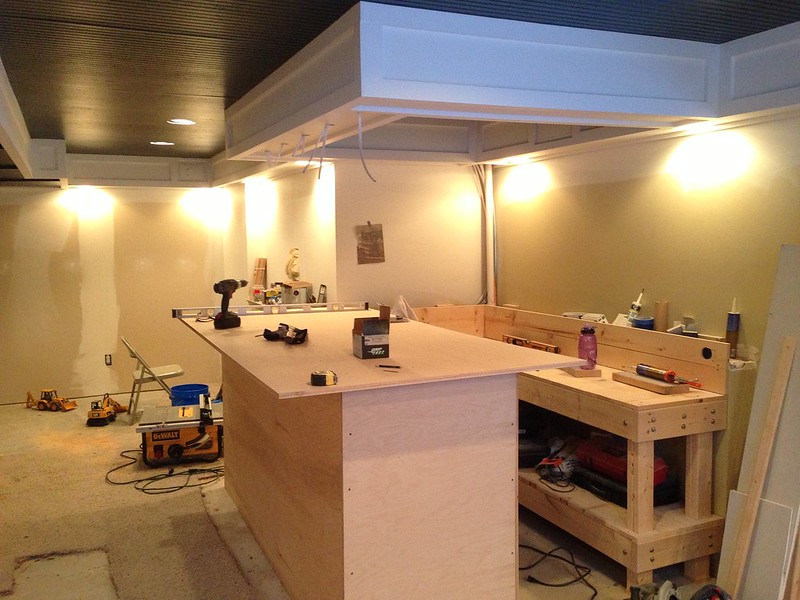
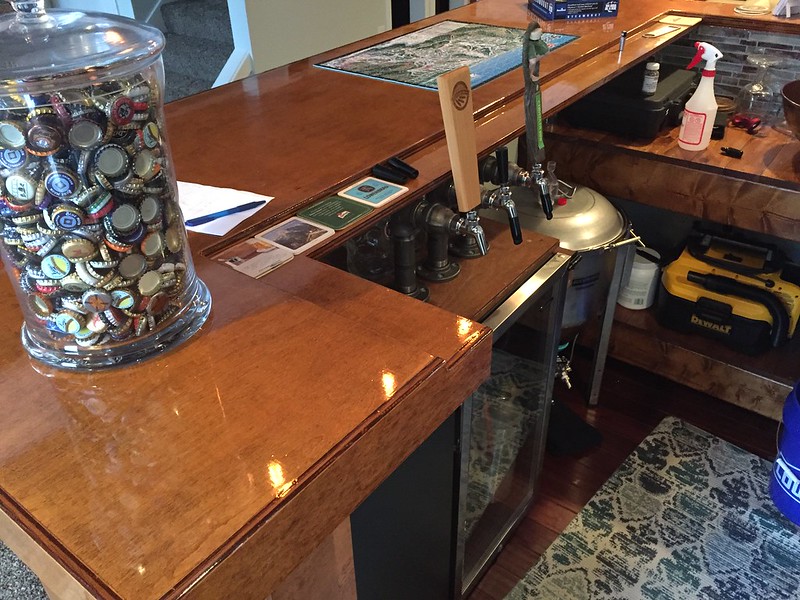
It took me a solid two years to complete the project. It's not unusual for me to underestimate the effort required but this was quite a lot longer than I would have ever imagined. Things like load bearing walls and having babies seemed to have the most impact on the project. As recently as this past Fall I finally added the taps. Prior to that I was still using picnic taps behind the bar. I still have smaller projects going but overall I'm just working on my brewing now and enjoying the basement.
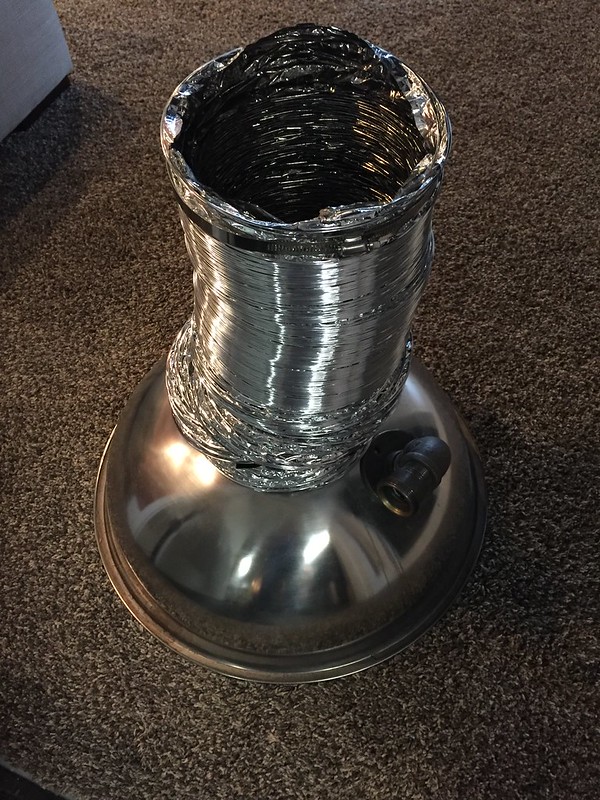
My brewing rig/bar is strategically located in an area of my basement without any reasonable means of accessing plumbing. As such I ended up using a pump to push my bar sink drain up into the ceiling and over to a different room for hookup to an existing vent.
And for the eagle-eye DIY'ers out there you may notice a piece of untreated lumber placed directly on the concrete under the bar. In order to save myself from an eighth trip to Lowes on that particular day I actually painted the under size vs returning to get a stick of treated 2x4. When DIY projects push beyond doubling the original timeline sacrifices get made in order to maintain sanity.
I hope someone will find this useful, helpful or at least moderately interesting. It was a fun project though it took far, far too long.
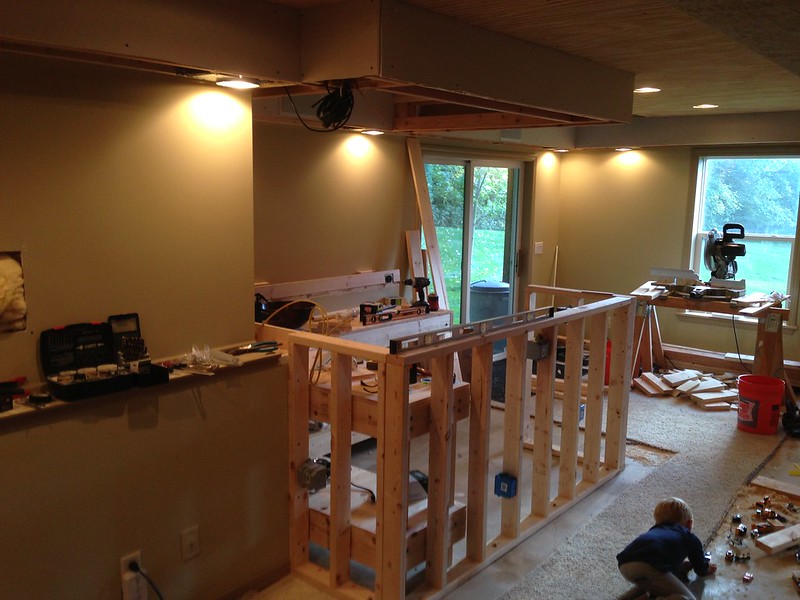


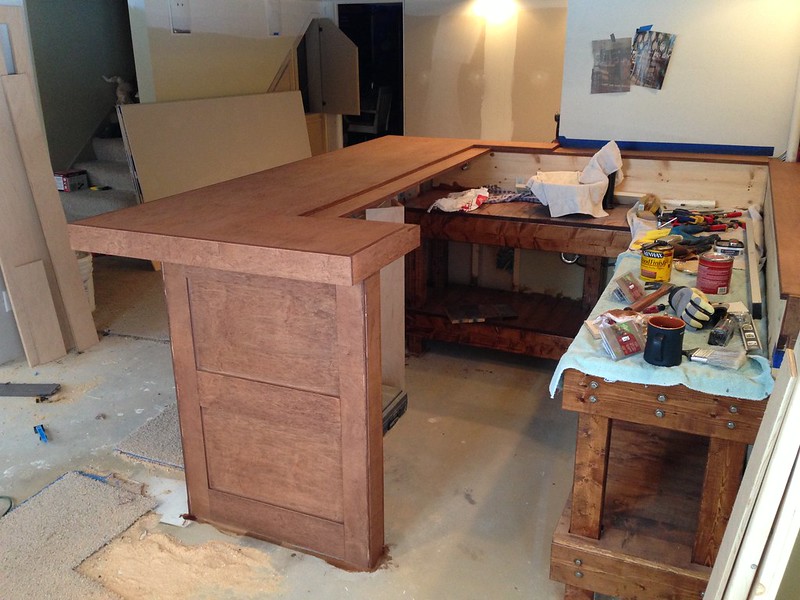

So my "bar build" was a basement remodel combined with my switch from extract to all grain brewing. Specific to the brewing my objective was to create a bar where I could go from brewing to serving with the least amount of wasted movement possible. I built the bar around Kal's brew stand design for the barback area. From there everything else was built with the intent to minimize the overall floor space I'd consume in the basement while also creating a comfortable place to enjoy the beer when not brewing. And if we're being honest here - if I was going to spend the money on the Blingman brewing gear I wanted it to be highly visible and as much a decoration as a tool for brewing.
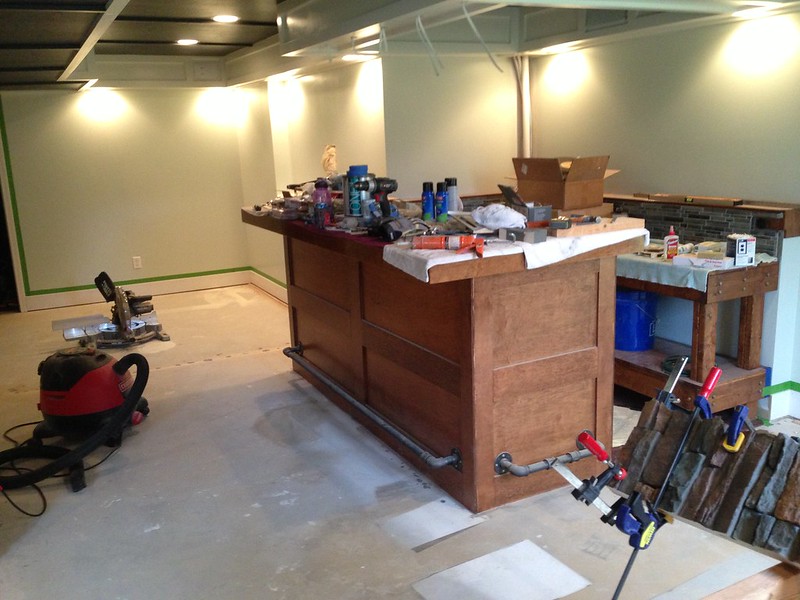
It took me a solid two years to complete the project. It's not unusual for me to underestimate the effort required but this was quite a lot longer than I would have ever imagined. Things like load bearing walls and having babies seemed to have the most impact on the project. As recently as this past Fall I finally added the taps. Prior to that I was still using picnic taps behind the bar. I still have smaller projects going but overall I'm just working on my brewing now and enjoying the basement.
My brewing rig/bar is strategically located in an area of my basement without any reasonable means of accessing plumbing. As such I ended up using a pump to push my bar sink drain up into the ceiling and over to a different room for hookup to an existing vent.
And for the eagle-eye DIY'ers out there you may notice a piece of untreated lumber placed directly on the concrete under the bar. In order to save myself from an eighth trip to Lowes on that particular day I actually painted the under size vs returning to get a stick of treated 2x4. When DIY projects push beyond doubling the original timeline sacrifices get made in order to maintain sanity.
I hope someone will find this useful, helpful or at least moderately interesting. It was a fun project though it took far, far too long.