Moding a DishWasher to clean Kegs Keggles Buckets Carboys!! Pictures

Homebrew Talk - Beer, Wine, Mead, & Cider Brewing Discussion Forum

Help Support Homebrew Talk - Beer, Wine, Mead, & Cider Brewing Discussion Forum:

This site may earn a commission from merchant affiliate links, including eBay, Amazon, and others.

Esmitee

Well-Known Member
Joined
Apr 23, 2011
Messages
759
Reaction score
57
Location
Little Egg Harbor, At the Bay and Ocean
Hia, I 1ST SEEN A THREAD MORE THAN A YEAR AND A HALF AGO, and from looking and reading it, KCBREWER the (OP) seemed to be a real Smart Man with Great Ideas and a thinker! And very LAZY to boot LoL. I like all of the above! I was so impressed by what he did with those few parts. I hate the cleaning of all the kegs carboys and such too. I have 3 kicked kegs waiting to be cleaned right now.

So a friend of mine was cleaning out his in laws Flooded SANDY home in Beach Haven NJ LBI and was chucking the Dishwasher, a Maytag hehehehehe I said I'd take it, then he said Hey, Do you want the 21 CF fridge too? They both work............

So I start to study it and ready myself to scavenge all the parts off of it.
I refer to KCbrewer's thread and notice that the pump in mine is much different looking than what he has??? much bigger in overall size.
Hummmm, 1st thought is I wont be able to use this dishwasher. I then start measuring it. I find right away that I'm pretty sure a keg will stand up in there. Instead of Frankensteining everything from the get go, I think I'll try this way 1st. I can always strip it down at a later date if this way fails.


.S C O R E.........I decided to Mod the Matag dishwasher and leave it intact with door, heat element. And full up front controls. 5 Gal kegs will fit in, carboys buckets and my keggles

:mug:

pic #1 and #2 : a 3/4" cap just happened to fit over a nub sticking up where a spinning wash ARM spun around. I used the cap as a centering jig in my drill press.

This cap will also become the spray Head. I will drill a center hole to spray up, And 8 angled holes to spray outward.

Pic #3 I drilled a hole through the "Pump HEAD" Don't know what it's really called, But I do know, ALL the pump water comes through it. I already removed the rear mounted water manifold and spray arms. I'll try and snap a pic of what it looked like before I started.

Pic #4 I installed a 3/4" threaded connector to pipe, and put the housing back on.

2013-03-20_17-54-15_198.jpg


2013-03-20_17-54-27_7.jpg


2013-03-20_17-57-48_960.jpg


2013-03-20_21-47-07_50.jpg
 
I used to use my dishwasher to clean my bottle for brew day. It was fantastic. Then I moved :(
 
This was the inside of DW before I started. But took the pic after I started LOL.
Of course it had a lower dish basket and an upper dish basket. The upper basket has a spray arm underneath it. That spray arm under that basket plugs into those 2 black holes in the middle of the water tower.

In this picture, I already modified the pump housing, But where the copper pipe is now, That lower spray arm was mounted and spun. The mount and place that spray arm was mounted, is where I drilled through and threaded the pipe fitting into.

As you can see in the back of the DW, there is, what I call, the water tower. The water supply comes from the pump housing (in the bottom) up into this water tower and supplies the middle spray arm and the spray arm at the top .

2013-03-21_22-12-10_158.jpg
 
Close ups of whats going on.
Water came up through the top of the pump housing to supply the spray arm where the copper fitting is now threaded in and flowed out as the arrows show to supply the water tower that I removed.

My idea is to block off the water flow to the water tower and redirect it up through the copper fitting. I think that by threading that copper fitting down below into the area where the water path is, I have blocked all of the water flow the the water tower. If not, I'm thinking I blocked at least 60 -70% of the flow? Even if it's only 60 -70% blocked and water does come out the back, I still think the water going up that 3/4" copper pipe with the drilled "spray Head" will be plenty of pressure to clean anything I place over it.
If it turns out it is not enough, I will epoxy some plastic part cut from that water tower to fill and block the back of the pump housing.

I'm not quite sure what that 90* elbow is for. After looking at it very close, I think it may be an air supply, a "Snorkel" of sorts. Maybe to keep the pump primed? I say this because it connects with the water tower , but only goes up 1/2 way to a hole in the side of the water tower. It does NOT connect with the water flow suppling the middle and top spray arms. If it is a snorkel, I'll connect a hose to it to raise it up and outa the water sump.

Any appliance Peeps out there, your knowledge will be greatly accepted.
Another question, Is the water heated by the "splashing effect", meaning the heating element is NOT submerged in the water, rather after the spraying of the water starts the drops hit the hot element and heat the water?

I have already did a half/assed wet test. I removed the door keeper ( what the door locks into) and put it into the door. Making the DW think it's door was closed and I could peek in to see what was going on. Well I did see. I watched the water fill out of the side, then.... it paused for a second, and.....Man that pump kicked on......I only had the door cracked and was looking in at the top. That is 1 powerful pump. It soaked my face in a second. I know it was shooting up the copper pipe, but I also think it was coming out the back of that pump housing.

At this point, I will go further in this build to get where I can place the kegs, keggles and carboys inside without them falling over.
I'll then run a cycle or 2 to see how it performs and if needed, Then block up the back of the water pump housing to increase water pressure.


Next: what you all want to see...............

2013-03-20_21-47-07_50edit1.jpg


2013-03-20_21-47-19_888edit2.jpg
 
Yes they do fit inside.
Thats a ball lock keg. It only has about 1 - 2" above it.
The keggle has maybe 3 -4"
The 3/4" copper pipe spray head I have in the pictures is only about 3 1/2 to 4 1/2" in height. Thats what I had laying around. I really think the length doesn't matter..... LOL I can extend it .

As it stands right now, with this set up, I can get the ball lock keg over the spray head and stand it up. The keggle may require a little bit shorter spray head.

If after testing, I determine the spray head must be longer (I really don't think it will have to be) I have no problems with cutting a round hole (door) in the top of the dishwasher to place the kegs, keggles and/or carboys from the top over the spray head. It would only really make it easier to place them in since I can open the door as well.

If you look close at the keggle picture. On the sides, at the bottom of the DW you will see small "FLAT" areas on the left and right. The bottom dish rack wheels ride on them. I will use those flats to fasten ALU. cross members to place the keggles on and they will be held above the heating element

I would like to keep that sump cover in the last picture, kinda to protect that pump and maybe to be able to fasten something to it to position the Ball lock keg and/or carboy.

2013-03-20_21-48-49_649.jpg


2013-03-23_14-18-55_364.jpg


2013-03-21_22-11-28_840edit3.jpg
 
Very clever.
I have several silly questions. None of which are really important.

Do you run the washer on a full cycle for each piece you want to clean, or cut it short?

What if you put a 'T' on the end of the tube or cobble together a manifold to clean more than one piece at a time... Seems like a lot of 'wasted' space per cycle in there...

Would putting a CIP spray ball on the end of the tube make a difference?

Have you tried to clean a sankey keg that isnt modded to a keggle? (Like a 1/6th barrel)

Thanks
 
I love this and, think I just figured out what I'm doing with my portable dishwasher after I move into the new house. The only thing I worry about is the heating element melting fermentation pails, but that's nothing a little wire can't fix.
 
I love this and, think I just figured out what I'm doing with my portable dishwasher after I move into the new house. The only thing I worry about is the heating element melting fermentation pails, but that's nothing a little wire can't fix.

Probably don't have to run the heated dry. Most have the option to turn it on/off.
 
I've been slowly working on this build. This was another testing . I think you can get the idea. I'm trying to fine tune somethings, and I changed others.

A video...
http://s1221.photobucket.com/user/Esmitee/media/MOV03276.mp4.html


ALSO, if anyone knows where I can get major spec's on this dishwasher as to "What each cycle does", Like , LIGHT cycle = !.Power on, 2. drain the sump, 3. water Fill, 4. spray water to wet, 5. dump detergent, 6. wash, 7. drain sump, 8. rinse......etc... I am interested the most about the heating element, as to when it comes on, for how long.etc. More tecno stuff like that. I have a Users Manual, But it just tells you about the cycles in general. I will update the build from where I left off very soon. I didn't wanta leave you guys hanging.

:mug:
 
looks like you're getting good flow!

Reading back through, I see you asked some questions that were never answered. The heating element does get submersed when the tub is full. The round mushroom cap sort of thing in the right front of the tub is a float switch to control the water level.

I've only worked on a couple like this and never looked that closely at the pump design. Can't help with identifying that angle fitting.

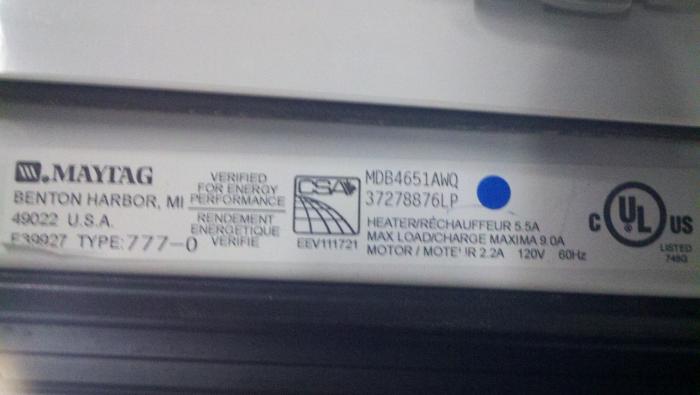
What's the model number? I may be able to find something to show what the different modes do.
 
Kinda late, But has anyone viewed the video?


Yep, I just did, and now I'm checking my contacts for a useable dishwasher!

I'm thinkin' a sprayball on mine, and I like your "roof modification", for loading purposes.

What are your vessels sitting on, to keep them clear of the element?

Are you using the dry cycle after the wash, or just "drip dry"?

Any foaming problems whilst washing?

Using PBW or Oxyclean in it, or something else?

Measured the temps, (water), while in use, and are you selecting a "sani-wash" option while cleaning?
 
Looks like it works great, Esmitee. And thanks for the acknowledgement. :mug:

I considered just using the full dishwasher when I built mine, but having limited space in the garage kept me from being able to dedicate that much room to just the keg/carboy washer. You'll also find that making different types of spray heads for each type of vessel will help it clean more effectively. I used some 3/4" cpvc with a cap on the end and then drilled different spray patterns. Cheap and easy way to figure out the patterns that work best.
 
looks like you're getting good flow!

Reading back through, I see you asked some questions that were never answered. The heating element does get submersed when the tub is full. The round mushroom cap sort of thing in the right front of the tub is a float switch to control the water level.

I've only worked on a couple like this and never looked that closely at the pump design. Can't help with identifying that angle fitting.

What's the model number? I may be able to find something to show what the different modes do.

Reynolds, thanks. I know about that float switch.
I'm going to have to watch the water fill amount again case I'm pretty sure the element does not get submerged.That's why I asked. I ass umed it would. Ill get back to you. I have a few kegs to clean. I get the model # . Thanks
 
Very clever.
I have several silly questions. None of which are really important.

Do you run the washer on a full cycle for each piece you want to clean, or cut it short?

What if you put a 'T' on the end of the tube or cobble together a manifold to clean more than one piece at a time... Seems like a lot of 'wasted' space per cycle in there...

Would putting a CIP spray ball on the end of the tube make a difference?

Have you tried to clean a sankey keg that isnt modded to a keggle? (Like a 1/6th barrel)

Thanks


Goliath86
I have ran a few full cycles and wound up cutting them short. The cycles go from RINSE @ 9 minutes all the way up to HEAVY @ 132 minutes

The Manual explains all of that

http://www.maytag.com/digitalassets/MLPDF/Use and Care Guide - 6920187.pdf

I just used the rinse cycle and added by hand PBW, let it spray, Then run the rinse again.

I'm working on a T to connect to the ball locks.

I have a 15 gal Sankey keg Un touched, not modified in anyway, with spear still it it. I wanta use it to ferment my 11 gal batches it. It will go in and get cleaned as Like a car boy does. More pictures to follow.

:mug:
 
Below is a link to a "tech sheet" for that model. Page 10 has a cycle chart to show you what it's doing when. It also has a wiring diagram and testing procedures.

www.comdac.com/literature/maytag/mdbh965aws-service.pdf

Reynolds, Thank you very much. Thats exactly what I was looking for.

Now I can understand what that machine is doing for each minute it is running.
I instantly learned what, AND for how long each cycle item (IE: wash, rinse, Preheat, Heat check temp, etc)and option (IE: add additional rinse/wash, higher temp, add additional time, etc.)does.

Actually, without this info. I was going to have to use it "ATTENDED", meaning I would have to kinda baby sit it. Put the soap in, add Hot water to it from a bucket of hot tap water. (I use a cold water garden hose to supply water to it, outside) Being I was only going to use the rinse cycle @ 9 minutes. I would have to add soap, turn it on, and as it filled add the hot water to it. 9 minutes later, after it finished, turn it on and add the hot water to it for a rinse, ETC. That's NOT what I wanted to do by using the dishwasher as it was.I wanted to SET IT, and Forget It!. Turn it on and walk away, come back to it when it was done. Now, I can do just that!

Tonite I ran a Light Wash, with the High Temp option, 10 minute heated wash, 10 minute heated rinse, then another 15 minute heated rinse. = Clean Corny keg ! Hands free and UN ATTENDED ! Yaaaaaa

Oh Yea, To wash the keg, This time I used dishwashing detergent. I had been using oxi clean, I'm giving up on that cause it does foam up to much and all ways leaves foam even after a rinse.

:mug:
 
You are probably aware of this, but most ALL of the dishwashing detergents have a "rinse aid" additive so as to minimize spotting.......

It kills head retention as well, although hopefully your long rinse cycle will eliminate all that stuff!

I like the build!
 
There is NO password protection on the video. I'm not completly sure if there was before, but there is NONE now . No one left any posts about it being protected.

BTW, I'll be adding more vids !:ban:


I've been slowly working on this build. This was another testing . I think you can get the idea. I'm trying to fine tune somethings, and I changed others.

A video...
http://s1221.photobucket.com/user/Esmitee/media/MOV03276.mp4.html


ALSO, if anyone knows where I can get major spec's on this dishwasher as to "What each cycle does", Like , LIGHT cycle = !.Power on, 2. drain the sump, 3. water Fill, 4. spray water to wet, 5. dump detergent, 6. wash, 7. drain sump, 8. rinse......etc... I am interested the most about the heating element, as to when it comes on, for how long.etc. More tecno stuff like that. I have a Users Manual, But it just tells you about the cycles in general. I will update the build from where I left off very soon. I didn't wanta leave you guys hanging.

:mug:
 
Nice project!

with some T's do you think this dishwasher could wash 2 or even 4 cornies at once? Maybe if the pump was upgraded?

I think it would be cool to use like sharkbite and swap the cleaning head out. 1 for carboys, 1 for 4x cornies, 1 for bottles etc.
 
Nice project!

with some T's do you think this dishwasher could wash 2 or even 4 cornies at once? Maybe if the pump was upgraded?

I think it would be cool to use like sharkbite and swap the cleaning head out. 1 for carboys, 1 for 4x cornies, 1 for bottles etc.

Well thank You OD13, I don't plan doing anything to the pump.
But my spray Wand/Head threads into the altered pump housing..... So I can remove it in a few seconds and pop on a dual, tri, or maybe even a quad head to do like you say. I may give it a whirl If I did that, I would deff want another connection to attach 2 Ball Lock disconnects to flush out the poppets. I find it kinda a pain to disassemble the entire keg to clean every time! As is....it works very well to just set it and forget it... LOL

Thanks!:mug:
 
I don't remember if I read it in the thread, but are you just adding cold water as your water supply, or tapping off of a hot water line, ( re: will the element within bring up the temp satisfactorily )?

I ask because I have one I am about to modify, and would like to just hook it up in the yard to the garden hose.
 
I do hook it up to the garden hose. Best would be a hot water supply. I dont have that yet. Depending what cycle you use, It will heat the water, maybe twice or three times during a cycle. However, I use the "Rinse Only" cycle.It's 9 minutes long. Reason being, I fill a bucket of hot water from an inside sink and dump it in the washer along with some pbw and let it do its thing for the 9 minutes. Then I run the cycle again and let it fill with the garden hose cold water supply and rinse for that time. I do sometimes use a few cycles that will take alot more time, depends on my mood at the time. LOL

Let me know how you make out with your build. :mug:
 
Glad I could help!


What did you figure out on water level vs. heater location? Is the water deep enough to submerse the heater? Or are you routing some of the flow to splash on the heater?

Wow I'm sorry Reynolds, Never answered your question..........L I F E !
water level comes right up to ALMOST touch the element. I figure the way a dishwasher is supposed work, that element get all the splashing it needs to heat the water. I added some fine "SPRAY HOLES" to the spray head at the bottom of it that do splash the element.
 
Back
Top