The Billy Bar, aka, Building an Articulated Tap Tower Keezer Without a Collar

Homebrew Talk - Beer, Wine, Mead, & Cider Brewing Discussion Forum

Help Support Homebrew Talk - Beer, Wine, Mead, & Cider Brewing Discussion Forum:

This site may earn a commission from merchant affiliate links, including eBay, Amazon, and others.

Phideaoux44

Well-Known Member
Joined
Oct 5, 2007
Messages
81
Reaction score
8
Location
Wilmington, NC
So I recently mourned the loss of my beloved bar that I built in '06. And I had since moved and the old one didn't fit right anyway, I decided it was time for a new bar to sit in my dining room. I love the idea of a kegerator/keezer setup since it can fit in a house and you can make it look nice, but I've never been a fan of the collar setup with the shanks running through. Mind you, I don't mean to knock all the gorgeous setups out there with those, I just have always preferred the look of the tap tower sitting on top, inviting me to come drink.

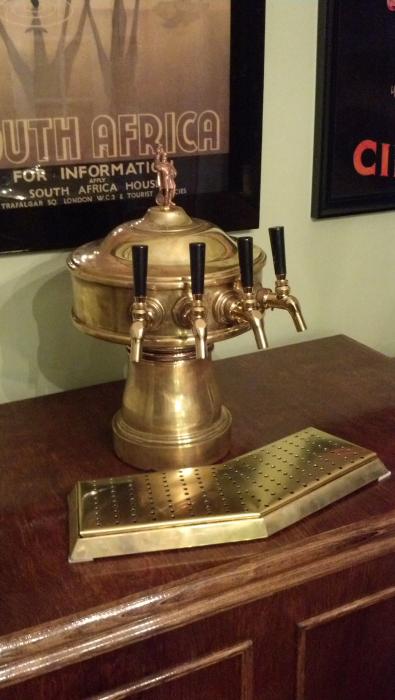
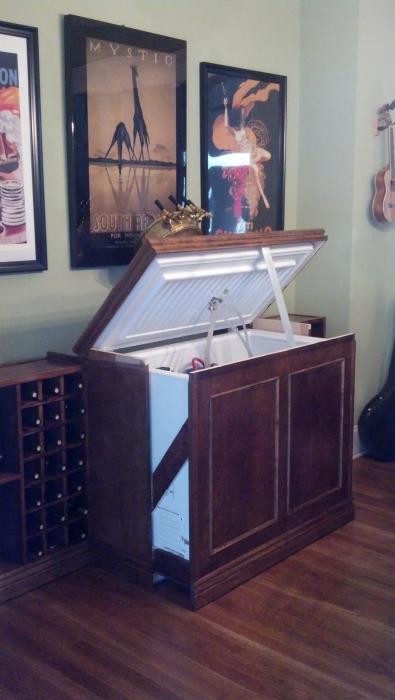
However, as with the first bar, I knew that one of the big reasons people seem to do the collar is that a tap tower mounted on a chest freezer smacks the wall when you open the keezer. So if you're determined to have a tap tower, you can leave it out in the middle of the floor (tacky) or slide it out every time you need to get inside (total P.I.T.A./ not always an option). So I came up with a design that allows you to slide it out easily, open it up, and then slide it back into hiding inside an otherwise nice looking piece of furniture. When people see it they don't think "oh there's a fridge" they think "wow, cool bar!" That's what I wanted. And I wanted it to be sufficiently awesome to house my baby: a gorgeous antique brass tap tower that I bought out of a bar up North.

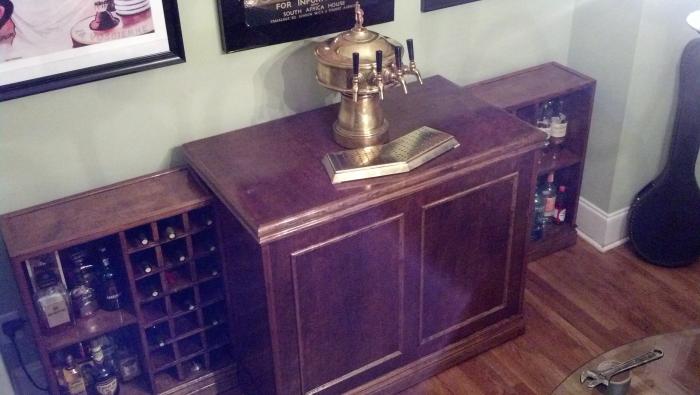
I did my best to document the adventure with pics and I hope to see more people join my "no collar" bar movement. Perhaps someone else has done one similar, but I've never seen it so I thought I'd do a write-up on my adventure. I used all my good ideas on inventing this and ran out when it came time to name it, so for now it's just "Billy's bar," after my nickname. I'll start with a picture of the end result, and then move onto the construction.

IMG_20130515_210746_335.jpg
 
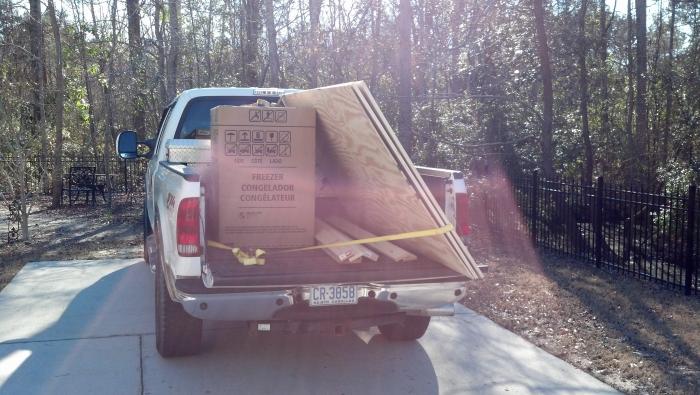
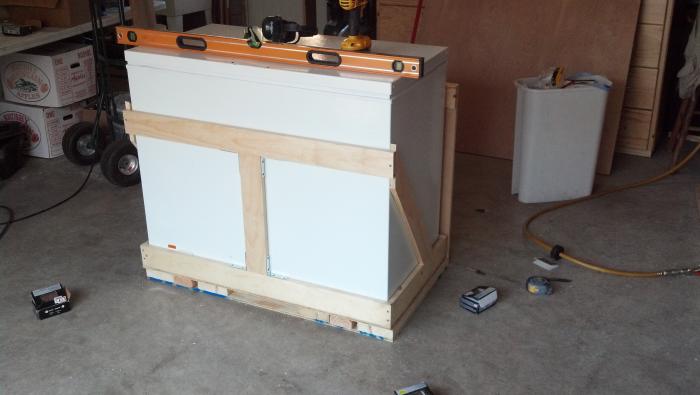
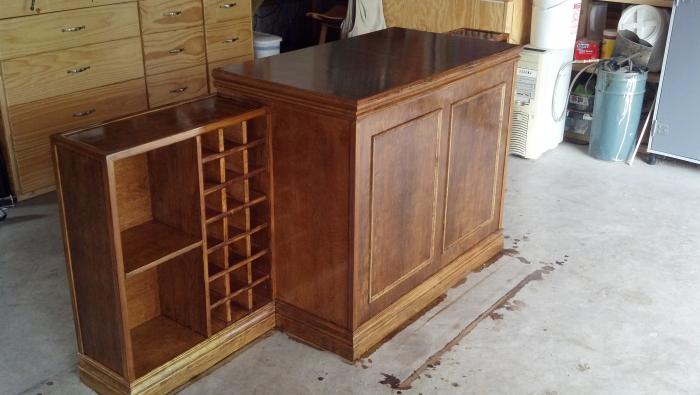
Alright, so here is the beginning of the project: gathering all of the materials. I built the cabinet and the shelves out of birch panels from the local big box hardware store and trimmed it out with what appeared to be some manner of pine. The following pics are of the tray that holds the keezer itself and how it slides out.

2013-03-03_15-46-09_51.jpg


2013-03-03_18-52-35_990.jpg


2013-03-03_19-17-17_117.jpg


2013-03-03_19-23-35_364.jpg


2013-03-03_19-23-46_409.jpg
 
Now I'm starting to frame out skeleton of the moving portion of the bar. This will provide support for the front which will make more sense later.

2013-03-04_16-41-53_335.jpg
 
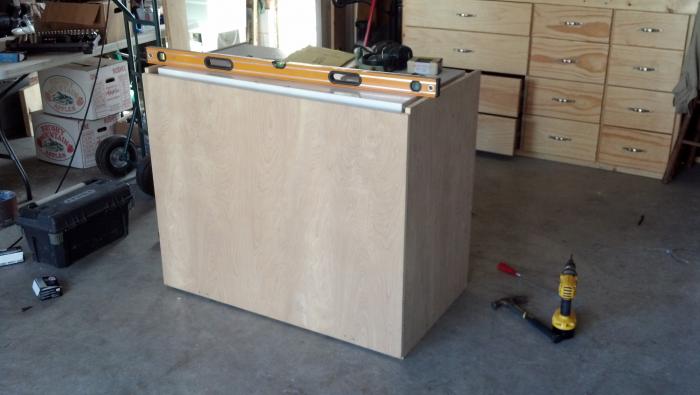
Now it's starting to look like something! Well, mostly just a box. But a box with very pretty wood grain. The front piece is the floating or moving piece and the sides and backs are stationary. And when the top is mounted, it too will "float."

2013-03-05_11-35-46_174.jpg


2013-03-05_12-11-45_538.jpg
 
At this point the base of the sides, back, front and top. The top and front will move when you slide out the keezer, while the sides and back stay in place. This will make more sense later.

2013-03-05_20-34-38_747.jpg
 
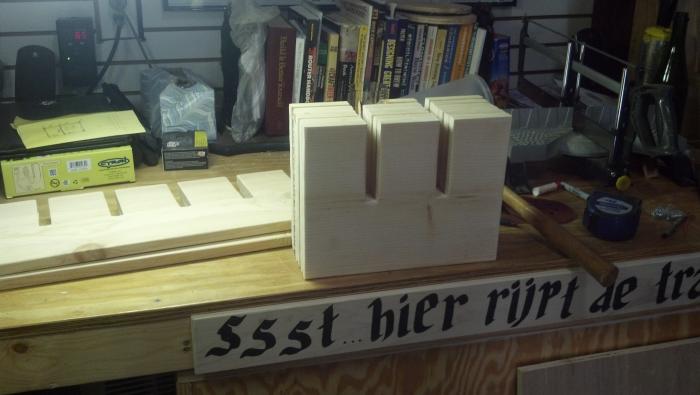
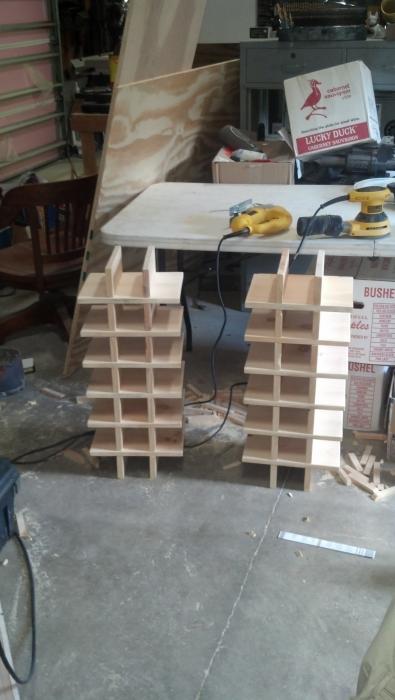
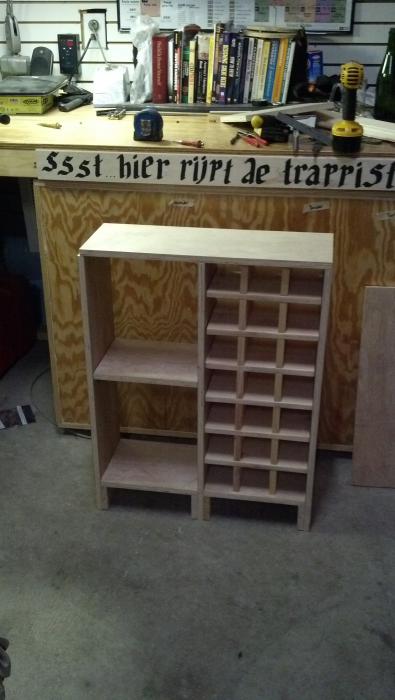
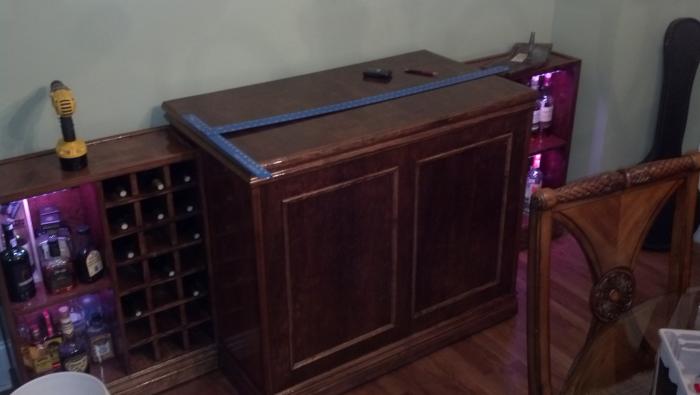
Now onto the wine racks and lighted liquor shelves. I designed the bar to have a mirrored set of shelves on each side to give me four shelves for liquor (or more specifically scotch, my other vice) as well as 42 slots for wine. The wine shelf parts took almost as much time as every other part of the bar since I had to cut out each individual piece as shown below. I'm sure someone will come along and say "well hell, why didn't you just..." and give me some idea that would have saved a million or so hours buuuut that's how custom work goes for me: I make it up as I go. There are some pics of me testing out the placement of the sides, but I ended up going another direction prior to the final mounting. Everything but the wine slots is birch. The slots themselves are some manner of high grade pine.

2013-03-06_11-27-38_209.jpg


2013-03-06_12-06-42_804.jpg


2013-03-06_16-07-57_790.jpg


2013-03-06_16-55-39_431.jpg
 
Alright, so in these pics I have

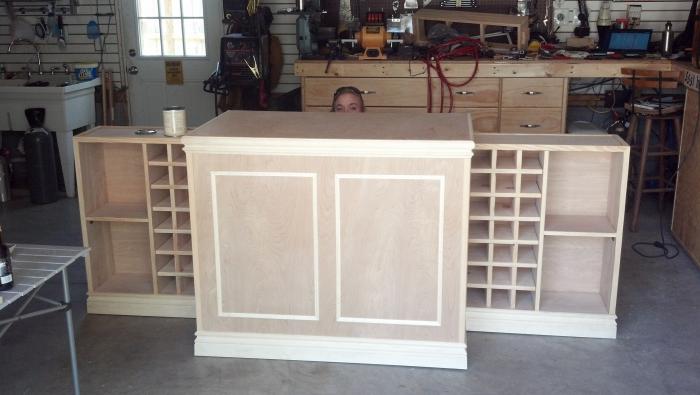
1)Added the back to the side shelves. These entire side units come off for moving this thing into my house, which if you're wondering, is a feat I would call "Herculean" or maybe "Impossible." The problem of a sturdy overengineered thing like this is the weight of it which, I would guess from having moved it, is somewhere in the aircraft carrier tonnage range.
2)Decided to switch up the arrangement of the sides. I think it looks more balanced with the wine toward the inside and the liquor/scotch shelves on the side. I've also started trimming out the bottom.
3)Finally finished the trim all around, including the trim on the front which helps push it closer to "piece of furniture" instead of "pretty wooden box."

2013-03-06_17-39-39_859.jpg


2013-03-06_20-05-26_624.jpg


IMG_20130407_143508_051.jpg
 
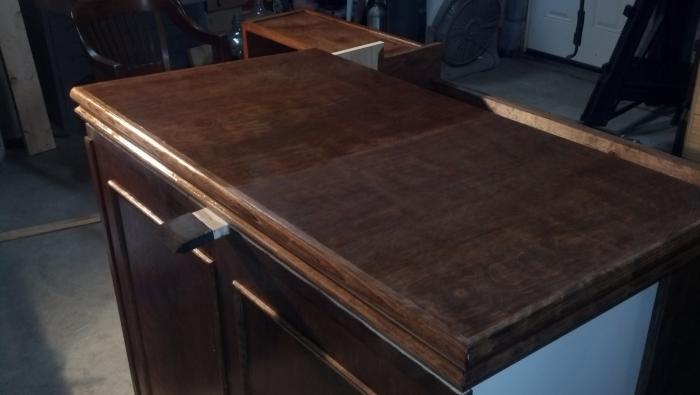
Time for stain. I was aiming for a classy old pub feel to this thing so I consulted with my buddy Dan who does cabinets and knows everything there ever was to know about all things wood. He inspired me to use this Epifanes stuff which they use on wooden boats and yachts to create a very durable and water protected finish since, surprise surprise, there are the occasional spills on a bar. It's bombproof stuff, but pricey. I paid about 40 or so for a quart, plus about 25-30 for the thinner.

I went with an English Chestnut stain on the bar and used two stain coats before I started using a part stain, part finish coat. I think I probably have 6 coats of the finish on there after it was all said and done. The pics at the top show the part thinner, part stain going on. It really added a nice depth to the woodgrain though the pics don't quite capture it.

And by the way, if you ever get an opportunity to stain 42 individual wine bottle slots with several coats, you should just set yourself on fire instead.

IMG_20130415_230149_845.jpg


IMG_20130415_230159_287.jpg


IMG_20130419_124712_390.jpg


IMG_20130419_143147_057.jpg
 
That is super fancy! Good work! I really dig the wine racks on the side.

Hmmm I think you have inspired me to make a wine rack this summer. :mug:
 
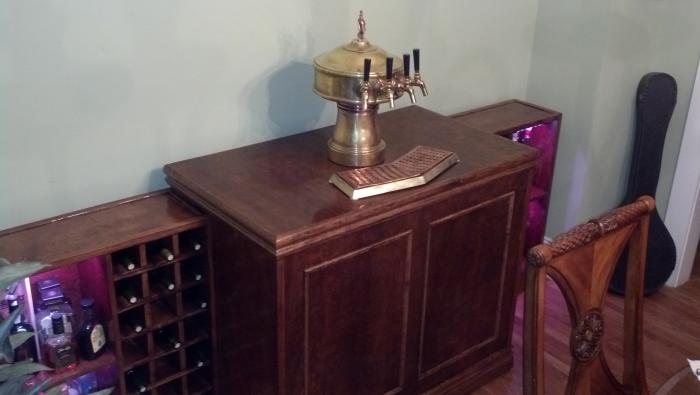
Now I had moved it into the house and had the nerve-wracking experience of having to drill five holes into the glass smooth, perfectly polished piece of wood that makes the top so I could mount the tower. However, the antique tap tower that makes the centerpiece is totally worth it. In this pic you can see the shelves lit up by the programmable LEDs built into each shelf, but for some reason they look pink instead of white, which is what they actually are.

The next pic with the tap tower shows the drip tray with its do-it-yourself copper drip grid that someone made in the tower's past life, presumably after losing or breaking the original. Not only did it barely fit, but it was copper and the tray is brass. It looked crappy like hubcaps on a ferrari, so I ditched it and made a new one.

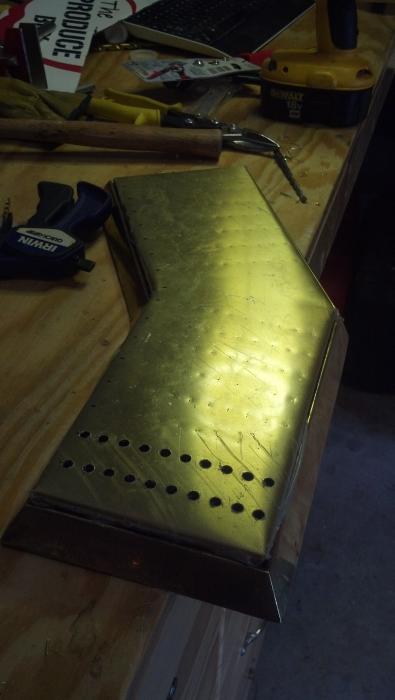
I started with a sheet of brass I bought from onlinemetals, laid out a pattern and then fabricated a drip tray grid. This took a while because I had to cut it out and then carefull bend it to fit the existing drip tray and then lay out the centers for each individual hole. And furthermore, I had one shot to make it right. Several hours later, I had drilled about all the brass I wanted and had it completed. When finally put together, fate had smiled upon me and the new brass and antique brass match seamlessly. It definitely could be better, but I was happy with it and few people look at the drip tray when the tap tower is so striking.

I still need to find a permanent solution for the spacer so the drip tray doesn't sit directly on the wood and scratch it up when it moves around or the lid is opened. For now I used thin strips of furniture felt.

IMG_20130423_194607_452.jpg


IMG_20130429_192210_734.jpg


IMG_20130505_193642_678.jpg


IMG_20130515_182550_804.jpg


IMG_20130515_210953_298.jpg
 
Very nice... I did a collor on mine so it would be more Bartop height and you can belly up to it but I like your idea...

I had to cheat a bit since my building and finishing skills don't really stand up to yours... I used half of a Butcher Block Table for the top and wainscot paneling for the sides...

Happy Brewing....
 
Well, here she is finally. I swapped out the crusty, crappy old faucets for some stainless Perlick forward seals with brass finish so it would work as beautifully as it looked. The bar works quite well. Keeps the kegs cold and slides out easy when you need an adjustment. The fridge holds four staggered cornies and two tanks (nitro and CO2).

I have no idea how old the tap tower is, but judging by some of the stuff it had on it I'd say "very". The hoses and fittings looked like they came out of a time capsule. The shame of the way it's mounted is that the back of it has a very ornate brass relief that says "On Tap" that you can't see. I've had some people suggest I put a mirror behind the tap so you can see it, but for now I just have the "every house ever" type art on the walls.

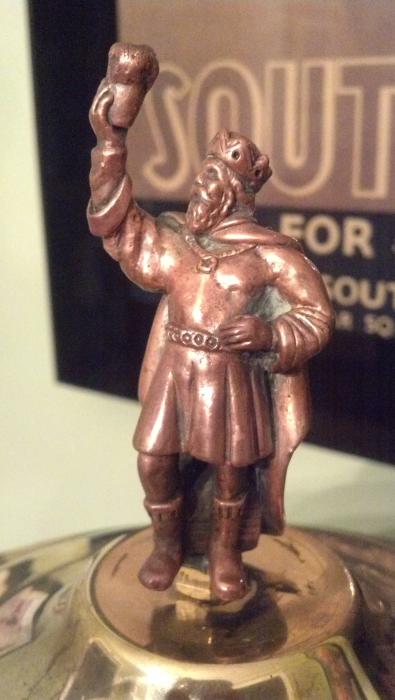
The drip tray appears to be the only part with any model or mfg inscription on it and it says it's made by Perlick. A search yielded not even a mention of that Perlick model number, so who knows. I haven't been able to find a tower or tray that looks like it and wish I knew the story behind it. Somewhere along the line someone mounted a little Gambrinus statue hoisting a pint on the top of the head pan retaining bolt and I loved it as soon as I saw it. It had broken off, so I fixed that one last thing, threw the kegs in and toasted the little copper man with the first pint from my new bar.

Feel free to hit me up with questions if you have them. Spread the word: collar free is the way to be!

IMG_20130515_210644_611.jpg


IMG_20130515_213058_655.jpg


IMG_20130515_210923_058.jpg


IMG_20130523_072145_710.jpg


IMG_20130515_213133_865.jpg
 
That is super fancy! Good work! I really dig the wine racks on the side.

Hmmm I think you have inspired me to make a wine rack this summer. :mug:

Thanks so much! You'll be cussing my very existence this summer if you decide to go through with it. You'll be in the millionth hour of sanding, cutting, or staining and you'll think "that son of a..."

However, they are nice to have. It really isn't hard at all, it just takes a long time.
 
Very nice... I did a collor on mine so it would be more Bartop height and you can belly up to it but I like your idea...

I had to cheat a bit since my building and finishing skills don't really stand up to yours... I used half of a Butcher Block Table for the top and wainscot paneling for the sides...

Happy Brewing....

Thanks! Heh, I like the belly up idea. I probably would have done something like that too if it was in a position in my house where people would sit around it. But in this case, it was along a wall and right next to the dining room table. Which is convenient and also terrible. When you don't even have to stand up from the dining room table to get another beer, you're headed for a disaster. Or a giggle. But usually both.

Also, I LOVE the idea of a butcher block and wainscotting on the sides! I bet that looks awesome.
 
Thanks so much! You'll be cussing my very existence this summer if you decide to go through with it. You'll be in the millionth hour of sanding, cutting, or staining and you'll think "that son of a..."

However, they are nice to have. It really isn't hard at all, it just takes a long time.


LOL. I doubt I'll cuss you for anything... Most likely I'll get all the materials lined up start the build and then move to something else. I think I have DiYADD. :D

My basement is basically a graveyard of half completed projects... well that and my super ghetto "Crappy Stereo Rack with Wine Cases on Their Sides Stuffed into it"™ wine rack. It ain't pretty at all, but it gets the job done and no one sees it.
 
That is absolutely exquisite! Job well done sir, very well done!

On a side note, if you ever decide to part ways or sell that tap tower, I would gladly take it off your hands. :)
 
Subbing as this is more or less identical to what i had envisioned for my keezer, except ill be doing a coffin since i dont have a fancy tower like that.
 
Absolutely beautiful piece of furniture. I think if mine looked that nice, my wife might demand I put it in the living room!
 
Great build nice wood working skills. I was going to post about the cooling issue yesterday but I got sidetracked with how well this turned out.
 
That is a beautiful job sir. Well done!

So I'm going to bite. how did you make your dividers? I would have made a jig and used a straight bit with a guide bearing. I would think that would eat through it pretty quickly. Those cuts look like they are too deep to use a dado on, but I could be wrong.
 
Bobdole, I appreciate the offer but I intend to be buried with that thing. I searched for over a year to find one that was just right since I'm so particular and this was exactly what I wanted. I appreciate the compliment though!
 
That looks great!! How are you cooling the sides of the freezer?

I'm not sure what you mean. The freezer itself is still intact, it just rides in the trays. If you're referring to the sides heating up as it would when you add a fresh keg, I have a glass door commercial fridge in my garage where I put all kegs prior to going into the bar. It does a great job of keeping all kegs the right temp so I can switch seamlessly during a party and also it's easier for me to tinker with the CO2 out there in the garage and get it perfect before I bring them inside. But it also puts less strain on the fridge inside the bar since everything I add is already chilled so the fridge doesn't ever have to suddenly cool down a large mass of beer. Does that answer your question?
 
When people see it they don't think "oh there's a fridge" they think "wow, cool bar!" That's what I wanted.

Well sir, I think you nailed it. And a million thank yous, because your photos are the sales pitch for my keezer to SWMBO. I hope to have something nearly as presentable when I'm finished. I may have missed it, but how did you run the tower lines? Are you cooling them or just insulating? Air or glycol? Any issues with foam?
 
Well sir, I think you nailed it. And a million thank yous, because your photos are the sales pitch for my keezer to SWMBO. I hope to have something nearly as presentable when I'm finished. I may have missed it, but how did you run the tower lines? Are you cooling them or just insulating? Air or glycol? Any issues with foam?

Thanks so much! I'm glad you enjoy it. Also, as for the SWMBO line, I almost named this thread "A SWMBO Approved Method of Making a Kegerator."

Anyway, the tower lines are just insulated. And I know a lot of people worry about the foaming issue, but I have never had a problem. The actual lines inside the tower are metal and they connect to the liquid lines below the lid. And the inside of the tower itself is 100% full of insulation, a type that looks vaguely similar to an early precursor to spray foam insulation. So each of the four lines are in the center of insulation that is about 2-3" thick in each direction at the narrowest part. Up at the top they are inside of an even thicker cross section of insulation.

However, even on my old towers which were the cheap hollow metal tubes with 1/16" inch piece of foam rolled around the inside edge never had trouble with foam. I worried about it for a bit with those but once I did the math to find the volume in the unrefrigerated portion, I wasn't convinced such a small amount could make that huge of a difference relative to the volume of the pint. And more importantly, I never experienced trouble with it in practice either. However I know some people have apparently had problems, so YMMV.
 
That is a beautiful job sir. Well done!

So I'm going to bite. how did you make your dividers? I would have made a jig and used a straight bit with a guide bearing. I would think that would eat through it pretty quickly. Those cuts look like they are too deep to use a dado on, but I could be wrong.

For the dividers, I laid everything out and made two cuts with my circular saw. Then I finished out each notch with a jigsaw. It was pretty time consuming. Ideally I would have used the straight bit and guide bearing, but I haven't quite perfected the technique with my router just yet. And I already knew this method from another bar I built, so I just went this way.

As for the dado, that also could have probably worked but I didn't have one. I considered making a jig to run several at a time but it didn't work out.
 
Bobdole, I appreciate the offer but I intend to be buried with that thing. I searched for over a year to find one that was just right since I'm so particular and this was exactly what I wanted. I appreciate the compliment though!

No worries mate! I can appreciate the sentiment, as I am still searching for my perfect tower. :) Again, Kudos!
 
I'm not sure what you mean. The freezer itself is still intact, it just rides in the trays. If you're referring to the sides heating up as it would when you add a fresh keg, I have a glass door commercial fridge in my garage where I put all kegs prior to going into the bar. It does a great job of keeping all kegs the right temp so I can switch seamlessly during a party and also it's easier for me to tinker with the CO2 out there in the garage and get it perfect before I bring them inside. But it also puts less strain on the fridge inside the bar since everything I add is already chilled so the fridge doesn't ever have to suddenly cool down a large mass of beer. Does that answer your question?

The coolant lines run under the skin of the freezer and many people that have encased them in wood have found they overheat and it kills the freezer. The way to fix this is to leave a gap and run fans through that space so air flows over the freezers skin to keep the walls cool.

Since yours is already build you will just have to wait and see if you will have the same problem other people did.

https://www.homebrewtalk.com/f35/enclosing-chest-freezer-110143/

http://www.doityourself.com/stry/how-to-maintain-your-chest-freezer#b
 
I'm starting to plot building a copy of your awesome bar for my new house. What did you use for the tracks that the freezer slides in and out on? Do you have any close ups of how you put that together?

Thanks.
 
I'm starting to plot building a copy of your awesome bar for my new house. What did you use for the tracks that the freezer slides in and out on? Do you have any close ups of how you put that together?

Thanks.

I'm glad to hear you liked it! You'll have to share when you finish it.

For the slides, I used the most heavy duty slides I could find at the hardware store which were, I think, 80# slides. Later this afternoon when I get to my other pc I'll upload the pics of how I got them in there.
 
Great, thanks. I just bought a new house with my fiancee. In my old bachelor pad, I had a huge ugly collared keezer in the kitchen. I mentioned buying a new chest freezer to build a bar in the new house, and she was like, '*where* is that going to go?' I showed her your pictures and she said, "oh, that would be awesome to have in the great room."
 
Back
Top