
I read thru a bunch of the threads on keezer controlers using the STC-1000 controller from amazon. Since I'm just getting into kegging my beers, this was the next logical step.
So I bought a 7.2 kenmore freezer from Kmart after scouring the local craigslists to no avail...
Then I read thru more of the forums to find what I wanted to do:
I wanted to have the cooling/switchable circuit as well as a constant on power outlet to power an old computer fan, as well as a green light to show when the unit was running (switched power was on). I didn't need the heating circuit as I'll build another one similar but on the heating side for a fermentation chamber.
So my needs were simple and after looking around the forums at some different options, here is what I ended up with:
STC-1000 controller from amazon (about $20)
Radio Shack 8"x6"x3" project box (part # 270-1809, $8)
Radio Shack green 120vac bulb (#272-0708, $3 for two)
9' tool replacement cord Home Depot (#342576 $13)
3/8" cable clamp (#839647 $2)
wire nuts
spare 14ga solid wire
two duplex outlets
dual cover for outlets (two outlets on one panel)
I followed all the usual directions (drill holes in the corners, used Dremel cut wheel to cut holes for two duplex outlets, STC-1000, green light and power cord). Here is where I ran into changes so thought I would post a little info on how I wired mine in case someone else is looking to do the same setup:
Main Power Cable from wall has three wires- white, black (power) and green (ground).
Black wire- split into three wires with wire nut- one to #1 on STC-1000, one to #7 on controller, and one to the gold screw on the continuous power outlet.
Green wire (ground)- this split into two wires, one to each power outlet ground.
White wire- split this into three wires as well. One to #2 on STC-1000, one to each power outlet (silver screw side on the ones I have).
At this point you have just a couple of extra connections to make:
1 wire from #7 outlet on STC-1000 to the gold connector on the switched power outlet (this provides the power to the switched outlet when the circuit turns on).
To power the green bulb, I added an extension of lighter wire (the blue and red/pink wire in the photo- 18 gauge?) from the silver and gold connections on the switched outlet (the other two that were not being used by the "main" power leads) to the two leads from the bulb. So when the outlet is energized, the light turns on.
So onto the photos:
mess of wiring on the box before I put the lid on: three main wire nuts (red). Ground is green/brown, most of the power wires are black, and the white is the return wire (except one from #7, where I needed a longer wire and only had white):
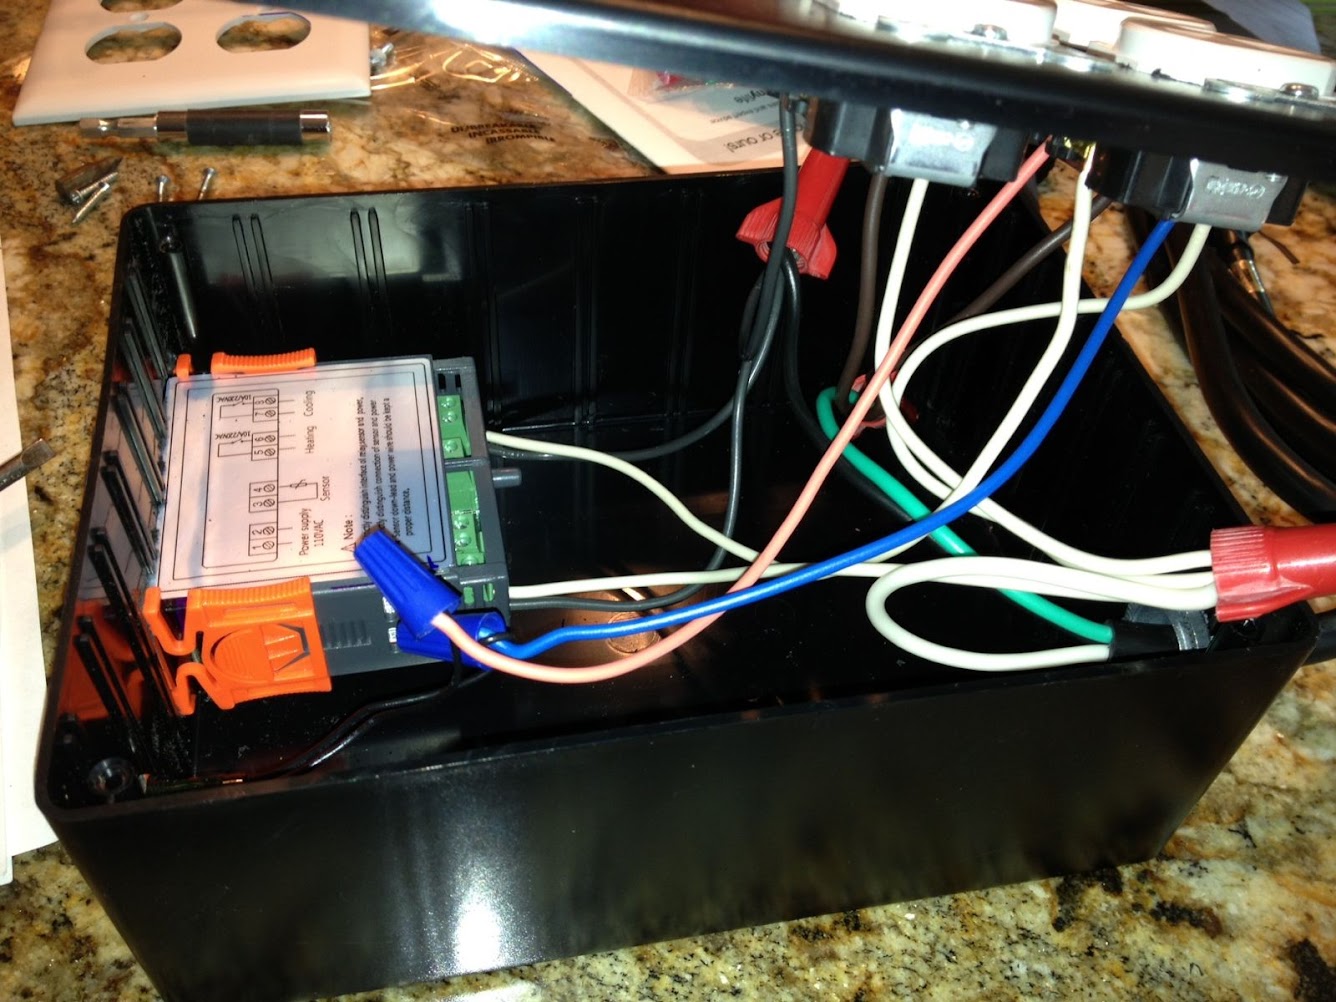
Photo of the outlets wiring

and lastly here is the finished box:
that's about it for my first DIY post on HBT. Hopefully it will help out some other newbie as they make their first controller for their freezer. I knew the info was out there to do it the way I wanted to have mine run but just put it all into one place. It's been running all day and so far it's good to go. Now to figure out the best settings for the controller, and figure out if I ruined my beer by leaving it in the freezer for about 6 hours and freezing it... went out on a parts run and forgot that I had turned it on to cool it off. DOH!!
if anyone has any suggestions on how to make this easier, or if I missed something by not doing a heating side, or any other comments, I welcome the feedback.
happy Brewing!
So I bought a 7.2 kenmore freezer from Kmart after scouring the local craigslists to no avail...
Then I read thru more of the forums to find what I wanted to do:
I wanted to have the cooling/switchable circuit as well as a constant on power outlet to power an old computer fan, as well as a green light to show when the unit was running (switched power was on). I didn't need the heating circuit as I'll build another one similar but on the heating side for a fermentation chamber.
So my needs were simple and after looking around the forums at some different options, here is what I ended up with:
STC-1000 controller from amazon (about $20)
Radio Shack 8"x6"x3" project box (part # 270-1809, $8)
Radio Shack green 120vac bulb (#272-0708, $3 for two)
9' tool replacement cord Home Depot (#342576 $13)
3/8" cable clamp (#839647 $2)
wire nuts
spare 14ga solid wire
two duplex outlets
dual cover for outlets (two outlets on one panel)
I followed all the usual directions (drill holes in the corners, used Dremel cut wheel to cut holes for two duplex outlets, STC-1000, green light and power cord). Here is where I ran into changes so thought I would post a little info on how I wired mine in case someone else is looking to do the same setup:
Main Power Cable from wall has three wires- white, black (power) and green (ground).
Black wire- split into three wires with wire nut- one to #1 on STC-1000, one to #7 on controller, and one to the gold screw on the continuous power outlet.
Green wire (ground)- this split into two wires, one to each power outlet ground.
White wire- split this into three wires as well. One to #2 on STC-1000, one to each power outlet (silver screw side on the ones I have).
At this point you have just a couple of extra connections to make:
1 wire from #7 outlet on STC-1000 to the gold connector on the switched power outlet (this provides the power to the switched outlet when the circuit turns on).
To power the green bulb, I added an extension of lighter wire (the blue and red/pink wire in the photo- 18 gauge?) from the silver and gold connections on the switched outlet (the other two that were not being used by the "main" power leads) to the two leads from the bulb. So when the outlet is energized, the light turns on.
So onto the photos:
mess of wiring on the box before I put the lid on: three main wire nuts (red). Ground is green/brown, most of the power wires are black, and the white is the return wire (except one from #7, where I needed a longer wire and only had white):
Photo of the outlets wiring
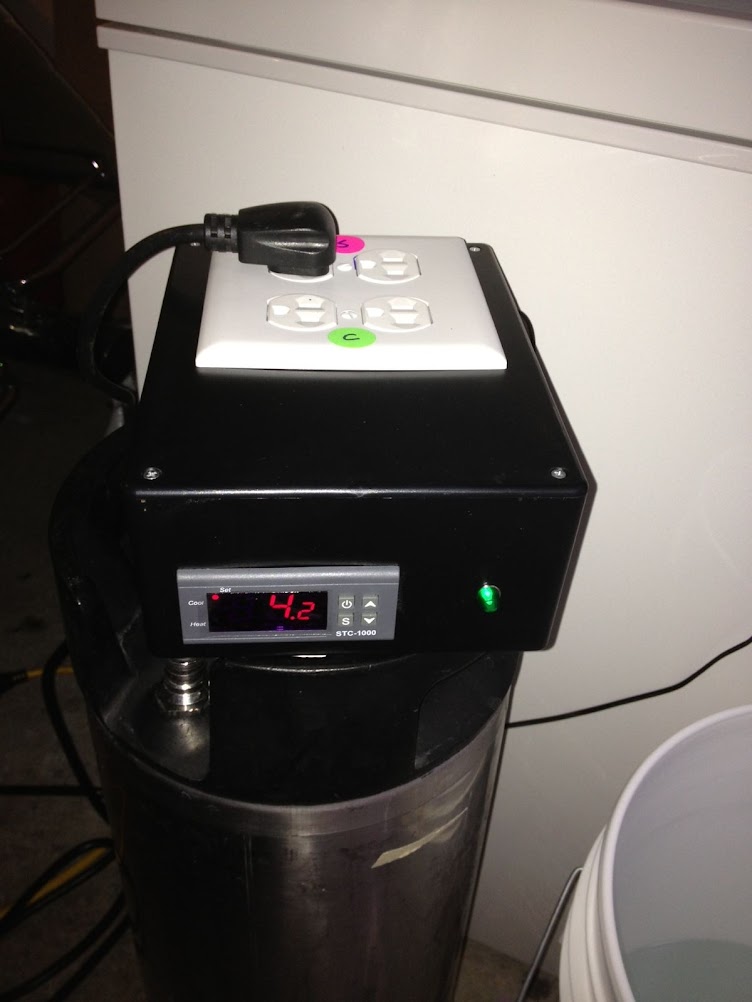
and lastly here is the finished box:
that's about it for my first DIY post on HBT. Hopefully it will help out some other newbie as they make their first controller for their freezer. I knew the info was out there to do it the way I wanted to have mine run but just put it all into one place. It's been running all day and so far it's good to go. Now to figure out the best settings for the controller, and figure out if I ruined my beer by leaving it in the freezer for about 6 hours and freezing it...
went out on a parts run and forgot that I had turned it on to cool it off. DOH!!if anyone has any suggestions on how to make this easier, or if I missed something by not doing a heating side, or any other comments, I welcome the feedback.
happy Brewing!
