120v Controller Build/BOM/Images <$200

Homebrew Talk - Beer, Wine, Mead, & Cider Brewing Discussion Forum

Help Support Homebrew Talk - Beer, Wine, Mead, & Cider Brewing Discussion Forum:

This site may earn a commission from merchant affiliate links, including eBay, Amazon, and others.

Mirilis

Lvl 10 Beer Nerd
HBT Supporter
Joined
Feb 15, 2008
Messages
1,876
Reaction score
164
Location
Chicagoland
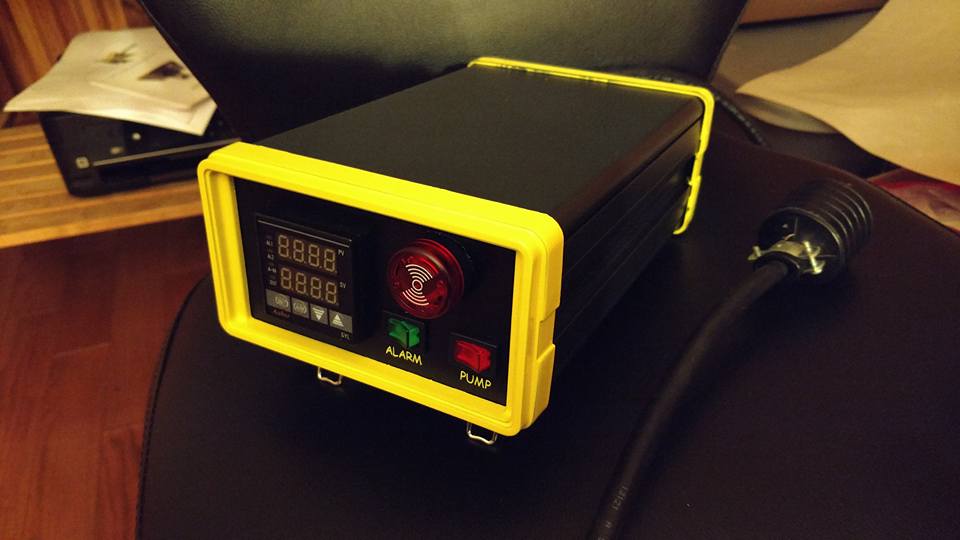
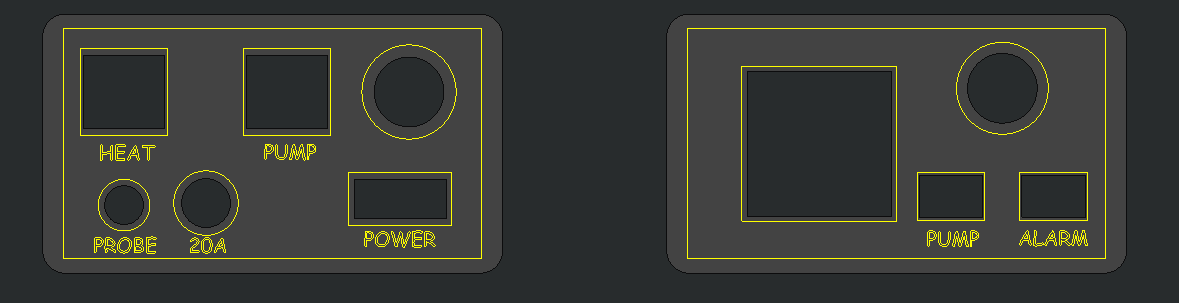
So I got rid of my old 120v controller because it was too large. I wanted something small and portable so I built this guy. My new brew setup (since i had to move to a rental house) is still BIAB, but i use gas to heat my strike and a Hot Rod Heat Stick to maintain mash temp (with this controller). All in all it came in just under $200 but i already had a cord i robbed from an old kettle so it may even out right at $200 if you build it.

bom1-68074.png


final1-68068.jpg


final-back-plate1-68069.jpg


final-front-plate1-68070.jpg
 
Testing it to make sure it works before i keep going..

alarm1-68075.jpg


Here is an image of the dry fit. The case was just small enough to get it all to fit.

dry-fit1-68072.jpg


Here are the drawings of where i placed the connectors.

dimensions-68076.png


cad-layout1-68073.png
 
I guess none of these images are in order.. here is a shot of all the stuff laid out on the table. Technically i could have saved about $20-40 by finding a different split body extrusion (i looked for a while.) I also could have saved another $10-20 if i used a MyPin TD4 and EBay PT100 probe.

table-of-parts1-68071.jpg
 
You can get away with mounting the body directly to the SSR as a heatsink?
 
Nice build. Cutting those rectangular holes must have taken some serious patience.

BrewApprentence - The Auber site says "It is made of aluminum extrusion with good heat dissapation. It can dissipate the heat generated from SSR when passing 20 amp current.'

I wish I had looked at this box before I rebuilt my controller with the Auber PBox16.

The holes weren't too bad.. originally we programmed a mill but that material turned into bubblegum. So on the back I drilled/jigsawed + file... Worked much better
 
There weren't very many comps so i didn't write one out like i did with my other controllers. I can sketch one up someday if i can a little spare time.
 
There weren't very many comps so i didn't write one out like i did with my other controllers. I can sketch one up someday if i can a little spare time.

Hate to ask but wondering if you ever did sketch up a wiring diagram for this build? Just in the midst of getting all the parts to build a controller just like yours.
 
Hate to ask but wondering if you ever did sketch up a wiring diagram for this build? Just in the midst of getting all the parts to build a controller just like yours.

Sorry I have been burried in work and havent had any time. It is pretty simple though. The hot goes in and then through the back power switch, then the fuse, then the SSR and finally on the heat outlet.

Coming out of the fuse it is pigtailed and runs power to the pump switch and then pump outlet. There is also another pigtailed wire out of the fuse that goes to power the PID. Power is jumpered off the pid to the alarm relay then through the alarm switch and finally the alarm itself.

All the neutrals basically go together with the neutral in. Grounds go to the outlets and the aluminum extruded case is grounded.

Hope that helps.
 
Back
Top